

In all my years working with SQL Server and navigating disaster recovery scenarios, I’ve come across surprisingly few practical and comprehensive guides on filegroup-level restoration. While many resources cover full and differential backups well enough, they often overlook or simplify the nuances of restoring just a portion of a database—especially when dealing with complex environments where data is distributed across multiple filegroups. The questions that really matter in real-world recovery situations are often left unanswered. For example, is it possible to recover a single corrupted filegroup without affecting the rest of the database? How should we approach recovery when critical data is split across several filegroups, each with different levels of importance? And what is the precise sequence of backup and restore operations required to bring such a database back to a consistent and usable state?
This article is an attempt to close that gap. It presents a working example of filegroup-level recovery from start to finish, including the setup of a multi-filegroup database, the generation of targeted backups, and the step-by-step restoration of only the required components. Rather than relying on abstract theory, it walks through a demonstration in a clean, isolated environment—restoring into a new database to safely showcase the mechanics involved. Whether you’re responsible for a very large database, managing archival and hot data separately, or simply aiming for faster recovery objectives with minimal downtime, understanding filegroup-level recovery can give you a powerful level of control and precision that full-database approaches often lack.
Step 1: Create a DB with 3 Filegroups
To demonstrate filegroup-level backup and recovery, we first need a database structured across multiple filegroups. The script below creates a new database called FG_Demo with one primary filegroup and two additional secondary filegroups. Each filegroup is associated with a physical .mdf or .ndf file located on disk. The goal here is to simulate a real-world setup where different tables or modules might reside on different storage volumes or logical partitions.
Step 2: Create Tables on Each Filegroup
With the database and its filegroups in place, the next step is to create a few tables—each one specifically placed in a different filegroup. This setup will help demonstrate how filegroup-level backups and restores behave when different parts of the schema reside in separate physical storage areas.
-- Use the DB
USE FG_Demo;
GO

-- Table in PRIMARY filegroup
CREATE TABLE table_fg1 (
id INT PRIMARY KEY,
data VARCHAR(100)
) ON [PRIMARY];

-- Table in secondary_fg2
CREATE TABLE table_fg2 (
id INT PRIMARY KEY,
data VARCHAR(100)
) ON [secondary_fg2];

-- Table in secondary_fg3
CREATE TABLE table_fg3 (
id INT PRIMARY KEY,
data VARCHAR(100)
) ON [secondary_fg3];
GO
Now insert some test data into each table:
INSERT INTO table_fg1 VALUES (1, 'Primary FG Data');
INSERT INTO table_fg2 VALUES (2, 'Secondary FG2 Data');
INSERT INTO table_fg3 VALUES (3, 'Secondary FG3 Data');
Step 3: Take Filegroup-Level Backups
With the tables in place and distributed across separate filegroups, the next step is to back up each filegroup independently. SQL Server allows you to perform backups at the filegroup level, which is particularly useful when dealing with large databases or when your recovery strategy requires restoring only certain parts of the database.
To begin, we take a full backup of the PRIMARY filegroup. This filegroup contains system objects and our table_fg1 table, and it is mandatory to include it in any restore sequence—even if the problem exists in another filegroup.
-- Backup PRIMARY
BACKUP DATABASE FG_Demo FILEGROUP = 'PRIMARY'
TO DISK = 'C:\SQLBackups\FGDemo_PRIMARY.bak'
WITH INIT;
This backup captures only the data contained within the PRIMARY filegroup and saves it to a .bak file. The WITH INIT option ensures the backup file is overwritten if it already exists, which is helpful when running repeated tests.
Next, we back up the secondary filegroups, secondary_fg2 and secondary_fg3, which contain the tables table_fg2 and table_fg3, respectively.
-- Backup secondary_fg2
BACKUP DATABASE FG_Demo FILEGROUP = 'secondary_fg2'
TO DISK = 'C:\SQLBackups\FGDemo_FG2.bak'
WITH INIT;

-- Backup secondary_fg3
BACKUP DATABASE FG_Demo FILEGROUP = 'secondary_fg3'
TO DISK = 'C:\SQLBackups\FGDemo_FG3.bak'
WITH INIT;
Finally, to bring the database to a transactionally consistent state during a filegroup-level restore, you’ll also need a log backup. This log backup is critical because it allows SQL Server to apply all changes that occurred after the full filegroup backup was taken.
-- Also take a log backup
BACKUP LOG FG_Demo
TO DISK = 'C:\SQLBackups\FGDemo_Log.trn'
WITH INIT;
Step 4: Restore Only a Selected File group into a New Database
Rather than simulating corruption in-place, this demonstration uses a separate database to showcase filegroup-level recovery. This approach avoids any risk to the original database and provides a clear, isolated walkthrough of the recovery steps. The process begins by restoring the PRIMARY filegroup into a new database named FG_RecoveryTest. This filegroup acts as the base and must always be restored first during any partial recovery.
The restore command for the PRIMARY filegroup uses the PARTIAL and NORECOVERY options, along with the MOVE clause to redirect data and log files to new paths appropriate for the recovery environment. The example below shows how this is done:
RESTORE DATABASE FG_RecoveryTest
FILEGROUP = 'PRIMARY'
FROM DISK = 'C:\SQLBackups\fg_primary.bak'
WITH
    MOVE 'FGDemo_primary' TO 'C:\SQLData\FG_RecoveryTest_primary.mdf',
    MOVE 'FGDemo_log' TO 'C:\SQLLogs\FG_RecoveryTest_log.ldf',
    PARTIAL,
    NORECOVERY,
    REPLACE;
RESTORE DATABASE FG_RecoveryTest WITH RECOVERY;
Once this command is executed, the database becomes accessible, but only the PRIMARY filegroup will be online. Any table that resides exclusively within this filegroup will respond normally. For example, the following query will return results as expected:
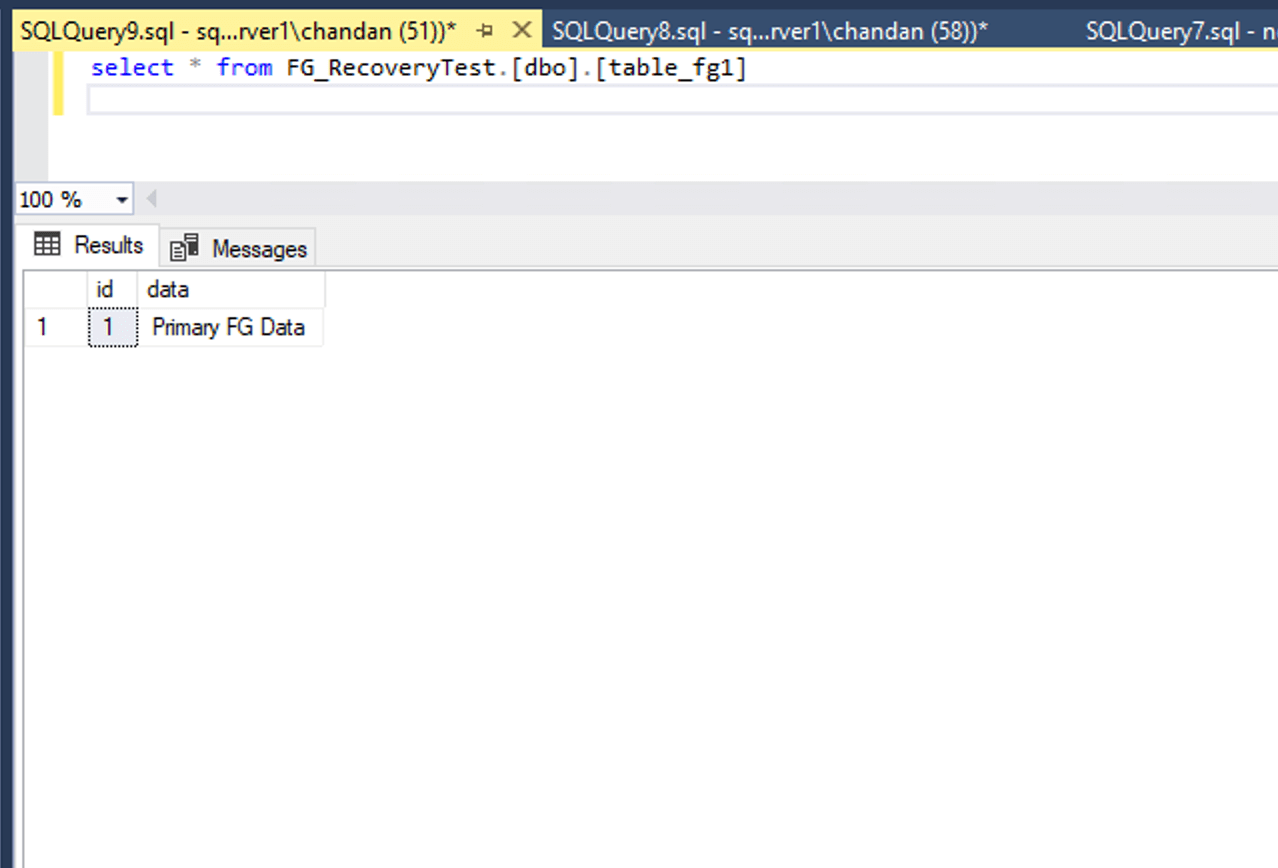
However, if we attempt to access a table stored in a non-restored filegroup, such as table_fg2 or table_fg3, SQL Server will throw an error. This is because those filegroups are still offline and have not been brought into the recovery chain. Running the following query gives error:
SELECT * FROM FG_RecoveryTest.[dbo].[table_fg2] or SELECT * FROM FG_RecoveryTest.[dbo].[table_fg3];
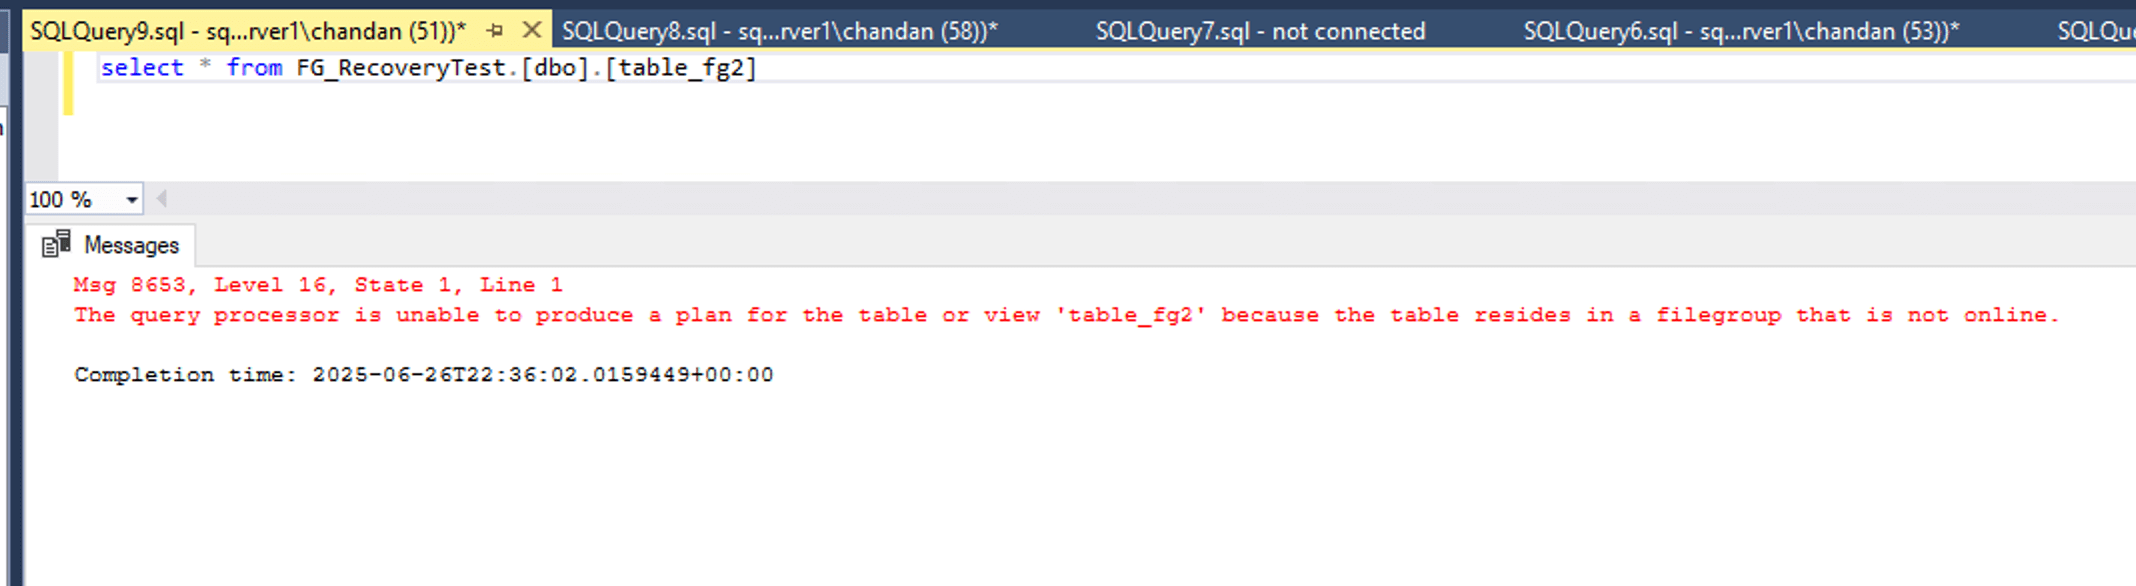
This behavior underscores the fact that SQL Server requires each filegroup to be explicitly restored and recovered before it can be queried. Until then, any object within an offline filegroup remains inaccessible—even if the rest of the database appears to be online and functioning.If we plan to restore additional backups after the PRIMARY filegroup, we must avoid bringing the database online too early. The next filegroup to be restored in sequence is secondary_fg2. This filegroup is restored using the NORECOVERY option to keep the database in a restoring state, allowing us to apply the corresponding log backup later to ensure transactional consistency. The MOVE clause is used again to redirect the data file to its new location within the recovery database:
RESTORE DATABASE FG_RecoveryTest
FILEGROUP = 'secondary_fg2'
FROM DISK = 'C:\SQLBackups\fg2_full.bak'
WITH
    MOVE 'FGDemo_secondary2' TO 'C:\SQLData\FG_RecoveryTest_fg2.ndf',
    NORECOVERY;
At this point, the database contains only the PRIMARY and the secondary_fg2 filegroups, both of which are still in a recovering state. To complete the process and bring the database online, a transaction log backup is applied. This ensures that all changes recorded in the transaction log are replayed and the filegroups are brought to a consistent recovery point. The final RESTORE command looks like this:
RESTORE LOG FG_RecoveryTest
FROM DISK = 'C:\SQLBackups\fg_log.trn'
WITH RECOVERY;
After the recovery is complete, the new database FG_RecoveryTest becomes accessible. It contains the tables from the PRIMARY and secondary_fg2 filegroups, while any table from a non-restored filegroup such as secondary_fg3 will be showing due to metadata retention in mdf file, but will not be available for querying.
Step 5: Verifying Filegroup Restore Success
To confirm that the filegroup-level recovery was successful, basic queries can be run on each table in the restored database. Accessing table_fg1 and table_fg2 should success , as both originate from restored filegroups. As we brought database in online mode without restoring secondary_fg3, so attempting to query table_fg3 should result the same error as mentioned in one above screenshot, indicating that the corresponding filegroup is unavailable. The following commands illustrate this validation step:
USE FG_RecoveryTest;

SELECT * FROM table_fg1; -- Expected to return results
SELECT * FROM table_fg2; -- Expected to return results
SELECT * FROM table_fg3; -- Expected to fail (missing FG)
Summary
A well-designed filegroup strategy allows a database to be partitioned logically—such as by department, business module, or storage type—making it easier to isolate and recover specific components during a failure. In real-world environments, it is common to prioritize restoration based on business criticality. For example, OLTP transaction tables residing in the PRIMARY filegroup would typically be restored before less critical data, such as audit trails or archived records. This approach not only speeds up recovery time but also helps avoid unnecessary downtime for areas of the system that were unaffected.
By restoring into a different database for demonstration purposes, this example shows how easy it is to surgically recover only the necessary filegroups. The same logic and sequence can be applied directly on production if the situation demands full restore in modular way with restoring tables or filegroups in order of criticality, assuming that backups are available and well-structured.