

Azure Cosmos DB is an evolution of Document DB, which offers a high scalability, low latency, multi model database service that replicates the data within a data center. You can also replicate your data across multiple data centers and distribute your data globally. This article will help on how to create Azure Cosmos DB Account using the Azure Portal.
To get started, go to the Azure portal and log in using your Microsoft account. Click Create a resource, and you will see Cosmos DB among the list of popular choices as shown in Fig 1.
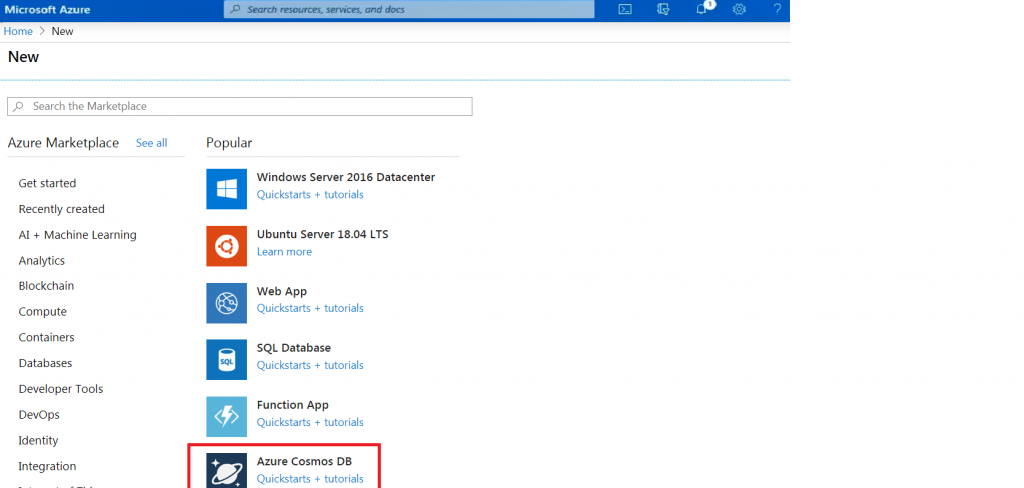
Fig 1
Select the Azure subscription that you want to use for this Azure Cosmos account.
Select a resource group, or select create new, then enter a unique name for the new resource group as shown in Fig 2.

Fig 2
Provide a name for the account to identify your Azure Cosmos account and check the Azure Cosmos DB account name already exists. If you get the right green tick after entering the account name, it specify that name is not used by others. A valid account name may contain only lowercase letters, numbers, and the '-' character, and must be between 3 and 50 characters.
Cosmos DB offers APIs for SQL (a core API),Cassandra, MongoDB, Gremlin and Azure Table Storage) to work with your data stored in your Cosmos database.You can choose one of the API out of this five resources as shown in Fig 3. We will choose the Core(SQL) API, which gives us a JSON data model that we can query using SQL, which I should say is a special version of SQL that's tailored for querying JSON documents.
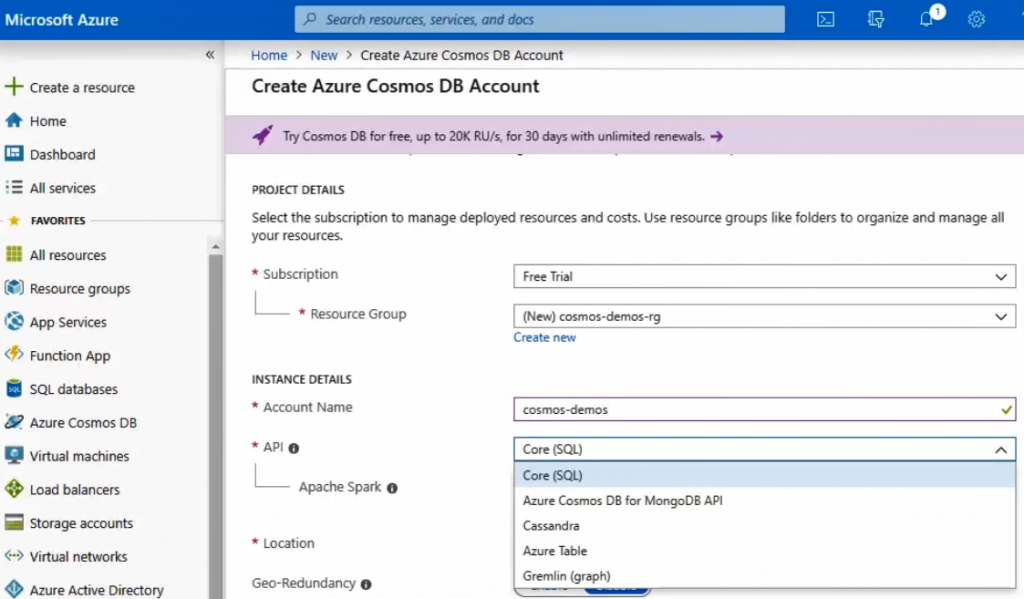
Fig 3
Select a geographic location to host your Azure Cosmos DB account. Use the location that is closest to your users to give them the fastest access to the data, will go with East US as location for this example as shown in Fig 4.

Fig 4
Geo-replication offers global distribution and replicates your data to different Azure geographical regions. This enables multi-region writes to reduce write latency. In our example, we will not enable these options, as shown in Fig 5.
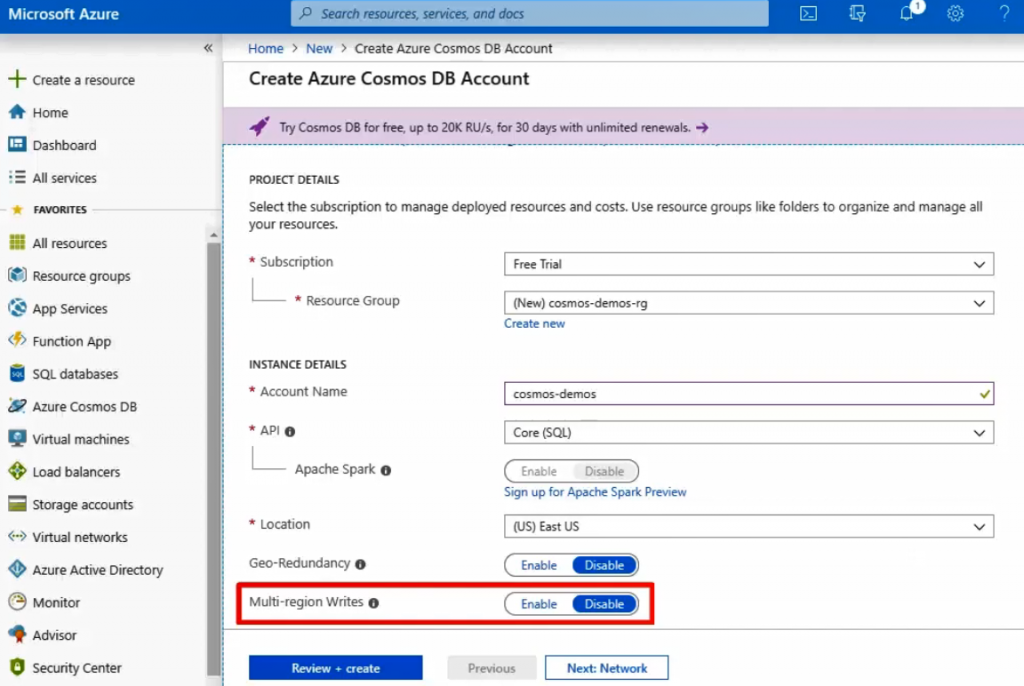
Fig 5
Click, review+create and then create to kick off the deployment, as shown in Fig 6. The deployment will take few minutes to set things up for the new account, while Cosmos DB allocates the endpoint provisions, replicas and performs other work in the background.
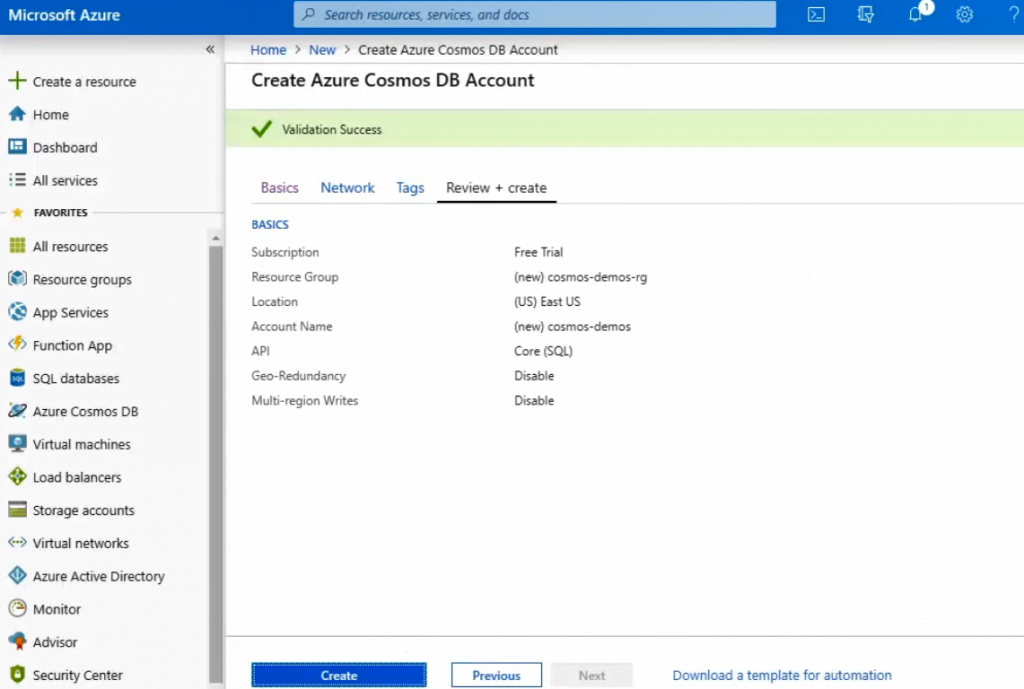
Fig 6
Once the deployment is succeeded, click on Go to resource to see the account is located in East US as shown in Fig 7.
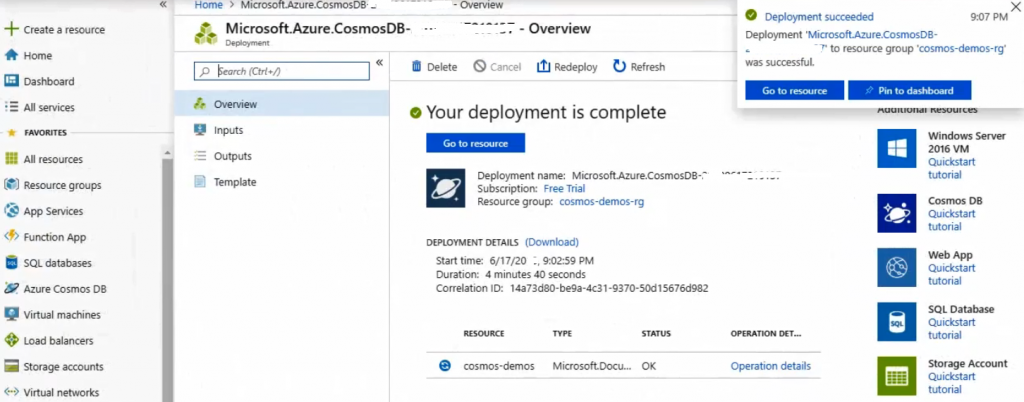
Fig 7
If we navigate over to the keys page, we see the primary and secondary master keys assigned to the account. These keys provide unlimited access to the accounts, so they should never be shared with end users. Generally, your application will use just the primary master key and use the secondary master key only when you want to change the primary.
Combining the key with the endpoint gives you the connection string, which is the connection string you use in your application whenever you want to access any database within the account again. You will typically use just the primary connection string, which is based on the primary master key, and switch to using the secondary connection string for rotating your keys. There are also read only versions of these keys that you can use, which provides unlimited read access to the account as shown in Fig 8.
For more details on the keys, refer to this link: https://docs.microsoft.com/en-us/azure/cosmos-db/secure-access-to-data
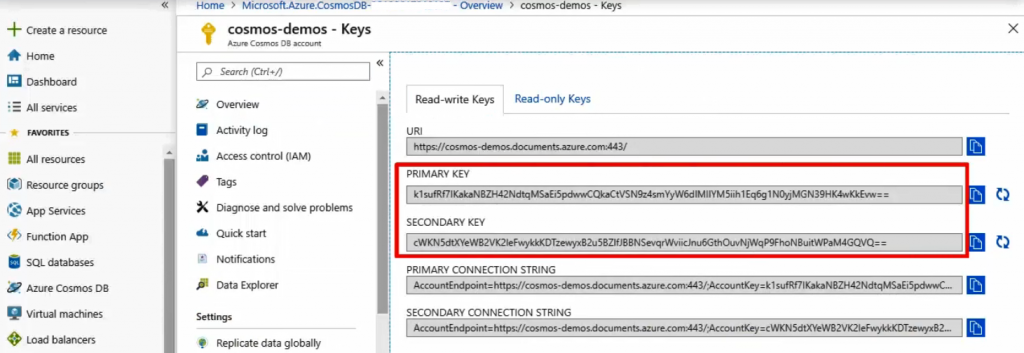
Fig 8
Summary
Cosmos DB is an azure cloud service, and as such, it runs in many Microsoft data centers throughout the world and it's simple as clicking a mouse on a map in the portal or turning a key if you will, which is why this feature is often called turnkey global distribution.
You can refer to this link on how to import data from other sources into Azure Cosmos containers and tables using the Azure Cosmos DB Data Migration tool.

