

Article Overview
In this article, we will learn how to integrate a Spring boot application with a Cassandra database. This article will help us understand what Cassandra is, why is it needed, how to install it, how to use it, and finally how to integrate it with a Springboot application
Let us see the topics to be covered in this article.
- What is Apache Cassandra?
- How to install Apache Cassandra?
- How to Start Cassandra Server and CQLSH(Cassandra Query Language Shell)?
- Pre-requisites for Springboot example
- Create Keyspace and table in Cassandra
- Sample Springboot CRUD operations
What is Cassandra?
Cassandra is a free and open-source highly scalable, high-performance, distributed NoSQL database designed to handle large volumes of data across multiple data centers and the cloud with no single point of failure. Written in Java and originally developed by Facebook, Cassandra offers many advantages which other NoSQL databases or relational databases cannot.
The main features are:
- Supports horizontal scaling.
- High availability and reliability
- Fault tolerant
- Distributed and supports data replication
- Capable of dealing with unstructured data
- Can handle huge amount of data
- Has its own query language - Cassandra Query Language(CQL)
Please visit this article https://www.sqlservercentral.com/blogs/sql-vs-nosql to learn more about the comparison between SQL and NoSQL database:
How to install Apache Cassandra?
We will show how to install this on both Windows 11 and Ubuntu 20.04.
Windows 64bit Installation
Apache Cassandra requires Java 8 to run on a Windows system. Additionally, the Cassandra command-line shell (cqlsh) is dependent on Python 2.7 to work correctly. To be able to install Cassandra on Windows, first you need to:
- Download and Install Java 8 ( http://official Oracle download page) and set environment variables(JAVA_HOME)
- Download and install Python 2.7(Python official download page ) and set environment variables.
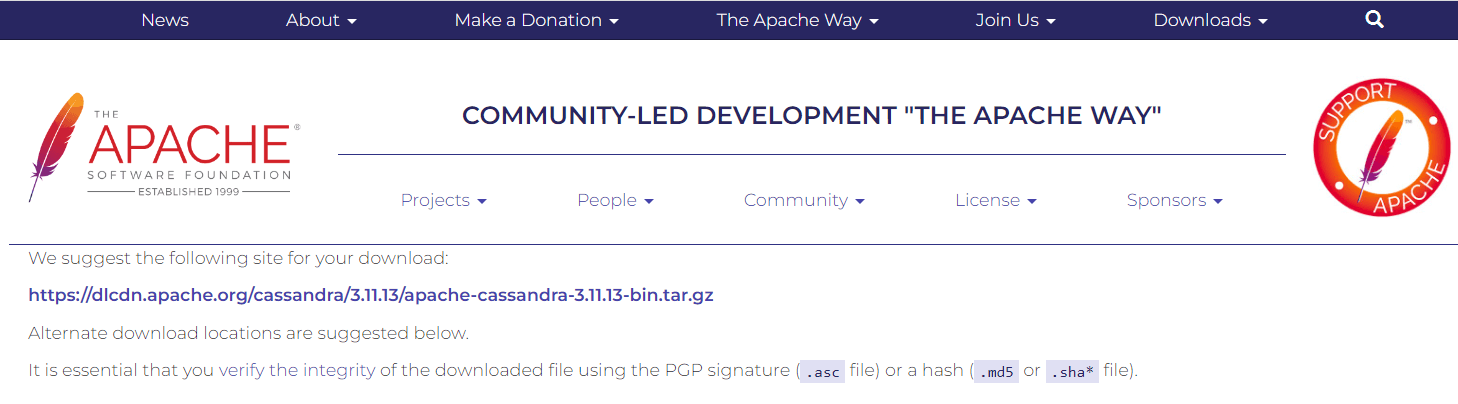
- Download Apache Cassandra 3.11 from http://Apache Cassandra Download page
4. Unzip the compressed tar.gz folder in a folder
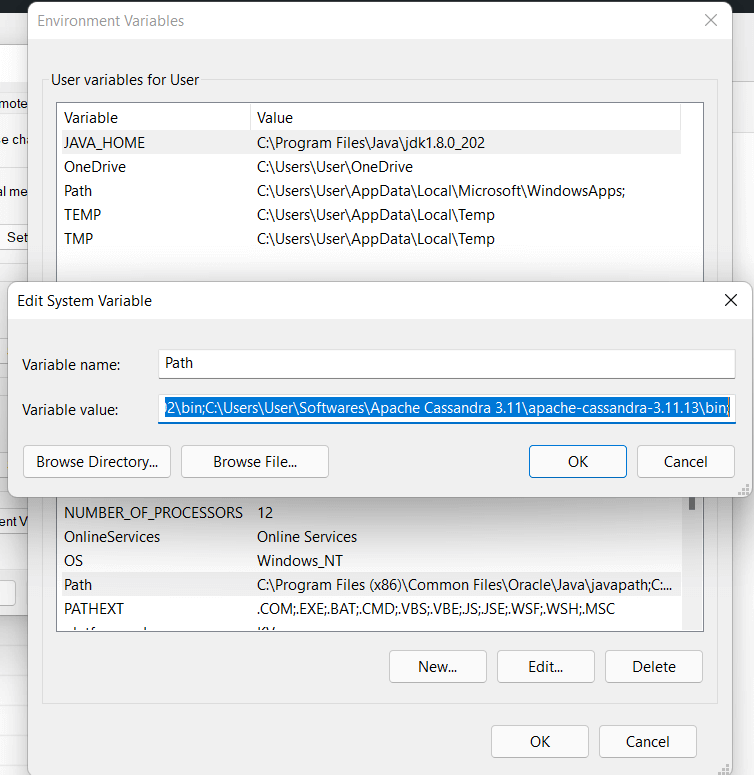
5. Configure the environment variable for Cassandra. Under System Variables, add a new entry to "Path"
Ubuntu Installation
- Install Java OpenJDK.
sudo apt update sudo apt install openjdk-8-jdk -y
Install the apt-transport-https-package
sudo apt install apt-transport-https
- Add Apache Cassandra Repository and Import GPG Key
sudo sh -c 'echo "deb http://www.apache.org/dist/cassandra/debian 40x main" > /etc/apt/sources.list.d/cassandra.list' wget -q -O - https://www.apache.org/dist/cassandra/KEYS | sudo apt-key add -
- Install Apache Cassandra
sudo apt update sudo apt install Cassandra
Verify installation- The output should display active (running) in green.
sudo systemctl status cassandra
How to Start Cassandra Server and CQLSH(Cassandra Query Language Shell)?
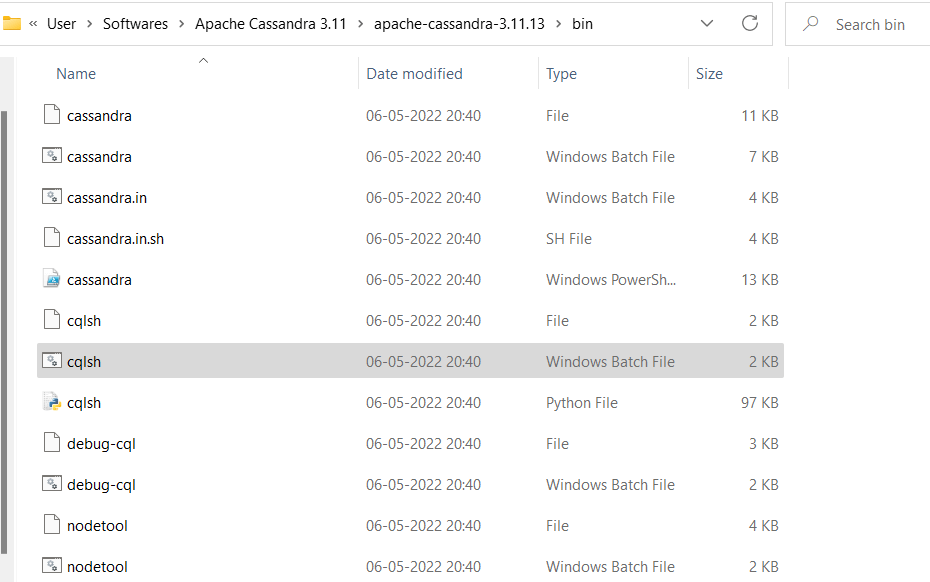
Once installation is completed(Step 5 of above Windows section) there are two ways to start the server . Navigate to the the bin folder of the Apache Cassandra installation directory:
- Double click on the 'cassandra' windows batch file
2. Open a command prompt and type 'cassandra -f' as shown below:

After starting the Cassandra server by any of these two methods, in order to open the Cassandra Query Shell terminal we have to double click on the 'cqlsh' windows batch file.
If you installed on Linux, the procedure is slightly different. Once installation is completed(Step 3 of above Ubuntu section), run the following command to start the server.
sudo systemctl start cassandra
some other important commands:
sudo systemctl stop cassandra
sudo systemctl restart cassandra
Pre-requisites for the Springboot example
- Java 8 or above
- IDE such as Eclipse/IntellIj
- Apache Cassandra
- Postman
Create Keyspace and Table in Cassandra
For our example, the first step is to create the Keyspace and Table using Cassandra Query Language in CQL shell.
To create the Keyspace, run this code:
CREATE KEYSPACE mykeyspace
WITH replication = {'class':'SimpleStrategy', 'replication_factor' : 3};
Navigate to the keyspace:
use mykeyspace;

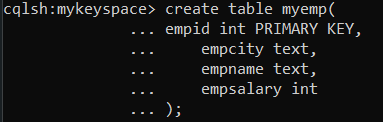
Create table named 'myemp'
create table myemp(
empid int PRIMARY KEY,
    empcity text,
    empname text,
    empsalary int
);
Springboot Example with Apache Cassandra
Now that we are all set with the necessary software and database, we are good to start with the programming. A Springboot application having two methods one post and one get to interact with Cassandra database. We use Postman as client to execute and test the operations.
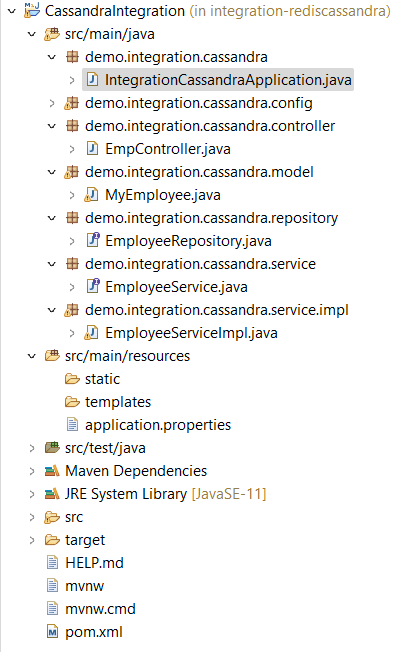
To begin with, let us setup a new Maven project in Eclipse. We used Spring boot's official website Spring initializr https://start.spring.io/ to generate a new project and then imported it in Eclipse. The project structure is shown below:
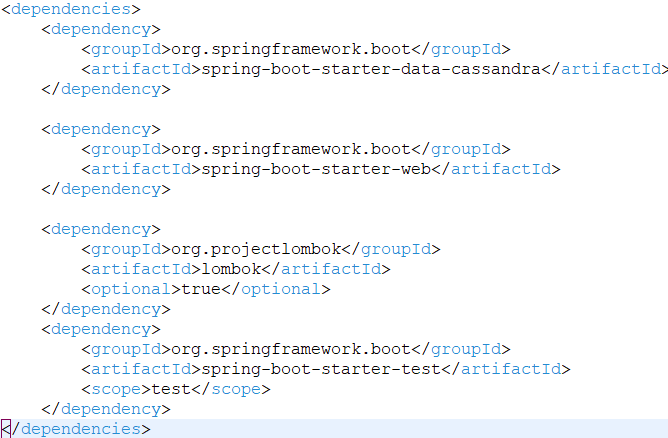
The following dependencies are required to setup the Spring boot project along with Cassandra in Pom.xml
The Application Properties are shown here:

Cassandra's configuration is declared in this file. Let us take a moment to study the configurations. 'keyspace-name' denotes the name of the Keyspace which we created above in the prerequisites section. 'Contact-points' denotes the end point for the host server, in this example it is localhost or 127.0.0.1. Default port for Cassandra is 9042. 'Schema-action=None' since no schema defined in this case.
The logging level for Cassandra is set to 'DEBUG', it will log the database queries in the console.
CassandraConfiguration.java

The Cassandra configuration class is used to get a session from the keyspace.
IntegrationCassandraApplication.java
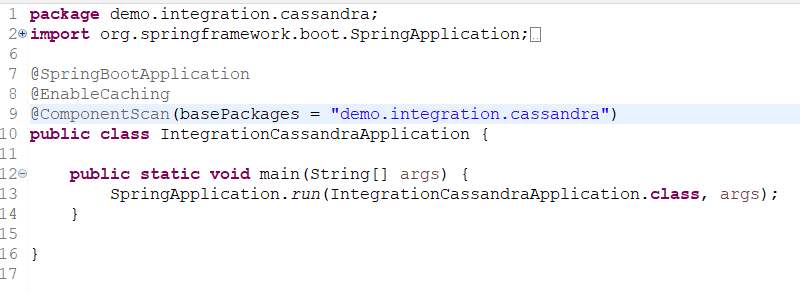
This is the entry class of the application.
MyEmployee.java

@Table is Cassandra's annotation to map the table against the Java model class. When this annotation is not used the class name and table's name is considered same by default. In this example we have used Lombok to generate the getter setter methods and constructors.
EmployeeService.java
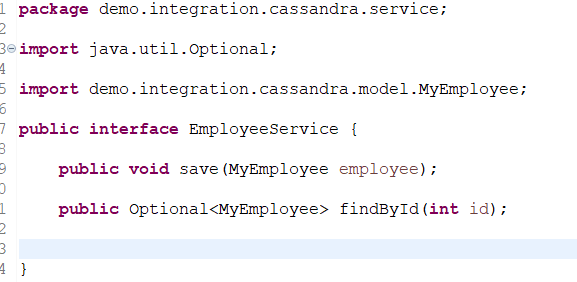
In this interface we have defined two methods, one to save the data to the database and the second one to fetch data from the database. These methods are called from the controller class.
EmployeeServiceImpl.java
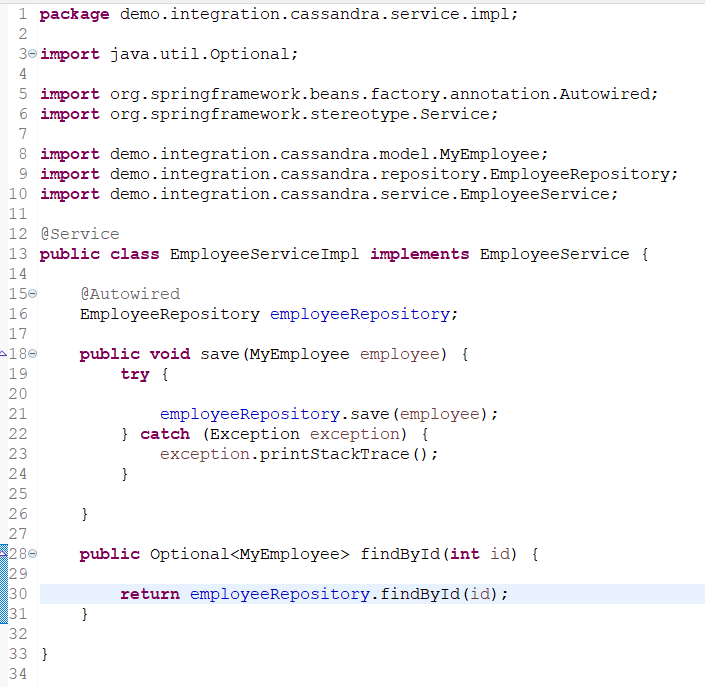
This class implements the previously defined interface and implements its methods. These methods are part of the EmployeeRepository which extends the CassandraRepository as shown in the next snapshot.
EmployeeRepository.java

We are extending the Cassandra Repository which in turns extends Spring's native Crud Repository interface. This interface contains all the necessary methods for the CRUD operations.
EmpController.java
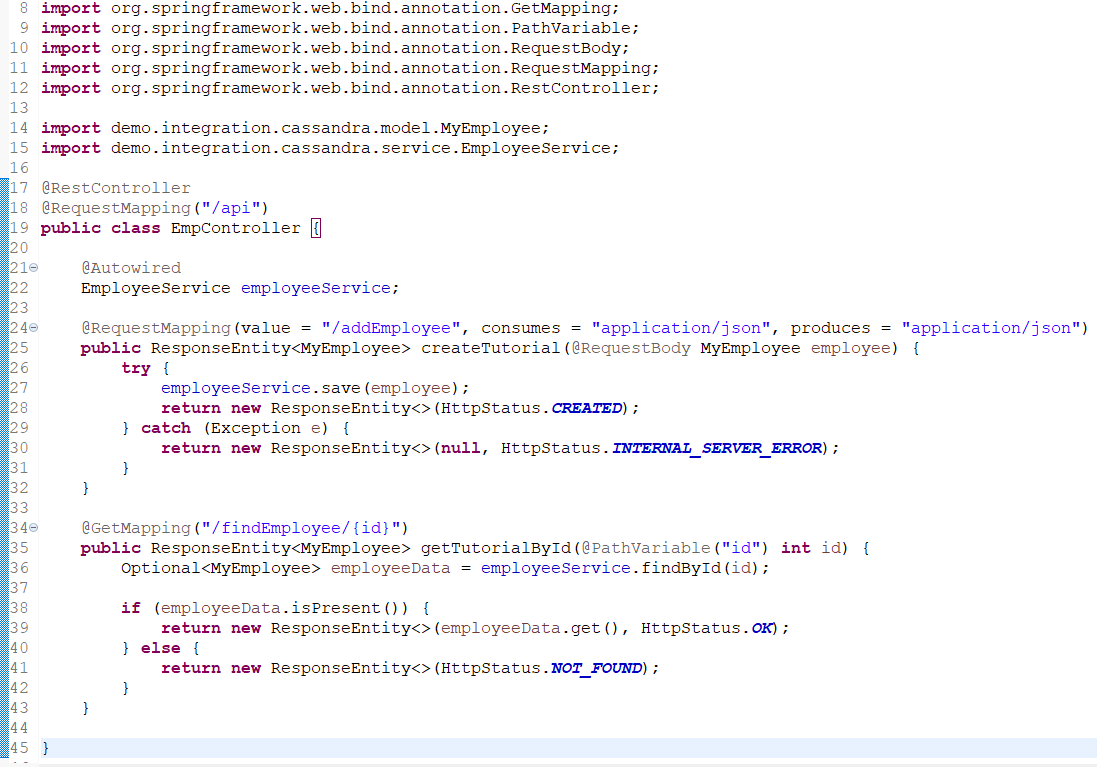
This is the controller class of the application which handles the incoming requests from the client. In this example our client is Postman as explained in the following steps. Let us now test with Postman:
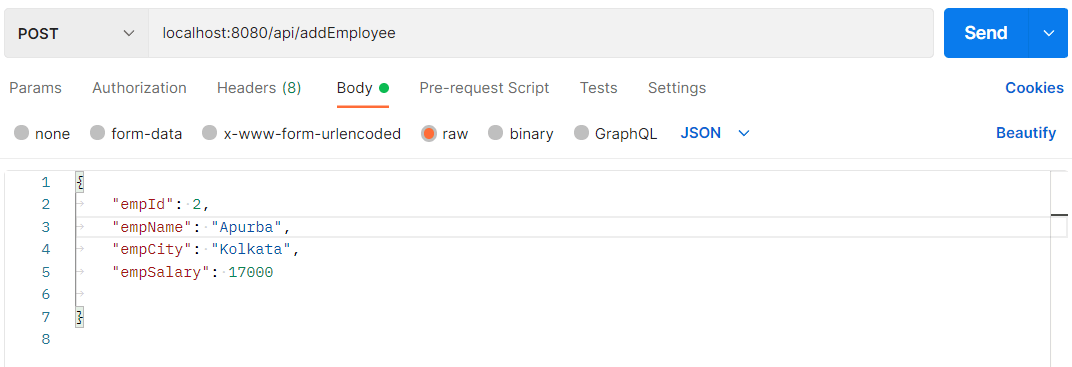
Step 1 - First we will execute the post method to insert a record in the database as shown below:
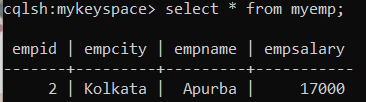
Let's verify in Cassandra using the select query:
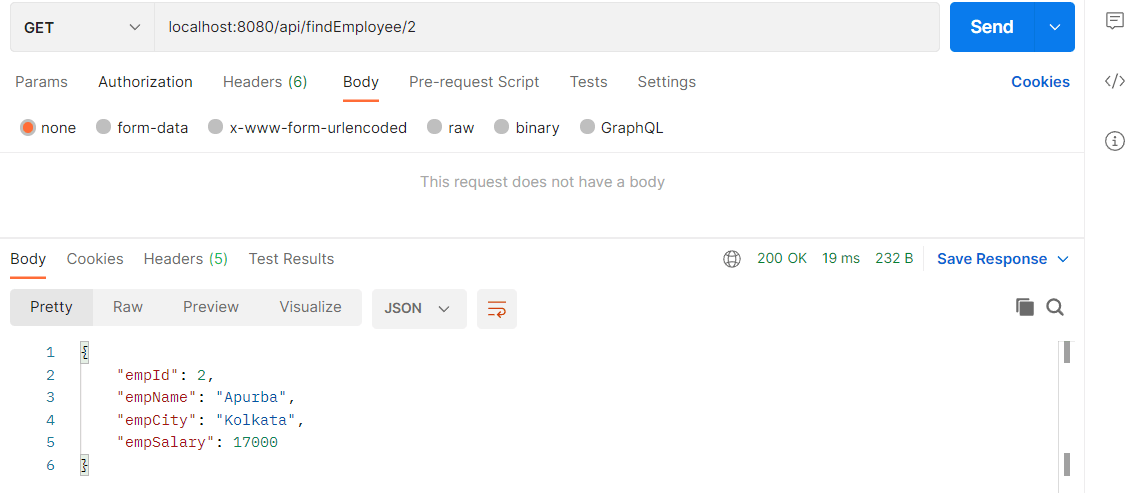
Step 2 - Let us now retrieve the record inserted in Step 1.

Conclusion
This article gives an understanding on what is Cassandra database and how Springboot can be integrated with Cassandra and how the basic CRUD operations can be performed using Cassandra Repository. We hope this article will help you get started on your Cassandra with Springboot journey.