
This is the fourteenth article in a series entitled Stairway to Integration Services. Previous articles in the series include:
- What is SSIS? Level 1 of the Stairway to Integration Services
- The SSIS Data Pump - Level 2 of the Stairway to Integration Services
- Adding Rows in Incremental Loads – Level 3 of the Stairway to Integration Services
- Updating Rows in Incremental Loads – Level 4 of the Stairway to Integration Services
- Deleting Rows in Incremental Loads – Level 5 of the Stairway to Integration Services
- Basic SSIS Workflow Management – Level 6 of the Stairway to Integration Services
- Intermediate SSIS Workflow Management – Level 7 of the Stairway to Integration Services
- Advanced SSIS Workflow Management – Level 8 of the Stairway to Integration Services
- Control Flow Task Errors – Level 9 of the Stairway to Integration Services
- Advanced Event Behavior – Level 10 of the Stairway to Integration Services
- Logging – Level 11 of the Stairway to Integration Services
- Advanced Logging – Level 12 of the Stairway to Integration Services
- An Overview of SSIS Variables - Level 13 of the Stairway to Integration Services
Introduction
In the previous installment we took a good long look at SSIS variables, variable configuration, and dynamic value management via expressions.
In this article, we will convert our first SSIS project to SSIS 2012 using SQL Server Data Tools – Business Intelligence (SSDT-BI), or Visual Studio 2012. Why would you want to upgrade our SSIS project to 2012? You may want to take advantage of the new features in SSIS 2012. (My favorite new feature is not listed. Pasted objects appear near the cursor.) You may also want to take advantage of the new SSIS 2012 Catalog. To use the Catalog, your project must adhere to the Project Deployment Model, which we will also demonstrate in this article.
Converting to SSIS 2012 Using SSDT-BI
In An Overview of SSIS Variables – Step 13 of the Stairway to Integration Services, we created an SSIS project from scratch (My_Second_SSIS_Project). Let’s begin this article by converting our earlier SSIS project named My_First_SSIS_Project to SSIS 2012 using SQL Server Data Tools – Business Intelligence (SSDT-BI).
There are at least two ways to approach SSIS project conversion: You can open the Solution file (*.sln) from Windows Explorer via the “Open With” menu or start SQL Server Data Tools – BI and open the SSIS Solution from the Open Project link on the Start Page. In An Overview of SSIS Variables – Step 13 of the Stairway to Integration Services I demonstrated how to create a new SSIS project from the Start Page and that process is remarkably similar to converting an SSIS solution using the “Open Project” link. We will use Windows Explorer for this demonstration. Figure 14-1 shows one method – opening the Visual Studio Solution file – My_First_SSIS_Project.sln – using the Windows Explorer “Open With” menu:

Figure 1
I prefer to start SSDT-BI and then open the SSIS project (or solution) file I wish to convert. In Windows 8 / 2012, open SQL Server Data Tools for Visual Studio 2012 as shown in Figure 2:
Figure 2
As stated in the article An Overview of SSIS Variables – Step 13 of the Stairway to Integration Services, this view isn’t much help. The Start Page is lots of help and you can view the Start Page by clicking “Start Page” on the View dropdown menu as shown in Figure 3:
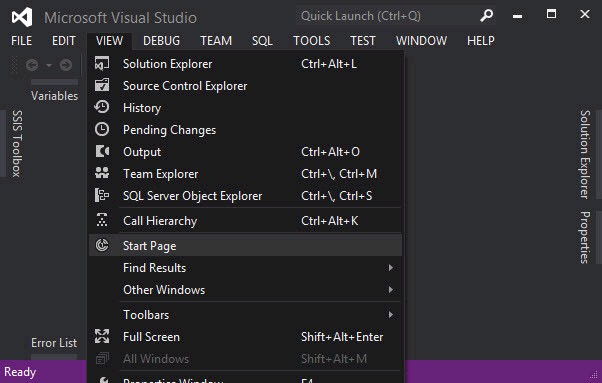
Figure 3
The Start Page includes a link to open existing projects (“Open Project…”) shown in Figure 4:

Figure 4
SSDT-BI will convert an SSIS project created a previous version of SSIS. Click the Open Project link and browse to the My_First_SSIS_Project SSIS project file (or solution file) as shown in Figure 5:
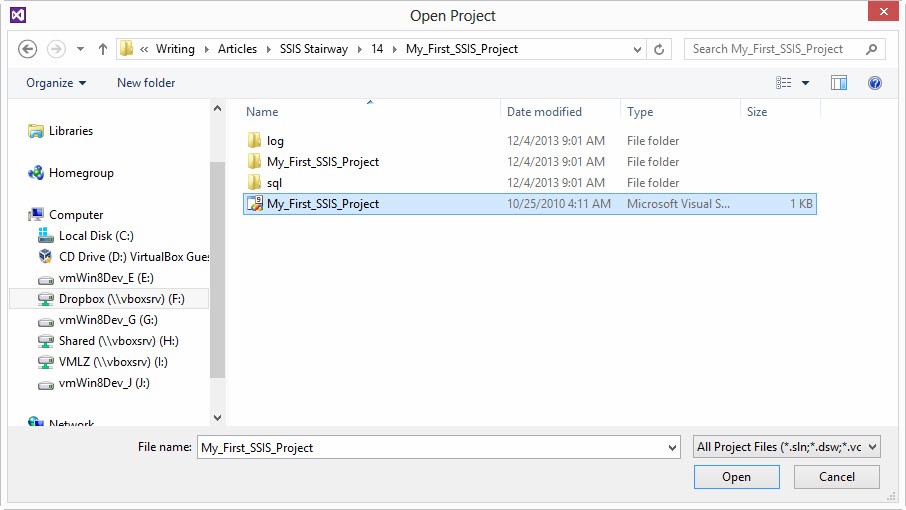
Figure 5
SSDT-BI warns this is a one-way upgrade. Once the SSIS project named My_First_SSIS_Project is upgraded to the SSDT-BI 2012 format, it will be inaccessible from Business Intelligence Development Studio (BIDS). The dialog shown in Figure 6 displays when opening an SSIS project built in a previous version:
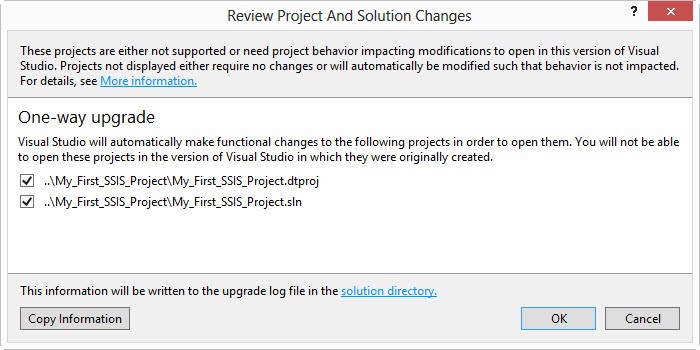
Figure 6
Back in the old days (2008), it was possible to accidentally update an SSIS project from SSIS 2005 to SSIS 2008. This was annoying to some developers because, depending on the situation, there was little or no warning that the upgrade was about to occur. Developers complained (and rightfully so, this was a tragic oversight) and Microsoft responded by adding this screen to make sure developers know this upgrade is not reversible. Once the SSIS project is upgraded, you can no longer open the SSIS project in the previous development environment. If you want to maintain an earlier version of your SSIS project, you need to make a copy of the project before completing this upgrade. Better yet, consider using source control.
Each time an SSIS project is opened from a non-local disk source in SSDT-BI, the Security Warning shown in Figure 7 displays:
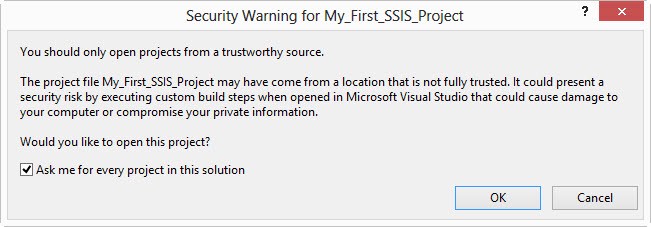
Figure 7
Once you acknowledge the Security Warning, a Migration Report is displayed in your default web browser, as shown in Figure 8:
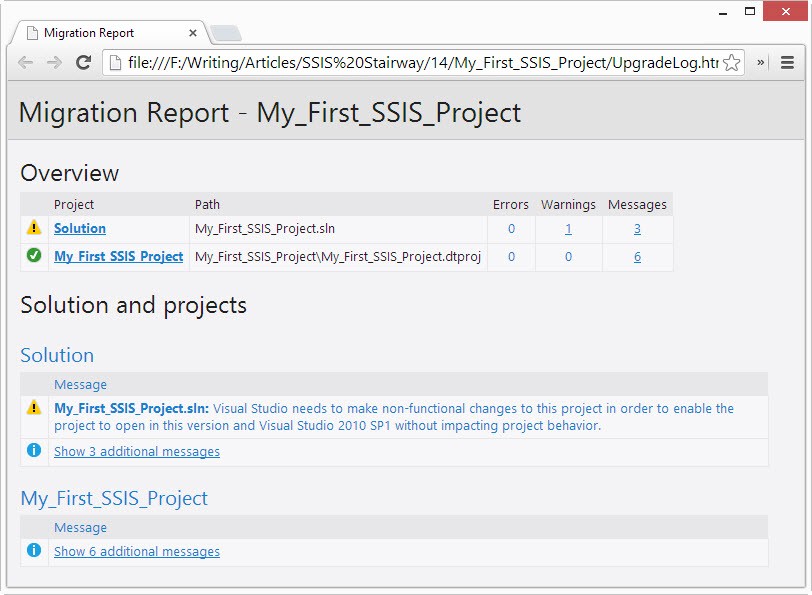
Figure 8
The SSIS Package Upgrade Wizard (shown in Figure 9) starts at the same time the Migration Report is displayed:
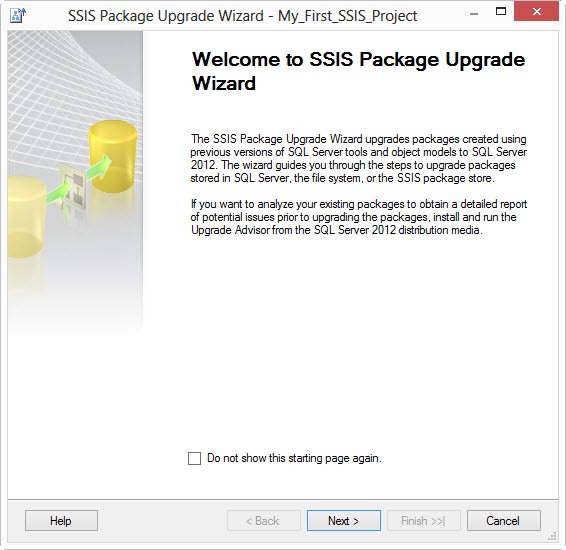
Figure 9
Click the Next button to proceed. The next screen contains a list of the SSIS packages to be upgraded, and is shown in Figure 10. All packages should be checked by default, and you should accept the default:
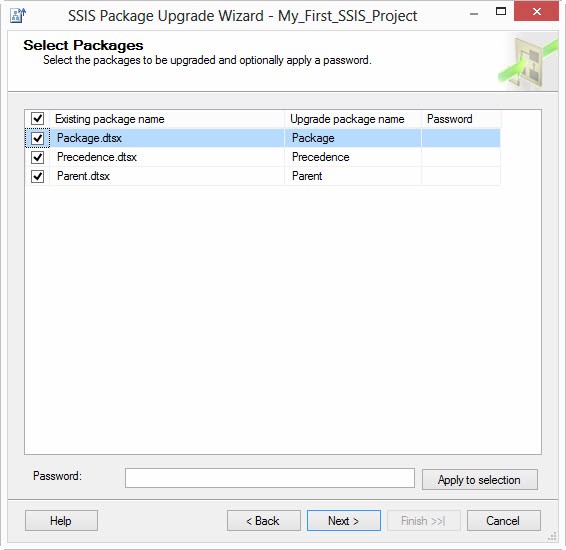
Figure 10
After selecting the packages you wish to upgrade, click the Next button to proceed. The next screen presents options for managing the upgrade. Figure 11 shows this screen with the default options selected:
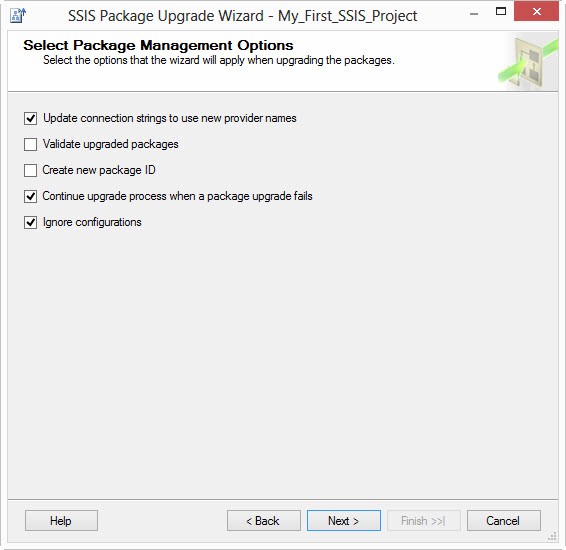
Figure 11
I rarely make changes to the default selections on the Select Package Management Options screen. When I make changes, I usually add “Validate upgraded packages”, “Create new package ID”, or both. You may not want to update the provider names in the connection strings unless all the servers with which the SSIS package connects are being simultaneously upgraded (although I haven’t encountered an issue with upgrading the provider names in years because they are backwards compatible). Validating the upgraded packages is a “double-check.” I will know whether the upgrade succeeded or not at the end of the operation. And if I’ve started this process, I want the wizard to attempt to upgrade the SSIS package and, if the upgrade fails, I will manually address the issue(s). I may opt to create a new package ID to keep my SSIS package ID values unique in the enterprise.
At execution-time – when executing from the file system, msdb database, or SSIS Package Store – you can set an option to verify the package ID. If I am executing SSIS packages with this verification in force, I may want to preserve the original package ID. I usually leave the “Continue upgrade process when a package fails” checkbox checked. If I have started this process, I want it to upgrade as many packages as possible. If one or more SSIS packages file to upgrade, I will manually upgrade them or simply rebuild them. I always leave the “Ignore configurations” checkbox checked. If I want to convert the SSIS package configurations to package (or project) parameters, I do that manually after the package upgrade is complete. Note: You can still configure and use package configurations in SSIS 2012.
When configured, click the Next button to proceed. The wizard will execute for several seconds (or minutes) depending on the amount of SSIS packages to upgrade and their complexity. Once completed, the Upgrade Status screen will display, as shown in Figure 12:
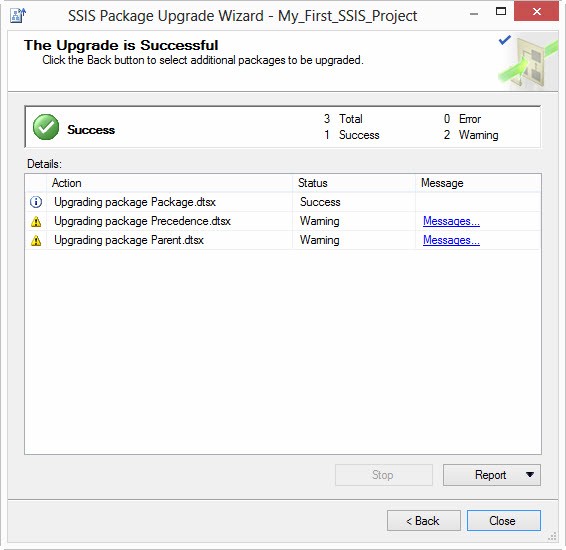
Figure 12
Deployment Models
If it isn’t open already, open the project named “My_First_SSIS_Project” – the SSIS project we just converted, as shown in Figure 13:
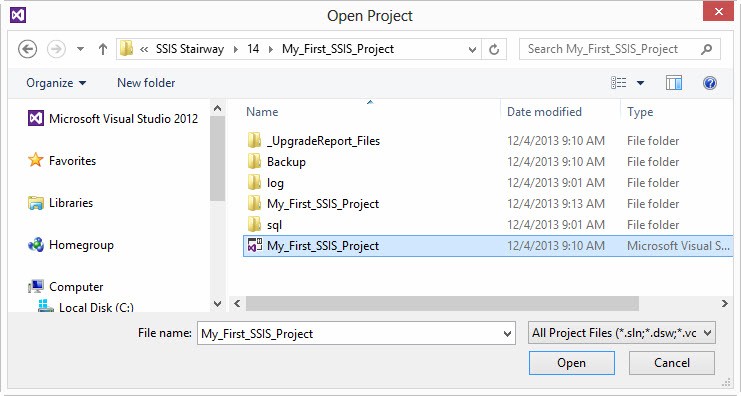
Figure 13
In Solution Explorer, you will notice the phrase “(package deployment model)” to the right of the project name as shown in Figure 14:
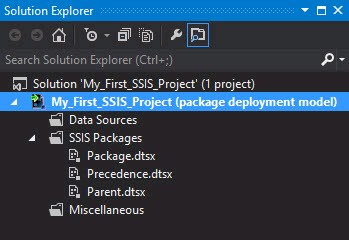
Figure 14
The Microsoft SSIS team did a fantastic job supporting backwards compatibility in SSIS 2012. The Deployment Models are a large part of this backwards compatibility. When you import an SSIS package from SSIS 2008, it will behave exactly as it did in 2008 because of the Package Deployment Model.
Package Deployment Model is Microsoft’s name for SSIS package deployment, execution, and management in SSIS versions 2005 through 2008 R2. Package Deployment Model is supported in SSIS 2012. This means you can run your SSIS 2008 packages in SSIS 2012. There are some caveats (aren’t there always caveats?) but they are well-known and relatively easy to address. For example, SSIS packages executed in the Package Deployment Model cannot take advantage of the SSIS 2012 Catalog, use Project-level Connection Managers, or use Project or Package Parameters.
The default deployment model for SSIS 2012 is the Project Deployment Model. Microsoft provided wizards to convert between the models. To convert My_First_SSIS_Project to Project Deployment Model, right-click the project name in Solution Explorer and click “Convert to Project Deployment Model” as shown in Figure 15:
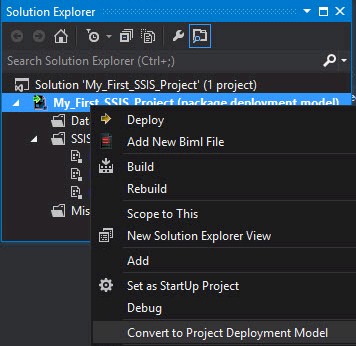
Figure 15
The Project Conversion Wizard starts as shown in Figure 16:
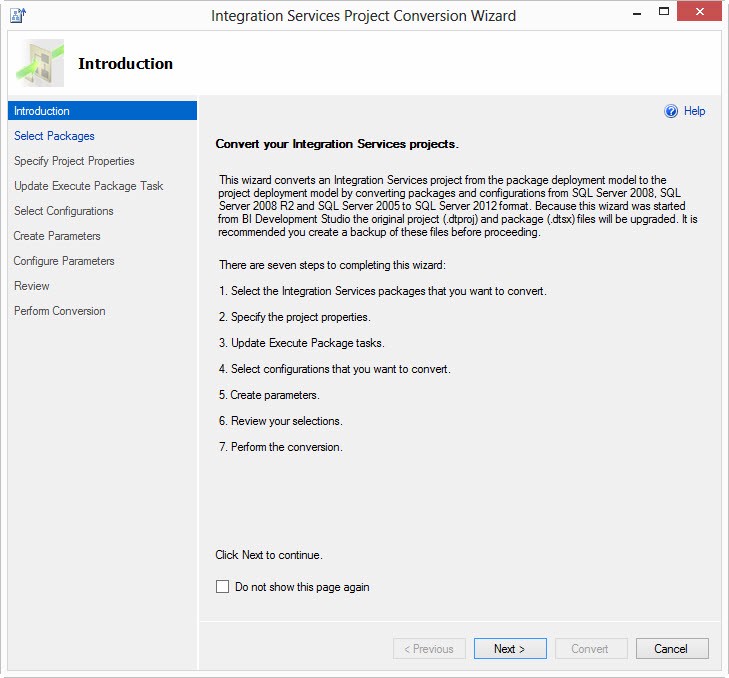
Figure 16
The first step in the Project Conversion Wizard is the Select the packages, shown in Figure 17:
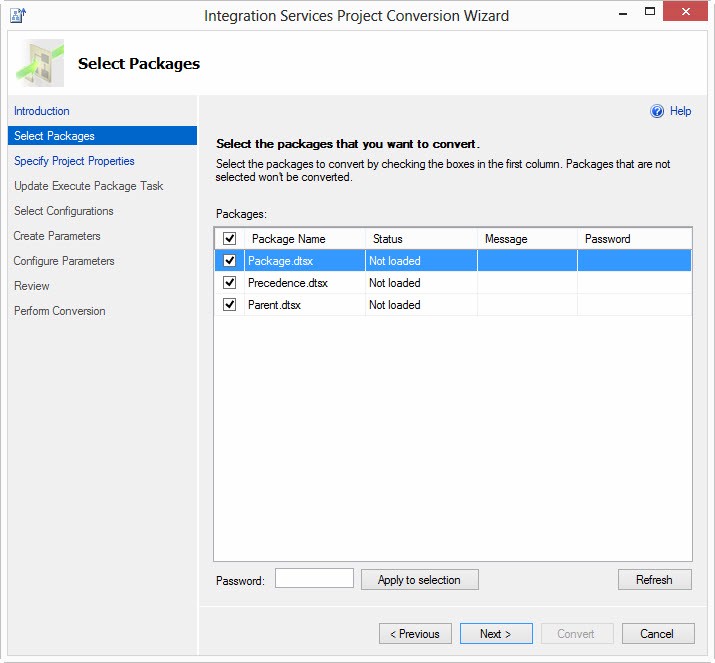
Figure 17
The next step, shown in Figure 18, is to specify project properties – the project Protection Level and Description properties:
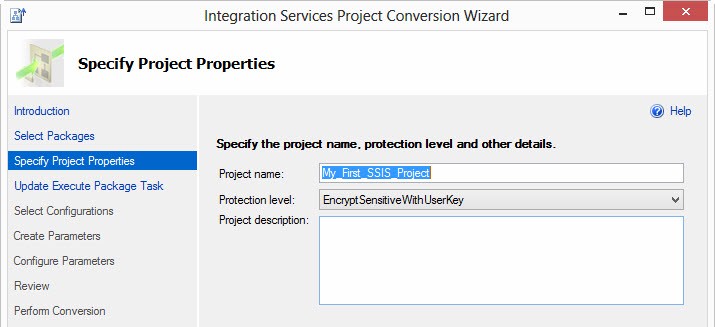
Figure 18
If the SSIS project contains Execute Package Tasks, they are upgraded in the next step – shown in Figure 19:
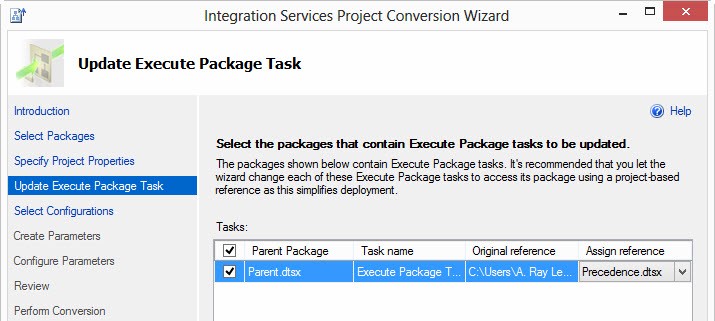
Figure 19
The new Project Deployment Model is the main reason Execute Package Tasks need to be updated. The SSIS 2012 Execute Package Task contains a new property: Reference Type. As in previous versions of SSIS, child packages can be executed from the file system or msdb database. The Reference Type property must be set to External Reference to execute child packages stored in these locations. To reference child packages contained in the same project as the parent package, set Reference Type to Project Reference.
This step in the Project Conversion Wizard allows you to assign the Package Deployment Model’s External Reference to a Project Deployment Model’s Project Reference.
The next two steps in the wizard allow us to convert Package Configuration values to Parameters, starting with the screen shown in Figure 20:
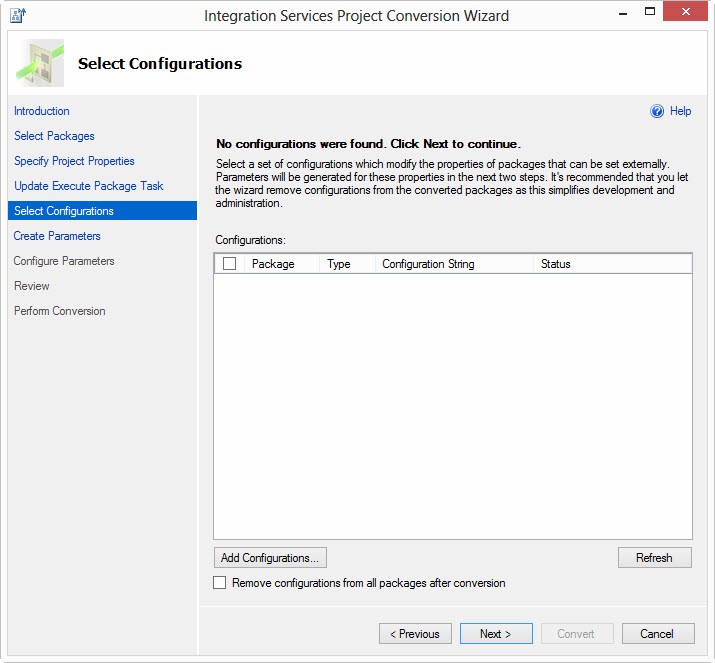
Figure 20
The Configurations screen shown in Figure 20 and the Parameters screen shown in Figure 21 do not apply to My_First_SSIS_Project because we do not have Package Configurations configured.
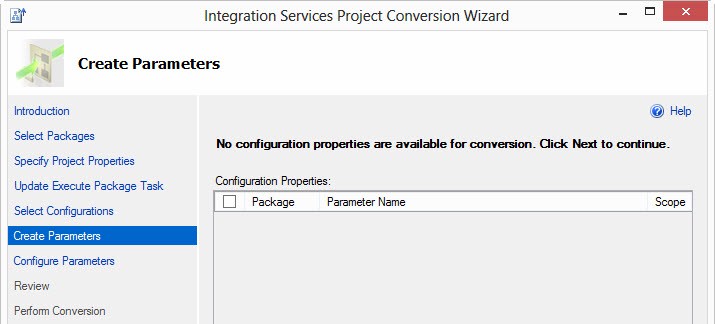
Figure 21
Since no parameters were created in the previous step, there are no parameters to configure in the step shown in Figure 22:
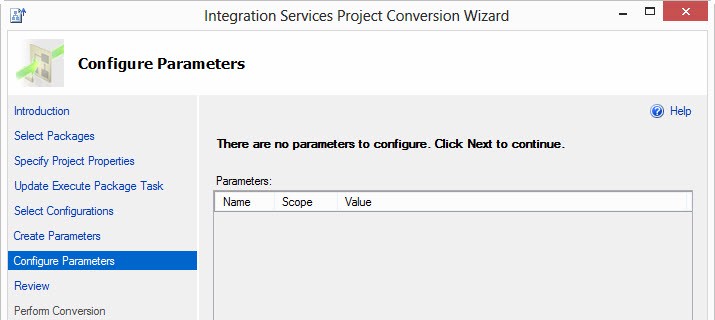
Figure 22
We are now ready to perform the conversion, shown in Figure 23:
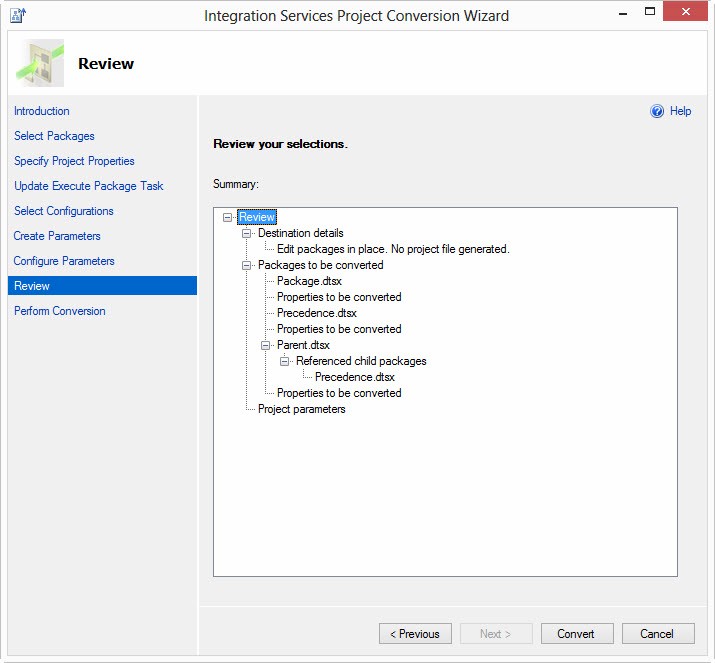
Figure 23
Once the conversion is complete, a report screen – shown in Figure 24 – will display showing the results of the conversion. Along with this screen a dialog displays to inform the user these changes will not be saved until the project is saved. The best way to save the Project is to save everything (Click File -> Save All).
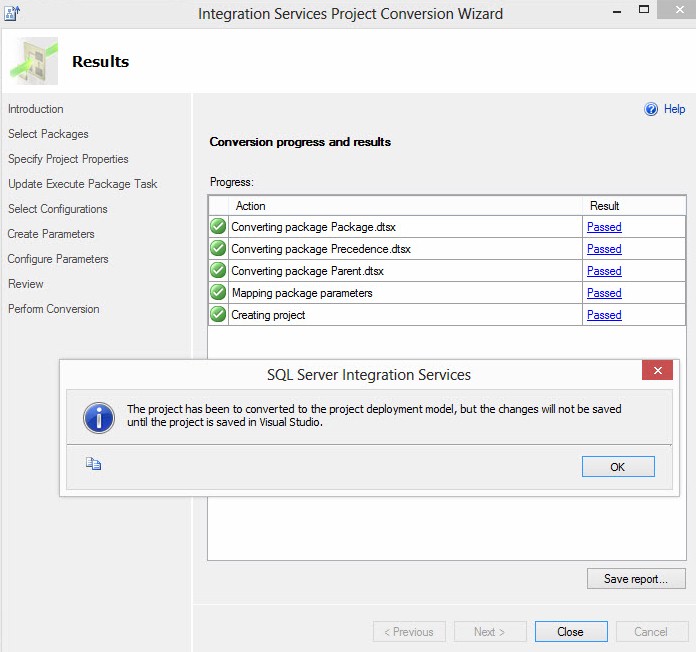
Figure 24
Once the SSIS project has been converted, it appears in Solution Explorer with no text in parentheses to the right of the Project name, as shown in Figure 25:
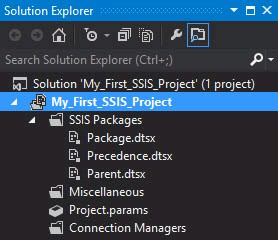
Figure 25
Note also in Solution Explorer a couple new virtual objects: Project.params and Connection Managers.
Conclusion
In this article, we converted our first SSIS project – My_First_SSIS_Project – to SSIS 2012 using SQL Server 2012 Data Tools – BI; and then we converted the imported SSIS project from the Package Deployment Model to the Project Deployment Model.