
In the previous level of this Stairway, you explored the security roles in the msdb database that grant access to SQL Server Agent. These roles include the SQLAgentUserRole, SQLAgentReaderRole, and SQLAgentOperatorRole. Membership in each role grants the user certain privileges to use SQL Server Agent, without having to be a sysadmin server role member. For full administrative control of SQL Server Agent, you will still need sysadmin role membership. Additionally, you reviewed the security implications and choices for the SQL Server Agent service account. In this step, you will examine the concept of Proxy accounts for SQL Server Agent. Proxy accounts allow a job step to impersonate a specific windows security account to perform the operations for that job step. This is typically done to have certain job steps perform operations that wouldn’t normally be available using the security credentials of the owner of the job.
What are Proxy Accounts
As mentioned above, a Proxy Account is a set of stored Windows security credentials. These credentials can then be used by job steps as the security context for that job. The proxy account can be used by one or more eligible subsystems to be impersonated when that subsystem performs some action on behalf of a job.
Subsystems available for Proxy Accounts
Not all of the subsystems are eligible to use proxy accounts. The subsystems that can use proxy accounts include:
- ActiveX Script
- Operating System (CmdExec)
- Replication subsystems*
- SQL Server Analysis Services Command (XML/A)
- SQL Server Analysis Services Query (MDX)
- SQL Server Integration Services Package
- PowerShell
Conspicuous by its absence is the Transact-SQL script (T-SQL) subsystem. T-SQL jobsteps always run in the security context of the job owner, and there’s no override in SSMS to change that. You can manually configure the job step, using the sp_add_jobstep system stored procedure, passing the database_user_name parameter to impersonate a database user for a jobstep, but of course you’ll need security rights to impersonate a database user to do so.
You will also note that the replication subsystems are grouped as one, even though there are several different subsystems dealing with replication. Technically you can use a proxy account with them but that’s an advanced configuration beyond the scope of this Stairway.
When you create a job step, as shown in Figure 1 (to follow along, open any job and click on the Steps page, then click the New… button, select a subsystem such as PowerShell that supports proxy accounts. You will see a list of the eligible accounts that can be impersonated to support that job step. If you have not created any proxy account credentials yet, the list should look like that shown in Figure 1, which is simply the SQL Server Agent security account.
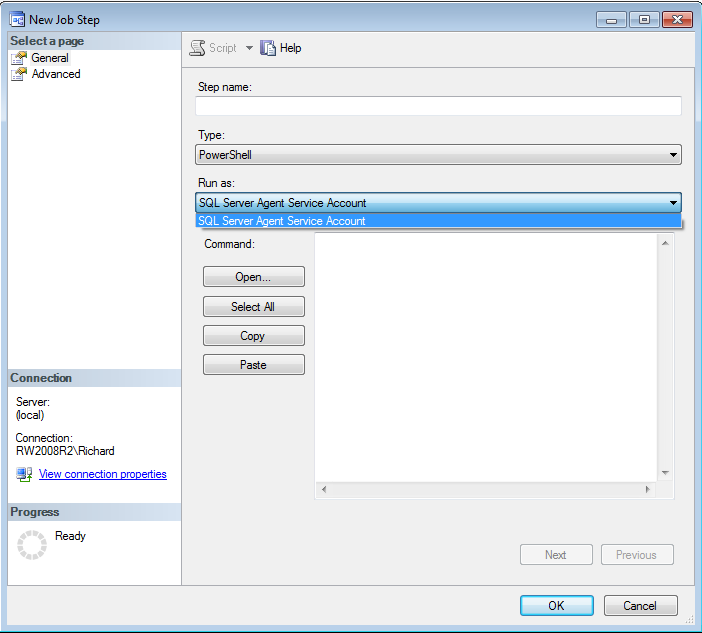
Figure 1: Selecting a proxy account for a job Step
Security considerations for Proxy Accounts
In order for a proxy account to work correctly, the account must have the “Log on as a batch job” (seBatchLogonRight) assigned to it by a Windows administrator (for example, in the Local Security Policy MMC snap-in, under Local Policies -> User Rights Assignment). Without that privilege the SQL Server Agent service will not be able to impersonate the account to run the job step. Also it is important to note that proxy accounts do not automatically have access to your SQL Server. If, for example, you want to use a CmdExec or PowerShell job step to log back in to SQL Server, the proxy account must explicitly be granted a login back to your SQL Server (or otherwise inherit access from a Windows group, etc.).
Creating a Proxy Account
You can create a proxy account using either Transact-SQL or SSMS. Using Transact-SQL, the system stored procedure sp_add_proxy is used. The syntax, referenced from MSDN (http://msdn.microsoft.com/en-us/library/ms188763.aspx), is:
EXEC sp_add_proxy
[ @proxy_name = ] 'proxy_name' ,
[ @enabled = ] is_enabled ,
[ @description = ] 'description' ,
        [ @credential_name = ] 'credential_name' ,
[ @credential_id = ] credential_id ,
[ @proxy_id = ] id OUTPUT
Leave the proxy_name blank to keep the proxy with the same name as the credential. The credential name should be from a security credential you create using the DDL statement “CREATE CREDENTIAL”, which you can read about at http://msdn.microsoft.com/en-us/library/ms189522.aspx.
For example, to create a proxy account for [rw2008r2\ProxyDemo], with a password of “Password1” (i.e. an account created on your local SQL Server machine), you could run the code in Listing 1, substituting a domain, identity and password that is valid in your environment.
USE MSDB;
GO
CREATE CREDENTIAL [rw2008r2\ProxyDemo] with IDENTITY = 'rw2008r2\ProxyDemo'
, SECRET = 'Password1';

Declare @rc int=0;

EXEC sp_add_proxy [rw2008r2\ProxyDemo],1,'This is an example proxy account',
[rw2008r2\ProxyDemo], NULL,@rc;
Listing 1: Creating a credential and a proxy account
Note that at this point you have a proxy account created, but it’s not associated with any particular subsystems. If you expand the Proxies folder in SSMS, then expand the Unassigned Proxies folder, you will see the proxy account you just created, as shown in Figure 2.
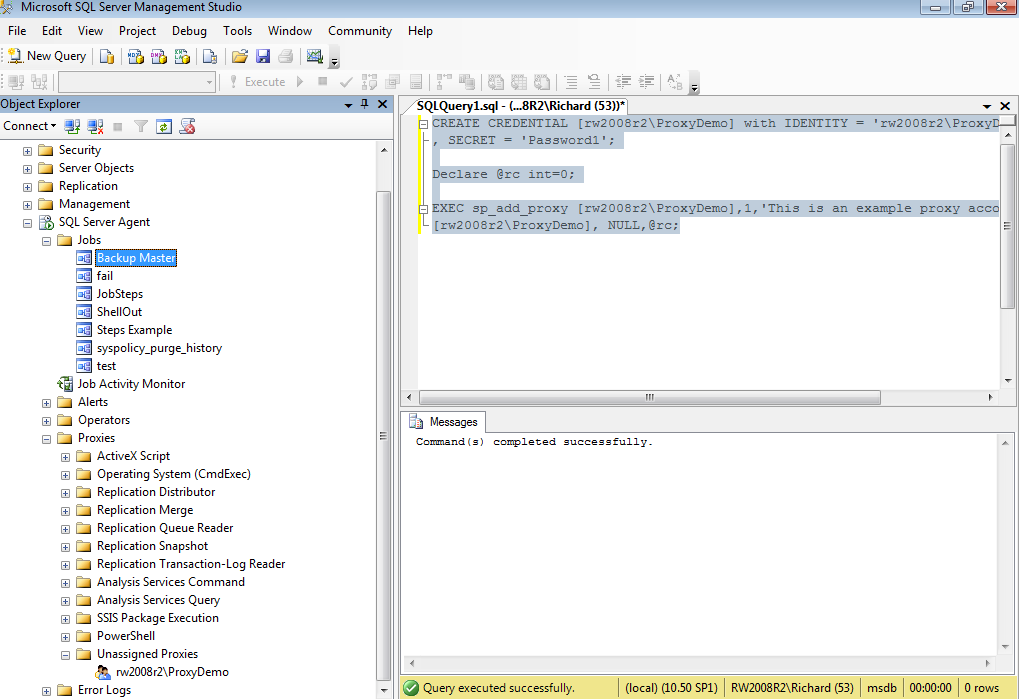
Figure 2: The unassigned Proxy account in SSMS
Note that it is easier to use SSMS, but is still a two-step process. You must first create a credential (expand the Security folder, then right-click on Credentials, and select the New Credential option, to open the New Credential Dialog. For this example, use rw2008r2\ProxyGUI as the account, with the same password, as shown in Figure 3.
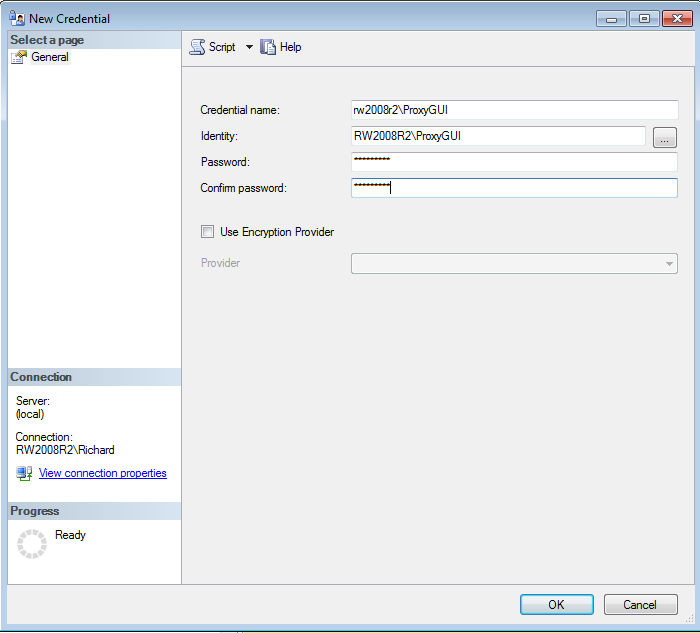
Figure 3: Create a Credential in SSMS
Click OK, then navigate to the Proxies folder in SSMS, and right-click on any proxy subsystem (or the Proxies folder itself), and select New Proxy. Enter the rw2008r2\proxygui name again, select the matching credential, enter a description, and if desired select a job subsystem that the credential will work with (as shown in Figure 4). If no Subsystem is selected, the proxy will appear in the Unassigned Proxies folder as it did when you created the proxy with Transact-SQL.
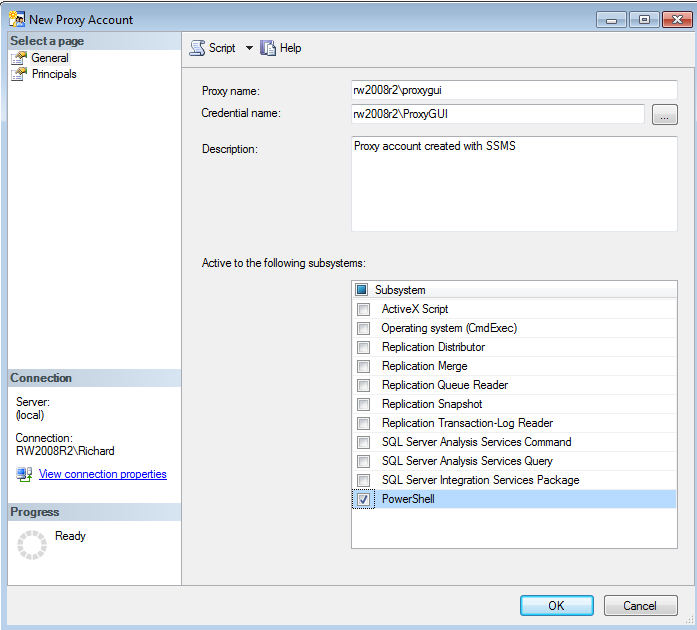
Figure 4: Create a New Proxy Account in SSMS
The last step, associating a proxy account with a Subsystem, is accomplished with the system stored procedure sp_grant_proxy_to_subsystem. For the example earlier, to assign the proxy account [rw2008r2\ProxyDemo] to the PowerShell subsystem, you would run:
EXEC sp_grant_proxy_to_subsystem @proxy_name=N'rw2008r2\ProxyDemo', @subsystem_id=12
Note that the subsystem_id list is documented in MSDN at http://msdn.microsoft.com/en-us/library/ms186760.aspx.
Granting Access to Proxy Credentials
You may have noticed that there is a Principals tab on the New Proxy Account dialog. By default, sysadmin server role members, and therefore the jobs that are owned by them, have access to the proxy credentials, but that’s not true for anyone else. If you desire to have a non-sysadmin user access proxy credentials (which is highly likely, otherwise why create them), then you need to grant explicit access to each login that you want using each proxy. You can accomplish this using the system stored procedure sp_grant_login_to_proxy (read more at http://msdn.microsoft.com/en-us/library/ms187338.aspx), or you can use SSMS. Open the rw2008r2\ProxyDemo proxy under the PowerShell proxy folder, and then click on the Principals tab. If you click Add (as shown in Figure 5), you can then associate one or more security principals (logins) with your proxy account. Once this is done, any job owned by that principal can now use the proxy account. Note that there’s a third tab, References. This will show you which job steps are using the proxy account, in case you want to modify or delete the proxy.
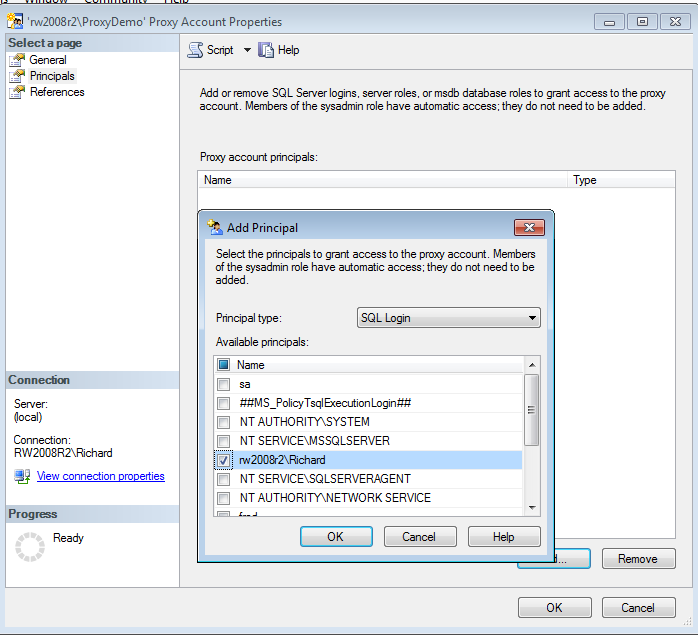
Figure 5: Associating a proxy account with a security principal (SQL Server Login)
Using the Proxy Account
Now it’s time to modify a job step to use a proxy account. If you’ve been following along in the series, you should have a job named ShellOut, with a step s2 of the PowerShell subsystem. Open that job step, and now change the Run As field to be the ProxyDemo credential (as shown in Figure 6). If you don’t have this job step, you should be able to create a copy from what’s shown in Figure 6.
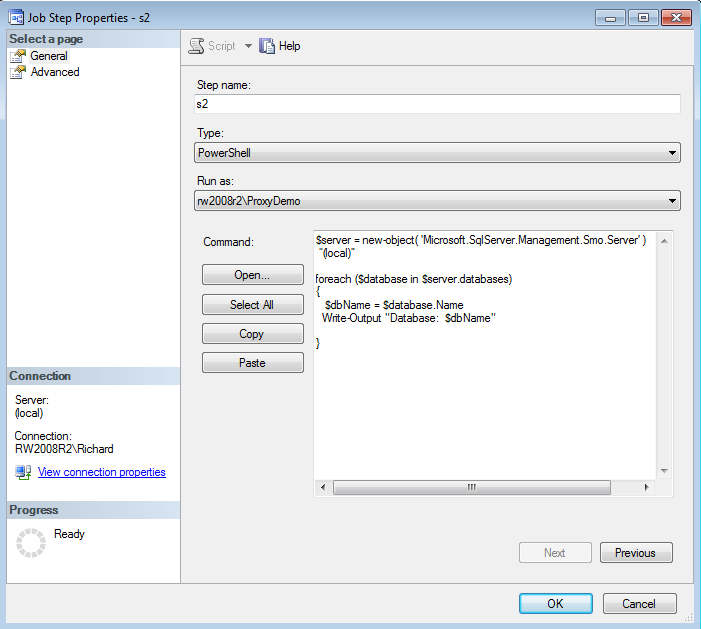
Figure 6: Updating a Job Step to use a proxy account
Now run the job again, and you will have used the proxy account rather than the SQL Server Agent service account to execute this job step. Remember that your proxy account must be able to log in to your SQL Server instance for this to work, so ensure you’ve created a SQL Server login for the proxy account.
Modify and Delete Proxies
Using SSMS to modify or delete a proxy is intuitive (open the proxy account dialog and make changes), but for the sake of completeness the Transact-SQL statements used are:
What's Next
SQL Server Agent Proxy accounts enable non-sysadmin users the ability to perform critical tasks while impersonating other Windows Security Credentials that have rights and privileges that are not otherwise available to that user on the server. When combined with subsystems such as CmdExec and PowerShell, they allow a lower privilege level than sysadmin to be granted to SQL Agent job owners.
In our next level, we will look at the unique considerations for maintenance plan jobs, and how they are different from jobs you create yourself.