This is the 3rd post in the series: SQL Server and Continuous Integration. This time I’ll cover the prerequisites of using ReadyRoll that include some Visual Studio basics and the installation of ReadyRoll. Once we have these skills, the next post can begin to cover the configuration and use of ReadyRoll. I don’t work for Redgate or anything, I just found ReadyRoll to be a good fit for my development setup.
We’ll be using Visual Studio (VS) which can be a scary place for us DBAs. I’m using VS 2015 community edition as it provides all the functionality I require for free. VS Community can be downloaded from here.
SQL Server Data Tools (SSDT)
SSDT is a VS plugin that can script out a database into individual files so that you can us a VCS (I use Git) to version control them. Once those scripts are in my Git repo, I can use it as the single source of truth to generate my releases from. This is the basis of getting our databases into our CI process. ReadyRoll will be used to further improve this process and to add our migration/upgrade scripts to our repo. SSDT is required by ReadyRoll and can be found here.
Before we can start with ReadyRoll, we need to learn some Visual Studio basics.
Team Explorer
Team Explorer is basically a visual Git client. Most developers will opt for the command line for speed (also the UI does not implement all Git functionality) but for this introductory post I’ll stick to the UI. IMO I don’t think it’s the most intuitive of UIs but once you get the hang of it, quick commits and pushes are possible.
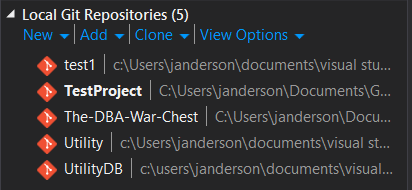
The Team Explorer pane can be accessed from the View menu. At the top of this pane the Manage Connections button can be used to view the local Git repos.
It’s now a choice of selecting an existing repo (that may have been cloned from a remote repo) or creating a new project with it’s own repo.
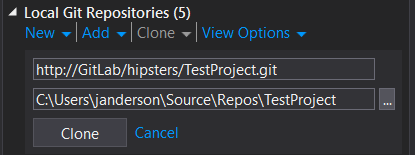
Remote repos can be cloned to your local machine with the UI by selecting ‘Clone’, inserting the address of the repo and the local folder to clone it into.
If you’re creating a new solution, click New and set it to create it’s own repo in it’s own folder.
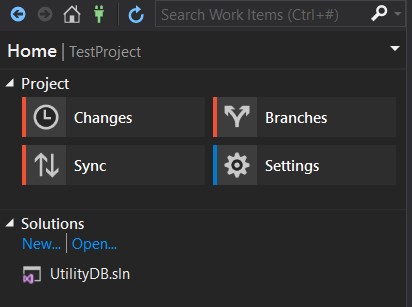
A single repo can have multiple solutions that each contain multiple projects. My repo only has 1 solution named UtilityDB.sln to open. The four boxes; Changes, Branches, Sync and Settings are the core of the Team Explorer UI. The Changes menu is where we will review and commit our changes. Branches allows us to create, merge and delete branches of our repo. Sync allows us to push and pull changes to and from our remote repo. Settings is where we can configure remote repos (required if we created a new solution) and filters on file types to version control.
To see this UI in action we need to make a change to our project. I’ll add the procedure Procedure1 to my database and check the changes section of the Team Explorer. It shows that a file dbo.Procedure1.sql has been added to my project and that the sqlproj file has been altered. I’ll add a short commit message and commit the changes.
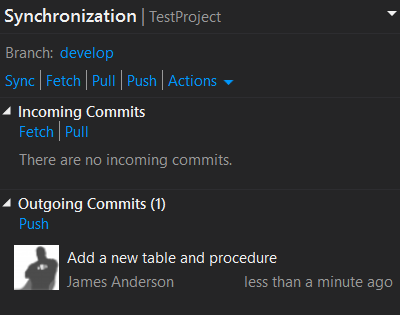
Moving to the Sync pane shows us that we have 1 local commit awaiting a push to our remote repo. Once we click Push, the commit will be added to the remote repo and other developers will be able to pull our changes to their local repos.
Solution Explorer
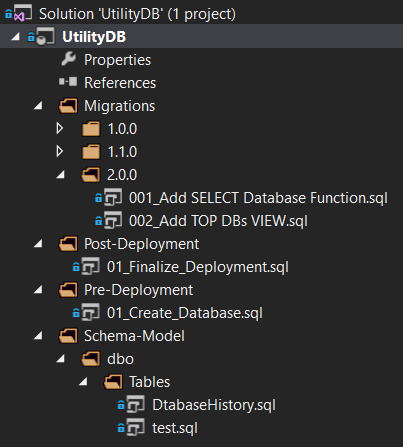
The Solution Explorer is also available from the View menu and allows us to see all of the files in our projects. With a ReadyRoll project this is where we see the scripts that ReadyRoll generates by scripting out our database objects. The screen shot below shows some migration scripts that are also generated by ReadyRoll. I will cover how ReadyRoll generates these scripts in a couple of posts time.
SQL Server Object Explorer (SSOE)
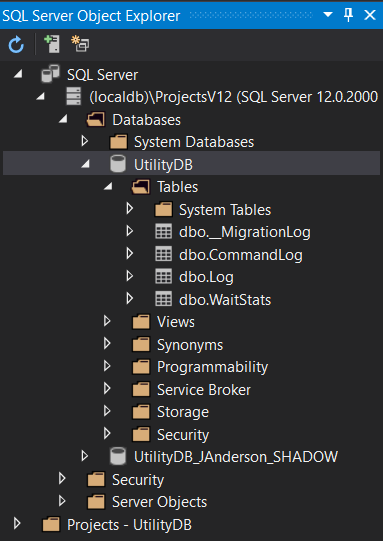
This pane gives us similar functionality to SSMS by allowing us to navigate through our databases and their objects. We can open designers to create new tables and procedures by right clicking the same folders we would in SSMS. We can even launch schema and data compare tools within VS from the SSOE.
This has been a really basic introduction to VS for DBAs, concentrating on the tools we will use with ReadyRoll. Now we have everything in place, we can move onto the ReadyRoll Installation and configuring our first project in the next post. See you there!
The post Visual Studio Basics for use with ReadyRoll appeared first on The Database Avenger.


