

In the previous posts, we learned how to install SQL Server on Ubuntu Server & install SQL Server on CentOS. Today, we’ll walk through how to install SQL Server on RHEL Server. At the end of this blog, you will be familiar with the installation of SQL Server on RHEL system.
Let’s hop over to my previous blog “how to create a virtual machine” to create a virtual machine so that you can perform the installation of RHEL on a virtual machine. To download the RHEL 7.4 iso image, you can refer the website: https://developers.redhat.com/products/rhel/download/
Installing RHEL Server
- I am assuming that you have created a virtual machine to do installation of SQL Server. Let’s Go to “Hyper-V Manager”, Select the created server, Right click the options start (power-on), and connect to the machine.
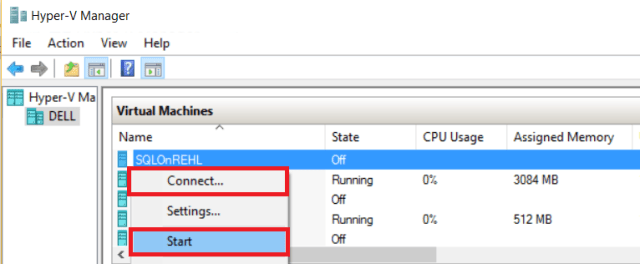
- The moment you are connected to the virtual machine, you are given a choice to select;
- Install Red Hat Linux Enterprise 7.4
- Test this media and then install Red Hat Linux Enterprise 7.4
- Troubleshooting
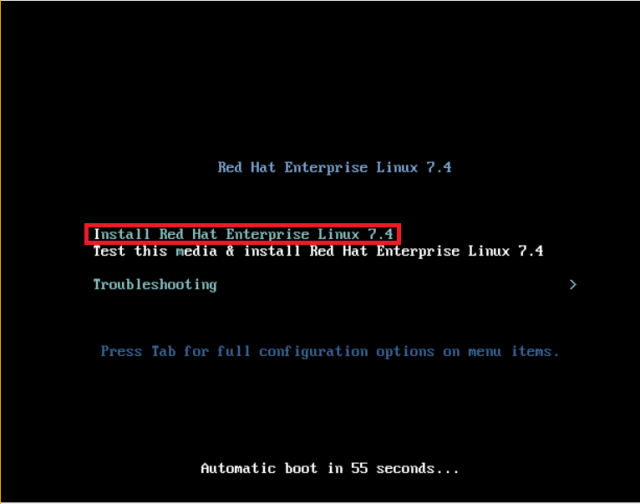
Select the option “Install Red Hat Linux Enterprise 7.4” & hit “Enter”, it will bring the graphical Anaconda Installer.
What is graphical Anaconda Installer?
Anaconda is the installer used by Red Hat Enterprise Linux. For details follow the link – http://red.ht/2miGMdh
- Now, the installation process is going to complete a whole lot of stuff, and everything is going to get logged into syslog file under tmp folder.

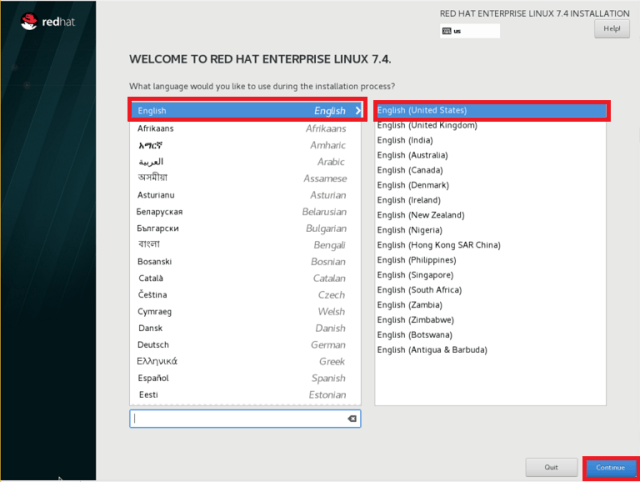
- It will bring you below graphical installer screen, go ahead and select your language, and hit “Continue”.
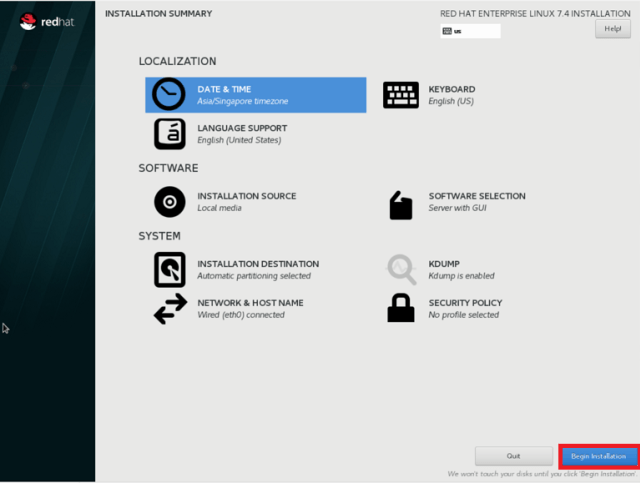
- Now, you will be presented “INSTALLATION SUMMARY” screen. This screen provides you a set of manually configure options like; Date & Time, Network & HostName, Language Support, Installation Media Source…etc
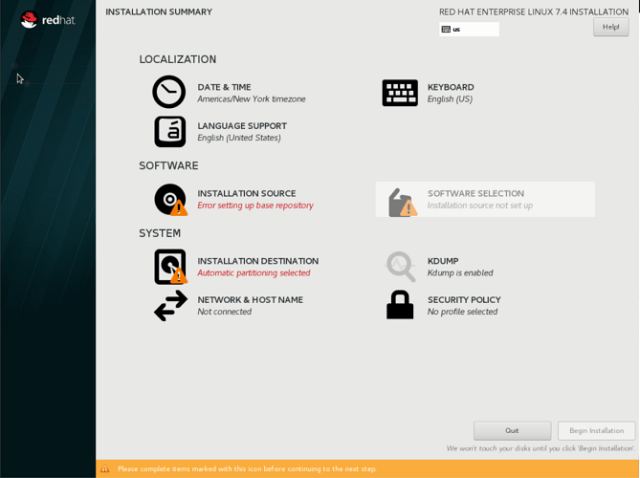
Let’s play with some required manual configurations;
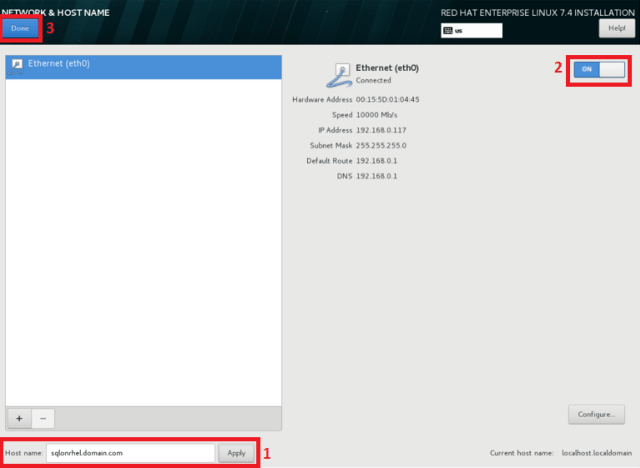
- NETWORK & HOSTNAME:
- Select the hostname option and give a machine name. For this demo, I am going to give the machine name “sqlonrhel.domain.com”.
- Configure the network – By default, the network connection is off. You have to turn-on by sliding slider into the on position. It is going to grab an IP address from DHCP, if your machine is connected to the internet.
- Click on the option “Done”, it will bring your back to the “INSTALLATION SUMMARY” screen.
- NETWORK & HOSTNAME:
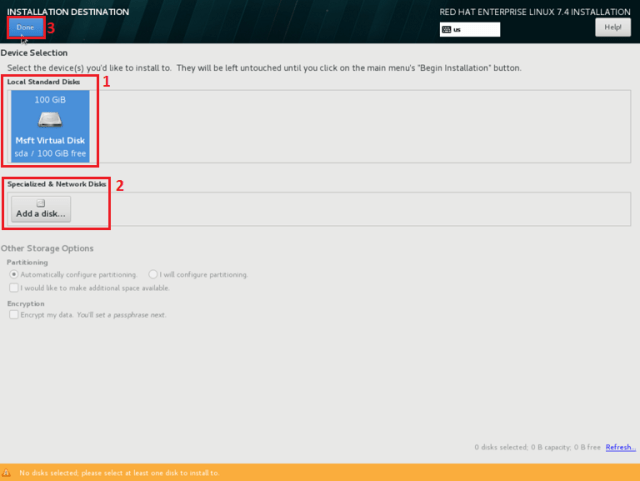
- INSTALLATION DESTINATION
- Hit the option “Installation Destination”, it will bring you to the below page. It asks where you want the RHEL to be installed. In this demo, we are going to use the local standard disk which we have attached to the virtual machine.
- In case, you want to use shared disks. You can go with the option “Specialized & Network Disks”.
- Click on the option “Done”, it will bring your back to the “INSTALLATION SUMMARY” screen.
- INSTALLATION DESTINATION
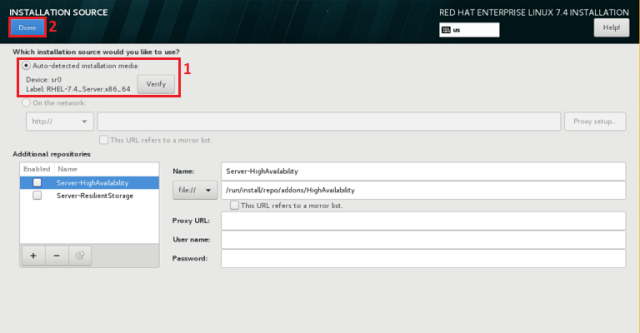
- INSTALLATION SOURCE
- Click the Installation Source icon and, it will prompt you the below screen. Basically, it gives you different-different installation source options. For now, we are going with the default option “Auto-detected installation media”.
- Click on the option “Done”, it will bring your back to the “INSTALLATION SUMMARY” screen.
- INSTALLATION SOURCE
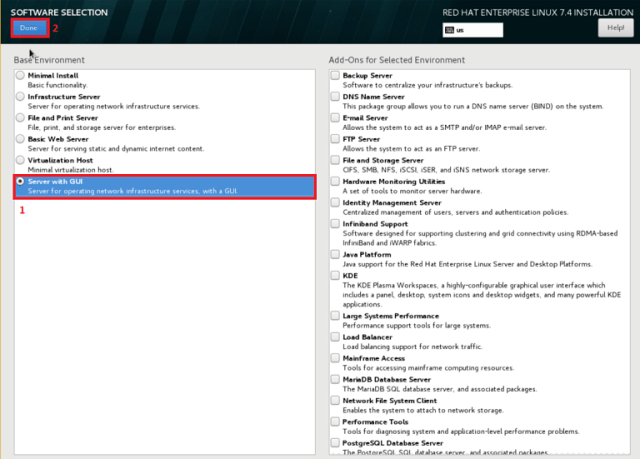
- SOFTWARE SELECTION
- Hit on the “Software Selection” option and, it will bring you to the below page. It provides several configuration options. Let’s select the option “Server with GUI”.
- Click on the option “Done”, it will bring your back to the “INSTALLATION SUMMARY” screen.
- SOFTWARE SELECTION
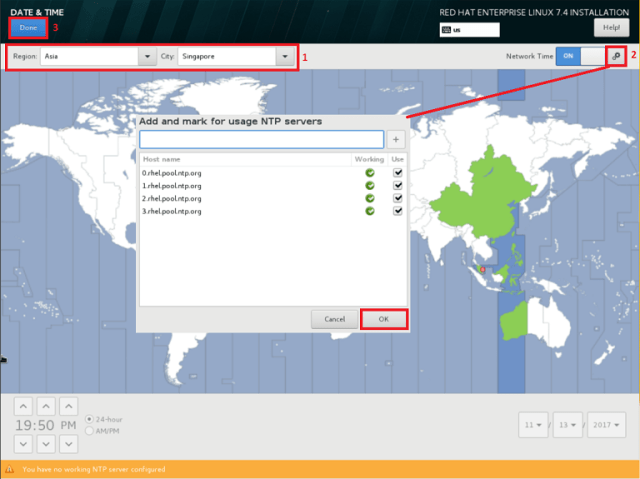
- DATE & TIME
- Click on the “Date & Time” option, and it will prompt you the below page. Kindly select the “Region” and “City”.
- Click on the gear button and check all the online Network Time Protocol (NTP) server and hit “OK”.
- Click on the option “Done”, and it will bring your back to the “INSTALLATION SUMMARY” screen.
- DATE & TIME
- Once you are done with all the manual configurations, let’s click on the “Begin Installation”. Now, the Anaconda Installer will start installing the RHEL in the background.
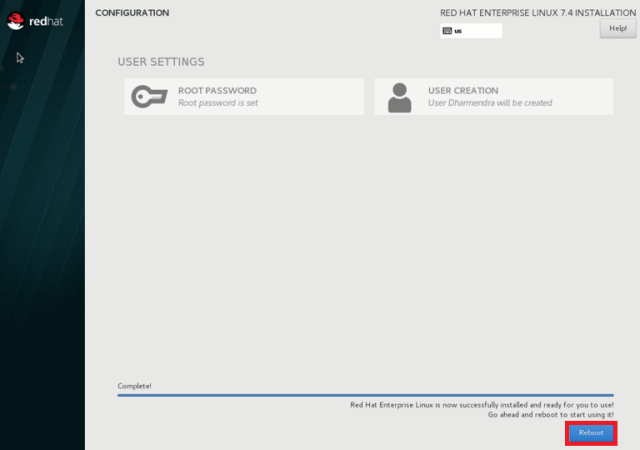
- By the time, Anaconda Installer is doing the installation. Let’s configure the “Root Password” and “User Creation” on the Configuration page.
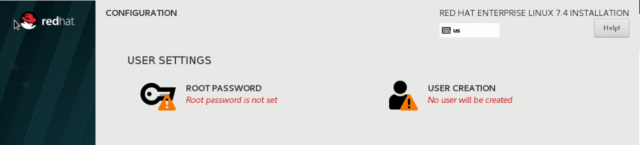
- Let’s configure the root password by clicking on the option “Root Password”, and it will bring you to the below page.
- Key a strong password.
- Once you are done with keying the password, hit the “Done” button.

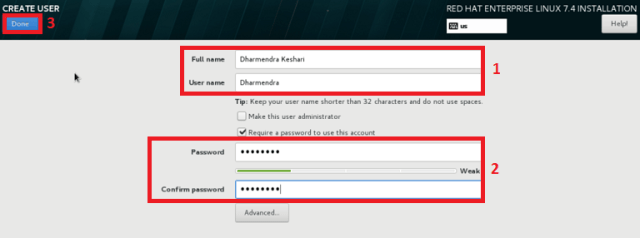
- Now, Let’s create another user to use the system by clicking on the icon “User Creation”. The moment you click on the icon, it will prompt you the below screen.
- Type Full User Name & Key UserName (login name)
- Key the password & confirm password
- Hit the “Done” button
- Once the installation is completed successfully, the system will ask for a reboot the machine. Let’s go ahead and hit the reboot button.
- When the system is up, it will prompt you to accept the license agreement.
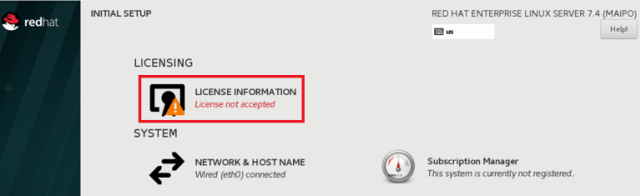
- Once you click on the “License Information”, it will bring you to “License Agreement” page. Go ahead check the option “I accept the license agreement” after that click “Done” button.
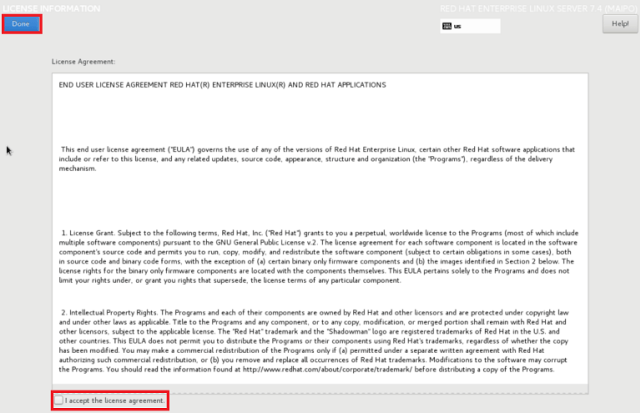
- Click on the finish configuration.

Note: If you are installing RHEL 7, after clicking on “Finish Configuration”, It will bring on the KDUMP page. Kindly click on the “Forward” option. Once you click on the “Forward” option, it will bring you on another page “Subscription Management Registration”, click on the option “No, I prefer to register at a later time” and hit “Finish”.
- Now, it will prompt you to log-in to the system. Go ahead and log-in.
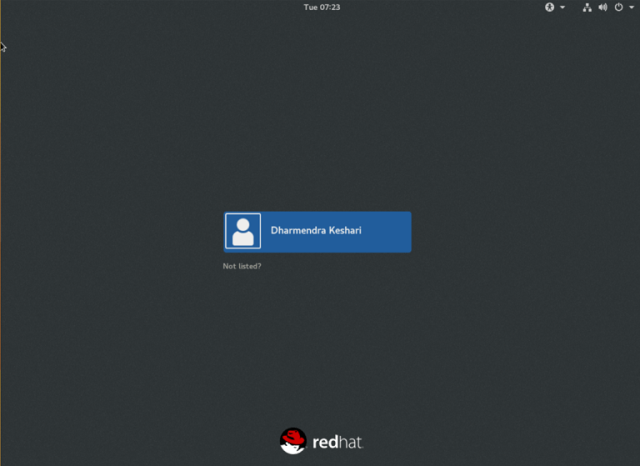
- And you are done with the installation. Your new toy is ready to play with.

Happy SQL Server on Linux learning!!!!!!
The post SQL Server on Linux Installation On RHEL Server – PART1 appeared first on .
