

Cloud is the future and moving there is now as easy as few mouse clicks.
Today we will see how an On-premise database can be moved to a SQL Server instance running up on a Windows Azure Virtual Machine.There are multiple ways to accomplish this and in this post we will see how this can be achieved using SSMS wizards.
Step 1
I have a database named “MoveMeToCloud”,and this is one who is ready to take the flight and move to the cloud. This is a database which is deployed on my on-premises SQL Server Instance.
The first process is to export this database. For that purpose we will choose Tasks –
Export Data-tier Application

As always an introduction wizard is opened up, and you can proceed by choosing next.(Also can say do not show this again !)

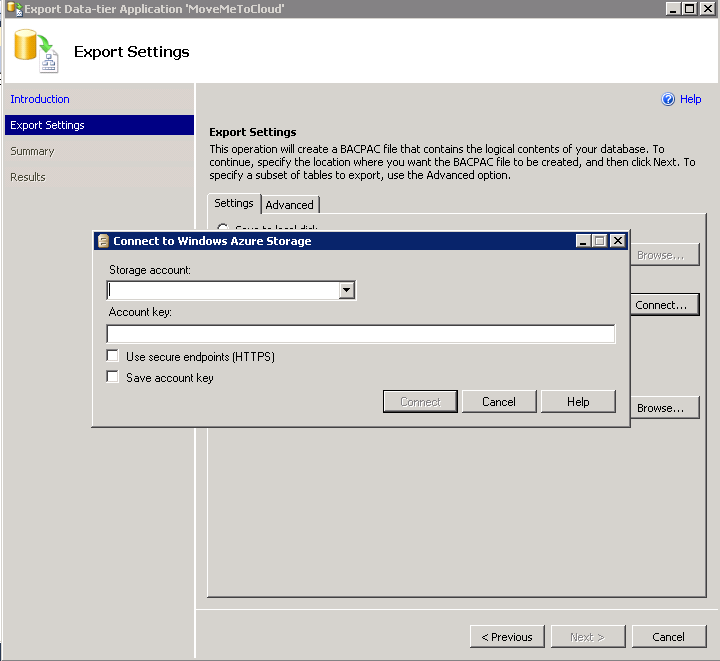
Step 2
In this step we will connect Windows Azure Storage Account and we will export the BACPAC directly to the cloud storage.

When we connect the Azure storage account we will need to provide the account name and the key. Manage Access Keys under the Azure portal(Storage section) will get this info for us.

Step 3
Once the storage account connection is established we can proceed and finish this export activity.

The wizard will do multiple checks, and the process will complete eventually(Provided all the conditions are met).
I will talk about the conditions in a different post.

Step 4
Once the export is completed successfully we can check and verify that the BACPAC is indeed available under Windows Azure Storage Account

Step 5
As the BACPAC is now local to the cloud we can now proceed and do an Import of that file.
We will connect to a Windows Azure Virtual Machine which is running SQL Server 2012 up in Azure to do the import.
We will choose Import Data Tier Application to initiate the import.

We will need to provide the storage account details under the import settings

Once the connection is established correctly we can proceed and choose the database settings

Database settings will allow us to place the data file and log file according to our requirements.
We can proceed and finish the wizard to complete the import activity.


Step 6
Once the import is completed we are good to access the database up in the cloud.

Thanks for reading and keep watching this space for more.

![]()
