


One of the most useful tools to the DBA when we need to test new features, recreate a fault that we’ve seen in production or just want to see ‘what if…?’ is a test lab.
Other Posts In The Series
Part Two, Creating a Domain Account and Joining a SQL Server to the Domain
Part Three, Creating a Windows Failover Cluster and a SQL Server Availability Group
Some of you are going to be lucky enough to have a few servers kicking around or a chunk of the virtual environment that you can build a test lab in but not all of us do. In this series of posts I’m going to look at how we can build up a fully functioning test lab consisting of a domain and clustered SQL Servers on our desktop PC. Now, although I’m going to be building this environment on my desktop, the main steps will be the same if you’ve got separate hardware for this so may still be relevant.
So, in this series we’re going to build a virtual test lab that’s going to consist of a domain controller and a couple of SQL Servers in a Windows Failover Cluster, hosting an Availability Group.
My Specs
I’m going to be using a fairly modestly spec’d desktop PC to build this environment on.
3.8GHz Quad Core Processor
16GB RAM
Windows 10 Pro
2TB HDD
500GB SSD
Hypervisor Software
We’re going to be creating this test lab using virtual machines so the first thing we’re going to need is some sort of hypervisor software. I’m going to use Oracle’s Virtual Box, mainly because it’s software that I know well but there are many other free offerings out there if you wanted to use something else and depending on your host operating system.
A couple of alternatives are VMWare Player or Microsoft’s HyperV
Building the Domain Controller
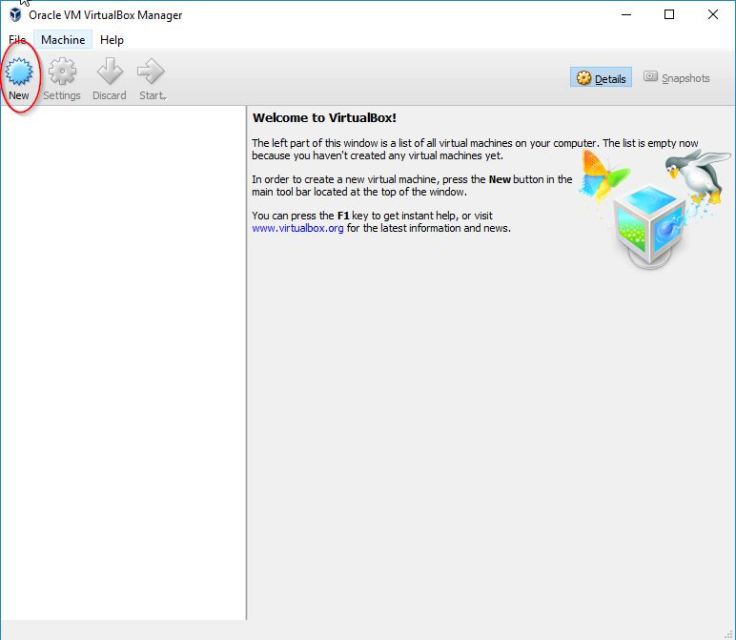
Once you’ve got your virtualisation software installed, the first thing that we’re going to need to do is going to be building our domain controller.
You’re first going to need to create a virtual machine to host this, if you’re using Virtual Box, simply click on the ‘New’ button (if you’re using a different hypervisor, you’ll need to check the vendor’s documentation for details).
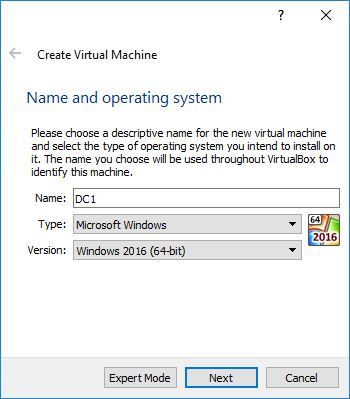
This’ll bring up an options window where we can give the VM a name and select the operating system type and version.
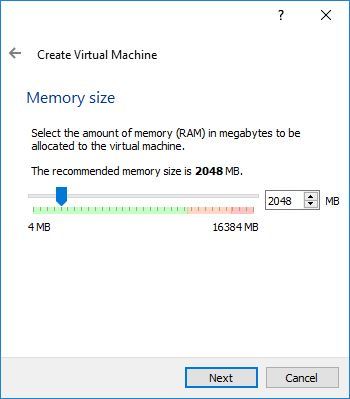
We then need to allocate some RAM to this VM. This is only going to act as a domain controller so isn’t going to need all that much RAM for our purposes so I’m just going to go with 2GB. We can always increase this at a later date if we find the server struggling.
The next step is to allocate a disk to the server, you’re probably going to want to select ‘Create a virtual hard disk now’
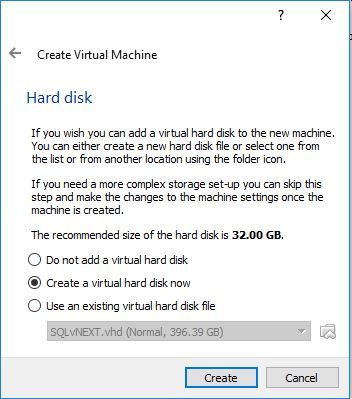
We’re now going to need to make a few choices about the hard disk that we’re creating.
What hard disk file type to use? Personally I always choose VHD, it’s a native windows Virtual Disk and can easily be mounted on your workstation’s operating system if you ever needed to.
Dynamically Allocated or Fixed Size? Totally up to you, I’d personally choose dynamically allocated, this will mean that the VHD file will only use as much space on our disk as it’s actually using and let us over provision our disks.
Size and Location? First, let’s think about the location. For best performance, this disk wants to be placed on the fasted disk that you’ve got available to you so I’m going to be putting it on my SSD. I’ve tried running VMs from a spinning disk but they can really struggle when you have more than a couple up and running.
Size? It doesn’t need to be big, I’ve got with 100GB which will be far more than enough.
Installing the OS
Now that we’ve got the machine up and running we’re going to need to install the OS. Grab yourself a Windows Server ISO image, right click on the virtual machine that you’ve just created, select settings and Storage.
To load in the ISO, select the CD drive and from the drop down you can choose the ISO image that you want to load. If it doesn’t appear in the list, you’ll need to select ‘Choose Virtual Optical Disk File…’ and locate the file.
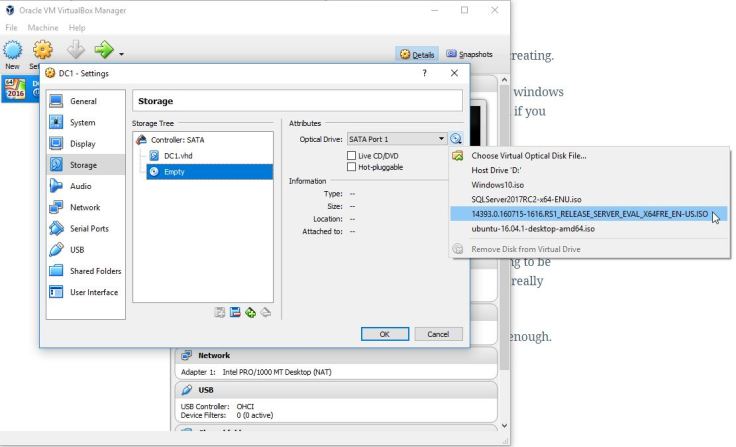
With the disk file loaded you just need to start up the VM and install your OS.
Right click on the VM, choose Start and Normal Start. Your VM will start up and you can install Windows Server.

Name The Server and Set its IP Address
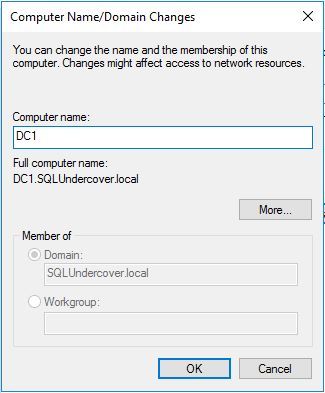
The first thing that I want to do is give this box a sensible name so I’m going to rename it at DC1.
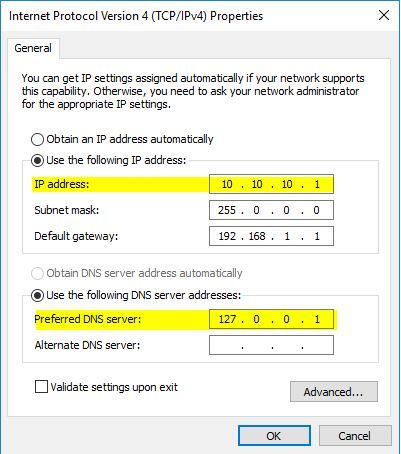
The next thing that we need to do is make a couple of changes to the servers network settings. We need to make sure that our domain controller is assigned a static IP address, I’ve chosen 10.10.10.1 for this and that the DNS server is pointing at the loopback IP address, 127.0.0.1.
Setting Up Active Directory
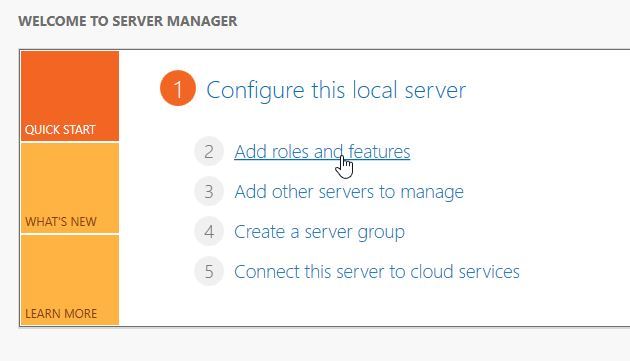
Now that our domain controller is built, we’re going to want to setup Active Directory.
Open up Server Manager and click on ‘Add Roles and Features’
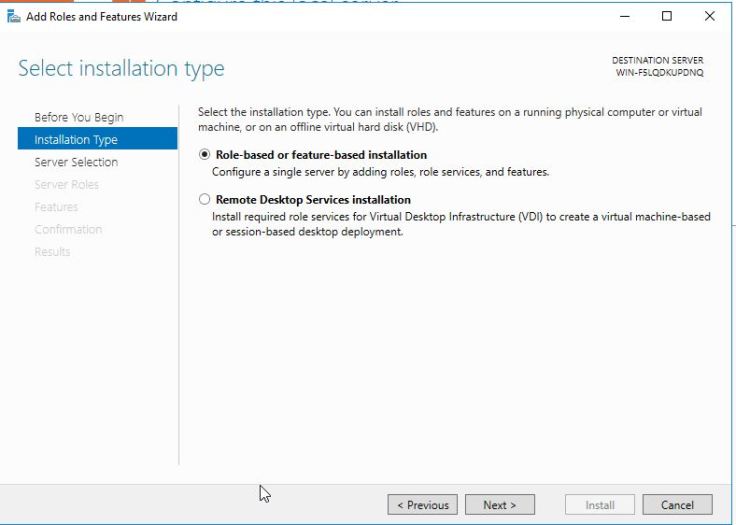
Choose ‘Role based or feature based installation’
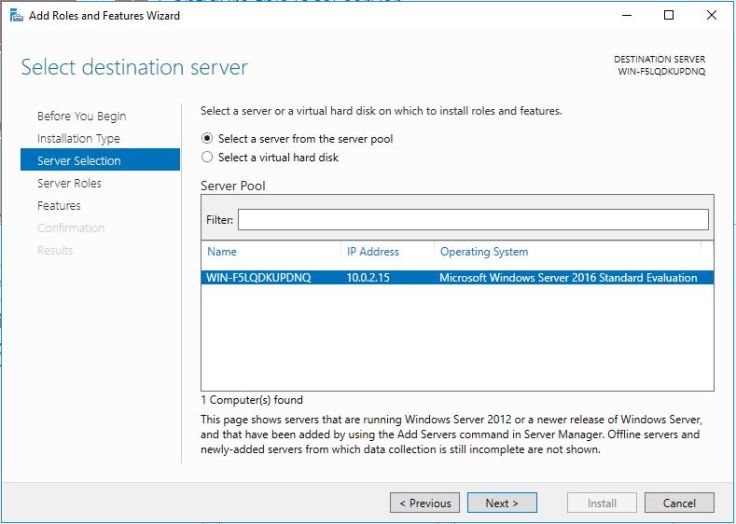
When choosing the destination server, you should only see one server and that’ll be the local VM. I know it’s going to have a silly name, but we’ll change that later on. For now just hit ‘next’
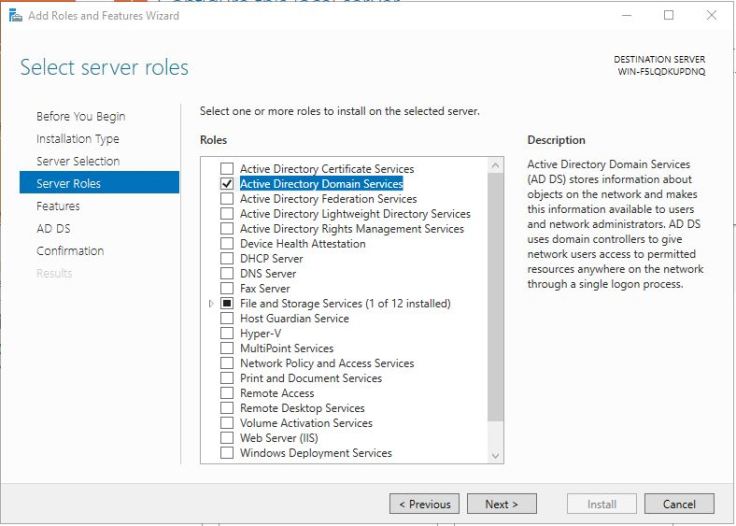
On ‘Select Server Roles’, you’re going to want to select ‘Domain Services’ When presented with ‘Add Features’, just hit ‘Add Features’ and ‘Next’
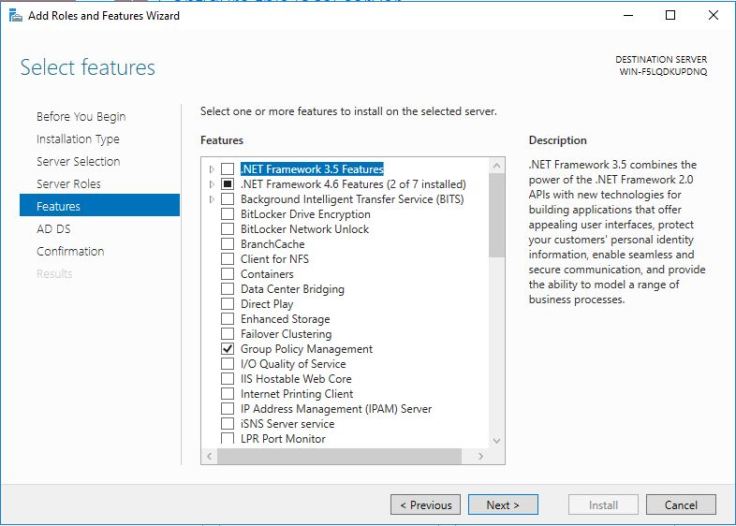
On the select features page, just keep the defaults and click Next.
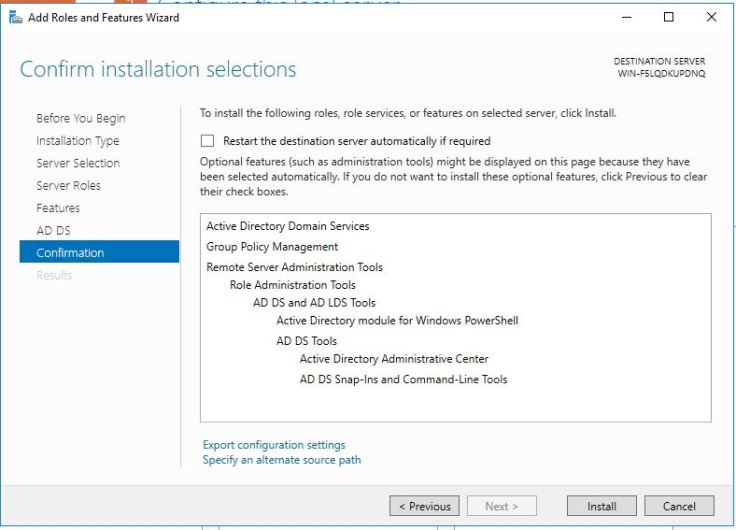
You can just skip through the AD DS page and hit ‘Install’ in the Confirmation screen.
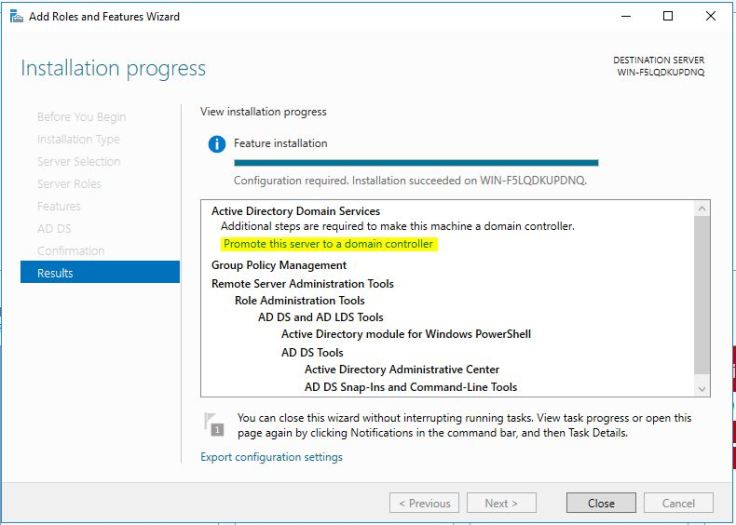
When that’s finished installing, we’re going to need to promote our server to a Domain Controller. Click on ‘Promote this server to a domain controller’.
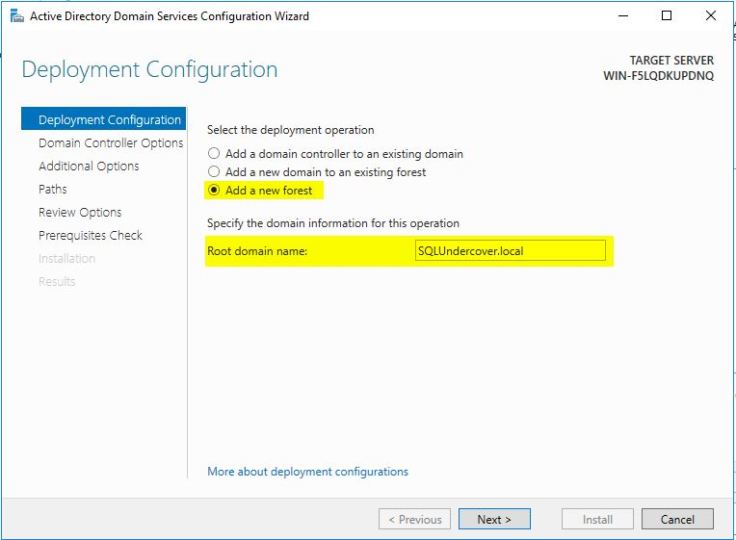
As this is a new domain that we’re setting up, we’re going to select ‘Add a new forest’ and then give our new domain a name.
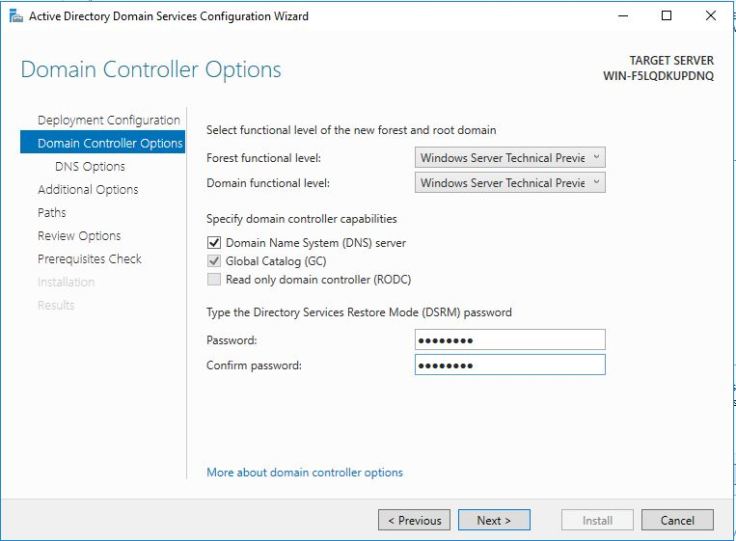
You can leave the functional levels where they are. We’re going to be using this server as our DNS server so we’ll also leave that ticked and provide a password for the DSRM.
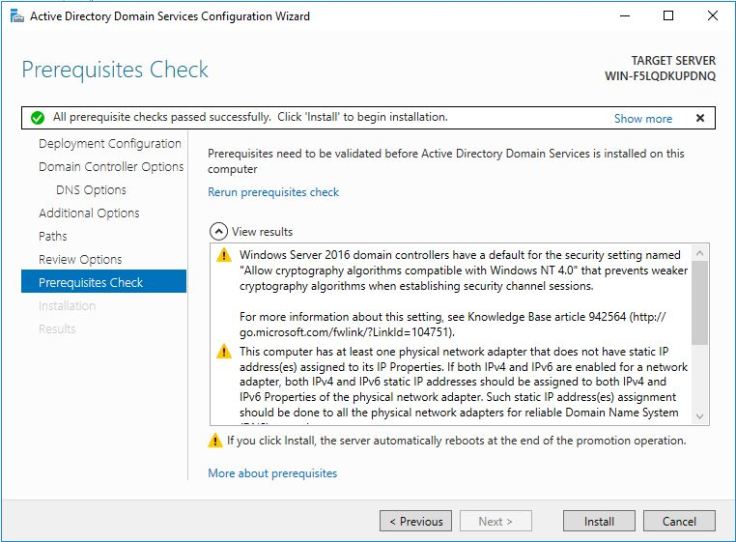
We can just select the defaults on the next few screens and the Prerequisites Check should pass although it might give a few warnings. We can ignore those warning, nothing there for us to worry about for now so go ahead and hit install.
The VM will probably reboot but when it comes back online, you’ll find that you’ve got yourself a sparkling new domain. There are a couple of things that we’re going to need to tidy up first though.
So there we have it, our domain controller for our new test lab is up and running. In the next part of this series we’ll build our first SQL Server, create a domain account to access the server and join it to our domain.
Thanks for reading 
