

I’ve been meaning to start a series of posts on “Dipping your toes into the cloud” for a while now, there are a number of things you can do to slowly take advantage of the cloud without having to re-architect your whole on-premise setup. This post will serve as part one of that series.
One of the easiest ways to start leveraging the “cloud” with minimal changes is to start moving your backups to your provider of choice. In this post I’m going to use Azure as SQL Server has built in support for it.
First up we need to log in to the Azure Portal and create a new storage account, the portal UI changes frequently so I’ll avoid too many screenshots. To add a storage account…
- Hit the “Create a Resource” button and search for storage account
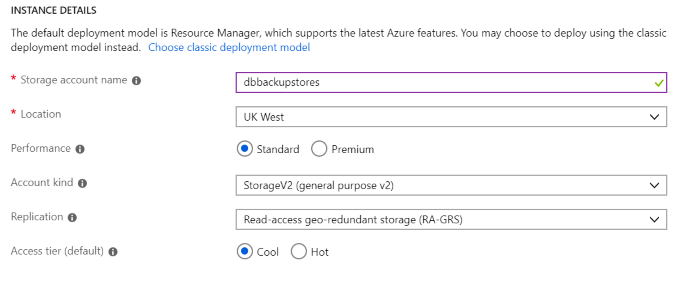
- Give your account a name
- Choose a data centre location
- For account type choose one of the general purpose ones (Blob storage option will not work for what we’re doing)
- Pick a replication strategy
- Pick an access tier, I’ll normally use Cold Storage as they won’t be frequently accessed
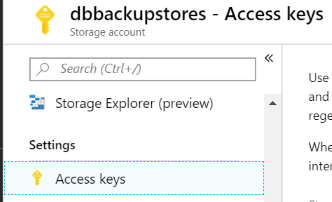
Next up let’s get the keys required to access this account…
Open the newly created storage account and navigate to the Access Keys menu item

Copy the value in Key 1
We now need to create a credential in our on-premise SQL Server to access this…
CREATE CREDENTIAL [dbbackupstorescredential]
   WITH IDENTITY = N'STORAGE_ACCOUNT_NAME_GOES_HERE',
   SECRET = N'KEY_GOES_HERE'
We then need to configure our blob container
- Go back to your new storage account in the Azure Portal and click on Blobs in the menu
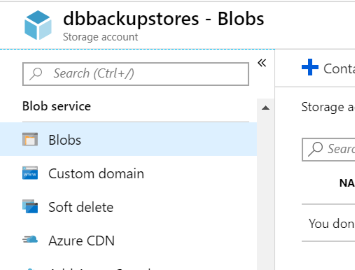
- Click the new container button, give it a name and click OK
- Click the newly created container
- Click properties in the menu
- Take a copy of the URL
We now have all we need to backup a database to the new blob storage container, The following TSQL will create a new backup in the blob storage container we just created…
BACKUP DATABASE MyDb
   TO  URL = N'https://dbbackupstores.blob.core.windows.net/dbcontainer/MyBackup.bak'
   WITH  CREDENTIAL = N'dbbackupstorescredential'
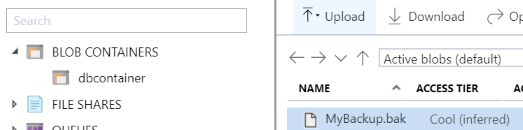
If you then go to back to the Azure Portal and go in to the “Storage Explorer” under the storage resource you can browse to Blob Containers and into your new container where you’ll see the backup you just took…
Finally, let’s restore our backup from Azure to a new on-premise database…
RESTORE DATABASE MyRestoredDatabase
FROM  URL = N'https://dbbackupstores.blob.core.windows.net/dbcontainer/MyBackup.bak'
WITH  CREDENTIAL = N'dbbackupstorescredential'
   ,MOVE N'MyDb' TO N'C:\temp\MyRestoredDb.mdf'
   ,MOVE N'MyDb_Log' TO N'C:\temp\MyRestoredDb.ldf'
