A couple of weeks ago, I blogged about boot diagnostics and how they can help you troubleshoot issues when virtual machines won’t start. But what if you selected to disabled boot diagnostics when the virtual machine was created? Can you go back and retro-actively add them back?
Yes, Virginia, yes you can. There is indeed a Santa Clause. It’s pretty simple to do.
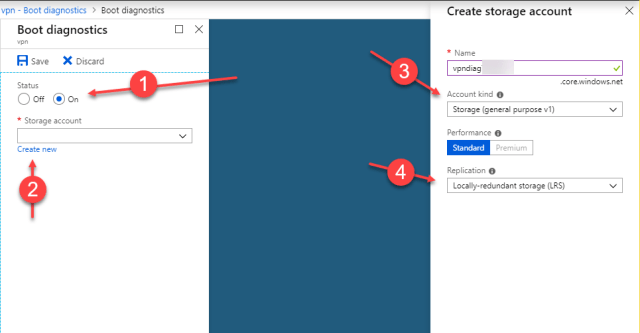
Open the Azure portal, locate the virtual machine in question, and go to Boot Diagnostics.
- Make sure that the Status is set to “On
- Select a storage account to use or select “Create new”. If you have a specific storage account that you use for diagnostics for all of your resources, you can use that, however I would just recommend creating a new storage account.
- You’ll need to give the storage account a globally unique name for the endpoint. Here you can see I’ve given mine the name of “vpndiagXXXXXX” since this particular machine is used for VPN services when I travel.
- Like many things in Azure, you can select an appropriate level of redundancy for your needs. If boot diagnostics are very critical to your environment, I would change the replication to geo-redundant storage (GRS). This would ensure that the logs are geo-replicated to another region for resiliency.
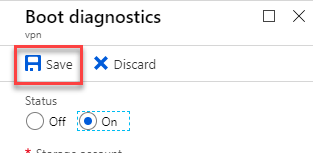
Once you are done configuring the storage account, just simply click “Save” at the top left.
Summary
Boot diagnostics is your friend and is useful in determining the status of your Azure virtual machine. If for some reason you didn’t enable this during creation, it’s simple to add back to the configuration.
© 2019, John Morehouse. All rights reserved.


