

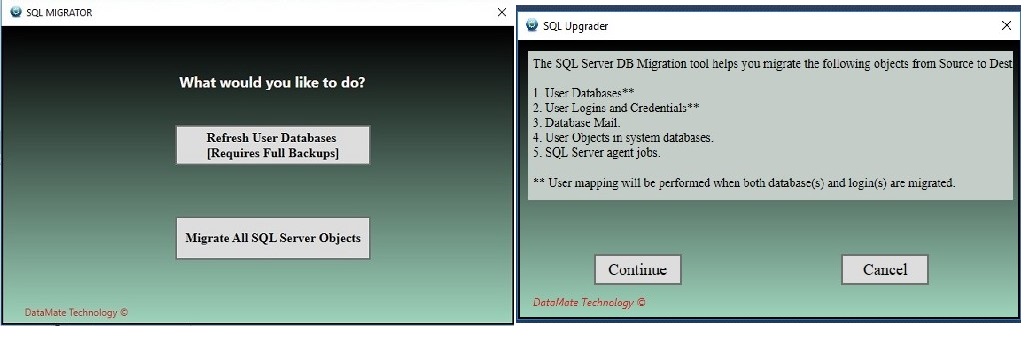
When you open SQL Migrator, you get the two options and we discussed the "DB Refresher" in part 1. That brings to the next topic which is the real deal available within SQL Migrator which is "SQL Upgrader". In this article, we will migrate a Version 2014 to Version 2016. The migration pattern needs to adhere to Microsoft described upgrade standards. This software supports upgrade from Version SQL Server 2005 and above.
- SQL Server 2005 to SQL Server 2008
- SQL Server 2005 to SQL Server 2008 R2
- SQL Server 2008 & R2 to SQL Server 2012
- SQL Server 2008 & R2 to SQL Server 2014
- SQL Server 2012 to SQL Server 2014
- SQL Server 2012 to SQL Server 2016
- SQL Server 2014 to SQL Server 2016
SQL Upgrader
Choose "Migrate All SQL Server Objects" and verify the pre-requisites. Click continue if the pre-requisites are met.
This feature requires that a person with sysadmin Privilege at both Source and Target perform this operation. Enough storage needs to be allocated on a shared Network folder to save copies of backup file from the source instance. Its preferable that you have a basic understanding of SQL Server database administration before running this task.
Some of the limitations are
A. Only Backup and Restore method are currently supported.
B. The data files and log files will be placed in default data and log folder as specified at the Target instance Configuration level. This cannot be modified and if these values are missing in the default parameters, the data and log files will be restored on the master datafile location of the target Instance.
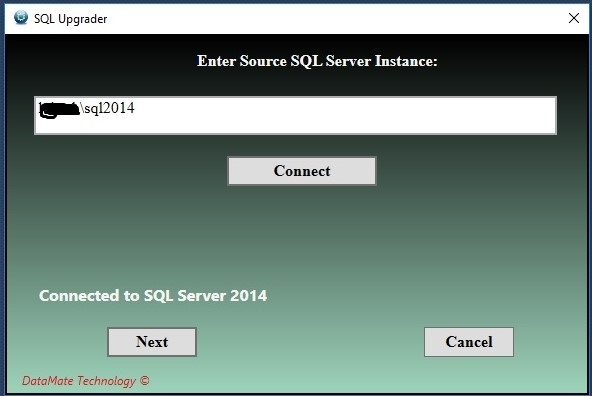
The next screen gives you the option the enter the Source SQL Instance Name: We are connecting to a SQL Server 2014 Version here. Connect and Click Next.
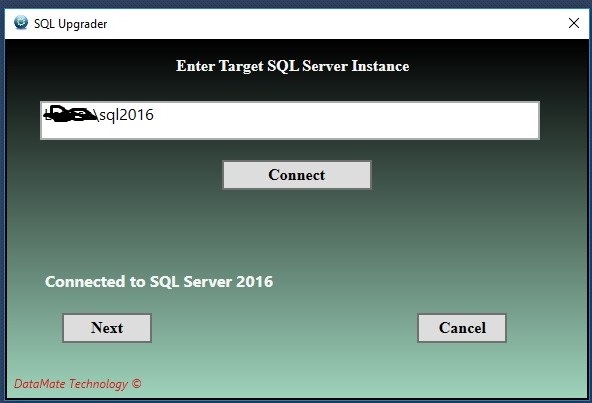
The next screen gives you the option the enter the Target SQL Instance Name: We are connecting to a SQL Server 2016 Version here. Connect and Click Next.
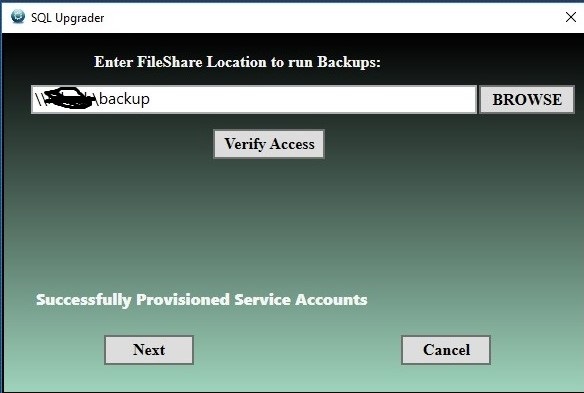
In this step, we provide the Network file share used by the source instance to Run the Backups to. The execution must have Full Control over the folder. When you click Verify, the service accounts at both source and target are automatically added with the required folder privileges. This behavior can be erratic due to how windows folder permissions work. It may need some manual tweaking if the step runs into unforeseen issues.
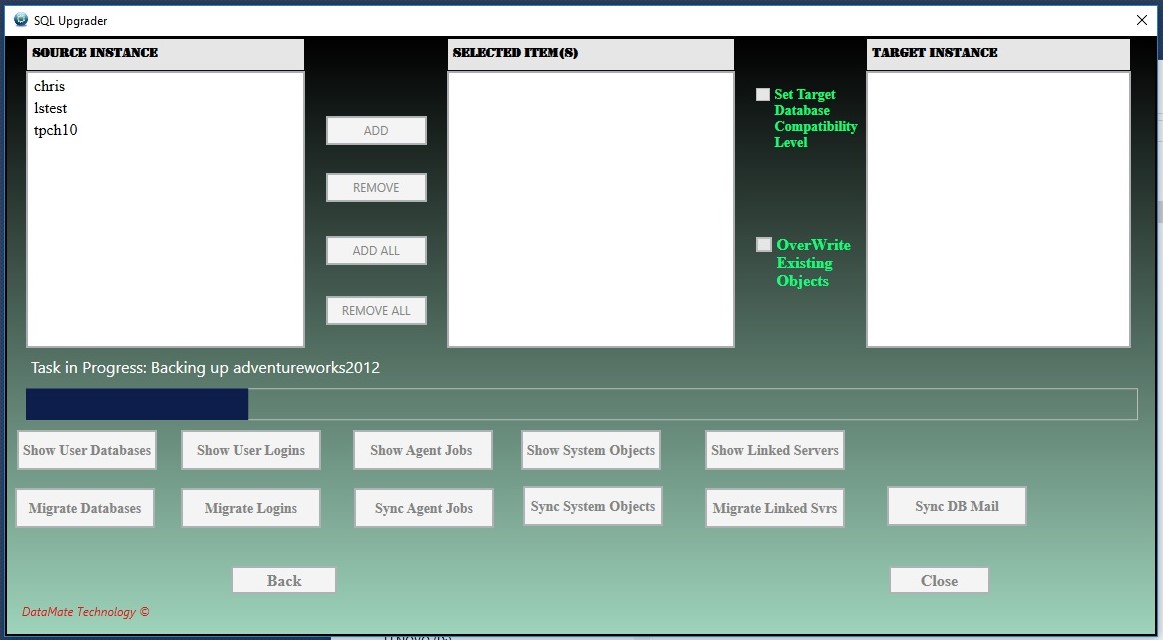
Review the details once more before and choose what type of migration you wish to perform. Custom gives you more control to choose objects to migrate while simple migration will migrate all of them from source to destination. The objects are database, logins, linked servers, Agent Jobs, user defined System DB Objects and Database Mail. The permissions and privileges are enumerated for Logins during this task.

For the Custom option, the picture makes it obvious the functionality you can obtain with this option. You can pick and choose the ones need to be moved from source to destination. This is usually the most preferred method adopted during Migration. You click each button to list the type of object and then add the ones to the "Selected Items List". You then click the Migrate button to move that object.
Here is the Simple option.

Verify the Log Folder for any potential errors caused during these activities. The information within the Logs get appended and not over written. Also, make sure you delete or move all the files in this folder before you run the program.
Enjoy SQL Migrator. We look forward for your comments and feedback for bug fixes and product enhancement
