Overview
Software developers live by version control. Trunks, branches, and features are ingrained in their DNA. For database developers and database administrators it has always been tough implementing version control on a database because database objects are not files that can be modified. Redgate tackled this issue with SQL Source Control by integrating their software in SQL Server Management Studio as a plugin.
This article will walkthrough how to setup your database for source control with Redgate SQL Source Control 5.0 and SVN. We will look at how to commit, view the history of changes, and undo changes to database objects.
Requirements
To operate SQL Source control the following are required:
- Windows Server 2012, Windows 7/8/10
- SQL Server Management Studio 2008/2012/2014/2016
- .NetFramework 4 or later
- MDAC 2.8+
Your source control system can be one of the following:
- GIT
- SubVersion 1.5 or higher
- Team Foundation Server 2008 or later
The following SQL Server Versions are supported. Keep in mind that 2005 and below are not supported. In addition, SQL Express editions are not supported.
- SQL Server 2008/R2 + SP’s
- SQL Server 2012
- SQL Server 2014
Assumption
For our demonstration, we have installed the following software.
- RedGate SQL Source Control 5.0
- Microsoft SQL Management Studio 2012
- Microsoft SQL Server 2012 Developer (Express is NOT Supported)
- AdventureWorks2012 Database
RedGate Source Control Development Model
There are two models available with SQL Source Control, development and shared. The shared model is used when developers and administrators are working on the same copy of the database. The Development model is used when developers have their own copy of the database to work off.
To commit to source control, each team member needs to install SQL Source Control on their own machine in either model.
Link a Database to a SVN Repository with Source Control
Let's get started with getting all our database code into source control.
Setup your SVN repository
For this step, we setup a free public SVN repository with RiouxSVN.com. We will use this repository to link our AdventureWorks2012 database to it. When you setup your repository make a note of the repository URL. For our demo, our repository URL is https://svn.riouxsvn.com/adworks2012/trunk.
Link the database to your SVN repository
In this step you will link your database to the repository URL you have in Step 1.
First, open SQL Server Management Studio. Then connect to the SQL Server hosting the database you want to link to source control. If you don’t see the SQL Source Control panel in the right hand pane window, click on the SQL Source Control button on the toolbar.
Select Subversion SVN from the Choose your Source Control System screen and click Next
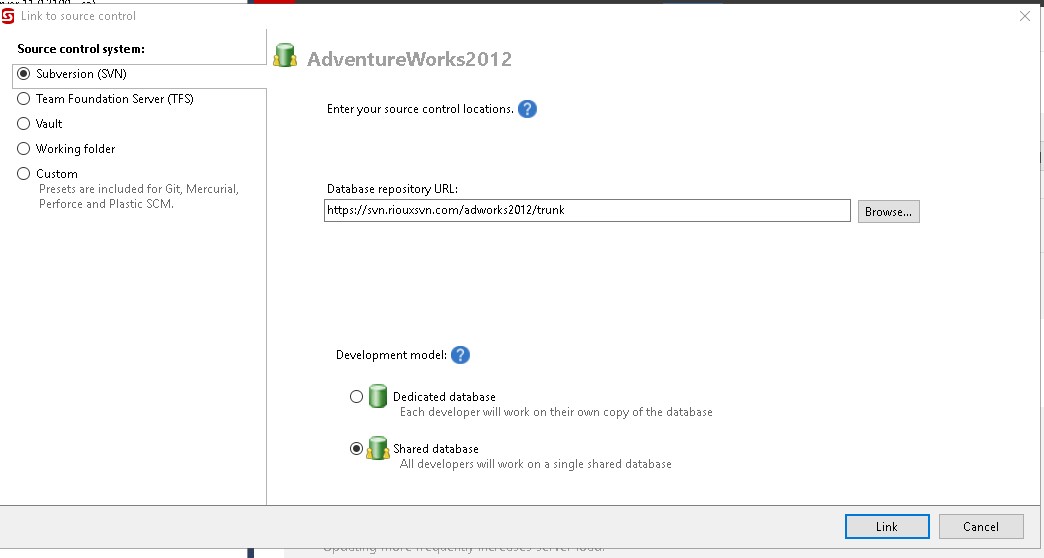
At the prompt, we type in our repository URL and choose Shared database and click Link. Click OK after successfully linking database to source control
You will now see some changes in your SQL Server Management Studio. First, the icon for our database turns from a yellow database to a green database. You will also see that database objects icon’s change also. These icons indicate that the objects definition does not match the code that is in our SVN repository.
Create a Baseline commit
Next we will create a baseline of our database objects and commit those to our SVN repository. Open SQL Server Management Studio and right click on the database that is linked to SVN.
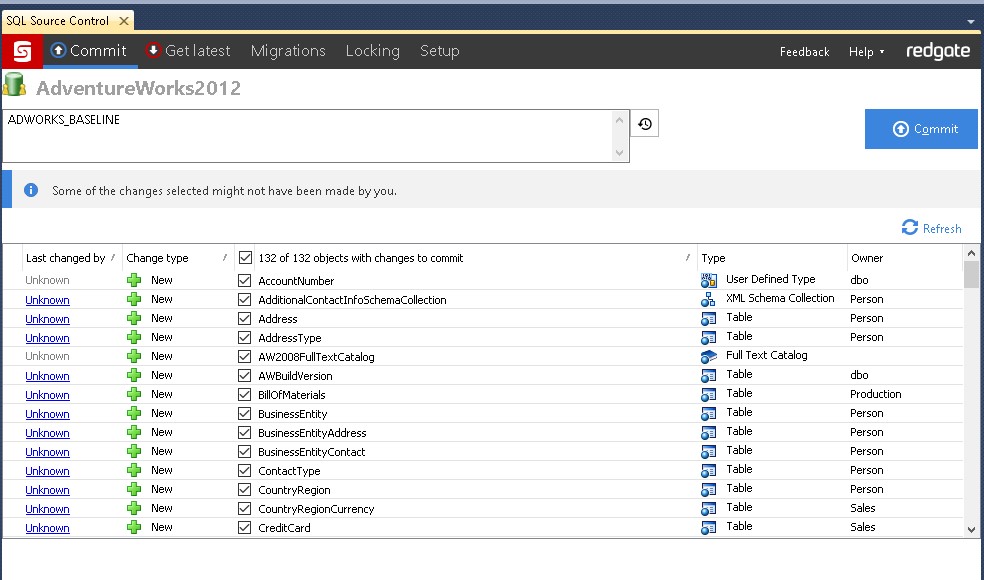
Click on “Commit Changes to source control”. In the right hand pane windows, the Redgate Source Control will compare the database objects to those in SVN. Choose all the objects with changes that need to be committed, type in a comment for your changes “ADWORKS_BASELINE ” and click “Commit
Once your changes are committed to your repository, click OK at the bottom right hand part of the pane window
You will notice that the icons for database objects and your database have the blue ball removed from them. This indicates that what is in your SVN repository matches your database objects.
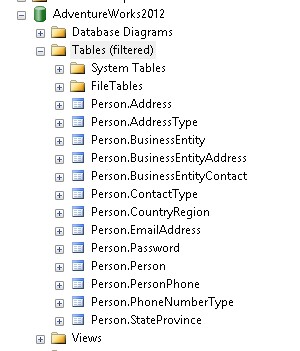
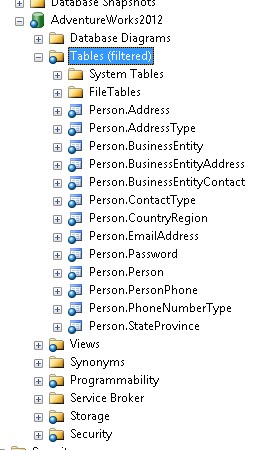
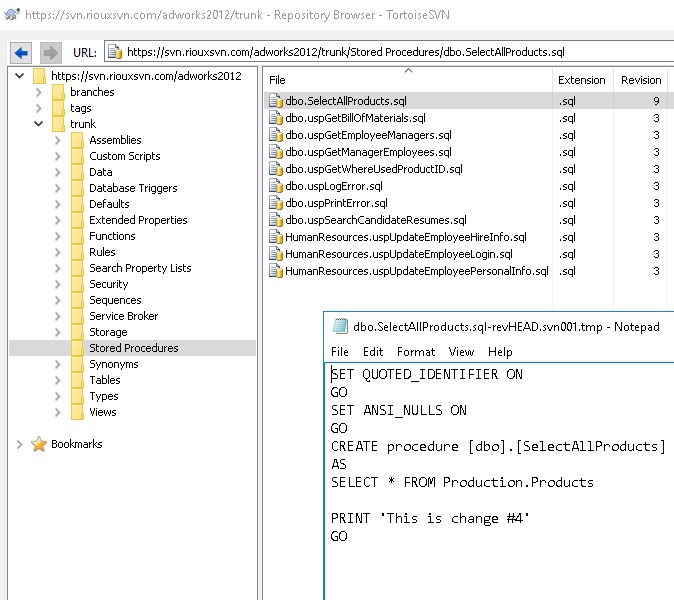
If we browse our SVN repository we will see a folder structure that has a folder for each type of database object that can exist in a database (Tables, Stored Procedures, Security, Views..etc). In each folder is the corresponding file for those database objects in our database. When we view these files they are simply CREATE statements with the object definition.
Committing, Viewing, and Undoing Changes
In this section we will create a new stored procedure and commit it to SVN. We will explore filtering out certain database objects and how to look at a database objects change history.
Commit Changes
First, we will go through step by step on how to make a change to a stored procedure and commit that change to SVN. To start, open SQL Server Management Studio. Then open a new query window for the AdventureWorks2012 database.
Execute the following code that will create a new stored procedure in the AdventureWorks2012 database
USE [AdventureWorks2012]
go
create procedure dbo.SelectAllProducts
as
select * from production.products
go
After we created our stored procedure, our database will pick up those change by going out to your SVN repository and performing a compare between the database object the .sql file associated with your object. In this case, our stored procedure is new so SQL Source Control flags the stored procedure as new.
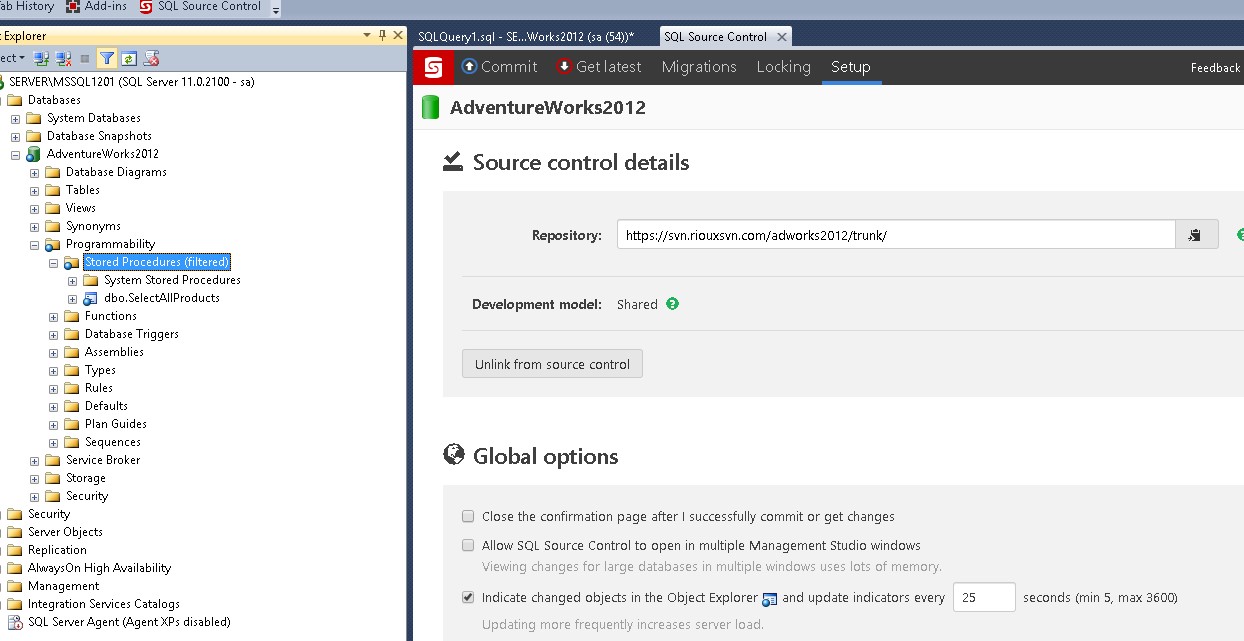
You will notice that the icon changes for the database, the Programmability folder, and the stored procedure itself. If you don’t see the icons right away, await about 25 seconds for the program to refresh. The 25 seconds is a global session that can be change in the SQL Source Control Details Tab under Global Options. The green database icon indicates as a visual that that database is linked to an SVN repository.
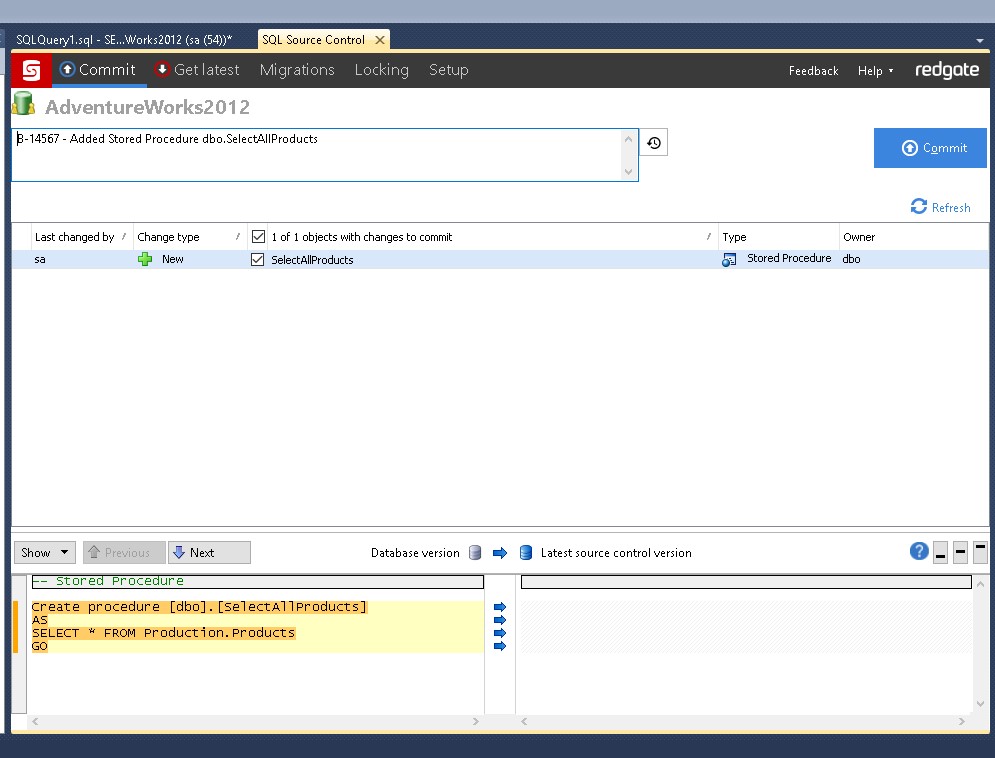
In the SQL Source Control tab, click on the Commit button. This will compare our SVN repository to our database objects and list out differences. It will also show us the exact line of code that changed. In this case, this is a new stored procedure and this is highlighted as “New”
We type in a comment for our change and click “Commit”
Once our change is committed we see our database icons revert to normal

Filter out Database Objects from SVN
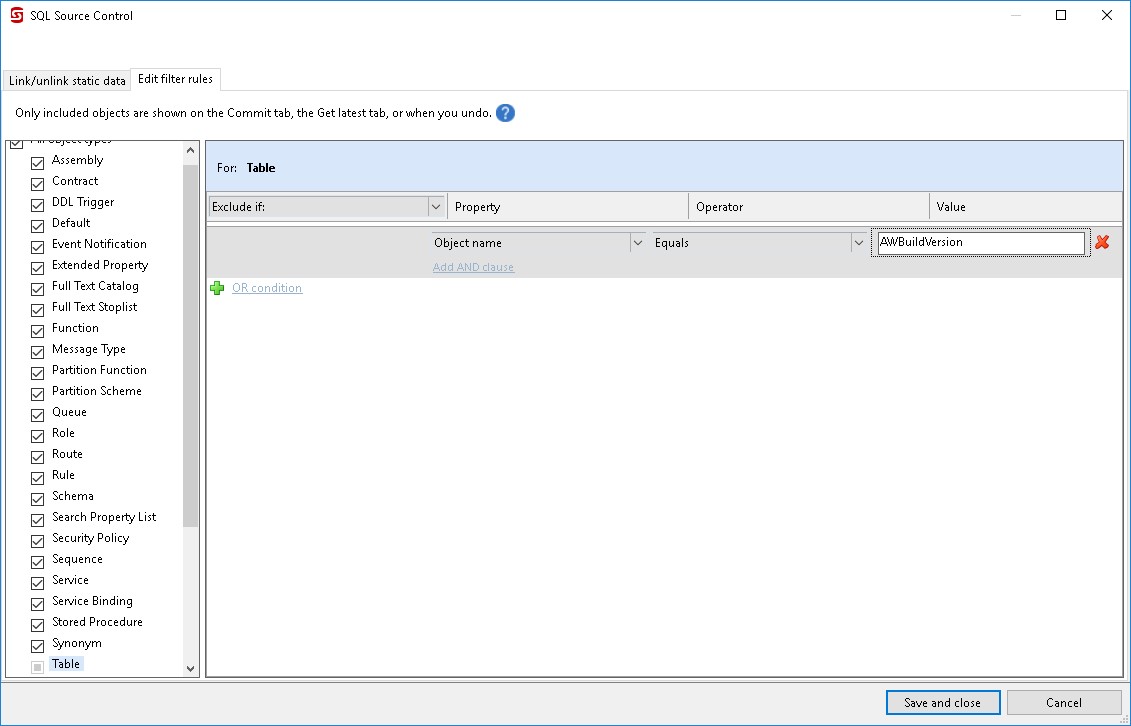
There are times when you don’t want certain objects under source control. In SQL Source Control we can filter out these objects so that it is not picked up doing the commit process. From the Edit Filter Rules screen we can place conditions on which objects are checked as part of source control. For our example, we will exclude the table dbo.AWBuildVersion.
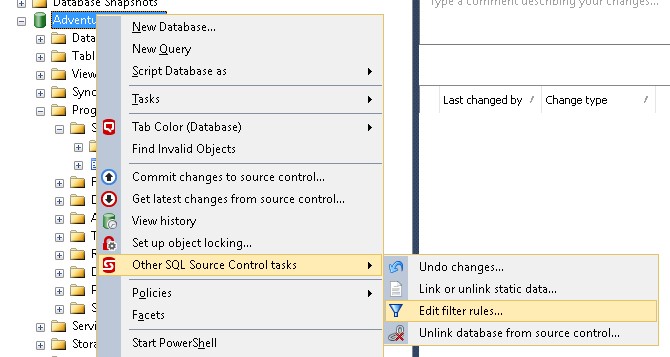
First, right Click on the database linked to source control. Choose Other SQL Source Control Tasks>Edit Filter Rules
Highlight the table check box in the Edit Filter Rules Screen. Then change the operator to Equals.
Then type in AWBuildVersion as the value. Click Save and Close.
We type in “BASE_LINE_FILTER” in the description field and click Commit. At this point, we can make schema changes to AWBuildVersion without SQL Source Control detecting it and trying to update our SVN repository.
Viewing Database Objects Change History
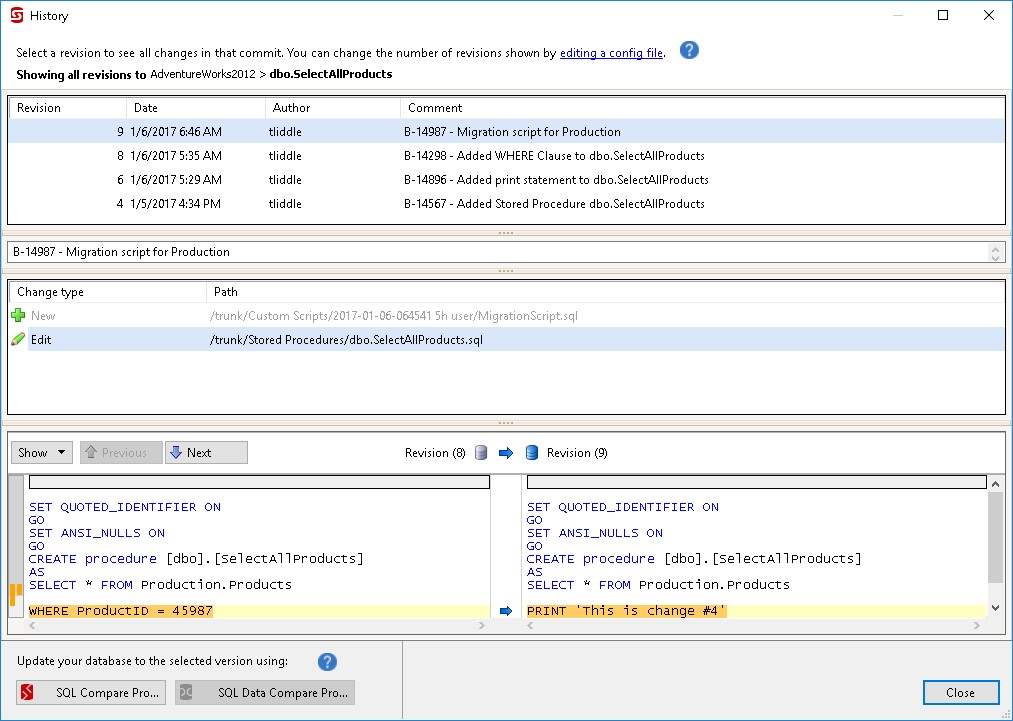
A great benefit to source control is allowing the developer to view changes to database objects over time. In SQL Source Control we can view the history of a database object based on when it was committed. For example, if Developer 1 made a change to a predicate in a stored procedure and committed it, and Developer 2 wanted to see what the predicate looked like three versions ago, viewing a database object's history will tell us that.
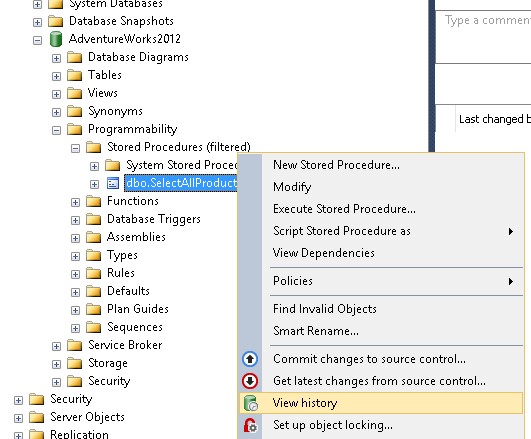
To get the history, in the database that is linked to the SVN repository, right click on the database object. Then click View History
The History screen will list all the revisions that had a change on the database object we selected. This screen has 3 windows. The first window is the list of revisions the object was associated with. The second windows describes the change type that was done and the location. The bottom window is an SQL Compare between the last commit revision and the pervious revision before that.
We can click through each revision and compare changes between revisions. This is a helpful tool to find out what has changed in our database.
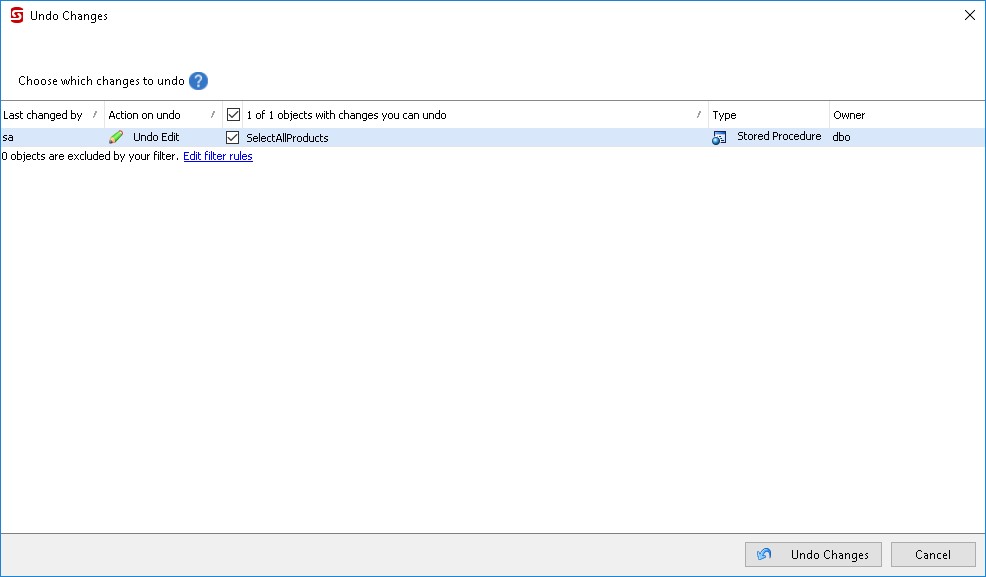
Undo Changes to Database objects
Have you ever needed to undo a change to a database object? Typically as a database administrator you script the object before you run your script and saved it to a safe location. Maybe you took a copy-only backup or snapshot of the database. These are all great options. SQL Source Control has a simple solution to undo changes to database objects that haven’t been committed to a SVN repository.
Right click on the object that is under source control and click Other SQL Source Control Tasks>Undo Changes. Then click Undo Changes. This will bring you back to a last known good state.
Migration Scripts
You can use a migration script to modify what will be deployed to a production system. Along with your schema changes you can add an INSERT/UPDATE/DELETE statement(s) to it.
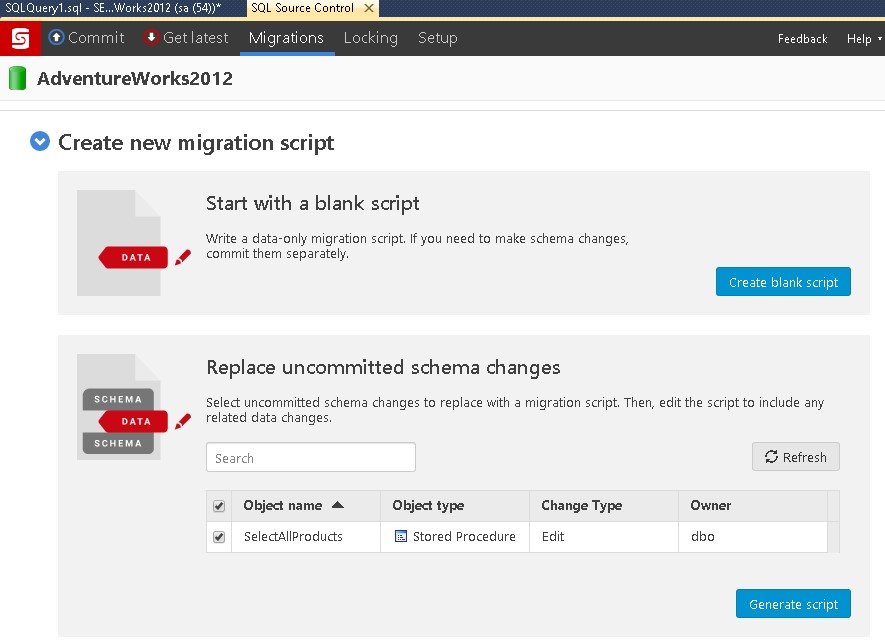
Create New Migration Script
When creating a new migration script we have two options. Blank script or Replace uncommitted schema changes. Blank scripts are for data only migrations and should not be included in schema change scripts. Replace uncommitted schema changes allows us to generate a script based on objects we selected, edit the script and commit it to our SVN repository.
We will demonstrate selecting database objects and generating scripts for migration. In the SQL Source Control tab click on Migrations. Under Create new migration script, click the Refresh button under Replace uncommitted schema changes
Choose the object(s) you want to include in your script and click Generate Script.
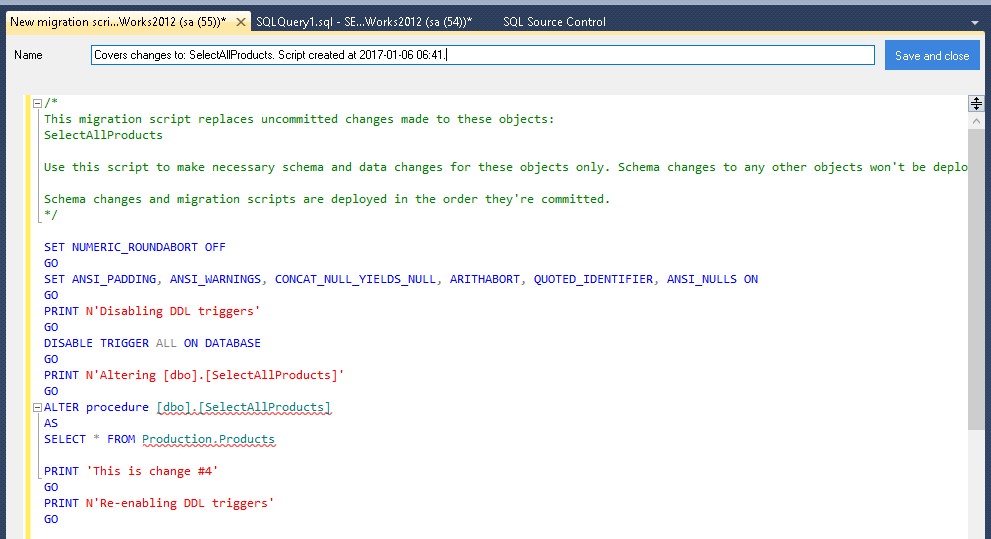
A New Migration script tab will open. Here you can make any modifications to the script you would like and click Save and Close.
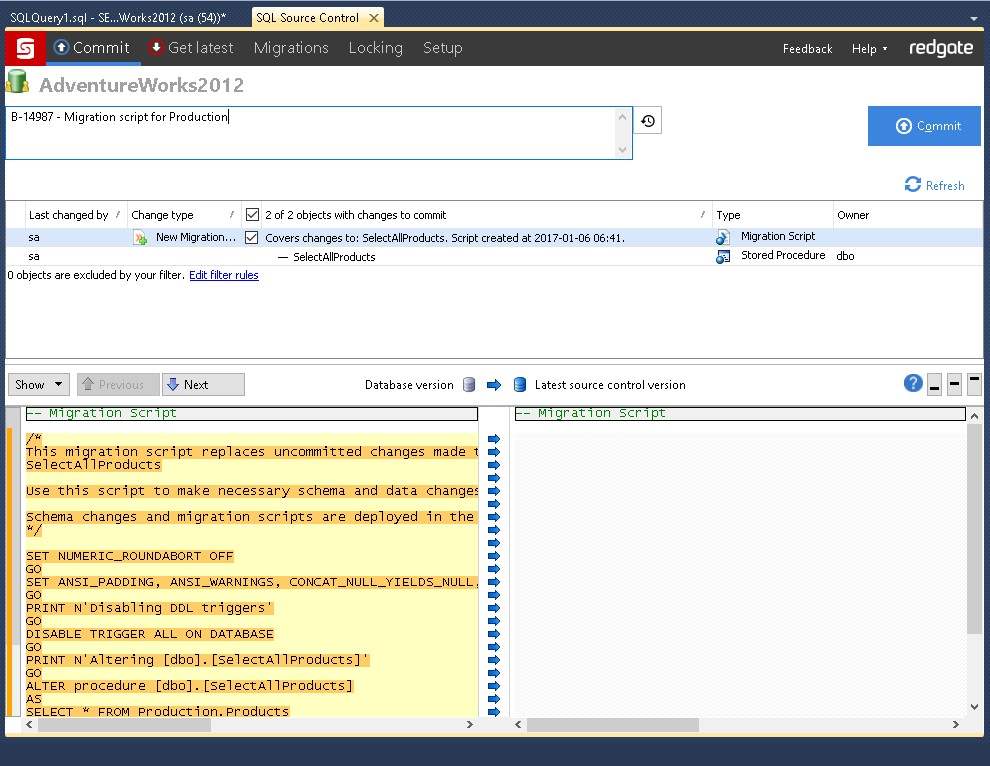
Once we complete the previous step, we will need to commit the script to SVN. This is the same as committing any other change.
If you are the one executing the migration script you can retrieve it from the SVN URL repository. You can also send someone the repository URL (permissioned applied) and they can retrieve it and execute it.
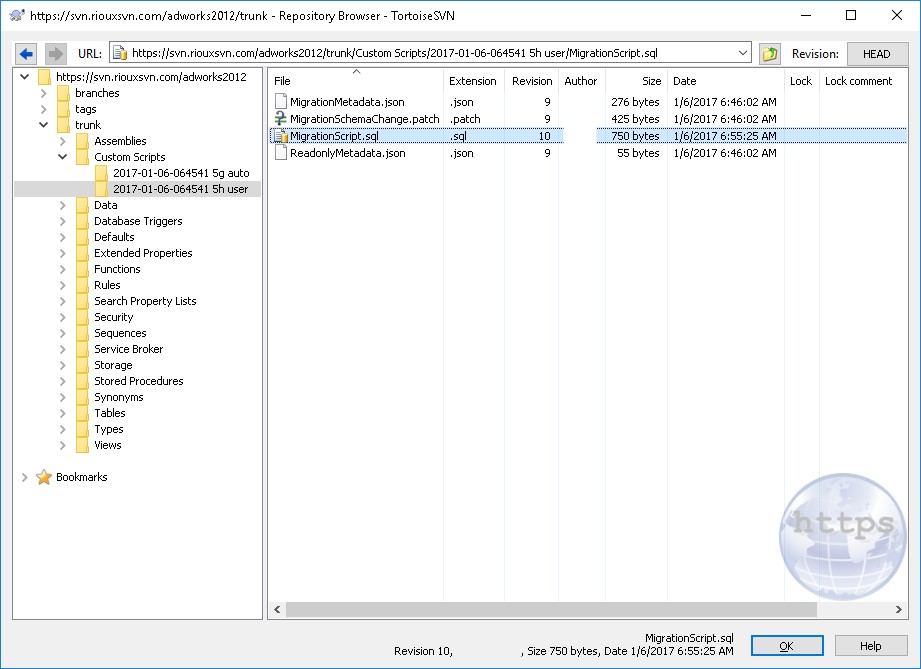
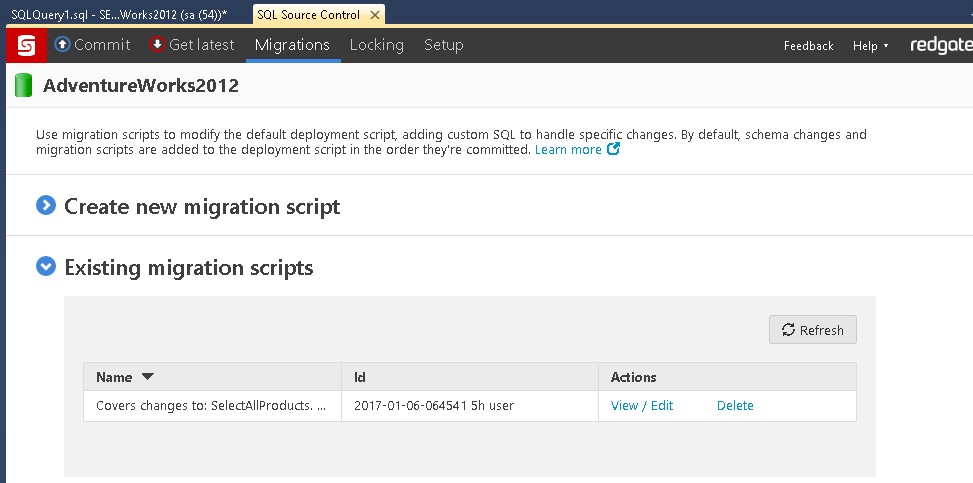
View or Edit Migration Scripts
You can also view and edit Migration scripts that have already been committed to the SVN repository. This allows you to make last minute modifications.
In the SQL Source Control table click on Migrations and scroll to Existing Migration Scripts. Note: You must have a migration script committed to SVN so that it shows up in this view.
Click on View/Edit next to the script you want to modify
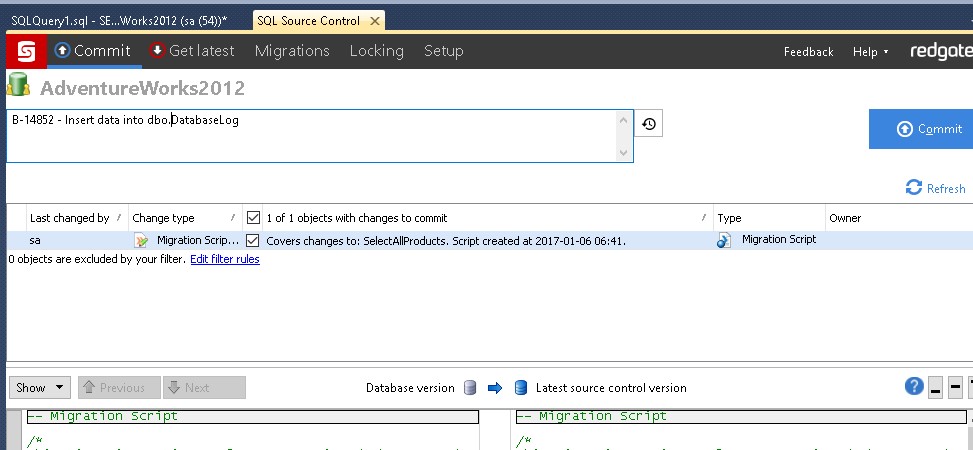
Make your changes to the script and then click "Save and close".

Once our changes are saved we have to commit the script, Click Commit (include a comment).
Conclusion
RedGate Source Control is a powerful tool that allows developers and administrator to source control their databases. For developers, reviewing schema changes on database they develop on is a benefit because it allows multiple people to work on a database and have all the functionality of subversion. For database administrators, source control gives them the peace of mind that they can undo changes to database schema without have to maintain a folder repository of scripts and backups.