

It is true that DBAs do everything in their capacity to protect the data in a database, but what about data that is loaded into Excel using an SSIS package and sent to customers or the management team? Information that is transmitted from one location to another using e-mail or portable devices needs to be protected as it is always susceptible to eavesdropping. Always protect any Excel file that has critical information first and then transmit it to the client. In the first part of this series I would like to protect the Excel file using "Microsoft Excel's" very own protection technique.
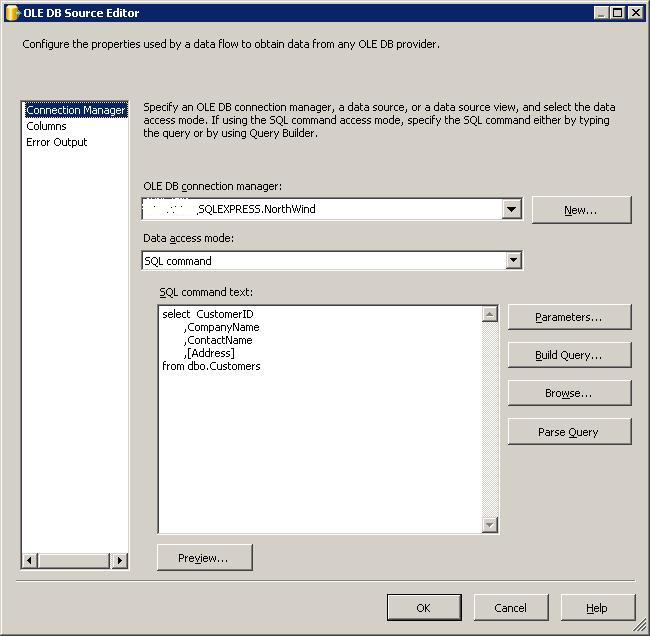
Now let us see how we can do this within an SSIS package. I am using the NorthWind database that is running on SQL Server 2008 R2. The query used for this project is as follows:
select CustomerID
 ,CompanyName
 ,ContactName
 ,[Address]
from dbo.Customers
Create the SSIS Package
Open the BIDS (Business Intelligence Development Studio) and chose an Integration Services project.

Click OK.
In the following folder, "C:\Excel.Password.Protect\Excel.Templates", I have two Excel files: one is the template file and the other is the file that will be loaded with the output of the select query given above. You can see these files below.
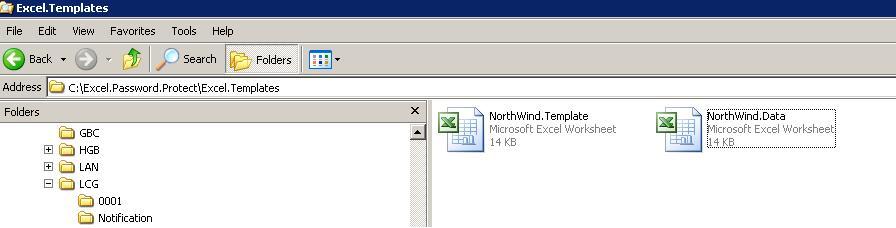
The NorthWind.Template is the template file (see below)

The NorthWind.Data is a copy of the NorthWind.Template file.
In BIDS drag and drop the File System Task onto the control flow canvas.Rename it to Copy template file, double click on the item and set the source connection to "C:\Excel.Password.Protect\Excel.Templates\ NorthWind.Template.xls" and destination to "C:\Excel.Password.Protect\Excel.Templates\ NorthWind.Data.xls".
Set the property Overwrite Destination to "true".

Click OK
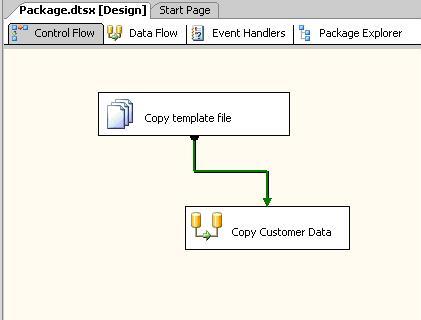
Now drag and drop a data flow task. Rename the data flow task to "Copy Customer Data" and connect the "Copy Template File" task and the to "Copy Customer Data" as shown.
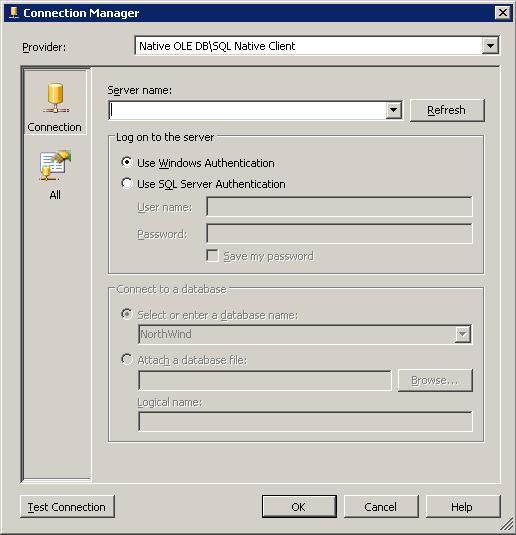
Double click on "Copy Customer Data" and drag OLE DB Source. Create a connection to the NorthWind database and enter the SQL query given above.
Click Ok.
Click Ok.
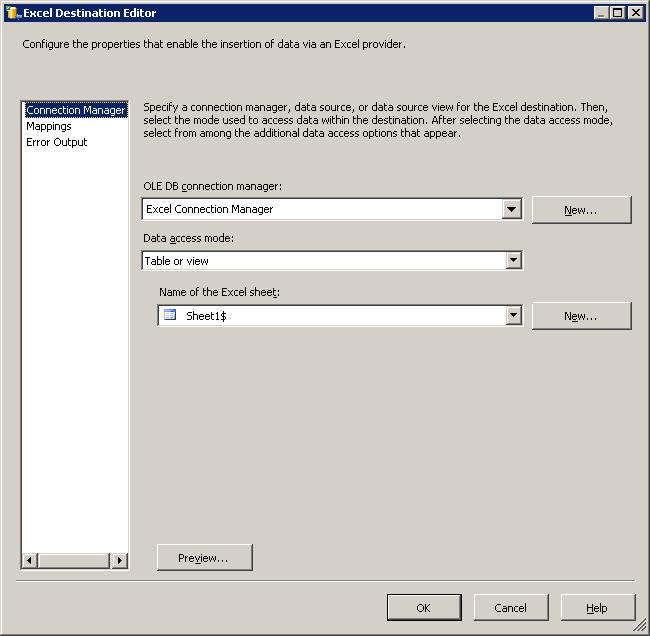
Now drag and drop "Excel Destination" and set the connection to "C:\Excel.Password.Protect\Excel.Templates\ NorthWind.Data.xls", check whether the mappings are correct and click OK.
Run the SSIS package to see whether the data is getting exported without any problem.
Protecting the Excel File with A Password
Now let us look at how we can protect the Excel file with a password. To automate the task in BIDS 2005, we can use script task (VB) or the method given below. Since I was overseeing a 2005 to 2008 migration project I thought I would write the code in C#. During the migration I could create a script task in BIDS 2008 that supported both VB/C# and the SSIS package could be migrated easily.
To do this in Visual Studio create a project for a C# console application and import the Microsoft Office interop dll
using System;
using System.Collections.Generic;
using System.Linq;
using System.Text;
using Microsoft.Office.Interop.Excel;
using System.IO;
using System.Runtime.InteropServices;
The code that does the password protection is shown here:
namespace PasswordProtectExcel
{
 class PasswordProtectExcel
 {
 static void Main(string[] args)
 {
 int i_debug_mode = Int32.Parse(args[0]);
 string s_sourcefile = args[1];
 string s_password = args[2];
Microsoft.Office.Interop.Excel.Application excelApp = null;
 Microsoft.Office.Interop.Excel.Workbook excelWorkbook = null;
 try
 {
 if (i_debug_mode > 0)
 {
 Console.WriteLine("The filename is: " + s_sourcefile);
 Console.WriteLine("Step1 Open the Excel file: " + s_sourcefile);
 }
 //open the Excel application
 excelApp = new Microsoft.Office.Interop.Excel.ApplicationClass();
 excelWorkbook = excelApp.Workbooks.Open(s_sourcefile,
 0,
 false,
 Type.Missing,
 Type.Missing,
 Type.Missing,
 true,
 Microsoft.Office.Interop.Excel.XlPlatform.xlWindows,
 "",
 false,
 false,
 0,
 false,
 false,
 false);
if (i_debug_mode > 0)
 {
 Console.WriteLine("Step1 Open the Excel file Completed: " + s_sourcefile);
 Console.WriteLine("__________________________________");
 Console.WriteLine("Step2 Save the Excel file: " + s_sourcefile);
 }
//Save the file with the "s_sourcefile" name
 excelApp.DisplayAlerts = false;
 excelWorkbook.SaveAs(s_sourcefile,
 Type.Missing,
 s_password, //password is used in the saveas function
 Type.Missing,
 Type.Missing,
 Type.Missing,
 Microsoft.Office.Interop.Excel.XlSaveAsAccessMode.xlExclusive,
 Microsoft.Office.Interop.Excel.XlSaveConflictResolution.xlLocalSessionChanges,
 true,
 Type.Missing,
 Type.Missing,
 Type.Missing);
if (i_debug_mode > 0)
 {
 Console.WriteLine("Step2 save the Excel file Completed with password: " + s_sourcefile);
 Console.WriteLine("__________________________________");
 Console.WriteLine("Completed processing Excel File" + s_sourcefile);
 }
 }
 catch (Exception e)
 {
 Console.WriteLine("The error message is : "+e.Message);
 }
 finally
 {
 GC.Collect();
 GC.WaitForPendingFinalizers();
 GC.Collect();
 GC.WaitForPendingFinalizers();
 //Close the workbook
 excelWorkbook.Close(true, s_sourcefile, false);
 Marshal.FinalReleaseComObject(excelWorkbook);
 excelWorkbook = null;
 //Quit the application
 excelApp.Quit();
 Marshal.FinalReleaseComObject(excelApp);
 excelApp = null;
 //Console.WriteLine("All connections are closed");
 }
 }
 }
 }
The input parameters for the above code are:
- i_debug_mode is used when you want to know why the above code isn't functioning as desired.When the i_debug_mode is greater than 0 then it displays various messages that will be helpful in finding the step which the above code is failing.
- s_sourcefile is the name of the excel file to be password protected.
- s_password is password that is used to protect the file
The saveas function in the code above helps specify the password that needs to be used to protect the Excel file.The two operations performed by the code are open the Excel file using the "Open" function, and then save the file with a password using the "saveas" function.
You can compile the code and create an .exe file. Now to use the '.exe' inside the SSIS package create a batch file. In the code below, "PasswordProtectExcel" is the .exe file created while compiling the C# code and the three parameters are explained above. C:\PasswordProtectExcel\bin\Release is the location of the .exe file.

CD C:\PasswordProtectExcel\bin\Release
PasswordProtectExcel 0 "C:\Excel.Password.Protect\Excel.Templates\NorthWind.Data.xls" password
In the SSIS package use the Execute Process Task and enter the location of the ".bat" file. The rationale behind using a ".bat" file (even though the .exe file created by the C# code can be directly executed from SSIS) is in case the password needs to be changed I need not open the SSIS package to change the password and import the modified package again to the SQL Server. Instead I just need to update the batch file. Another possible method is storing password in the database and retrieving it to a variable in the SSIS package. Make sure that you set the Window style property of the Execute Process Task to Hidden.

Do not forget to delete the Excel file that is password protected as the SSIS package will not be able to open the Excel file with a password. Deleting the Excel file can either be the first step or the last step within the SSIS package.
One such example can be seen below.In this example the email with the password protected Excel file is sent to the client and the deletion of the Excel file occurs as the final step withing the SSIS package.

One important property that needs to be set at the package level so that one can run this package multiple number of times in debug mode is "Delay Validation" to true.This property need to be set because the Northwind.Data.xls file (destination Excel file) will be deleted at the beginning or end of each SSIS package run.Since this file isn't present during validation phase the SSIS package will fail.

Conclusion
This article shows how to automate the process of protecting data exported from the database to an Excel File. In this article we used the security feature provided by Microsoft Excel to protect data.
