

Abstract
The purpose of this article is to detail steps that would help implement an enhancement to a reporting application that uses a SQL Server database (or any other database) as the back end without causing any downtime for the reporting application.
Background
In today’s world, businesses relies heavily on reporting for making business decisions on a day to day basis. For example, retail companies make staffing, supply chain, and merchandise stocking decisions on the basis of reports they run. These reports give business insight into areas like customer traffic at each store, average sales amounts, items per purchase, revenue, and profits. This way a business makes decisions on which stores are performing better, or which may be under performing. In order to meet these needs, reporting applications need to be available at all times except during limited hours of maintenance windows.
There are times where business enhancements are requested to add additional details to the report. This would in many cases entails to adding new columns to existing tables or creating new tables in a SQL Server database. In this article we will go over steps to load historical data in existing, large tables (3 billion rows) without causing any significant downtime to reporting application.
Implementation Process
Adding new columns to existing tables could be implemented by issuing a simple ALTER command to the database for a specific set of tables. The challenge comes when data in some of the data warehousing tables being modified have billions of rows in them. Organization typically keep around 3 years of historical data and the older data is shipped out to archive or purged. Even with 3 years of data in them, there will be tables that would contain billion of rows. Adding a few columns to these large tables is not something that could be achieved in couple hours of downtime during a maintenance window. In these cases, one of the ways to implement enhancement without impacting reporting is as follows:
- Create replica table structures (without data) of the existing large tables
- Alter the newly created replica table structures with new columns
- Create any new tables that are needed for enhancement
- Insert data into replica tables
- Validate the data in new replica tables
- Rename/swap the tables
We cover each of these steps below.
Create replica table structures (without data)
In order to make things easier to understand, I will use tables that come by default with a SQLite database to follow through an example. I am also using the SQL Querying tool, DBeaver, though query tools vary from organization to organization. You can install SQLite on your Mac using this article: https://database.guide/how-to-install-sql-server-on-a-mac/
Please Note: Even though SQL Queries in this article are compatible with both SQLite and SQL Server, the overall approach explained in this article would work for any relational database.
One of the fact tables that I have is the “Invoice” table. We will be creating a replica of the “Invoice” table as “Invoice_new” in the following two ways:
- Using the command "Select * into" or "Create table table_name as select" (Not preferred approach)
- Using the DDL of the existing table (Preferred Approach)
Using command "Select * into" or "Create table table_name as select"
Please Note: This approach will not carry over Indexes, Keys, Constraints and Permissions. You would have to add them later using an ALTER command, so this is not a preferred approach.
SQL Server Database Syntax:
select * into invoice_new from invoice where 1=0
SQLite:
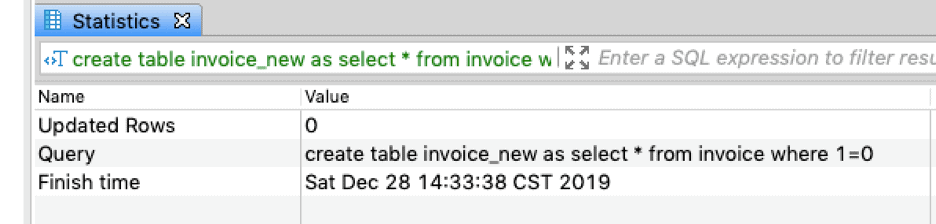
create table invoice_new as select * from invoice where 1=0
You can see these results below:
In order to alter the table to add a Primary Key constraint, run this code:
ALTER TABLE invoice_new
ADD CONSTRAINT PK_Invoice PRIMARY KEY  (InvoiceId)
Using DDL (Preferred Way):
CREATE TABLE [invoice_new]
(
    [InvoiceId] INTEGER  NOT NULL,
    [CustomerId] INTEGER  NOT NULL,
    [InvoiceDate] DATETIME  NOT NULL,
    [BillingAddress] NVARCHAR(70),
    [BillingCity] NVARCHAR(40),
    [BillingState] NVARCHAR(40),
    [BillingCountry] NVARCHAR(40),
    [BillingPostalCode] NVARCHAR(10),
    [Total] NUMERIC(10,2)  NOT NULL,
    [StoreId] INTEGER ,
    CONSTRAINT [PK_Invoice] PRIMARY KEY  ([InvoiceId]),
);
We are only creating replica table structures without data and NOT copying tables with data and then updating them. Copying tables with data and updating them will be slower due to the following reasons:
- Two operations are involved if we create replica tables with data and update them. The first operation being inserting all data in the new table during table creation, and the other operation will be to update the data after altering the table.
- Altering an empty table is much faster than altering a table with 3 billion records
Altering tables in SQL Server database is fast irrespective of number of rows in the table but for other relational databases altering a large table could take long time. Instead we will be creating empty table structures and then load the data of existing columns and new columns in one single operation.
Alter the newly created replica table structures
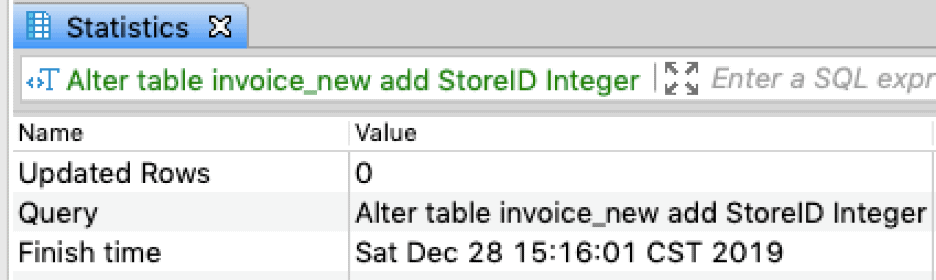
In this case let’s say we have business requirement to add StoreID to the reports. This field is not available in invoice table and needs to be added. We will add the “StoreID” column to “invoice_new” replica table as follows:
Alter table invoice_new add StoreID int
Create the New Tables Needed
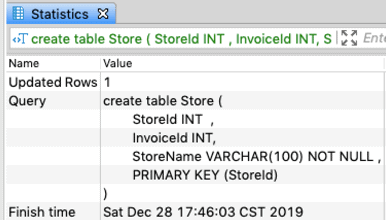
In order to populate the historical data for the “StoreId” field in the “Invoice” fact table, the historical data should be provided by a source system through some means. This data we will load it in a table, called “Store”. In this example, we will create a table “Store” that would have StoreId, InvoiceId and StoreName.
create table Store (
StoreId INT  ,
InvoiceId INT,
StoreName VARCHAR(100) NOT NULL ,
PRIMARY KEY (StoreId)
);
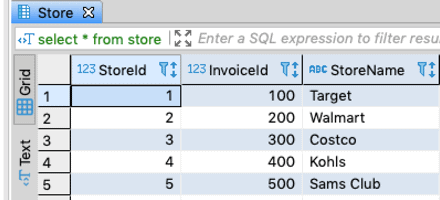
Once the new table “Store” is created, this table could be loaded using ETL tool like SQL Server Integration Services (SSIS). If the number of records is small, they could be loaded using a shell script or with manually created INSERT statements. In this case I am going to insert only 5 records using simple insert statements as follows:
Insert into store (StoreId,InvoiceId,StoreName) Values (1, 100, "Target");
Insert into store (StoreId,InvoiceId,StoreName) Values (2,200, "Walmart");
Insert into store (StoreId,InvoiceId,StoreName) Values (3,300, "Costco");
Insert into store (StoreId,InvoiceId,StoreName) Values (4,400, "Kohls");
Insert into store (StoreId,InvoiceId,StoreName) Values (5, 500,"Sams Club")
We can see the data in the table.
select * from store
Insert Data into Replica Tables
In this step we will load data using following SQL statement. This SQL statement could be run through a shell script, manually, or through ETL tool.
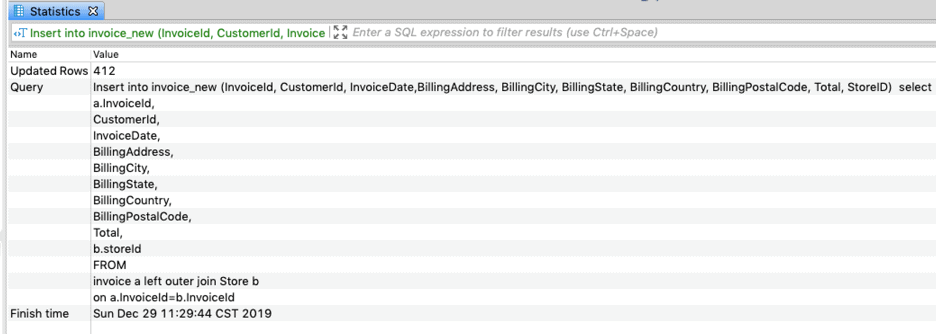
Insert into invoice_new (InvoiceId, CustomerId, InvoiceDate,BillingAddress, BillingCity, BillingState, BillingCountry, BillingPostalCode, Total, StoreID)
select
a.InvoiceId,
CustomerId,
InvoiceDate,
BillingAddress,
BillingCity,
BillingState,
BillingCountry,
BillingPostalCode,
Total,
b.storeId
FROM
invoice a left outer join Store b
on a.InvoiceId=b.InvoiceId
In the above example, we have limited rows but in the real world we would have billions of rows. In this case it would be required to split the insert statement to load smaller chunk of records, say around 100 million records at a time or any other number that the system could handle. An example of SQL that is broken into multiple insert statements would look like following:
Insert into invoice_new (InvoiceId, CustomerId, InvoiceDate,BillingAddress, BillingCity, BillingState, BillingCountry, BillingPostalCode, Total, StoreID)
SELECT
a.InvoiceId,
CustomerId,
InvoiceDate,
BillingAddress,
BillingCity,
BillingState,
BillingCountry,
BillingPostalCode,
Total,
b.storeId
FROM
invoice a left outer join Store b
on a.InvoiceId=b.InvoiceId
where InvoiceId>=1 and InvoiceId <=100000000
The WHERE condition should be incremented as we progress inserting more and more rows.
Validate the Data in Replica Tables
To validate data loaded in new replica tables, we would execute the following test cases. First, we can check that the count in the old table and new table are exactly the same:
select count(*) from Invoice
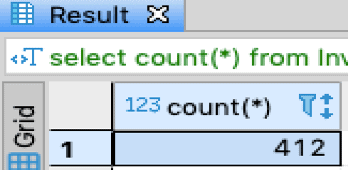
select count(*) from Invoice_new
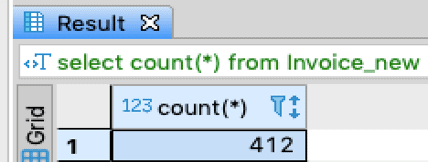
Note: In the real world this count would be in the billions. We are using a sample database here.
Validate Existing Columns are not Impacted
To validate existing columns are not adversely impacted and the data in existing columns are in sync with the original tables we would run the code below. In the below SQL, we will compare columns between “invoice” and “invoice_new” table. We will exclude “StoreId” new columns that exist in replica table but not in original “invoice” table.
select InvoiceId, CustomerId, InvoiceDate, BillingAddress, BillingCity, BillingState, BillingCountry, BillingPostalCode, Total
 from invoice
 whereInvoiceId<=20
EXCEPT
select InvoiceId, CustomerId, InvoiceDate, BillingAddress, BillingCity, BillingState, BillingCountry, BillingPostalCode, Total
 from invoice_new
 where InvoiceId<=20
 order by InvoiceId

The result shows that there is no difference in all other columns between the “Invoice” and “invoice_new” table. Apart from this run other test cases to validate data in “StoreId” column.
Rename/Swap the Tables
Once the data is validated in the new table, invoice_new, we can rename the “Invoice” table to “invoice_old” table and rename “invoice_new” to “Invoice”. The renaming of the tables should take only few seconds and the new field will be available to the business to use through any reporting application without any downtime. The renaming of table could be scheduled to happen during the maintenance window essentially creating no business impact with the implementation.
Rename the existing tables that support reporting to a different name as follows:
SQL Server Database Syntax:
EXEC sp_rename 'invoice', 'invoice_old'
SQL Lite Syntax:
ALTER TABLE invoice

RENAME TO invoice_old
Rename the Replica tables to reporting table name as follows:
SQL Server Database Syntax:
EXEC sp_rename 'invoice_new', 'invoice'
SQL Lite Syntax:
ALTER TABLE invoice_new

RENAME TO Invoice
Conclusion
This article explains step by step on how a SQL Server (or any other database) based reporting application enhancements could be implemented without impacting business reporting needs.
