

In this article, I will work you through the process of creating elastic jobs in Azure using PowerShell. The elastic jobs are similar to regular agents jobs in SQL Server although they add extra functionality like for example dedicated target groups that can be used in the job step level.
Currently, the elastic jobs are in preview and some of the activities described here cannot be done via Azure Portal (cannot add jobs or target groups for example).
Solution
Most of the tasks can be achieved with the Azure cmdlets, but I am also using some dbatools commands to execute the T-SQL needed to create logins and users.
Prerequisites
Before we start we need to make sure the below PowerShell modules are installed. I have the versions I used in brackets:
Overview of the Process
To create elastic jobs in Azure, we need a job database and at least one target database. This can be Azure SQL Server, Azure SQL Database, Elastic Pool or Shard Map. To simplify we are going to use the first two types in this article. We will then need to create each of the following items:
- Resource Group - All the resources created in this article will be placed in a single resource group. This will be helpful in the end when we are done with the exercise, so we can simply drop a resource group containing all the objects.
- Jobs Database - For the job database, this needs to be an empty Azure SQL Database (S0 or higher). The database is used to store all the information about jobs, executions, etc. The Elastic job database is the equivalent of an msdb database in a regular SQL Server. An elastic job agent is an Azure resource for creating, running, and managing jobs that we will configure below.
- Targets - In this example, we are going to use two Azure SQL Servers with different combinations of Azure SQL Databases.
- Firewall - The Azure resources need to be able to communicate with each other. Additionally, I need to be able to do anything on the Azure SQL Servers from my machine, so I need my IP address added to the firewall.
- Job Credentials - The job credentials are the database scoped credentials created in the job database. As per Microsoft's recommendation, it is best to use separate credentials to enumerate databases available on the logical Azure SQL Server, the refresh credential, and to execute the jobs, the job credentials.
- Logins and Users - We do need logins and users on the targets. Each target Azure SQL Server requires login and user in the master database to refresh the credential. Additionally, the master database needs a login for the job execution credential and each target database needs a user for the same purpose.
- Target Groups - Target groups are basically sets of objects that our job is going to run against. In this article, we are going to create few examples to show the capabilities of elastic jobs.
- Jobs - The job is composed of job steps that execute T-SQL commands. In this article, each step of the job will target a different target group.
Implementation
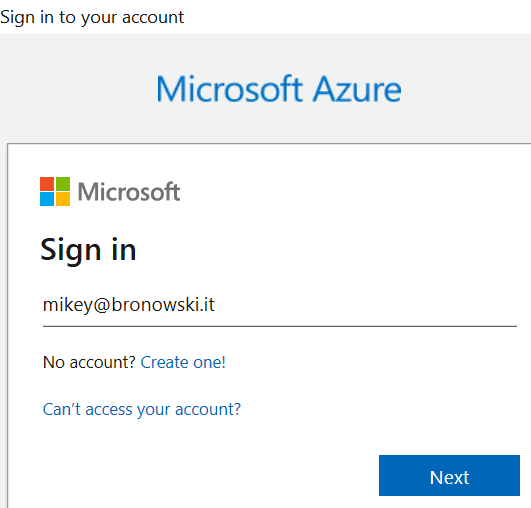
We are going to start with connecting to Azure and creating the resource group. You can see the results below after I sign in with my Microsoft account.
# connect to Azure account

# it will prompt for the username and password

# once it will display details of the account

Connect-AzAccount


<#


Account            SubscriptionName            TenantId                Environment

-------            ----------------            --------                -----------

mikey@bronowski.it MSDN Platforms Subscription xxxxxxxx-xxxx-xxxx-xxxx AzureCloud


#>
Resource group
Next, we are going to create the resource group with the New-AzResourceGroup cmdlet.
# 1. Create a resource group for each resource

#

$resourceGroupArgs = @{

    Name = "SQLServerCentral"

    Location = "UK South"

    Confirm = $false

    Force = $true

}


$resourceGroup = New-AzResourceGroup @resourceGroupArgs


<#


ResourceGroupName : SQLServerCentral

Location          : uksouth

ProvisioningState : Succeeded

Tags              :

ResourceId        : /subscriptions/xxxxxxxx-xxxx-xxxx-xxxx/resourceGroups/SQLServerCentral


#>
After that, we are going to create an Azure SQL Server that will be hosting the job database. Before we do that, let's set up the credentials for our Azure SQL Server. To make it simple I am going to use the same credentials across all servers.
Azure Elastic Job Database
The creation of a single server takes between 1 and 2 minutes in my case. Below I am creating a server with New-AzSqlServer and providing the details as parameters.
# 2. Create elastic job database

# setup credentials for the new Azure SQL Server

$azCredentials = (Get-Credential -UserName AzureAdmin -Message "Password please")


# 2.1. Configure Azure SQL Server

$serverArgs = @{

    ResourceGroupName = $resourceGroup.ResourceGroupName

    Location = $resourceGroup.Location

    SqlAdministratorCredentials = $azCredentials

}


# job server

$server0 = New-AzSqlServer @serverArgs -ServerName sqlservercentral-0


<# Example of one of the server's details


ResourceGroupName        : SQLServerCentral

ServerName               : sqlservercentral-0

Location                 : uksouth

SqlAdministratorLogin    : AzureAdmin

SqlAdministratorPassword :

ServerVersion            : 12.0

Tags                     :

Identity                 :

FullyQualifiedDomainName : sqlserversentral-0.database.windows.net

ResourceId               : /subscriptions/xxxxxxxx-xxxx-xxxx-xxxx/resourceGroups/SQLServerCentral/providers/Microsoft.Sql/servers/sqlserversentral-0

MinimalTlsVersion        :

PublicNetworkAccess      : Enabled


#>
After the server is ready, we will create the Azure SQL Database. The size of the database is a minimum of an S0. In my case, this costs around £15 ~ $21 per month.
# 2.2. Create Azure SQL Database at minimum S0

$jobDbArgs = @{

    DatabaseName                  = "JobDatabase"

    ServerName                    = $server0.ServerName

    ResourceGroupName             = $resourceGroup.ResourceGroupName

    Edition                       = "Standard"

    RequestedServiceObjectiveName = "S0"

    MaxSizeBytes                  = 2GB

}


$jobDb = New-AzSqlDatabase @jobDbArgs
Elastic Job agent
The last bit on the job database is to create the agent. I will do this with the New-AzSqlElasticJobAgent cmdlet, giving a name and the job database as parameters.
# 3. Create Elastic Job agent

$jobAgent = $jobDb | New-AzSqlElasticJobAgent -Name 'sqlservercentralagent'


<#


ResourceGroupName ServerName        DatabaseName AgentName             State Tags

----------------- ----------        ------------ ---------             ----- ----

SQLServerCentral sqlservercentral-0 JobDatabase  sqlservercentralagent Ready


#>
Targets
As mentioned earlier, we are going to create two Azure SQL Servers targets. One will host a single target database and the other one will have four of them.
# 4.1. Create target servers

# using the same parameters as for the job server


# target servers

$server1 = New-AzSqlServer @serverArgs -ServerName sqlservercentral-1

$server2 = New-AzSqlServer @serverArgs -ServerName sqlservercentral-2
For the databases, we are going to use the cheapest option, which is the Basic tier, 5 DTU. This costs ~3 times less than the S0 in my example.
# 4.2. Create Azure SQL Databases (Basic edition)

$targetDbArgs = @{

    ResourceGroupName = $resourceGroup.ResourceGroupName

    Edition = "Basic"

    MaxSizeBytes = 1GB

}


# four databases on the first server

$targetDb1 = New-AzSqlDatabase @targetDbArgs -DatabaseName db1 -ServerName $server1.ServerName

$targetDb11 = New-AzSqlDatabase @targetDbArgs -DatabaseName db11 -ServerName $server1.ServerName

$targetDb12 = New-AzSqlDatabase @targetDbArgs -DatabaseName db12 -ServerName $server1.ServerName

$targetDb13 = New-AzSqlDatabase @targetDbArgs -DatabaseName db13 -ServerName $server1.ServerName


# single database on the second server

$targetDb2 = New-AzSqlDatabase @targetDbArgs -DatabaseName db2 -ServerName $server2.ServerName
Firewall Rules
We need to configure firewall rules to be able to connect to the databases. To get my IP address programmatically I am going to follow one of the solutions described here. Then I add my IP to the firewall as a rule wiht New-AzSqlServerFirewallRule.
# 5. Add firewall rules

# https://www.scriptinglibrary.com/languages/powershell/how-to-get-your-external-ip-with-powershell-core-using-a-restapi/

$myIp = Invoke-RestMethod -Uri https://api.ipify.org


# 5.1. Firewall rule to allow connections from my own IP address

$firewallMyIpArgs = @{

    FirewallRuleName = "Firewall rule - Let me in"

    StartIpAddress = $myIp

    EndIpAddress = $myIp

    ResourceGroupName = $resourceGroup.ResourceGroupName

}


# set up the rules

$firewallMyIp0 = New-AzSqlServerFirewallRule @firewallMyIpArgs -ServerName $server0.ServerName

$firewallMyIp1 = New-AzSqlServerFirewallRule @firewallMyIpArgs -ServerName $server1.ServerName

$firewallMyIp2 = New-AzSqlServerFirewallRule @firewallMyIpArgs -ServerName $server2.ServerName


# 5.2. firewall rule to allow connections beteween Azure resources

$firewallAzureArgs = @{

    ResourceGroupName = $resourceGroup.ResourceGroupName

    AllowAllAzureIPs = $true

}


# set up the rules

$firewallAzure0 = New-AzSqlServerFirewallRule @firewallAzureArgs -ServerName $server0.ServerName

$firewallAzure1 = New-AzSqlServerFirewallRule @firewallAzureArgs -ServerName $server1.ServerName

$firewallAzure2 = New-AzSqlServerFirewallRule @firewallAzureArgs -ServerName $server2.ServerName
Job Credentials
As described in the overview section, we need two databases scoped credentials: one for the job execution and another for the server refresh. In the script, I am not providing the database nor server names as I am using the agent object that has been created before.
# 6. Create two database scoped credentials in the job database

# set the password

$password = Read-Host

$loginPasswordSecure = (ConvertTo-SecureString -String $password -AsPlainText -Force)


# configure the refresh credential

$refreshCred = New-Object -TypeName "System.Management.Automation.PSCredential" -ArgumentList "refresh_credential", $loginPasswordSecure

$refreshCred = $jobAgent | New-AzSqlElasticJobCredential -Name "refresh_credential" -Credential $refreshCred


# configure the job execution credential

$jobCred = New-Object -TypeName "System.Management.Automation.PSCredential" -ArgumentList "job_credential", $loginPasswordSecure

$jobCred = $jobAgent | New-AzSqlElasticJobCredential -Name "job_credential" -Credential $jobCred
Logins and Users on Targets
The next logical step is to configure security principles on the targets, which means I need to create two logins in the master database on each server as well as the user for the refresh credential. Additionally, I need to create a user in each target database for the job execution credentials.
To do so, I am going to use the Invoke-DbaQuery command from dbatools. Unfortunately, New-DbaLogin and New-DbaDbUser do not support Azure SQL Database at this time. Firstly, let's focus on logins.
# 7. Create logins and users in target servers

# 7.1. Create the login for both credentials: refresh and job execution

# In the master database on both servers

$targetLoginUserArgs = @{

  'Database' = 'master'

  'SqlInstance' =  @($server1.FullyQualifiedDomainName, $server2.FullyQualifiedDomainName)

  'SqlCredential' = $azCredentials

  'Query' = "CREATE LOGIN refresh_credential WITH PASSWORD='$($password)';"

}


# using dbatools Invoke-DbaQuery as New-DbaLogin does not support Azure SQL Database

# create a login for refresh credential

Invoke-DbaQuery @targetLoginUserArgs


# create a login for job execution credential

$targetLoginUserArgs.Query = "CREATE LOGIN job_credential WITH PASSWORD='$($password)';"

Invoke-DbaQuery @targetLoginUserArgs
Now, it is time to create users. Additionally, we are going to grant some extra permissions so the job execution credential can actually do something useful on the targets (db_ddladmin to create tables).
# 7.2. Create users for both credentials


# create a user for refresh credential in master database

$targetLoginUserArgs.Query = "CREATE USER refresh_credential FROM LOGIN refresh_credential;"

Invoke-DbaQuery @targetLoginUserArgs


# create a user for job execution credential in each target database


# get the database list on target servers with Get-DbaDatabase from dbatools

$targetDatabases = Get-DbaDatabase -SqlInstance $server1.FullyQualifiedDomainName, $server2.FullyQualifiedDomainName -SqlCredential $azCredentials -ExcludeSystem


# loop through all the databases and create user + extra permission

$targetDatabases | % {

    $targetLoginUserArgs.SqlInstance = $_.ComputerName

    $targetLoginUserArgs.Database = $_.Name

    $targetLoginUserArgs.Query = "CREATE USER job_credential FROM LOGIN job_credential;"

    $targetLoginUserArgs.Query += "ALTER ROLE db_ddladmin ADD MEMBER [job_credential];"

    Invoke-DbaQuery @targetLoginUserArgs

}
Target Groups
We have done all the necessary configurations at this point, so we are going to create the target groups. We create the group wtih New-AzSqlEslasticJobTargetGroup and then add the targets to the group.
# 8. Create target groups


# 8.1. whole servers - this will contain both servers, i.e. all databases on those servers

$targetGroup1 = $jobAgent | New-AzSqlElasticJobTargetGroup -Name 'TargetGroup1'

$targetGroup1 | Add-AzSqlElasticJobTarget -ServerName $server1.FullyQualifiedDomainName -RefreshCredentialName $refreshCred.CredentialName

$targetGroup1 | Add-AzSqlElasticJobTarget -ServerName $server2.FullyQualifiedDomainName -RefreshCredentialName $refreshCred.CredentialName


# 8.2. selected databases - one database per server

$targetGroup2 = $jobAgent | New-AzSqlElasticJobTargetGroup -Name 'TargetGroup2'

$targetGroup2 | Add-AzSqlElasticJobTarget -ServerName $server1.FullyQualifiedDomainName -DatabaseName $targetDb1.DatabaseName

$targetGroup2 | Add-AzSqlElasticJobTarget -ServerName $server2.FullyQualifiedDomainName -DatabaseName $targetDb2.DatabaseName


# 8.3. exclude database from a server

$targetGroup3 = $jobAgent | New-AzSqlElasticJobTargetGroup -Name 'TargetGroup3'

$($server1 | Get-AzSqlDatabase) | % { $targetGroup3 | Add-AzSqlElasticJobTarget -ServerName $server1.FullyQualifiedDomainName -DatabaseName $_.DatabaseName }

$targetGroup3 | Add-AzSqlElasticJobTarget -ServerName $server1.FullyQualifiedDomainName -DatabaseName $targetDb1.DatabaseName -Exclude

$targetGroup3 | Add-AzSqlElasticJobTarget -ServerName $server1.FullyQualifiedDomainName -DatabaseName master -Exclude
Jobs
The final step is to create the job that will do actual work. The New-AzSqlElasticJob is used and we directly are adding SQL text to create the job. We can add each set of SQL text below as a separate step with Add-AzSqlElasticJobStep.
# 9. Create elastic job


# 9.1. Create a job and setup the schedule

$jobName = "Job"

$job = $jobAgent | New-AzSqlElasticJob -Name $jobName -RunOnce


# 9.2. Add steps to the job


# each job runs different T-SQL command


$sqlText1 = "IF NOT EXISTS (SELECT * FROM sys.tables WHERE object_id = object_id('Step1Table')) CREATE TABLE [dbo].[Step1Table]([TestId] [int] NOT NULL);"

$sqlText2 = "IF NOT EXISTS (SELECT * FROM sys.tables WHERE object_id = object_id('Step2Table')) CREATE TABLE [dbo].[Step2Table]([TestId] [int] NOT NULL);"

$sqlText3 = "IF NOT EXISTS (SELECT * FROM sys.tables WHERE object_id = object_id('Step3Table')) CREATE TABLE [dbo].[Step3Table]([TestId] [int] NOT NULL);"


# add the steps with target group assignment and command to be executed

$job | Add-AzSqlElasticJobStep -Name "step1" -TargetGroupName $targetGroup1.TargetGroupName -CredentialName $jobCred.CredentialName -CommandText $sqlText1

$job | Add-AzSqlElasticJobStep -Name "step2" -TargetGroupName $targetGroup2.TargetGroupName -CredentialName $jobCred.CredentialName -CommandText $sqlText2

$job | Add-AzSqlElasticJobStep -Name "step3" -TargetGroupName $targetGroup3.TargetGroupName -CredentialName $jobCred.CredentialName -CommandText $sqlText3
Execute the Job
Finally we can run our job and monitor its execution as well as the results. There is a Start-AzSqlElasticJob cmdlet to start the job and Get-AzSqlElasticJobStepExecution to get the results.
# start the job - keep the execution object for later

$jobExecution = $job | Start-AzSqlElasticJob


# monitor the steps of the job

# status will change but eventually we want to see "Succeeded"

$jobExecution | Get-AzSqlElasticJobStepExecution


<#


JobName JobVersion StepName StepId JobExecutionId                       Lifecycle StartTime           EndTime

------- ---------- -------- ------ --------------                       --------- ---------           -------

Job     3          step3    3      35456e50-801a-4239-9bca-31f295fe6c0c Succeeded 03/05/2021 22:15:08 03/05/2021 22:15:14

Job     3          step2    2      35456e50-801a-4239-9bca-31f295fe6c0c Succeeded 03/05/2021 22:15:05 03/05/2021 22:15:07

Job     3          step1    1      35456e50-801a-4239-9bca-31f295fe6c0c Succeeded 03/05/2021 22:15:00 03/05/2021 22:15:04


#>
Once we are sure the job completed successfully, we can see the results in each target:
# check the tables with dbatools

$tables = Get-DbaDbTable -SqlInstance $server1.FullyQualifiedDomainName, $server2.FullyQualifiedDomainName -SqlCredential $azCredentials -Table Step1Table, Step2Table, Step3Table

$tables | select ComputerName, Database, Name | Format-Table | Sort-Object Name


<#


ComputerName                            Database Name

------------                            -------- ----

sqlservercentral-1.database.windows.net db1      Step1Table

sqlservercentral-1.database.windows.net db11     Step1Table

sqlservercentral-1.database.windows.net db12     Step1Table

sqlservercentral-1.database.windows.net db13     Step1Table

sqlservercentral-2.database.windows.net db2      Step1Table

sqlservercentral-1.database.windows.net db1      Step2Table

sqlservercentral-2.database.windows.net db2      Step2Table

sqlservercentral-1.database.windows.net db11     Step3Table

sqlservercentral-1.database.windows.net db12     Step3Table

sqlservercentral-1.database.windows.net db13     Step3Table


#>
As expected we can see that the Step1Table table was created in all databases, Step2Table got created only in two specified databases, and Step3Table is in all databases on server 1, except the one we excluded.
Final Word
Creating the resources in Azure using Portal might be easy, however, in many cases, the PowerShell way is much quicker and repeatable. We can also store the script and create a template from it. Also, in this case, as this is a preview feature and not everything can be done via Portal and we need extra work either via CLI or T-SQL or PowerShell.
The complete script can be found in my GitHub repository.
Thanks,
Mikey
