

Introduction
As you may know, Azure SQL Databases do not have SQL Agents to schedule tasks. In this new article, we will show how to schedule a Job to perform some Azure SQL tasks.
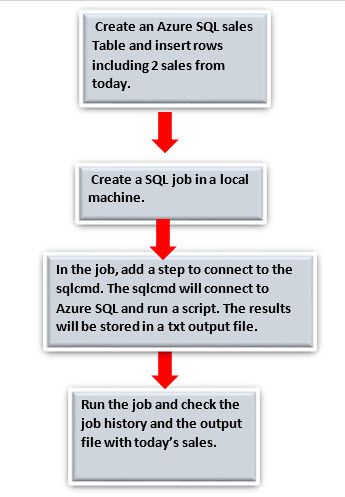
We will run the sqlcmd command line inside a local SQL Server Agent to connect to Azure showing today's sales. This diagram shows what we are going to do:
Requirements
We need the following:
- An Azure Account.
- An Azure SQL Database already installed (if you do not know how to create an Azure SQL Database, you can check the first 2 steps of our article about it.
- A local SQL Server installed (any edition except the Express Edition, which does not include the SQL Agent).
Getting Started
In this example, we will save a text file. We will use a table in Azure containing all the sales as the source, and we will save today's sales in a txt file on daily basis.
1. In SSMS, connect to the Azure SQL database and create a table named sqlservercentralsales:
CREATE TABLE [dbo].[sqlservercentralsales](
[id] [int] NULL,
[Productid] [int] NULL,
[Quantity] [int] NULL,
[salesdate] [date] NULL
) ON [PRIMARY]
GO
2. Insert data in the table. This code will insert 2 rows with the current date.
INSERT [dbo].[sqlservercentralsales] ([id], [Productid], [Quantity], [salesdate]) VALUES (2, 2, 55, CAST(getdate() AS Date))
INSERT [dbo].[sqlservercentralsales] ([id], [Productid], [Quantity], [salesdate]) VALUES (1, 1, 34, CAST(N'2016-05-01' AS Date))
INSERT [dbo].[sqlservercentralsales] ([id], [Productid], [Quantity], [salesdate]) VALUES (6, 5, 99, CAST(getdate() AS Date))
INSERT [dbo].[sqlservercentralsales] ([id], [Productid], [Quantity], [salesdate]) VALUES (3, 1, 77, CAST(N'2016-01-07' AS Date))
INSERT [dbo].[sqlservercentralsales] ([id], [Productid], [Quantity], [salesdate]) VALUES (4, 3, 66, CAST(N'2016-12-01' AS Date))
INSERT [dbo].[sqlservercentralsales] ([id], [Productid], [Quantity], [salesdate]) VALUES (5, 4, 21, CAST(N'2016-01-07' AS Date))
INSERT [dbo].[sqlservercentralsales] ([id], [Productid], [Quantity], [salesdate]) VALUES (6, 5, 99, CAST(N'2016-07-01' AS Date)
3. Create a SQL script named todaysales.sql to query today's sales:
SELECT [id]
,[Productid]
,[Quantity]
,[salesdate]
, month(salesdate)
FROM [dbo].[sqlservercentralsales]
WHERE salesdate=CAST(getdate() AS DATE)
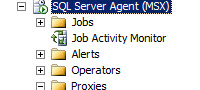
GO4. In SSMS (SQL Server Management Studio), on a local instance, expand the SQL Server Agent Folder:
5. Go to the Jobs folder, right click it and select New Job:

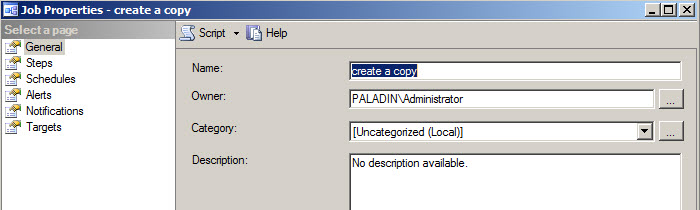
6. Specify a Name for the Job:
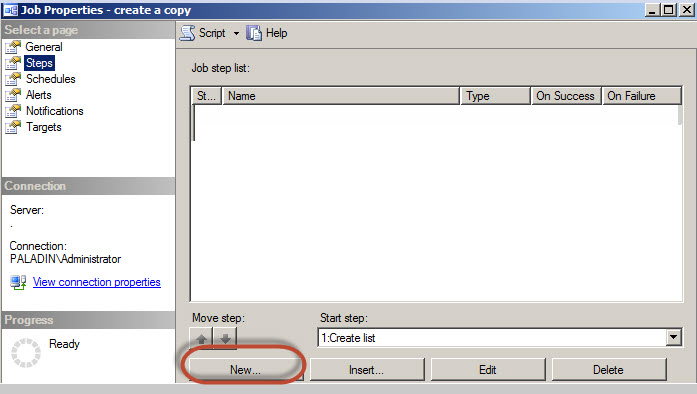
7. On the Steps page, press the new button to create a new step:
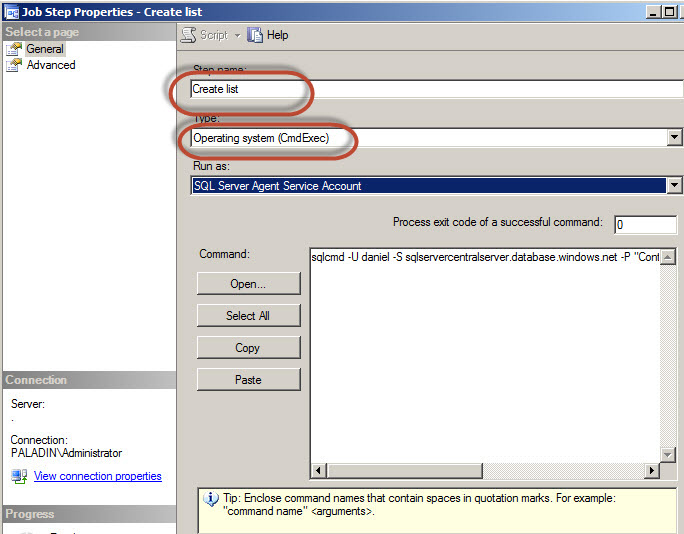
8. Specify a name for the step. In the Type field, select Operating system (CmdExec) to run the command line:
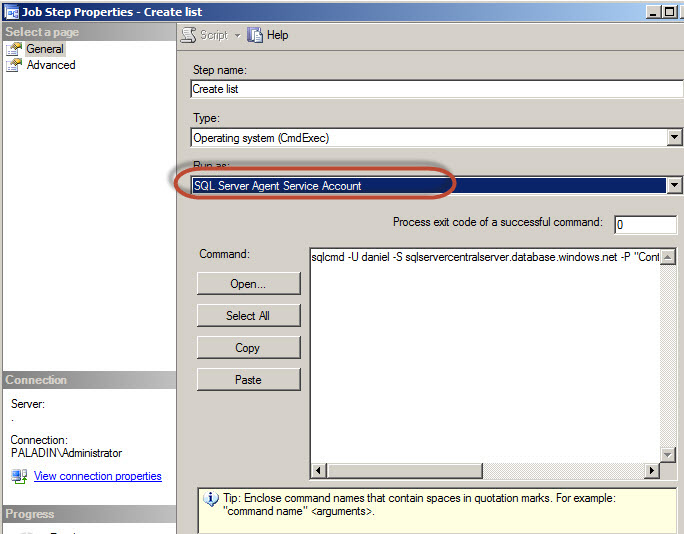
9. In Run as text box, make sure that the SQL Server Agent Service Account has privileges in the path where we will create the file or use a Proxy (for more information about proxies, review our article about proxies):
10. This is the most important section of the article.In the command, write the following command:
sqlcmd - U daniel -d sqlcentralazure -S sqlservercentralserver.database.windows.net -P "YourAzurePassword" -i c:\script\todaysales.sql -o c:\script\azureoutput.txt
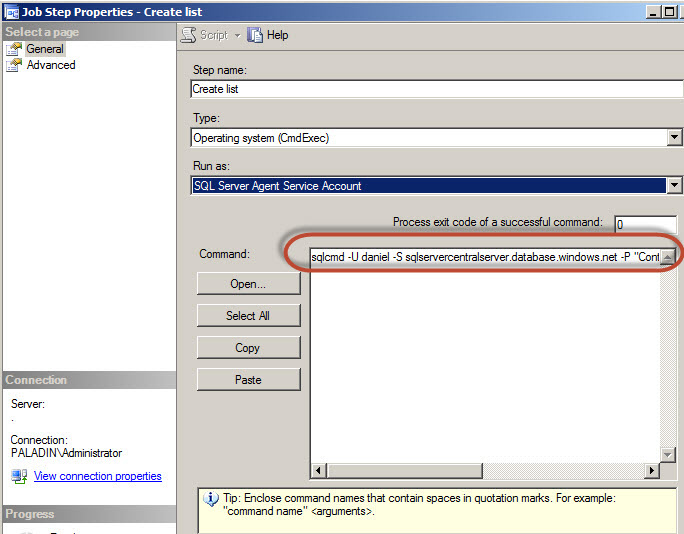
Where sqlcmd is the command line to connect to and query SQL Server.
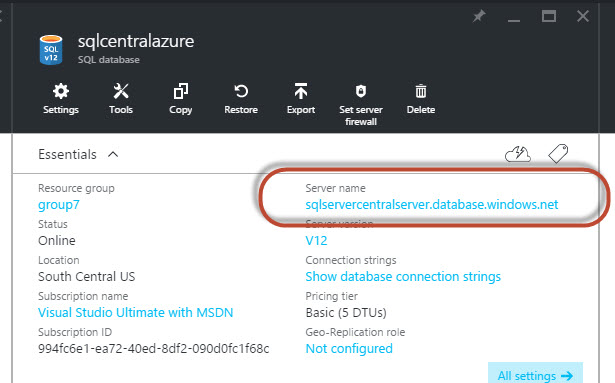
-S is the option to specify the Azure Server Name. The server name can be obtained in the Azure Portal following these 2 steps. First, go to Databases and click the database with the tables used:
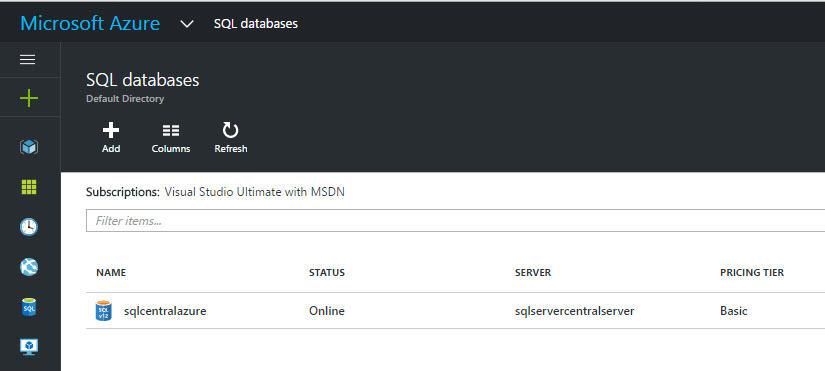
Next, copy and paste the Azure Server Name:
- -U is used to specify the Azure SQL user name. This is the user created to access to your Azure SQL Database.
- -d is used to specify the Database.
- -P is used to specify the user's password.
- - i is used to specify the script with the query created on step 3. This query shows today's sales. You can use any folder of your preference. Just make sure that the SQL Agent account or the Proxy account have privileges on the folder used.
- -o is used to specify the txt output. In this example, we are using a folder named scripts. You can use any folder of your preference. Just make sure that the SQL Agent account or the Proxy account have privileges on the folder used.
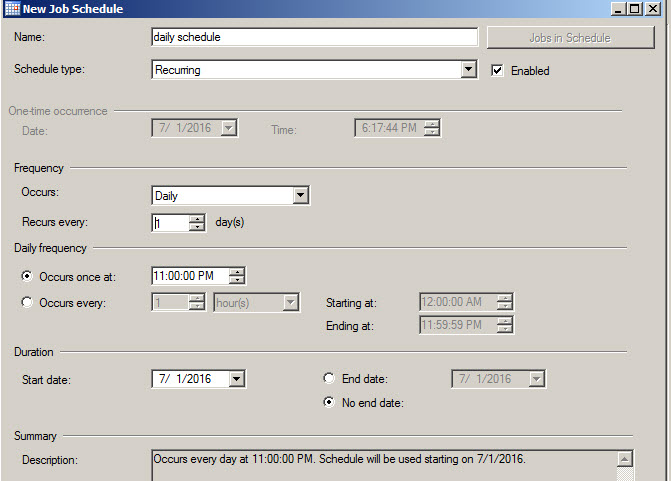
9. In the Schedules page, press New to create a new schedule:

7. Specify a name for the schedule and select a Recurring Schedule type. We will run the job on daily basis:
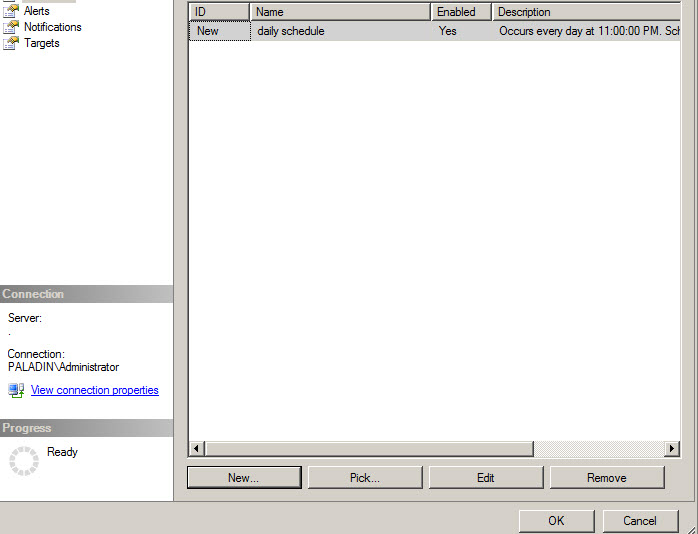
8. Once the schedule is created, press OK:
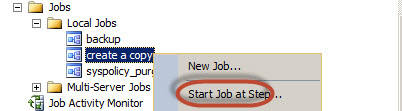
9. To test the job, right click the Job and select Start Job at Step:
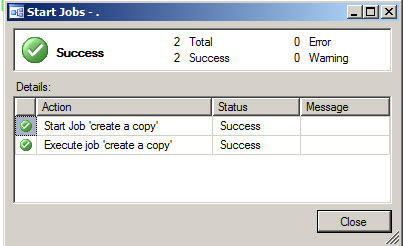
10. If everything is OK, a success message will be displayed:
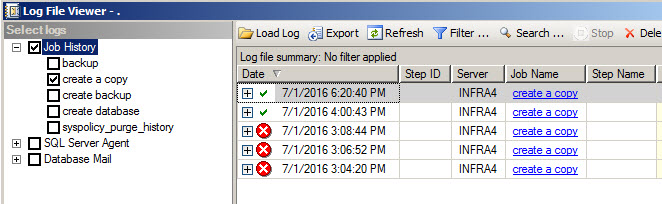
11. You can always see the errors or the complete success message by right clicking on the Job and selecting the View History option:

12. You will be able to see the success and error messages:
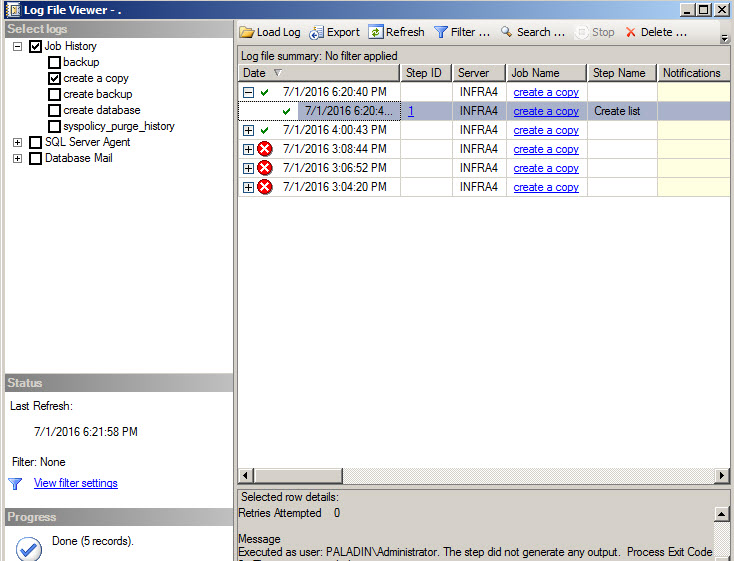
13. Expand the success message and click the child message. You will be able to see the detailed error:
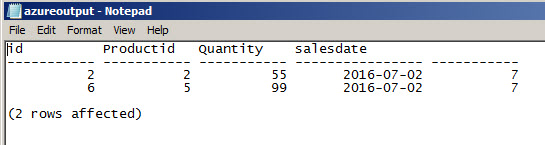
14. In the command line, we created an output file in the script folder. Go to the folder created:

15. Open the file and check the results. As you can see in the text file, Today's sales are stored in the file:
Conclusions
In this example, we run a query using the sqlcmd in the SQL Agent to connect to Azure SQL. We used a local SQL Server Agent to schedule task on Azure SQL. The key is to use sqlcmd to connect to Azure SQL.


