

Introduction to PostgreSQL
PostgreSQL is a free and general purpose open source object-relational database system that uses and extends the SQL language. Though originally designed to run on UNIX platforms, PostgreSQL is eligible to run on various platforms such as Linux, macOS, Solaris, and Windows. PostgreSQL databases provide enterprise-class database solutions and are used by a wide variety of enterprises across many industries, like financial services, information technology, government and media & communications.
PostgreSQL in addition to being free and open source is highly robust and extensible. For example, one can define his own data types, develop custom functions and conform to SQL standard without compromising on architectural designs. Almost all the features of SQL are supported though sometimes with a slightly different syntax. A few important features:
- Has wide range of datatypes both out of the box and customized
- Has full support for data integrity. All needed constraints like UNIQUE, NOT NULL, Primary Keys, Foreign Keys and Exclusions are supported
- Uses powerful indexing techniques to deliver strong concurrency and performance
- Data recovery mechanisms are also well supported in PostgreSQL thus making it reliable and secured to use
- Has NoSQL-style JSON processing features, which makes it compatible to the modern day architecture and design patterns
Software Setup
We need to have PostgreSQL installed in our system. This is the link which can be used to download the latest stable version. The package comes bundled with PostgreSQL server, pgAdmin4 (a GUI tool to manage the database) and a command line tool, psql.
Typically there are two methods to execute PostgreSQL queries:
- Using pgAdmin (a GUI Management tool)
- With the help of SQL Shell (psql). This article covers both the techniques.
For Linux installation refer to this article, https://www.sqlservercentral.com/articles/postgresql-jdbc-tutorial-on-linux
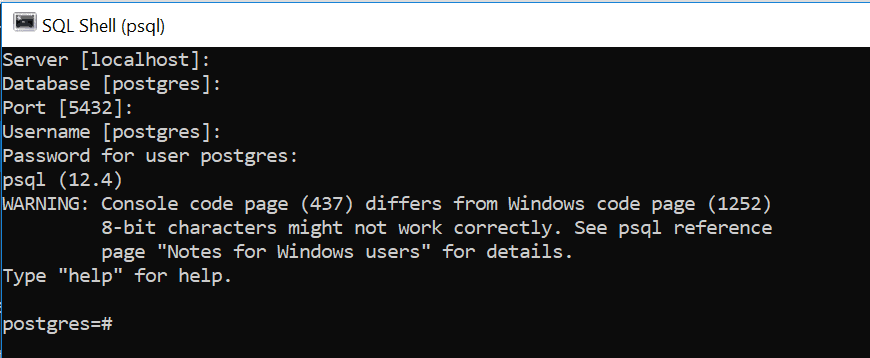
On Windows, there is a little post installation work. To start a SQL Shell terminal, navigate to start->SQL Shell(psql) and enter the credentials set during installation.
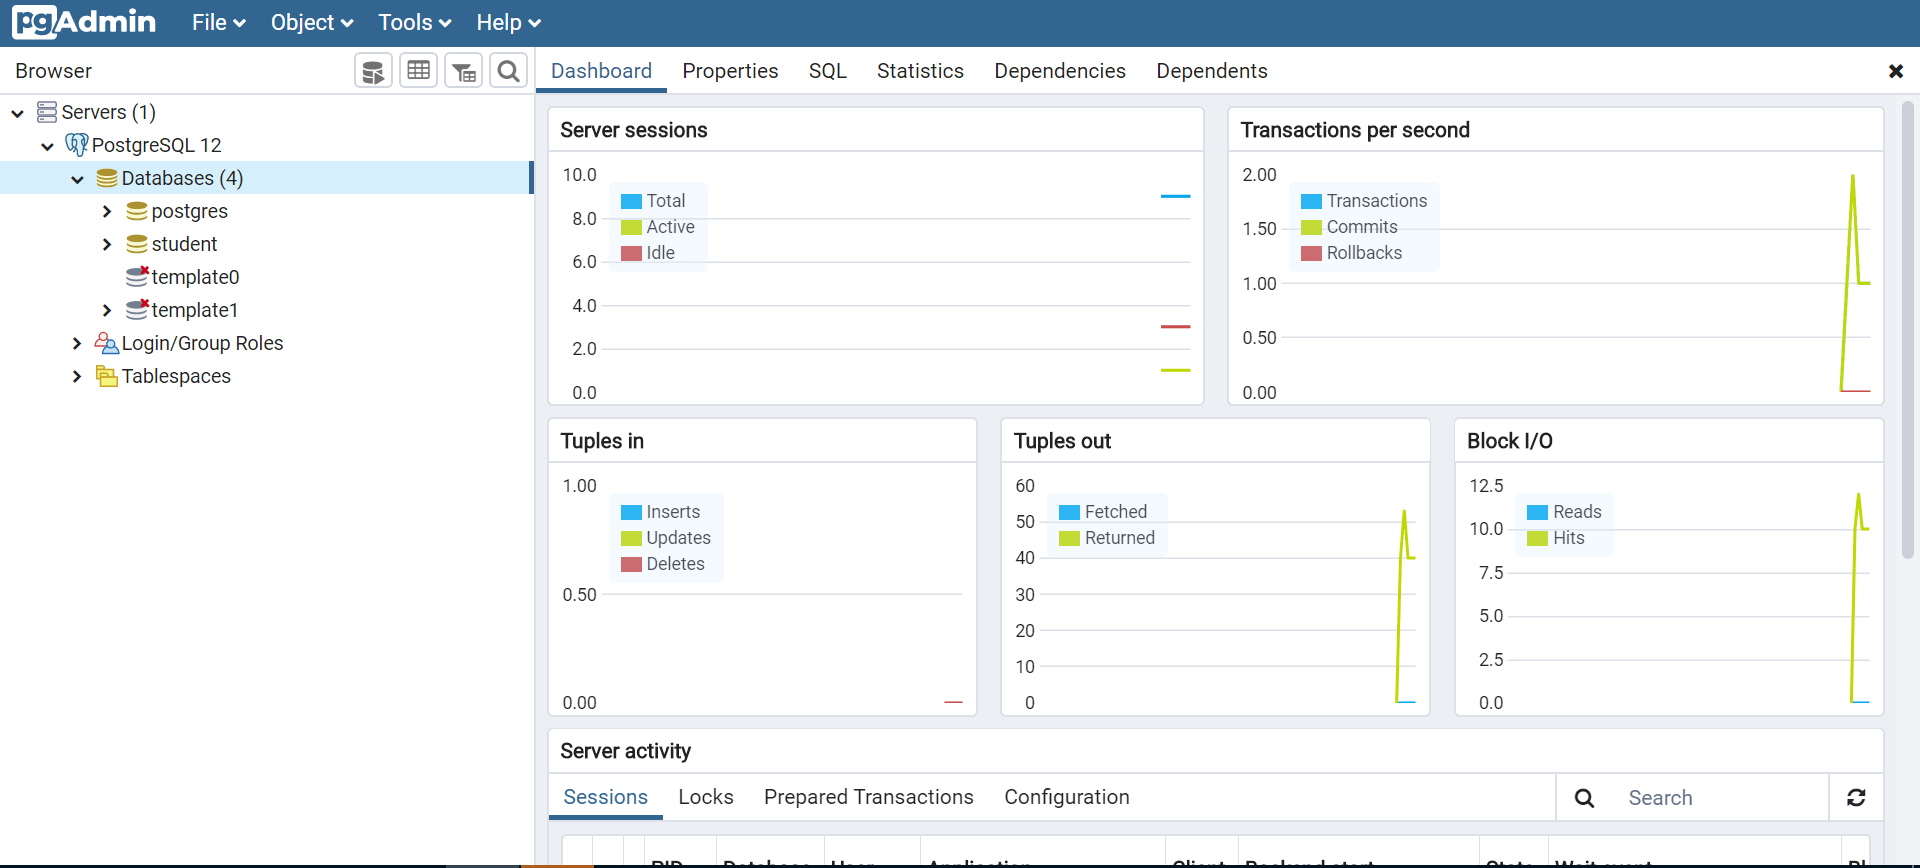
To start pgAdmin4, navigate to start->pgAdmin4 and enter the 'postgres' user password set during installation.
PostgreSQL DDL Statements
There are a number of DDL statements you will need to work with PostgreSQL, such as creating, dropping, and working with a database.
Creating a Database with the SQL Shell
The following syntax shows how to create a database in PostgreSQL. Section also covers how to list and change databases post creation of a database using the psql shell. The 'CREATE DATABASE' statement is used to create a new database as shown below;
Syntax:
CREATE DATABASE database_name;
Sample Code:
CREATE DATABASE studentDB;
![]()
Before jumping over to the next topic let us learn some psql commands to list and change databases;
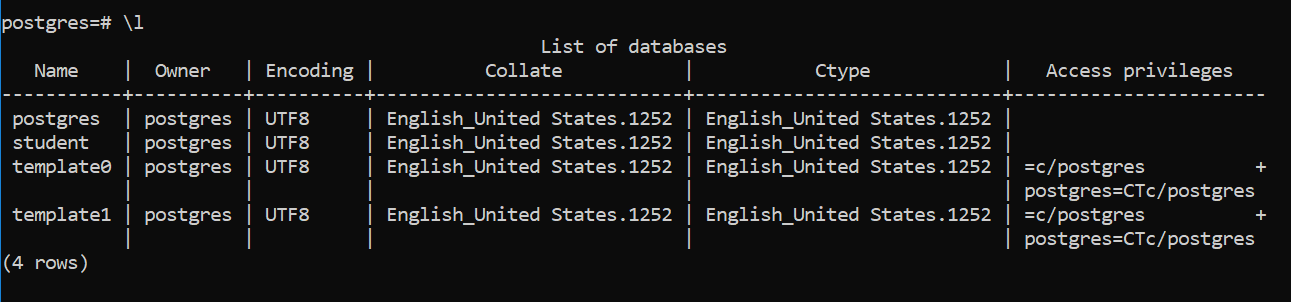
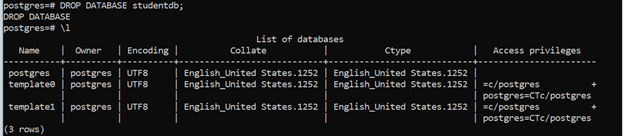
To list databases, use \l.
postgres=# \l
You can see all the databases listed below.
To change the database, use the \c command.
postgres=# \c database_name;


postgres=# \c studentdb;

Creating Database In PgAdmin
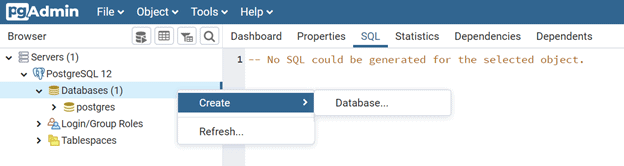
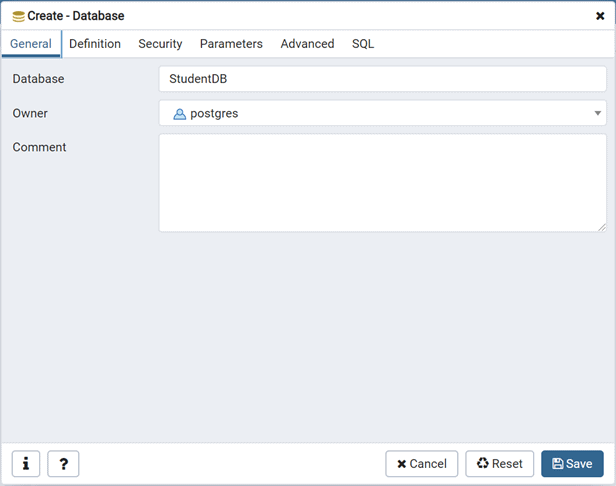
After starting PgAdmin, navigate to Databases->Create->Database and specify the details as shown below:
Specify the database name and comments if any. The comment is a note on the database object itself.
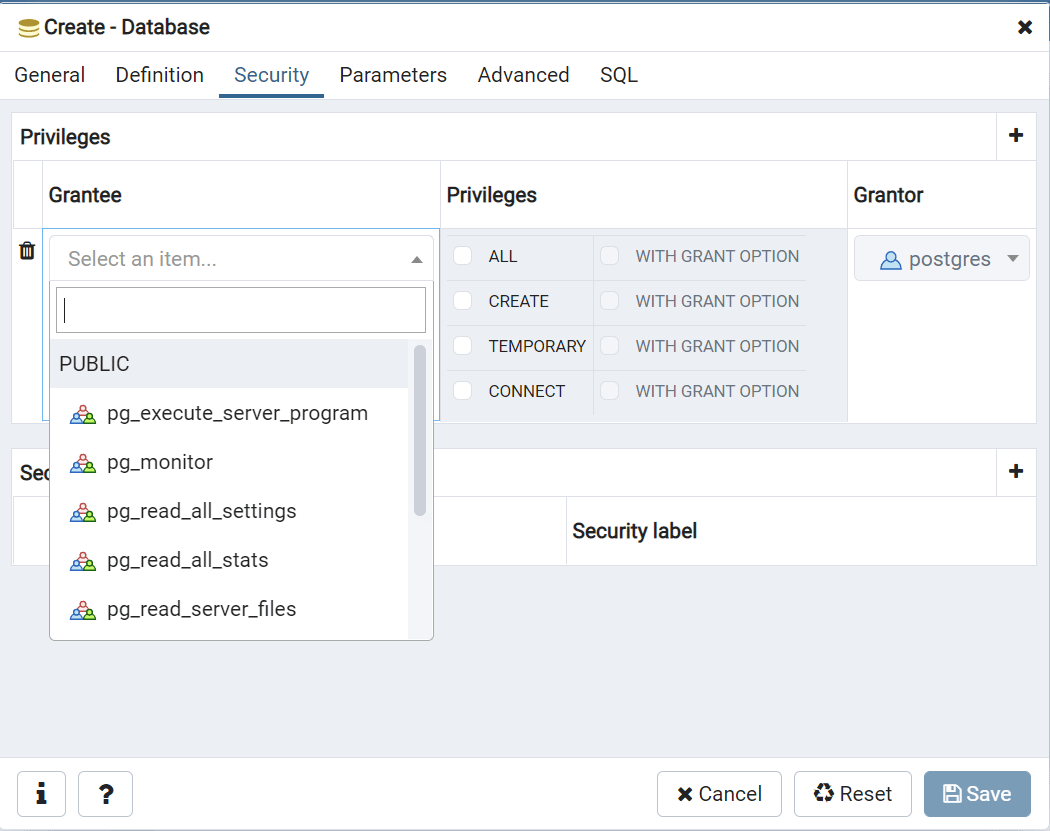
Grants/Permissions can be specified using the Security tab.
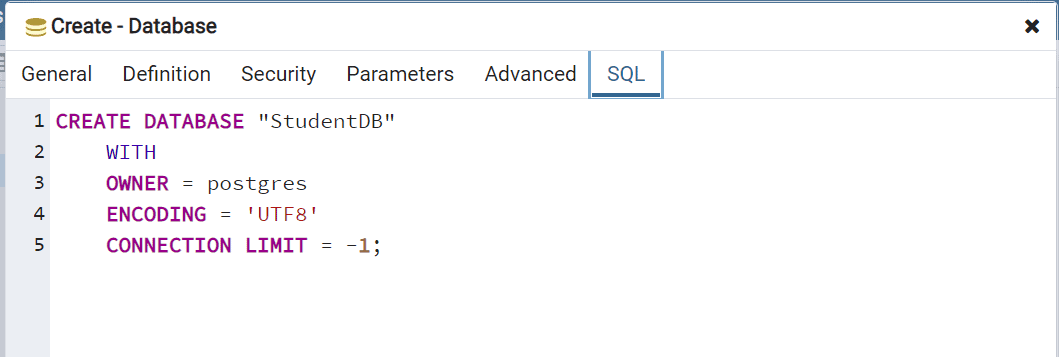
Finally the complete SQL query can be viewed from the 'SQL' tab.
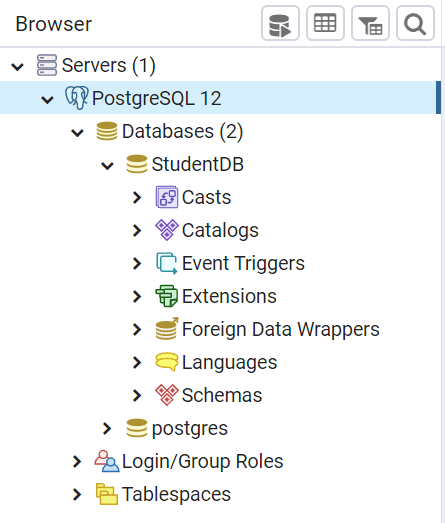
Click Save to create the database. We can then see the database in our list of databases on the left side.
Dropping a Database with the SQL Shell
When a database is no longer required, it can be dropped or deleted using the 'DROP' command.
Syntax:
DROP DATABASE database_name;
Sample Code:
DROP DATABASE studentdb;
We can see the database has been removed.
Drop Database In PgAdmin
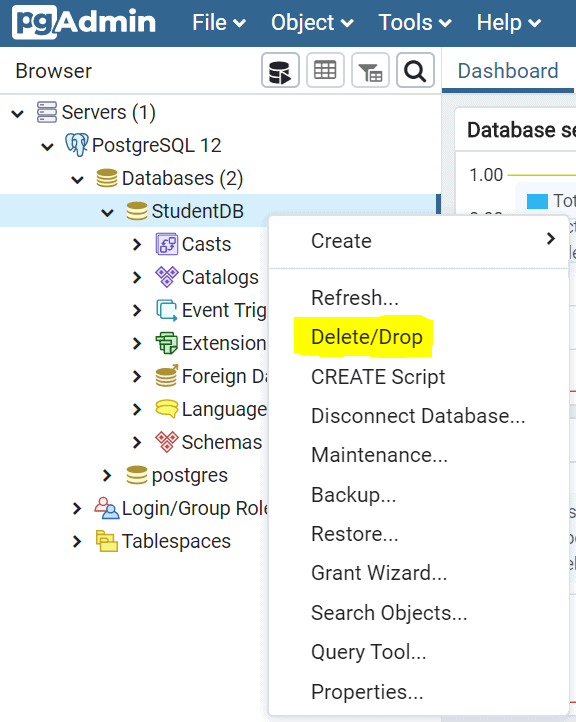
In Pgadmin, right click the database. Then navigate to Databases -> Target Database -> Delete/Drop.
PostgreSQL Schema Commands
These are some of the common commands that you can use to work with schemas in PostgreSQL.
Creating a Schema
This command is used to create a new schema in an existing database.
Syntax:
CREATE SCHEMA schema_name;
Sample Code:
CREATE SCHEMA dummy_schema;

Before jumping over to the next topic, let us learn some psql commands to list, view, and change schemas.
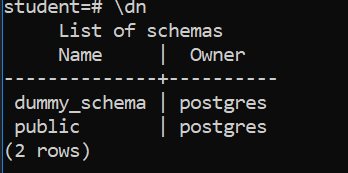
List Schema
postgres=# \dn
Change Schema
postgres=# SET search_path TO dummy_schema,public;
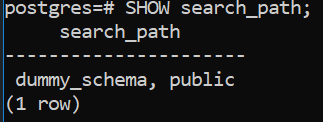
Show Current Schema
postgres=# SHOW search_path;
Create Schema In PgAdmin
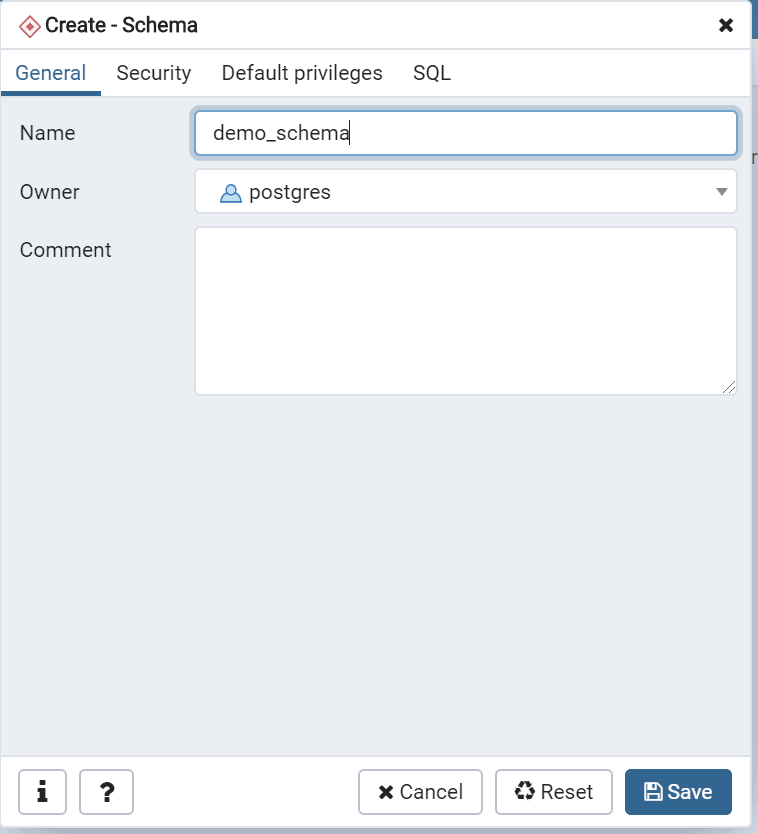
In PgAdmin, right click the Schemas entry. Then navigate to Databases-> Target Database -> Schemas -> Create -> Schema

We can enter a name and comment.
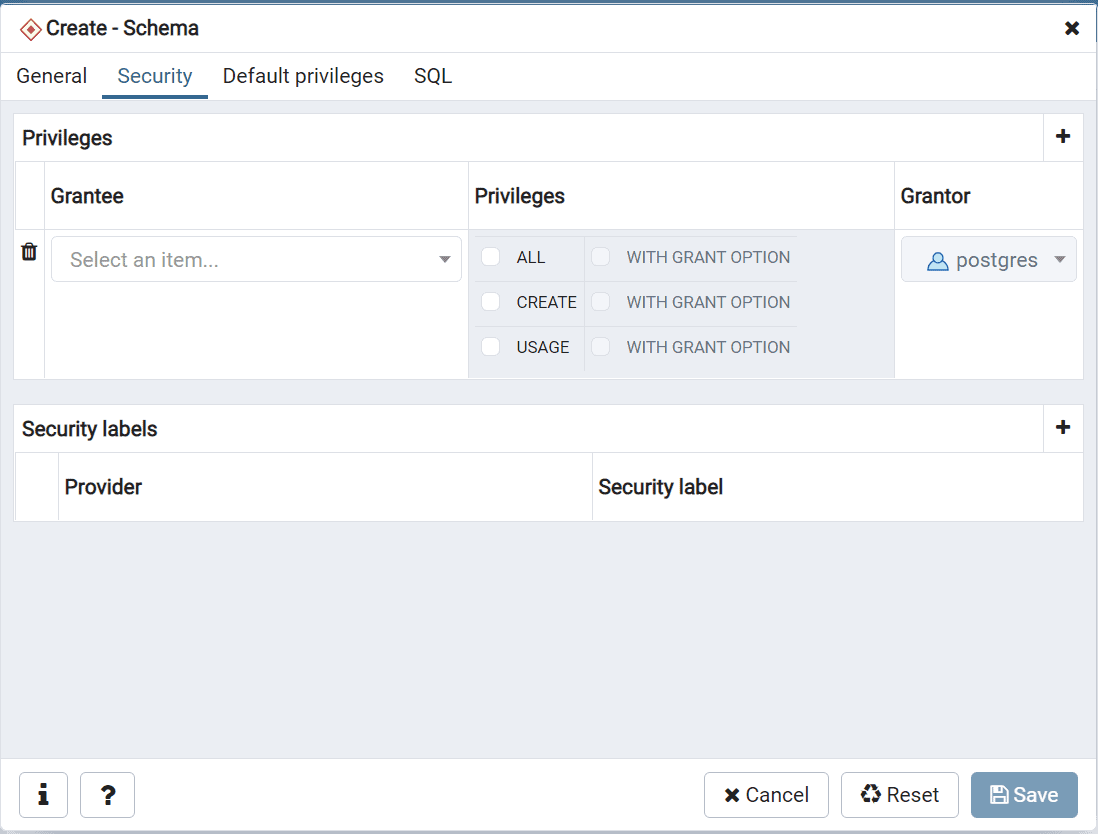
Grants/Permissions can be specified from the Security tab
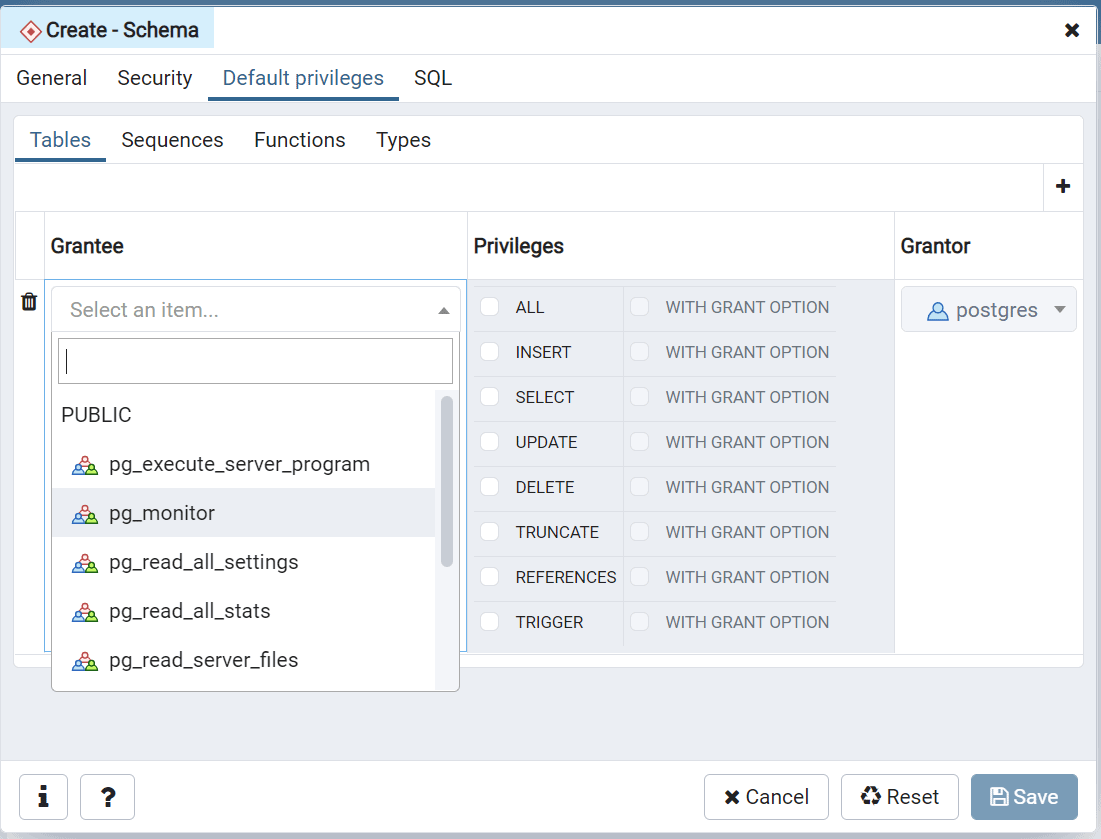
Default privileges which are applied globally to the entire database can be set from the 'Default Privileges' tab
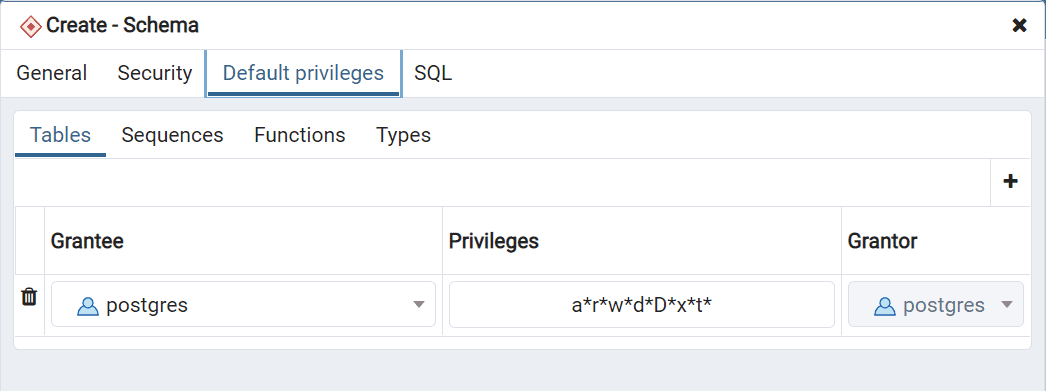
Here the user, postgres, is given all rights(insert,select,delete,update,truncate,references,trigger) with GRANT option
Finally the complete SQL query can be viewed from the 'SQL' tab.

Click Save to create the schema.
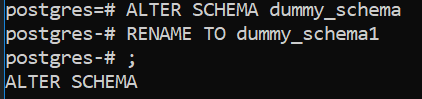
Alter Schema in SQL Shell
The ALTER SCHEMA command is used to update an existing schema definition. Using this command it is possible to rename the schema or change its owner.
Example 1 - Syntax to alter schema name:
ALTER SCHEMA schema_name

RENAME TO new_name;
Sample code:
ALTER SCHEMA dummy_schema

RENAME TO dummy_schema1;
Example 2 - Syntax change alter the schema owner:
ALTER SCHEMA Schema1

OWNER TO new_owner_name;
Sample code:
ALTER SCHEMA dummy_schema1

OWNER TO postgres;

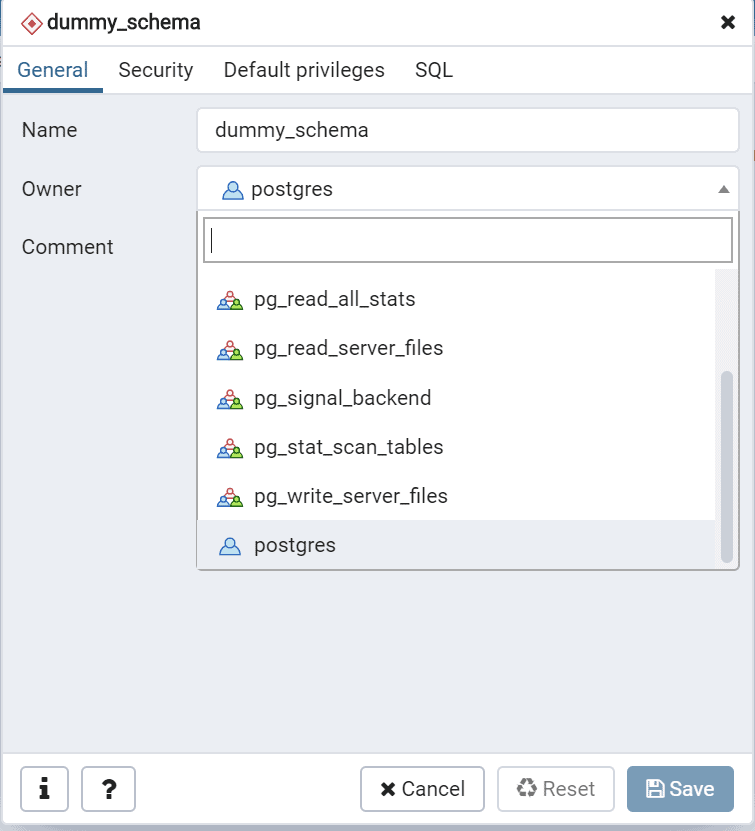
Alter Schema In PgAdmin
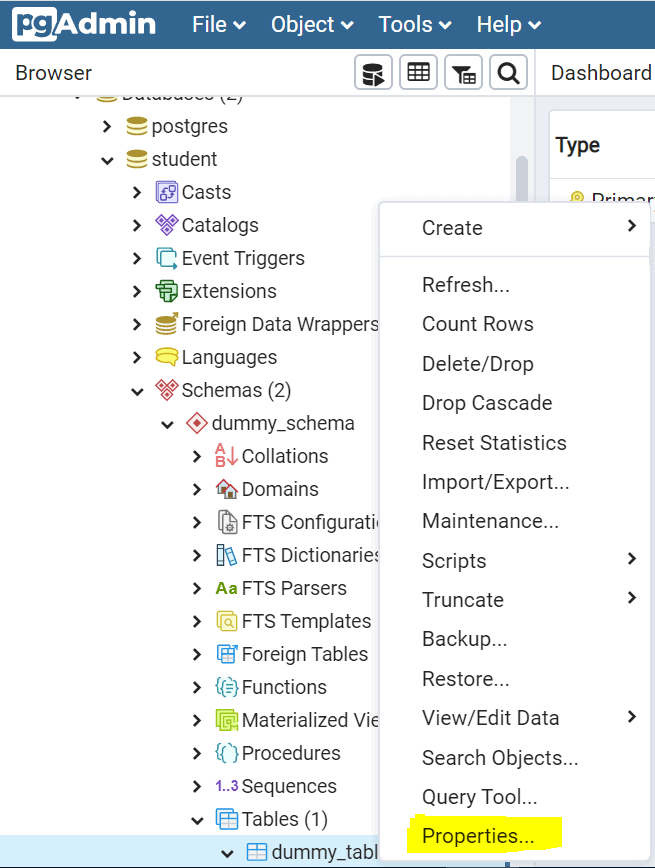
In PgAdmin, right click the schema you wish to alter. Navigate to Databases -> Target Database -> Target Schema -> Properties

You can then pick a new owner for the schema. Click Save to make the change.
Drop Schema in SQL Shell
The 'DROP SCHEMA' statement is used to drop a schema when it is no longer needed. A schema can be either be dropped alone or it along with its dependent objects. When it is dropped along with its objects it is called a CASCADE DROP.
Syntax to drop a schema:
DROP SCHEMA schema_name;
Sample code:
DROP SCHEMA dummy_schema1;
![]()
CASCADE DELETE - Dropping a schema in the above fashion may sometimes result in an error due to its dependent objects. In this scenario the CASCADE command is used.
Syntax:
DROP SCHEMA schema_name CASCADE;
Sample code:
DROP SCHEMA demo_schema CASCADE;
The image below shows the error about the presence of dependent objects.

If the CASCADE option is used, the schema is dropped.

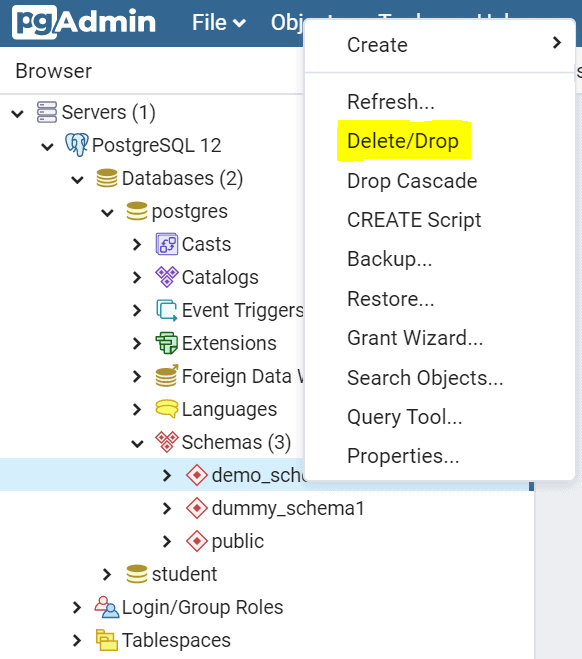
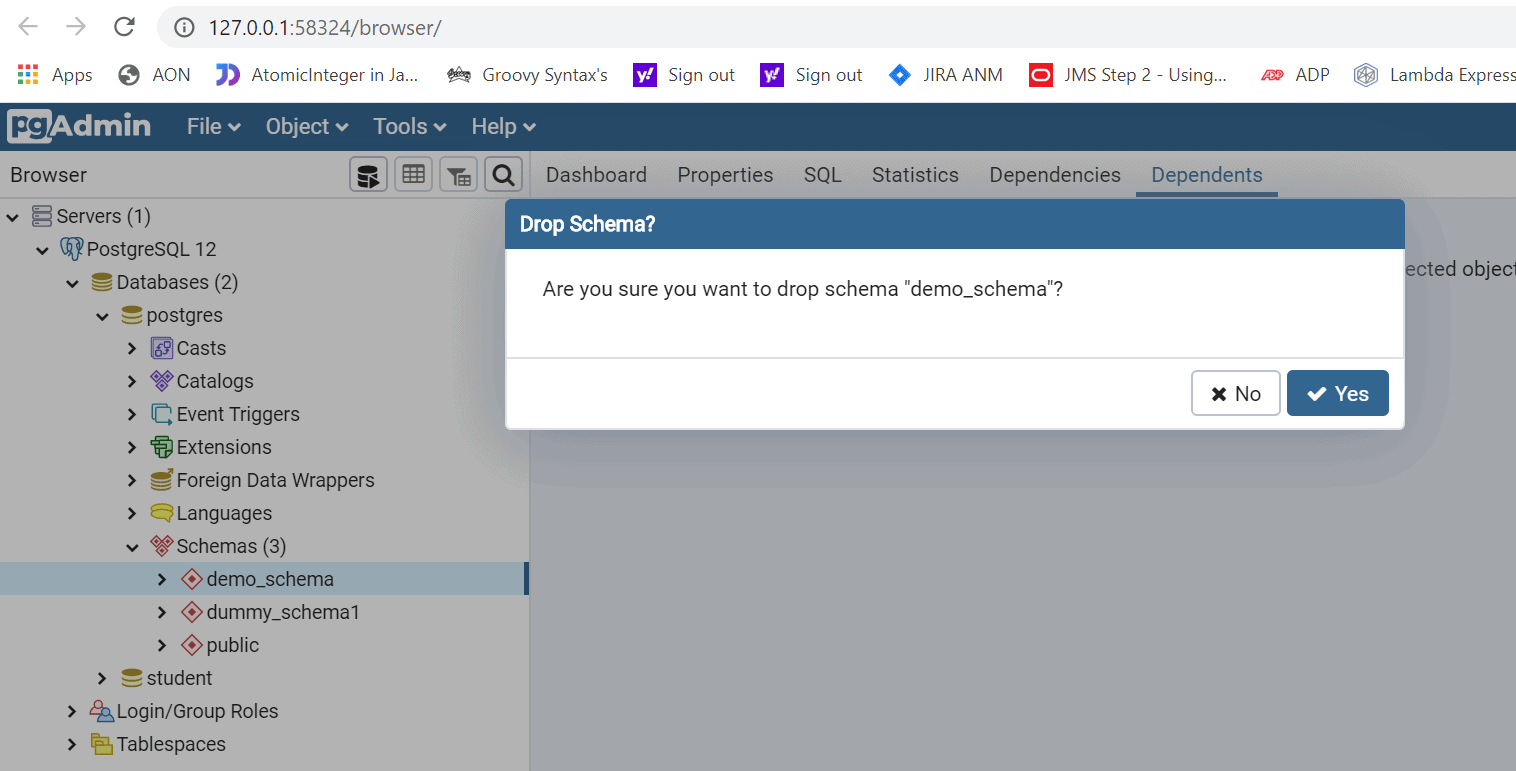
Drop Schema In PgAdmin
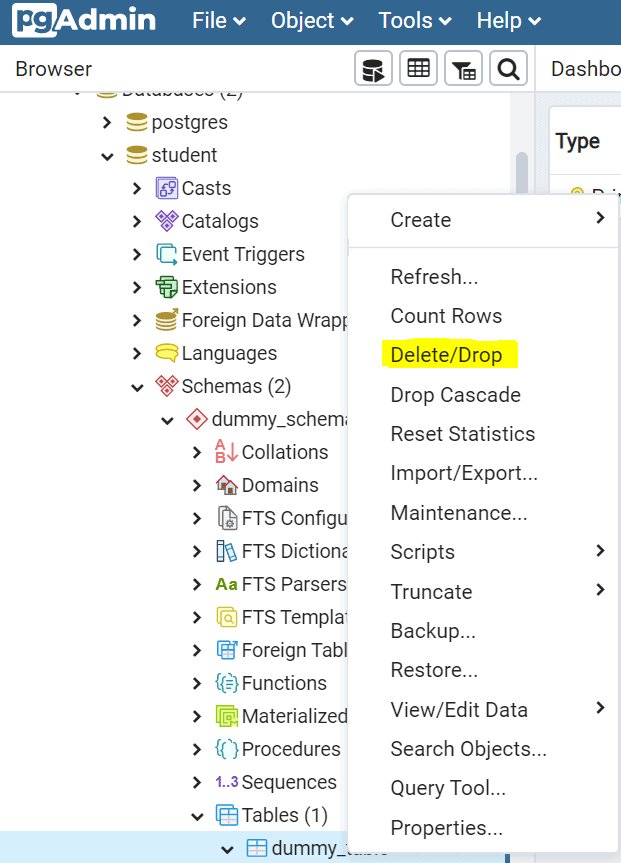
In PgAdmin, right click a schema and navigate to Databases -> Target Database -> Schemas -> Target Schema -> Delete/Drop.
Before you can drop a schema, you need to confirm the action.
PostgreSQL Table Commands
These are the common commands for working with tables in PostgreSQL.
Creating a Table in SQL Shell
A table, as we know, is the core of any relational database. The following section illustrates how we can create a table in PostgreSQL.
Syntax:
CREATE TABLE table_name

(

    COLUMN_NAME1 datatype,

    COLUMN_NAME2 datatype,

    ........

    COLUMN_NAMEN datatype,

);
Sample code:
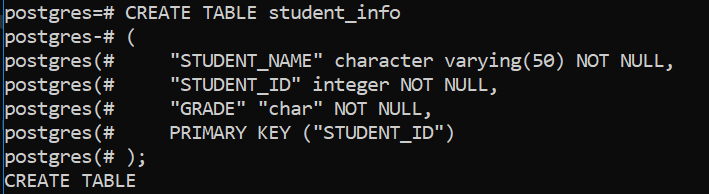
CREATE TABLE student_info

(

    "STUDENT_NAME" character varying(50) NOT NULL,

    "STUDENT_ID" integer NOT NULL,

    "GRADE" "char" NOT NULL,

    PRIMARY KEY ("STUDENT_ID")

);
We get a confirmation that the table is created.
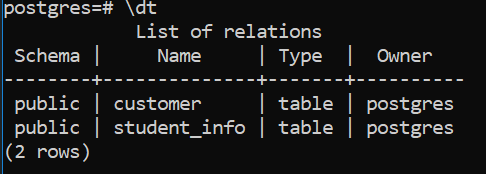
Let us now learn how to list tables in a schema. By default only the tables under the public schema are listed.
postgres=# \dt;
We can then see a list of the tables.
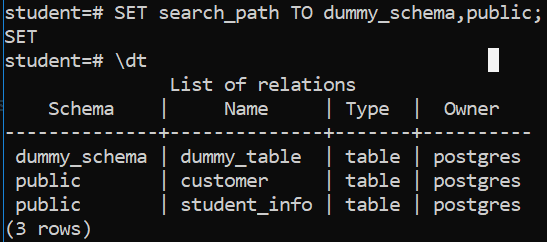
To list tables under any other schema, that particular schema needs to be set in the search path, as shown below. Using this command one or more schemas can be set to the search path. As we have set dummy_schema and public, all their corresponding tables are being returned
SET search_path TO dummy_schema,public;
We see the tables with their schema listed.
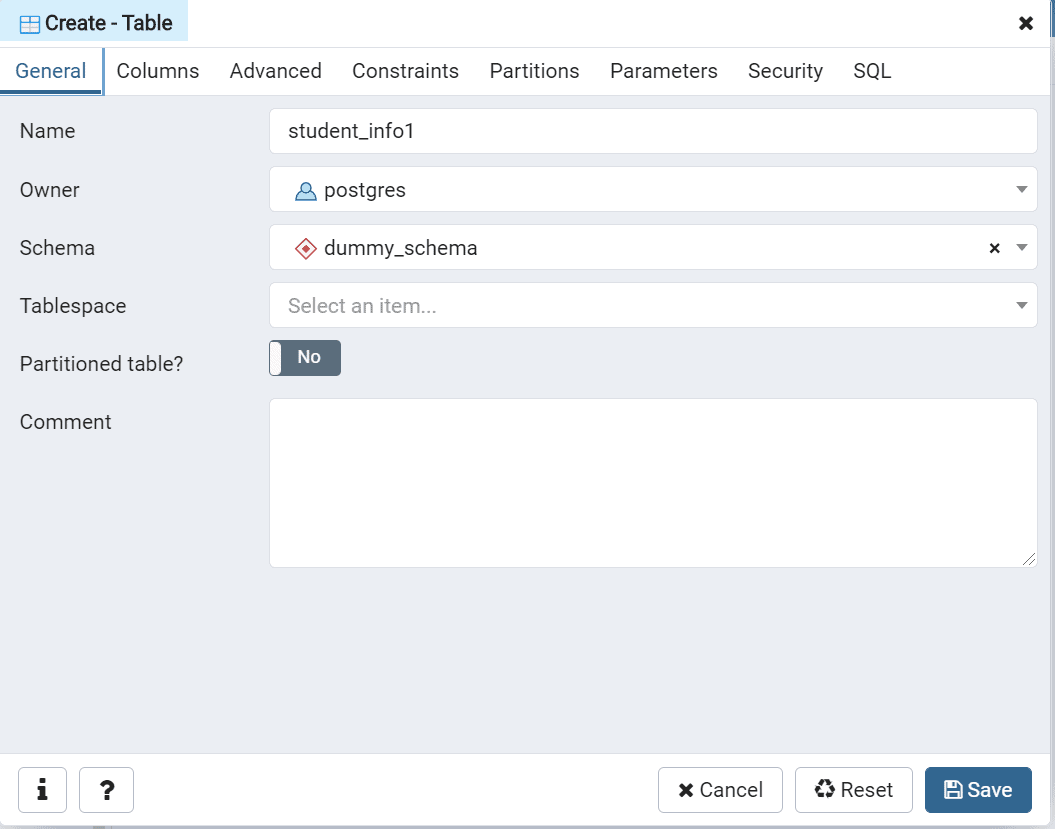
Create Table In PgAdmin
Right click the Tables item under a schema, and navigate to Databases-> Target Database-> Schemas-> Target Schema->Tables- >Create->Table.
Creates a new table within 'public' schema of 'Student' database.We can fill in the name and owner for the table. Here, the owner refers to the user 'postgres'. The schema is 'public' by default. Any schema can be used as per the requirement.
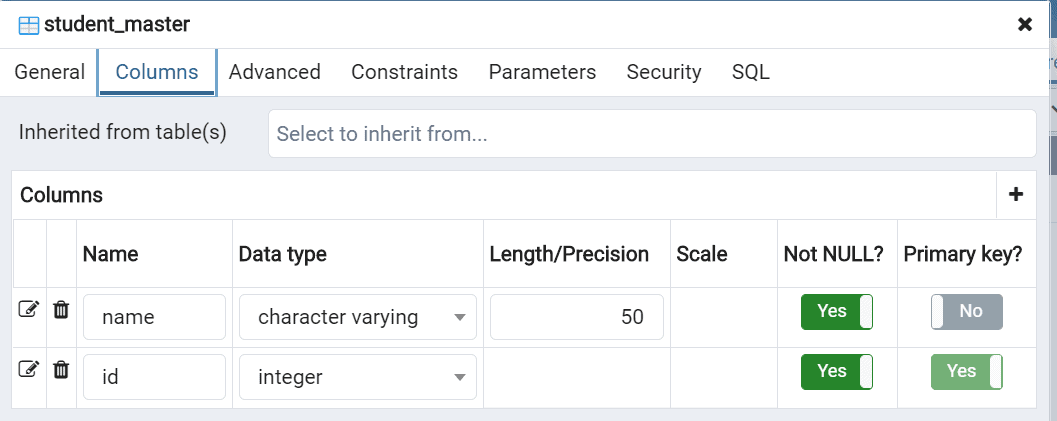
The second tab is where you specify the columns, their data types and precision/scale.

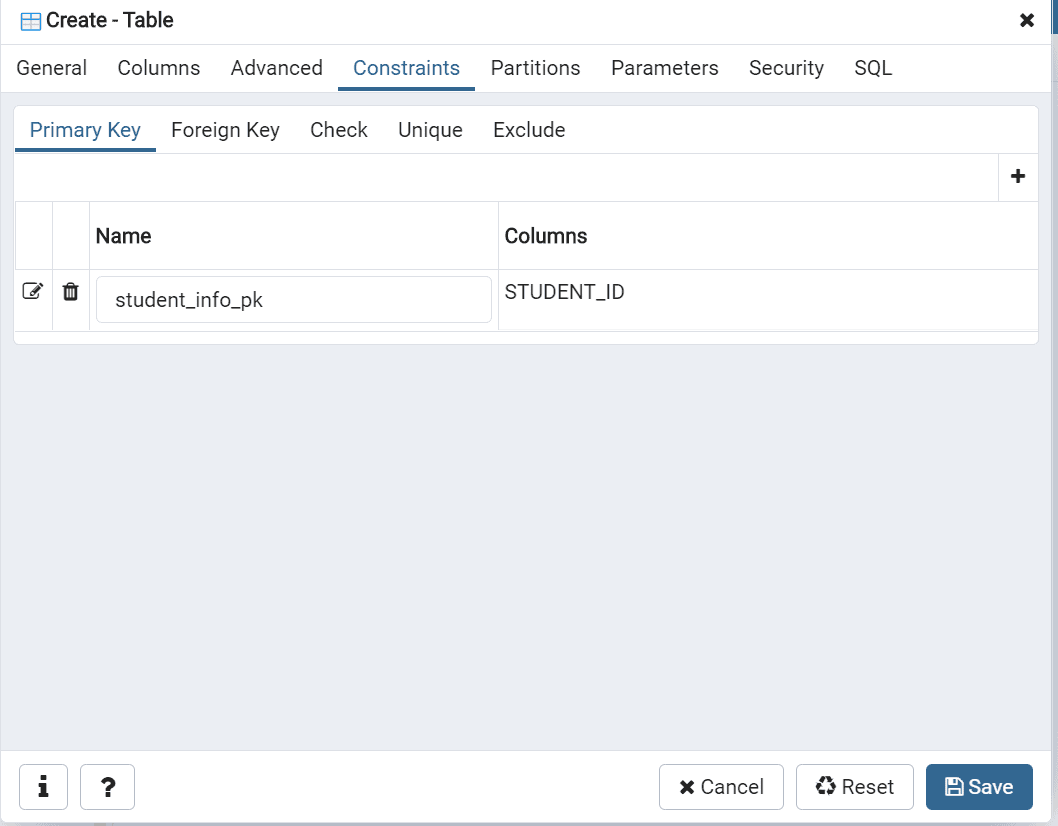
The Constraints tab is used to specify any constraint like Primary Key, Foreign Key, Unique, etc. Since we declared the column STUDENT_ID as the primary key in the previous step, a primary key representing the same is automatically generated on saving. Other constraints if required can be added .
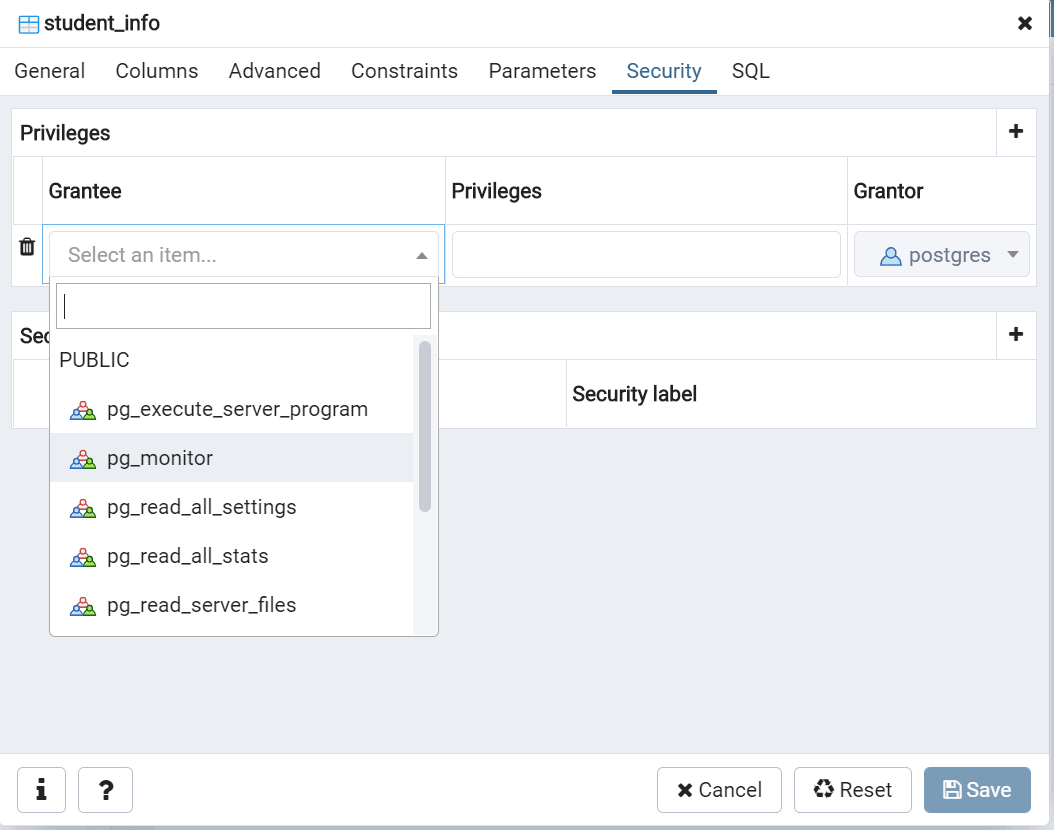
Grants and permissions can be specified using the Security tab.
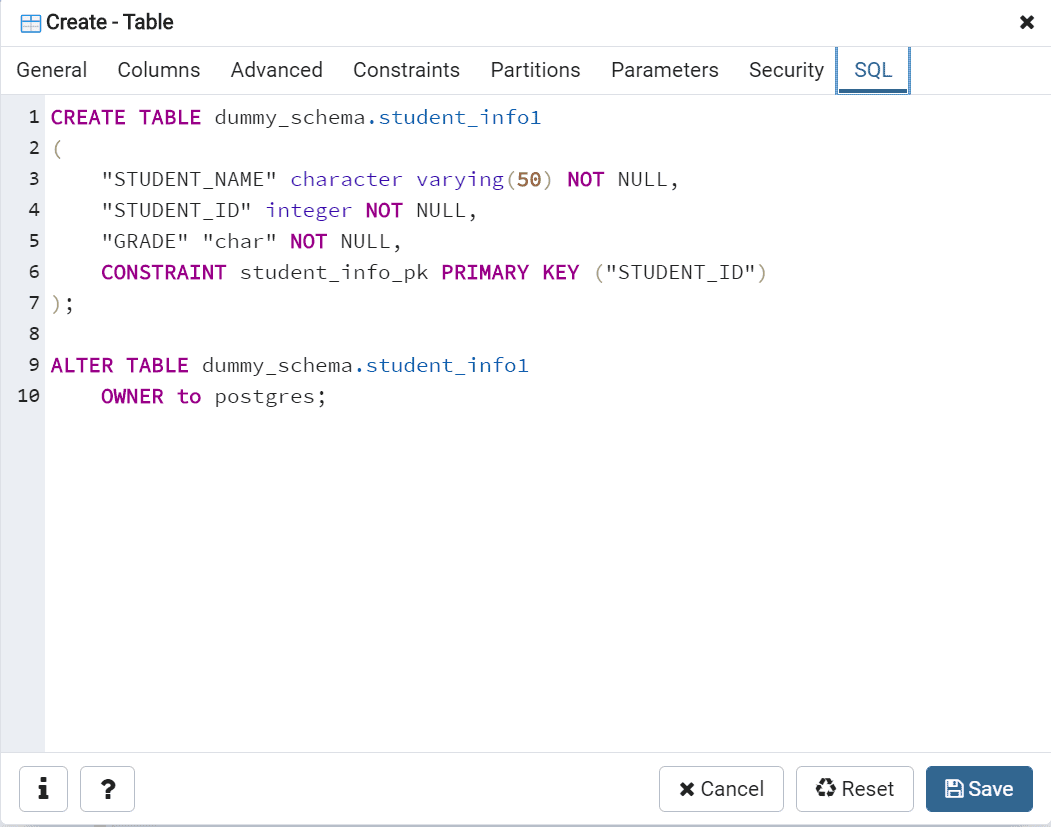
Finally the complete SQL query can be viewed from the 'SQL' tab
Click Save to create the table.
The features available in the other tabs Advanced, Partitions are not very common and seldom used, except under very specific business requirements.
Alter a Table in SQL Shell
The 'ALTER TABLE' statement is used to add, delete, modify columns in an existing table.
Syntax:
ALTER TABLE table_name

ADD column_name datatype;
Sample code:
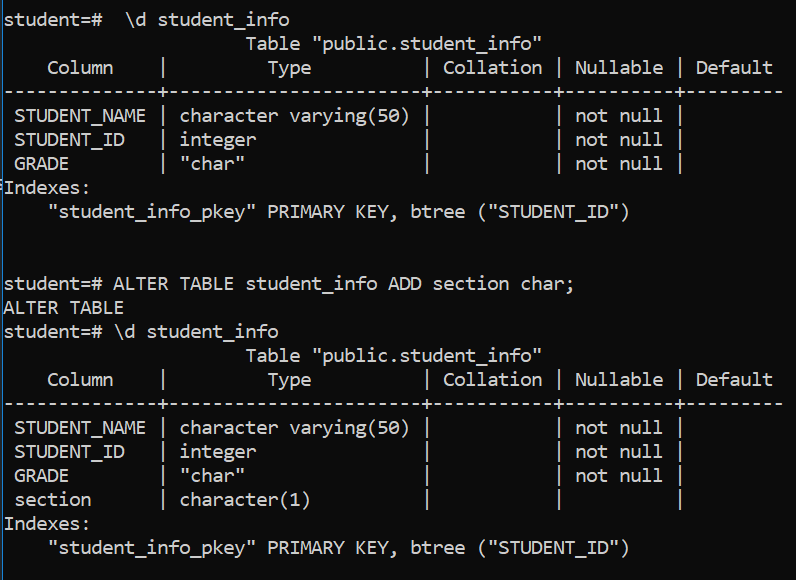
ALTER TABLE student_info ADD section char;
We get a note that table has been altered.
![]()
We can then display the table info. Notice the before and after table data in the image below.
Describing a Table in SQL Shell
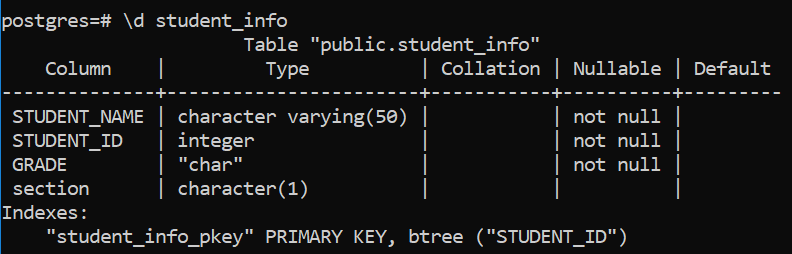
In PostgreSQL there is no 'describe' keyword to find the definition of a table. There are two ways to do it. In the psql terminal, we can type the table name with a \d.
postres=# \d student_info
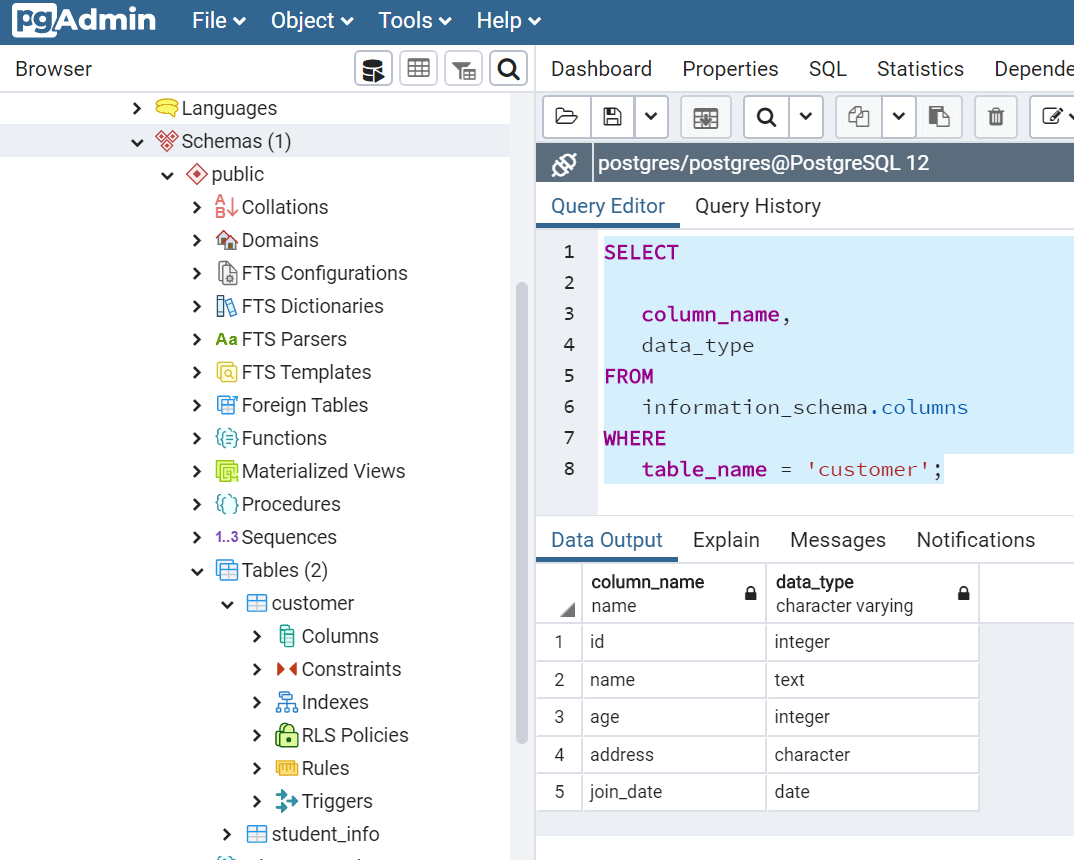
In pgAdmin, we can use a SQL query:
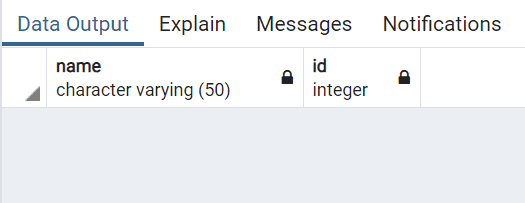
SELECT

   column_name,

   data_type

FROM

   information_schema.columns

WHERE

   table_name = 'customer';
Please note 'information_schema' is a system defined schema where information pertaining to all tables is stored. You can see the results below.
Altering a Table In PgAdmin
Right click the table, and navigate to Databases-> Target Database-> Schemas-> Target Schema->Tables- >Target Table->Properties.
Dropping a Table
The 'DROP TABLE' statement is used to drop a table when it is no longer needed.
Syntax:
DROP TABLE table_name;
Sample code:
DROP TABLE student_info;
This drops the table.

We can confirm the deletion of the table.
![]()
Drop Table In PgAdmin
Choose the table in PgAdmin, and navigate to Databases->Target Database->Schemas->Target Schema->Tables->Target Table->Delete/Drop.
Truncate Vs Truncate Cascade Table
TRUNCATE statement is used to delete all rows/data in a table keeping the original table structure intact, is an option when table has no dependent objects.
TRUNCATE CASCADE is used to empty a table along with its dependent objects. For example a primary key-foreign key relationship exists between two tables. In this scenario if we try to execute TRUNCATE on the master table, system will throw an error because it's primary key is referenced as a foreign key in some other table.
TRUNCATE in PSQL shell:

Syntax:
TRUNCATE TABLE table_name;
Sample code:
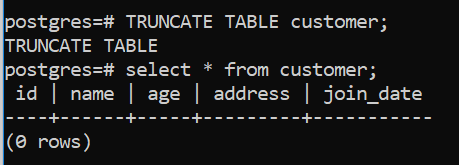
TRUNCATE TABLE customer;
After the command, we see all data is deleted.
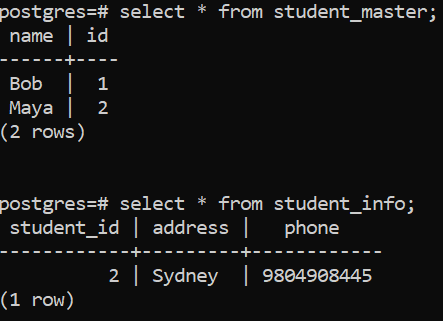
TRUNCATE CASCADE in PSQL shell: Here is our table with rows i nit.
On executing Truncate on the student_master, system reports an error as explained above.

Syntax:
TRUNCATE TABLE table_name CASCADE;
Sample code:
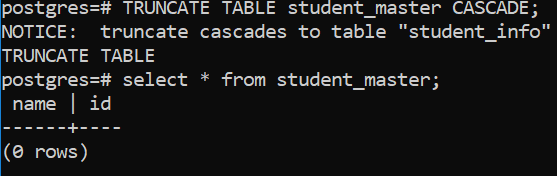
TRUNCATE TABLE student_master CASCADE;
This is the table after truncating.
For TRUNCATE in PgAdmin: Pick the table in PgAdmin, and navigate to Databases->Target Database->Schemas->Target Schema->Tables->Target Table->Truncate.

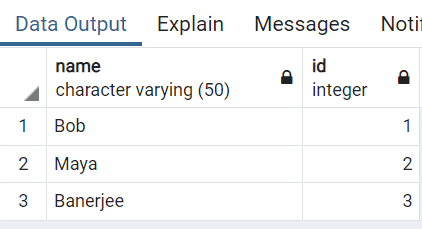
We can see the table before truncating it.
After truncate, there is no data.
TRUNCATE CASCADE in PgAdmin: Pick the table in PgAdmin, and navigate to Databases->Target Database->Schemas->Target Schema->Tables->Target Table->Truncate Cascade.
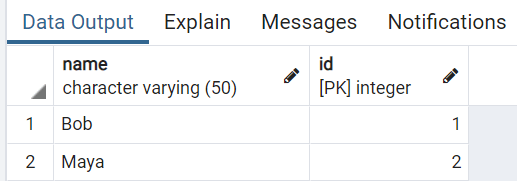
The parent table has 'id' as its primary key.
The child table whose column 'student_id' is referenced as a foreign key with the parent table's primary key 'id'
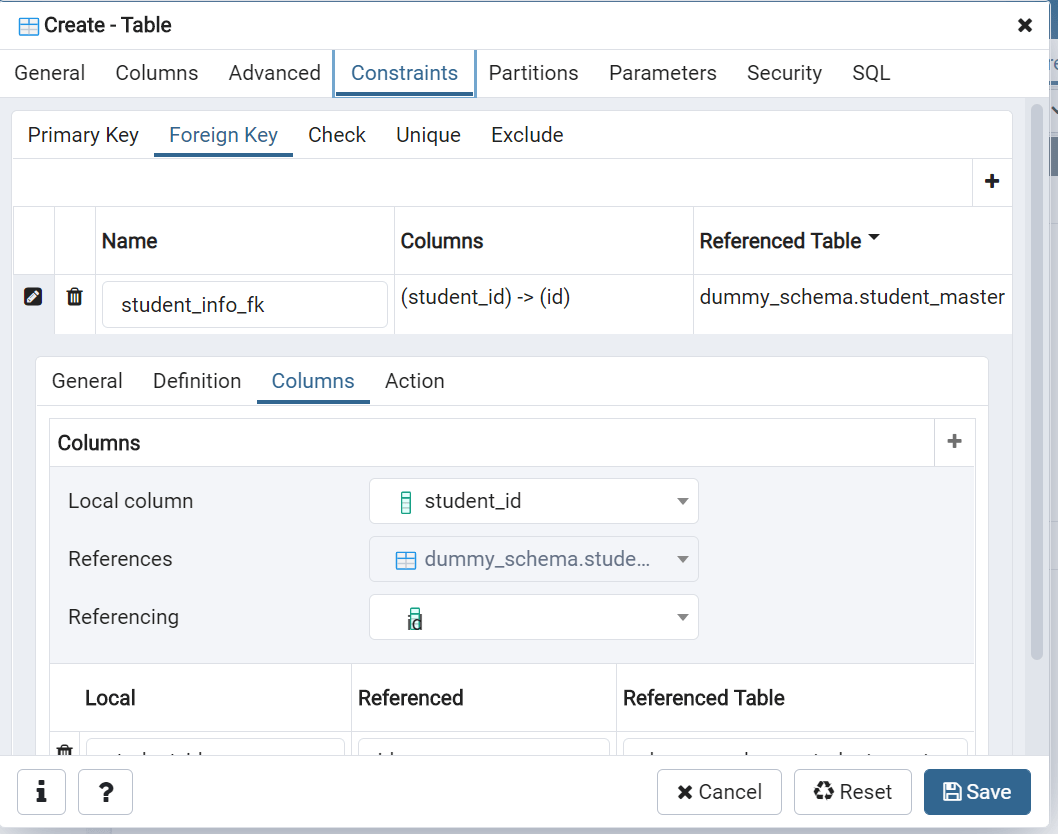
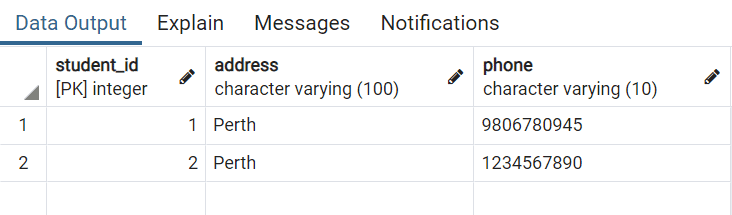
Data exists in both the tables before 'Truncate Cascade'
On executing Truncate on the student_master, the system reports an error as explained above.

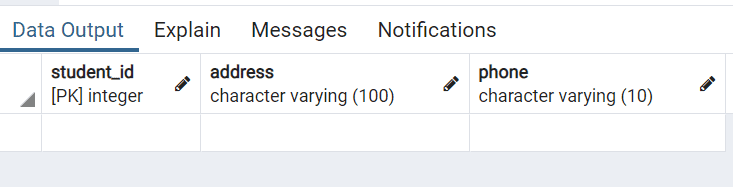
Executing Truncate Cascade, both the parent and child tables are truncated.
Conclusion
This article gives an overview on the different aspects of DDL statements in PostgreSQL. We show how to construct a relational database and add objects inside it with the help of schemas and tables. We hope this article will help you get started on your journey.