
In the previous level of this Stairway, we looked at maintenance plan jobs, and how maintenance plans are likely to create multiple jobs, with multiple schedules, to support a single maintenance plan. You also looked at the SSIS subsystem briefly, and examined some of the properties of maintenance plan job steps. In this final step, you will examine MSX/TSX, the multi-server scale-out system for SQL Server Agent. The capabilities of MSX/TSX allow you to run jobs on multiple systems and consolidate the job results and history onto a single SQL Server instance.
Multi-Server Administration using MSX/TSX - Concepts
The multi-server administration feature, also known as the MSX/TSX feature (which stands for Master/Target Servers) has been available for quite a few versions of SQL Server. MSX/TSX provides the capability to define SQL Server Agent jobs on a master server, and then have those jobs run on one or more target servers. Those target servers can also then send events back to the master server, so that you can have a single view of your SQL Server Agent events across multiple servers.
There are a few terms and concepts you’ll need to know in order to properly understand the MSX/TSX environment. These include:
Master Server (MSX)
The master server (MSX) is the host server where jobs, job steps, and schedules are created. Additionally, job results will flow from the target server(s) to the master server. You can view results from all job on the master server.
Target Server (TSX)
The target server (TSX) consists of one or more servers that are configured to accept jobs from a master server, and to report the results when those jobs are run back to the master server (MSX). The target servers will occasionally connect to the MSX server to download jobs, and updates to jobs.
Polling Interval
The TSX connection frequency to the MSX servers for downloads/updates happens at the polling interval. The polling interval by default is one minute, meaning that if you make a change to a job on the MSX server, it could be a minute before the TSX server will check for updates to the job from the MSX server. You can change this interval based on network load or your need to keep the servers in sync more or less frequently.
Note: In SQL Server 2008, a new policy-based management capability was introduced. That feature is completely unrelated to MSX/TSX.
Version compatibility between versions of SQL Server is a key issue with MSX/TSX configurations. As long as your servers are all SQL Server 2008, then you don’t need to be concerned with this. However, if you are like most people and have a mixed environment, you should carefully review the MSDN compatibility charts for compatibility between master and target servers. In some cases it even depends upon the service pack level of the down-level server. You can read more about this at http://msdn.microsoft.com/en-us/library/ms191305.aspx.
Setup and Security Considerations
For an MSX/TSX environment to succeed, a couple of security considerations must be addressed. There are security considerations for the SQL Server Agent Service Account, and there are encryption considerations for communications between the MSX and TSX Servers.
Service Account Selection
The default service accounts that are frequently used, such as Network Service, may or may not be appropriate for your MSX/TSX environment. Because you will need the SQL Server Agent service to communicate with other servers and/or instances, you will need an account that you can provision correctly over a network. Local-only service accounts should not be used, because you will have difficulties connecting to remote servers. Domain User accounts, or machine accounts that are provisioned over the network, are better choices. In all cases, it is not a requirement that the service account be a windows administrator on the server(s) being used in the MSX/TSX environment.
Encryption Options
You can edit the registry on your SQL Server instance(s) for MSX/TSX if you want to disable encryption of communications between servers. This is not recommended, but if you must do so review the documentation at http://msdn.microsoft.com/en-us/library/ms365379.aspx and consider carefully what you are doing. This will most likely be a consideration with very old MSX/TSX server environments, such as SQL Server 2000 systems.
Do note that if you are trying to configure this on a home system, or system without security certificates, you will need to set the registry keys to disable encryption or the MSX/TSX setup will almost certainly fail.
Setting up MSX/TSX
For the purposes of this step, the demo environment will consist of three instances of SQL Server on a single machine. These instances should all be registered in advance in SSMS. The two additional instances here will be named “Target1” and “Target2”, and the default instance will be the MSX or master server.
The easiest and recommended way to set up an MSX/TSX environment is to use the Master Server Wizard. Right-click on your SQL Server Agent node in SSMS, and select Multi Server Administration => Make this a Master… from the menu (as shown in Figure 1).
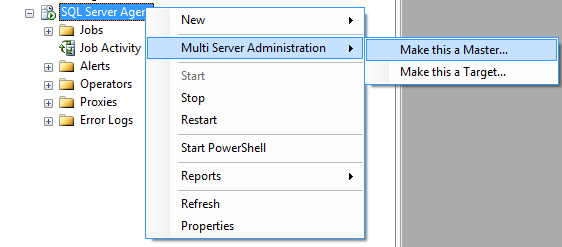
Figure 1: Starting the Master Server Wizard
This will launch the Master Server Wizard, and you will see the welcome screen as shown in Figure 2. Click Next, and you are presented with the Master Server Operator screen, as shown in Figure 3. Enter the appropriate contact information, and then click Next.
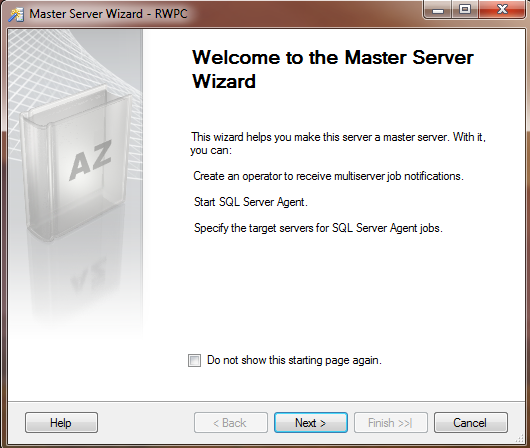
Figure 2: Master Server Wizard Welcome Dialog
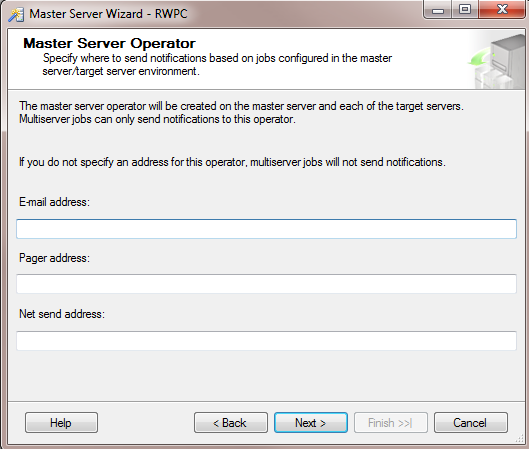
Figure 3: Master Server Wizard – Specify Operators for Contact
Click Next, you are presented with the Target Servers dialog (Figure 4). You will probably have to register your connections in this dialog, so click Add Connection… and add the appropriate connection. For the purposes of this step, you will use the local instances Target1 and Target2. You can always come back later and add or remove servers or instances.
Click Next again, and your selected Target Server connections are validated, as shown in Figure 5. Click Close, and you will be requested to specify login credentials. If possible, accept the defaults and use the service accounts to connect with Windows Authentication, as shown in Figure 6. If you have already created logins to all instances for the service accounts you don’t need to have the wizard create the logins for you.
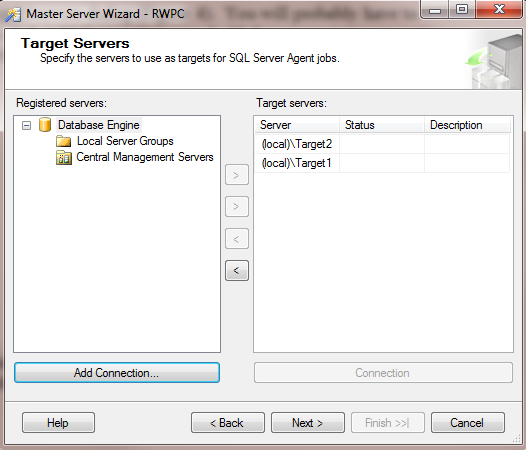
Figure 4: Master Server Wizard – Specify Target Servers
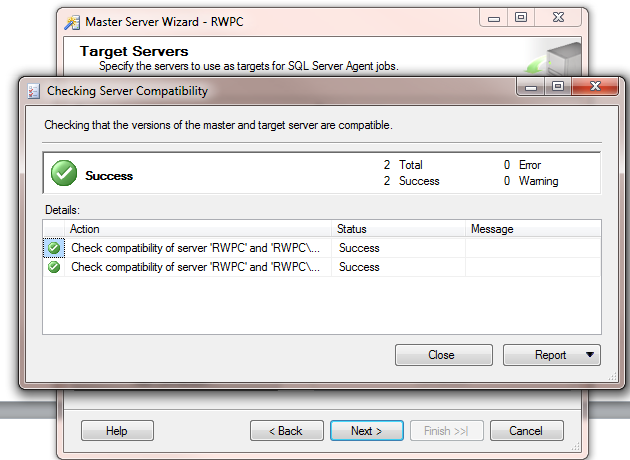
Figure 5: Master Server Wizard – Specify Target Servers Validated
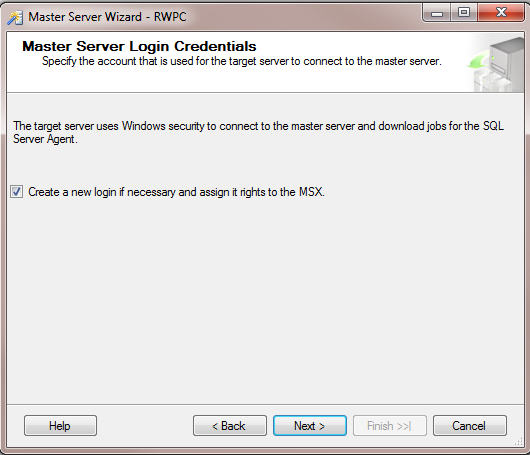
Figure 6: Master Server Wizard – Login Credentials
Click Next, and Finish, and you should see something like Figure 7 with the wizard completed, your default instance a master server, and your two additional instances as target servers. You may get errors, as shown in Figure 7, with the login creation. If that happens, you should ignore the errors as long as the enlist process works. The errors may simply mean that the service accounts are already provisioned.

Figure 7: Master Server Wizard – Finalizing the Wizard
If you now refresh your SQL Server Agent nodes on your instances, you will note that SSMS shows the MSX/TSX roles for each node, as shown in Figure 8.
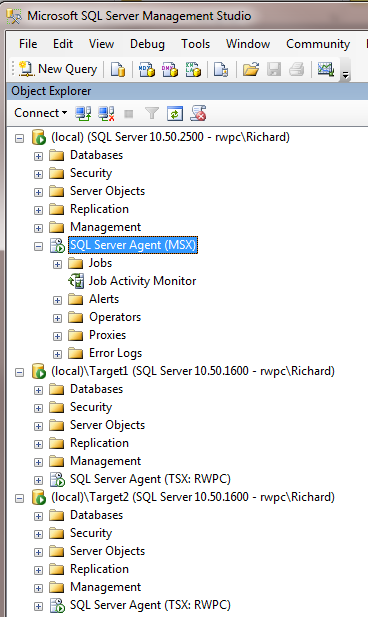
Figure 8: SSMS after configuring MSX/TSX
Creating an MSX/TSX Job
Now that you have the environment configured, it’s time to create a master job that will run on all servers, and report status back to your master server. Create a new job on your master server, with a simple single step (a T-SQL job step with SELECT * FROM sys.all_objects in master will do nicely). Now, click on the Targets tab (as shown in Figure 9), and select the two target servers. Click OK, and the job is created on the master server.
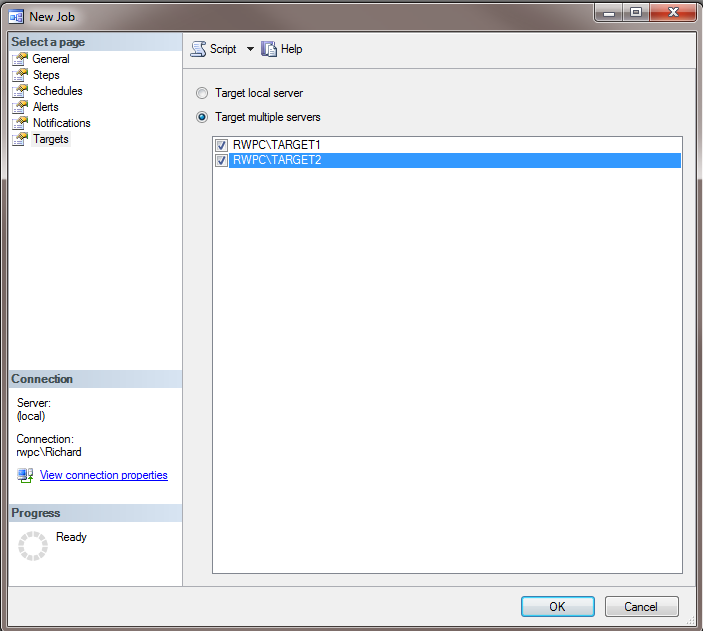
Figure 9: Making a job run on the target servers
Wait at least one minute, for the replication of the job to the target servers to occur, and then refresh your SQL Server Agent Jobs nodes, and you’ll see something like Figure 10. Notice that on the master server, you now have a Multi-Server Jobs folder for the MSX jobs, and the jobs just show up as regular jobs on the target servers.

Figure 10: The MSX job has replicated to the TSX servers
Now, run the job on one of your TSX servers. Wait one minute or so, and then go back to your Master Server, right-click on the job MSXTest, and select View History. You will now note that the history from each TSX server is reflected (Note the Server field in the Log File Viewer), as shown in Figure 11.
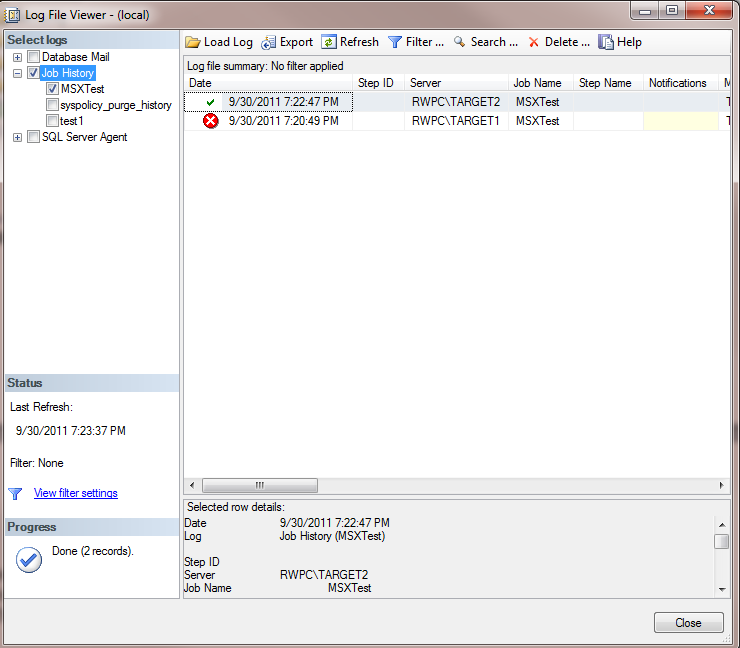
Figure 11: Viewing Job History on the master server
Event Forwarding
You can also configure SQL Server error events to be forwarded to a central server, such as your MSX server. This will generate additional network traffic, but you can then view all of the relevant events from your TSX servers on the central server as well. Right-click on the SQL Server Agent node in SSMS, select properties, and then the Advanced tab. You can select the option to “Forward events to a different server”, enter your server name, and then configure if you want all events forwarded or only errors of a particular severity. For example, Figure 12 shows a configuration that only forwards unhandled system events (severity 17 or higher) to the MSX server.
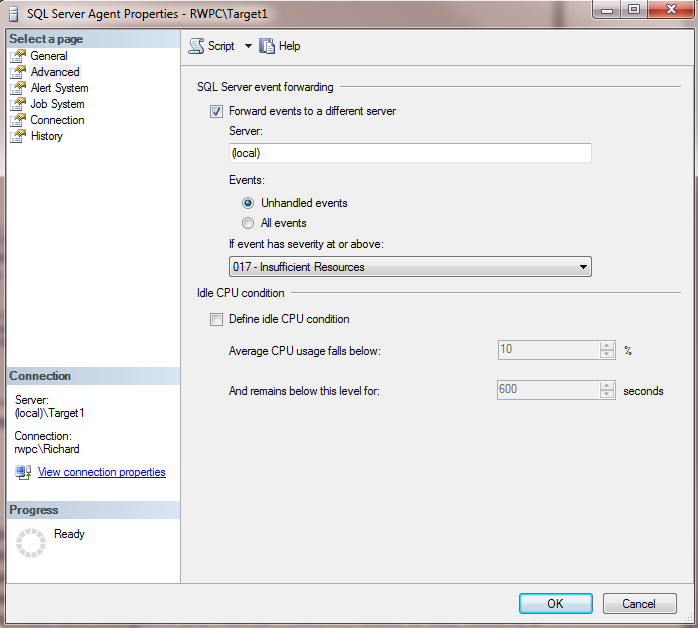
Figure 12: Configuring Event Forwarding
What’s Next
This step covered the Multi Server Administration feature of SQL Server Agent, MSX/TSX. You can use an MSX/TSX environment to centralize job administration and management, as well as centralized event reporting. Using this capability reduces the number of servers to which you must connect to monitor the state of your systems.
Thank you for taking the time to read this SQL Server Agent Stairway!