

Microsoft has released a version of SQL Server 2017 for Linux. I have been working with SQL Server on Windows for the last 10 years. I don’t have much experience with Linux, but I have decided to try to use it. Many years ago I had some experience with installing and managing Oracle 9i on Linux. I know some of the basic Linux command line tools and can copy files, use vi, and am aware of the Linux file system structure. If you are not familiar with Linux you can follow my instructions and try this new Microsoft product as I did.
Preparation steps
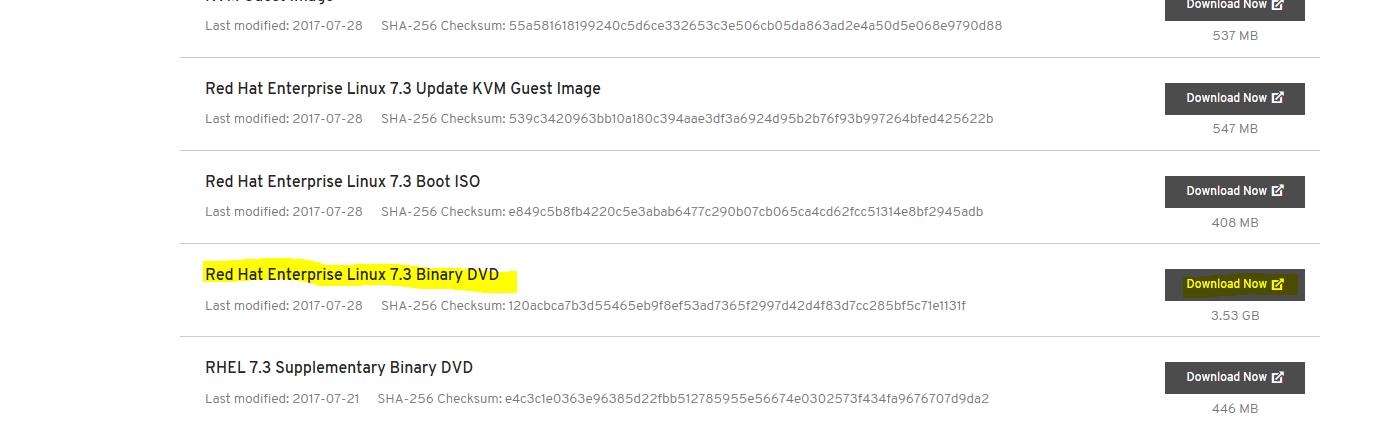
First, I downloaded the binary distribution package, Red Hat Enterprise Linux 7.3 Binary DVD, from the official web site from Red Hat. In order to download the evaluation version of Red Hat you must be registered on the web site and confirm your e-mail. Please do not skip the registration step; it will be required for installation of the database tools.
I have installed this OS on a virtual server with 3 GB of RAM. The minimal requirements for SQL Server on Linux is 2 GB. I chose 3 GB of RAM because I wanted to install SQL Operations Studio on the server. The filesystem I used for installation was XFS, which is the default for Red Hat Enterprise Linux 7.3. SQL Server on Linux supports only certain file systems - XFS or EXT4.
The user account I will be using is ‘sqlserver’. A full and up to date list of requirements can be found on the official Microsoft web site at: https://docs.microsoft.com/en-gb/sql/linux/sql-server-linux-setup#system.
Installing and Configuring Linux
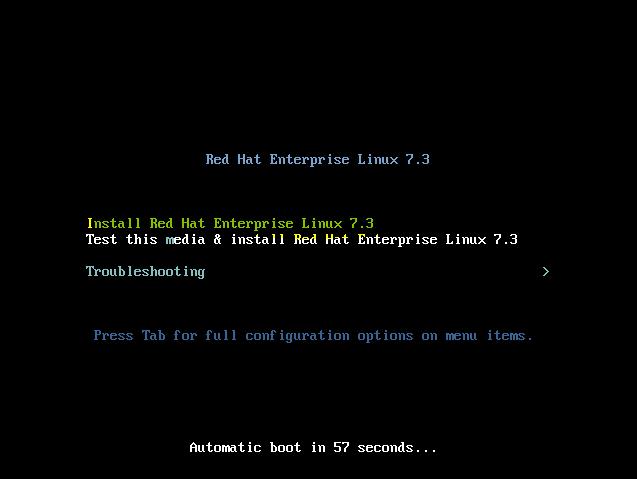
For my particular installation I used Oracle VM VirtualBox but you can use any virtual or physical environment you are familiar with. I have dedicated 60 GB disk space, 3 GB RAM and 2 CPU for that particular box. Insert virtual or physical DVD in your new server, start it, and then chose “Install Red Hat Enterprise Linux 7.3” when requested.
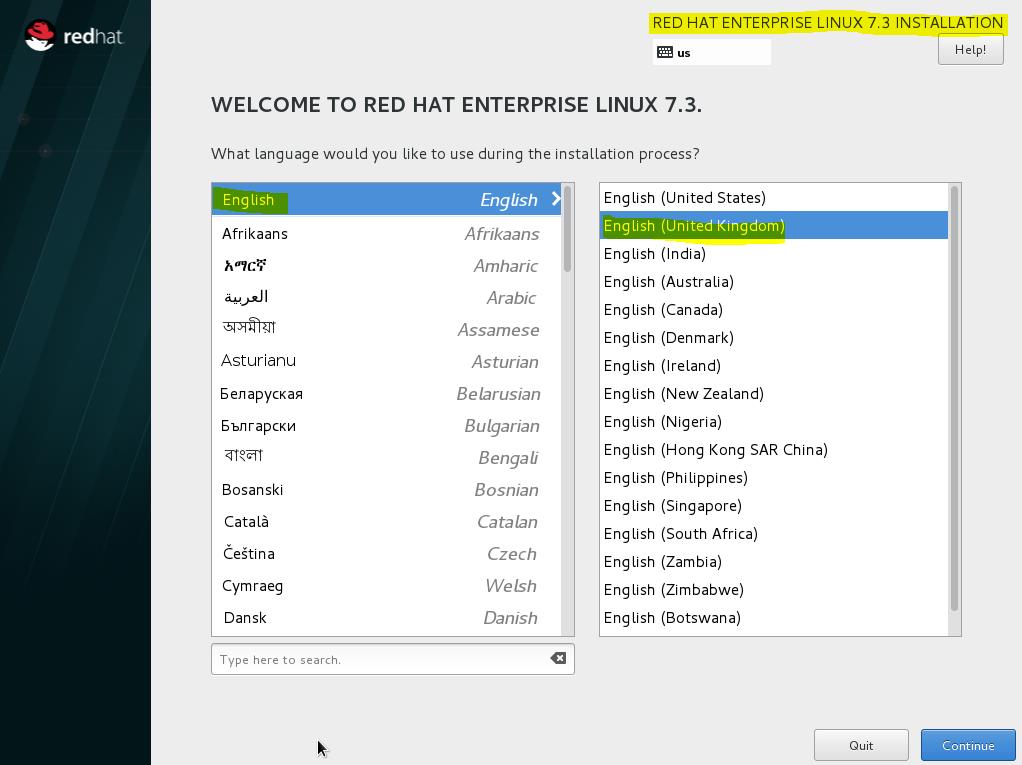
Choose a language and a keyboard layout for your new server.
I used all the default options for my server apart from the “Software Selection”. If you are familiar with Linux you can use non-default options for disk partitioning but please make sure that the options you chose are comply with the Microsoft requirements for a file system.
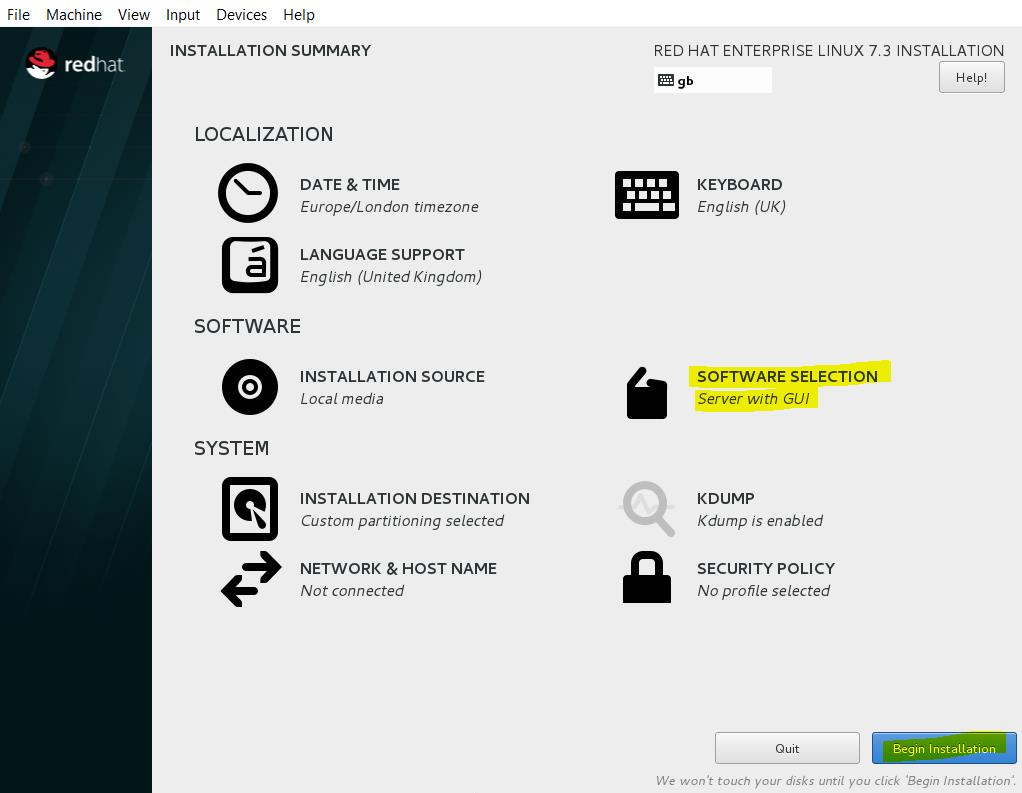
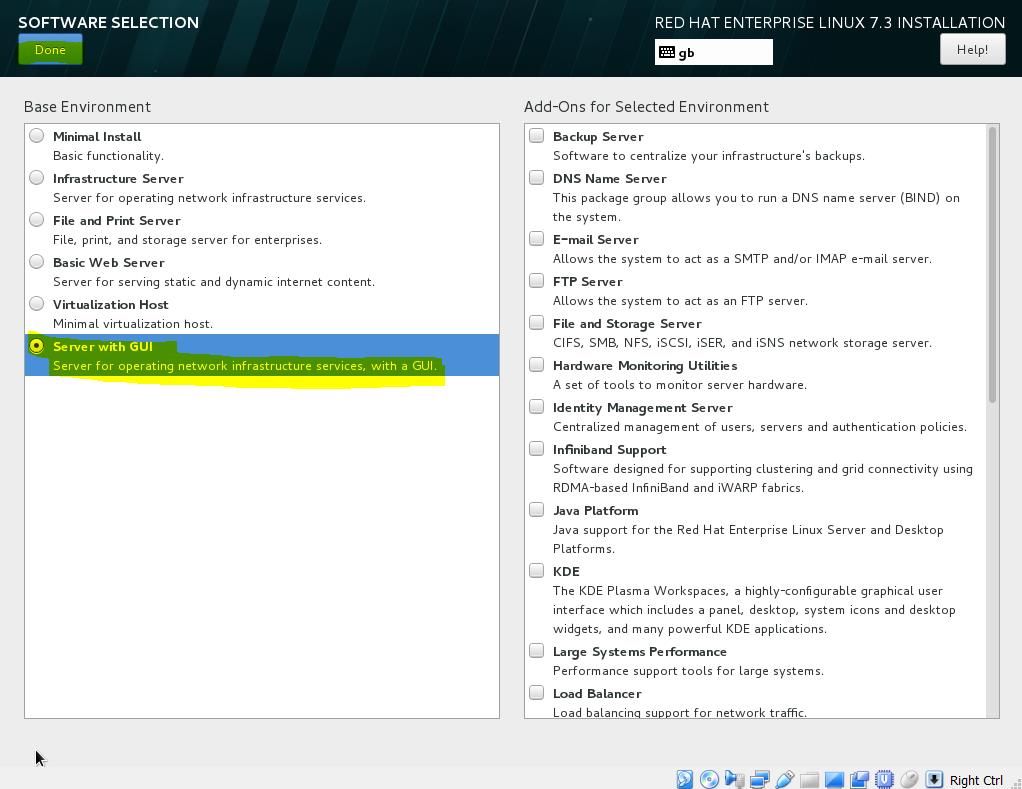
In “Software Selection” I chose “Server with GUI” without any additional services.
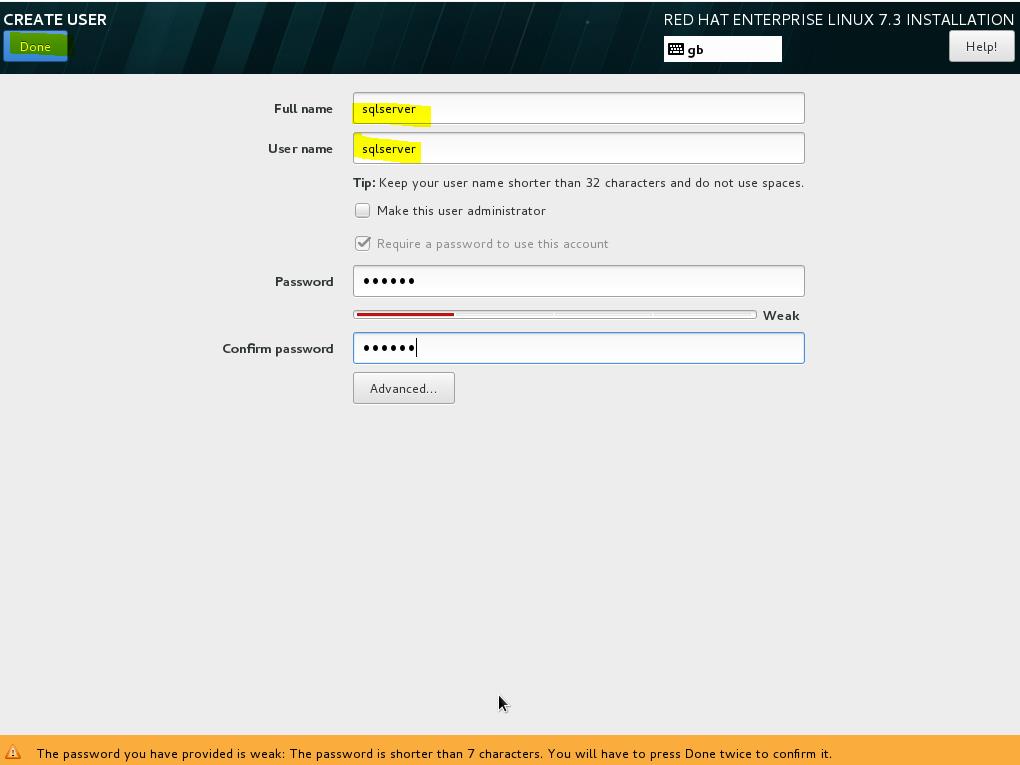
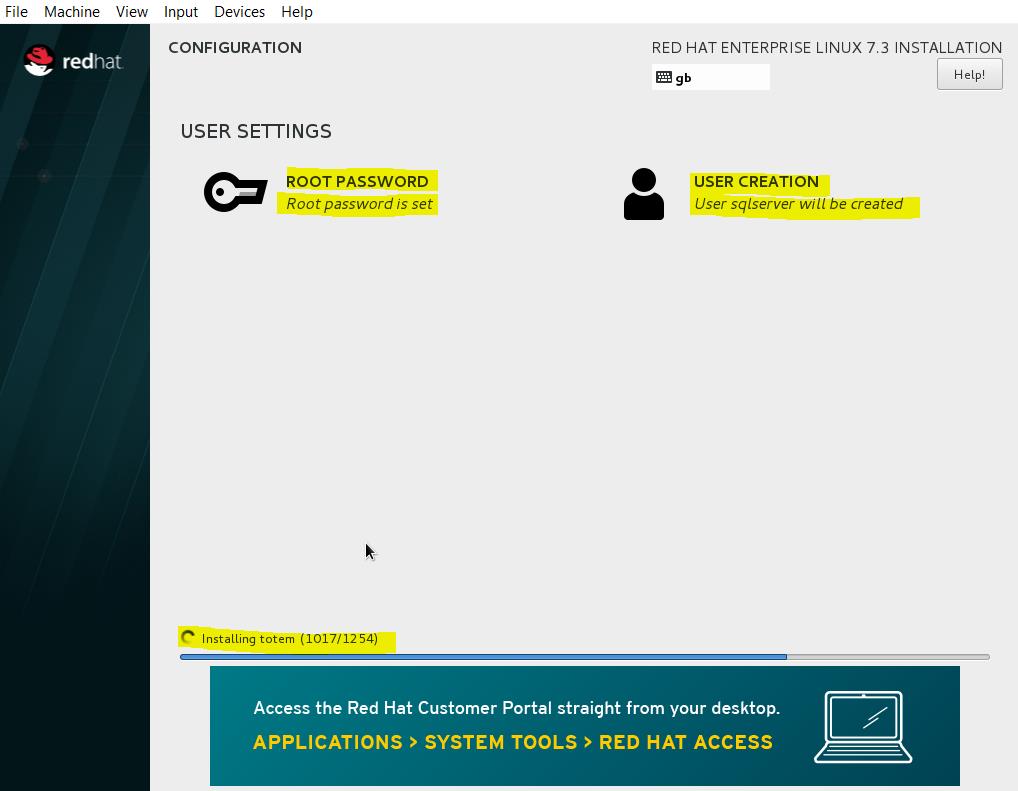
I created the user, sqlserver, because it is not recommended to use the root account for non-administrative tasks on Linux.
I set up the ‘root’ password while my installation was running.
SQL Server installation
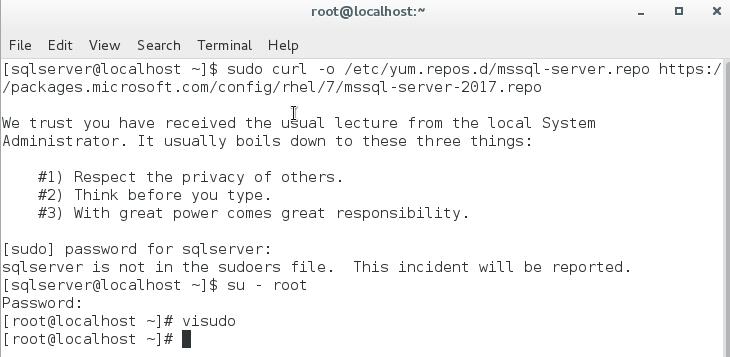
The first step is to download the Microsoft SQL Server Red Hat repository configuration file. I quickly realized that the user account I setup did not have the necessary permissions.
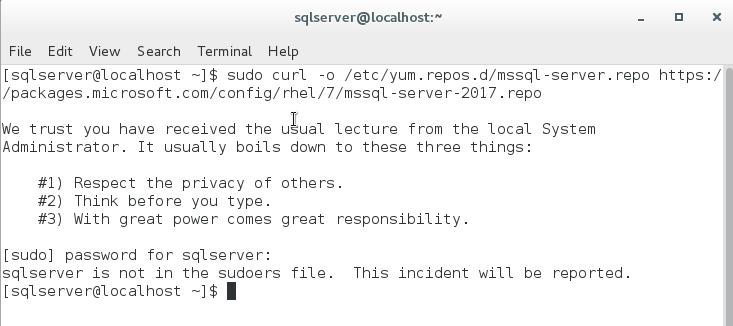
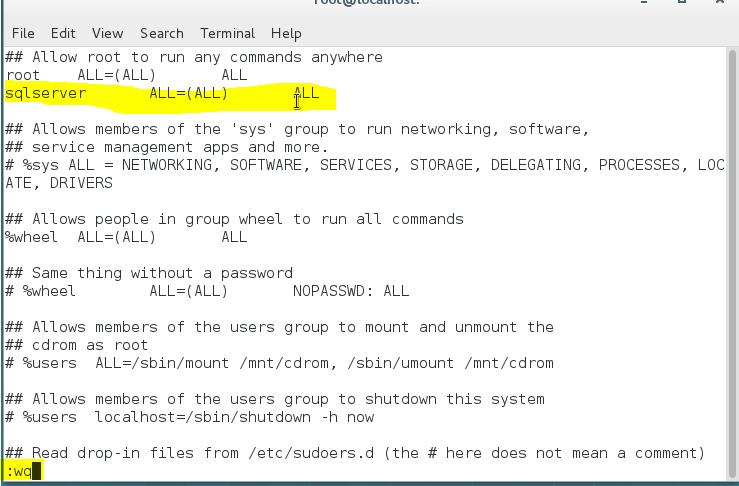
Let’s fix it. In this case I needed the root password. I switched to root using the command, su - root. And I executed ‘visudo’ under the root account.
I used visudo to add the new account. So I have inserted a line “sqlserver ALL=(ALL) ALL” in the sudoers file. In order to insert a line in vi you can use the “i” command. If you want to save content of the file can use vi command “:wq”. May be that is not the best approach, but I am not a Linux specialist. Anyway, that did work for me.
After that I found that network settings were incorrect on my Linux box. How to configure and troubleshoot a network on a Linux box is outside of the scope of this article and there probably won’t be the same problem in your case. Finally, I have managed to download the Microsoft SQL Server Red Hat repository configuration file with this command:
sudo curl -o /etc/yum.repos.d/mssql-server.repo https://packages.microsoft.com/config/rhel/7/mssql-server-2017.repo

The next step was the actual installation of MS SQL Server.
sudo yum install -y mssql-server
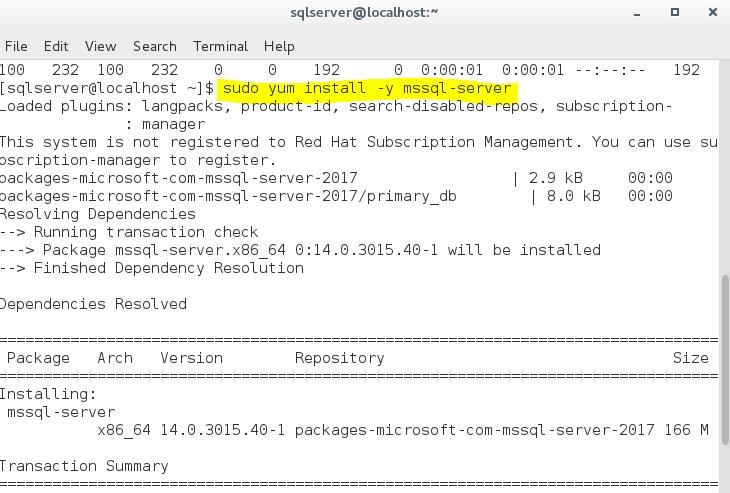
Looks good so far, I have managed to install MS SQL Server on Red Hat Linux 7.3.
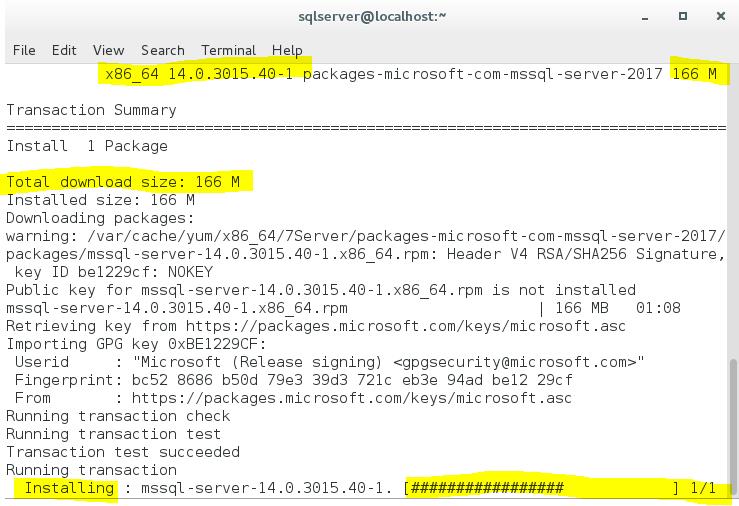
The SQL Server package version 14.0.3015.40 was installed on my Linux box.

After the package was installed, I needed to configure the SQL Server service on the box.
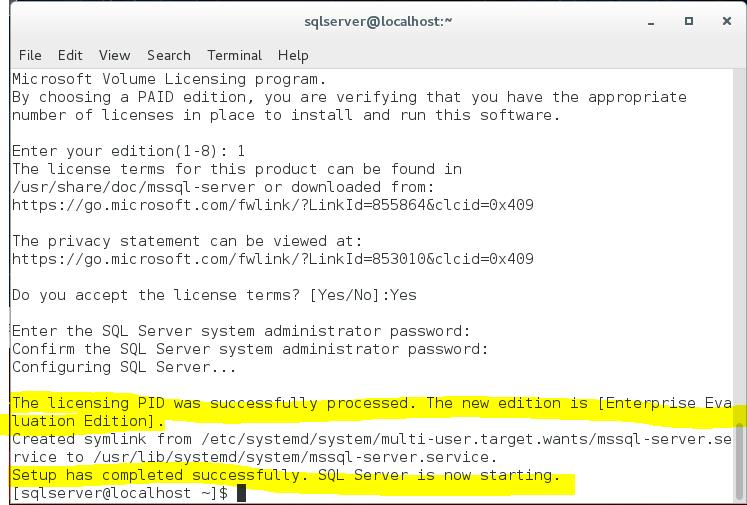
sudo /opt/mssql/bin/mssql-conf setup

I was asked about the edition of SQL Server. My choice was the Evaluation Edition, and I accepted the license terms. I also was asked to provide the SA password for the instance.
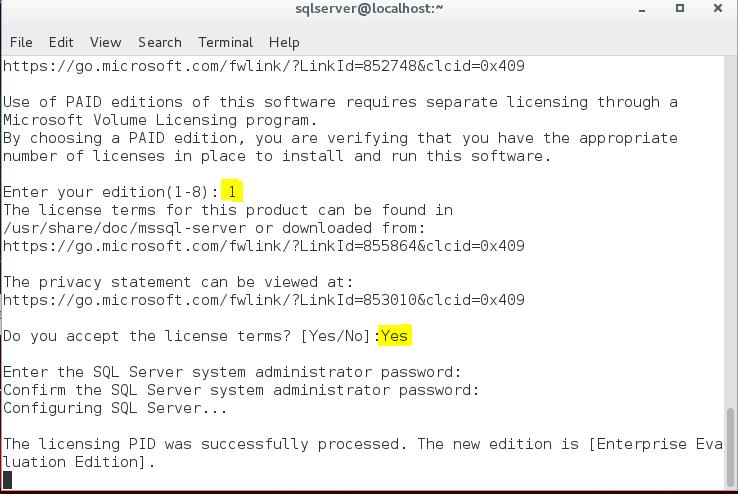
And now I completed my first installation of the SQL Server instance on Linux.
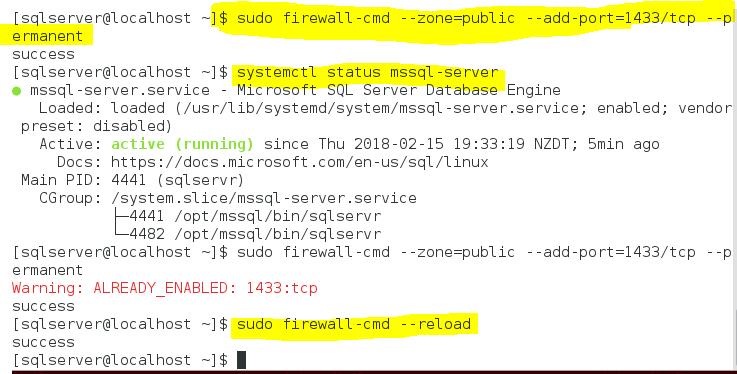
Let’s configure the firewall and check that the SQL Server instance is running.
sudo firewall-cmd --zone=public --add-port=1433/tcp –permanent
sudo firewall-cmd –reload
systemctl status mssql-server
The common command line tool I used with SQL Server on Windows is sqlcmd. But it was not installed on my Linux box.

Installing the SQL Server Command Line Tools
As I figured out, every installation on Linux starts with downloading a repository file.
sudo curl -o /etc/yum.repos.d/msprod.repo https://packages.microsoft.com/config/rhel/7/prod.repo

The prerequisite package for installing MS SQL Server command tools is ‘unixODBC-devel’. But I have bumped into another unexpected problem. My system was not registered with Red Hat. In order to register my Linux box, I used the gui tool ‘subscription-manager-gui’. How to register your system with Red Hat is out of scope of this article, but all the required information is on the Red Hat web site - https://www.redhat.com.
I registered, then I successfully installed the ‘unixODBC-devel’ package.
sudo yum install -y unixODBC-devel

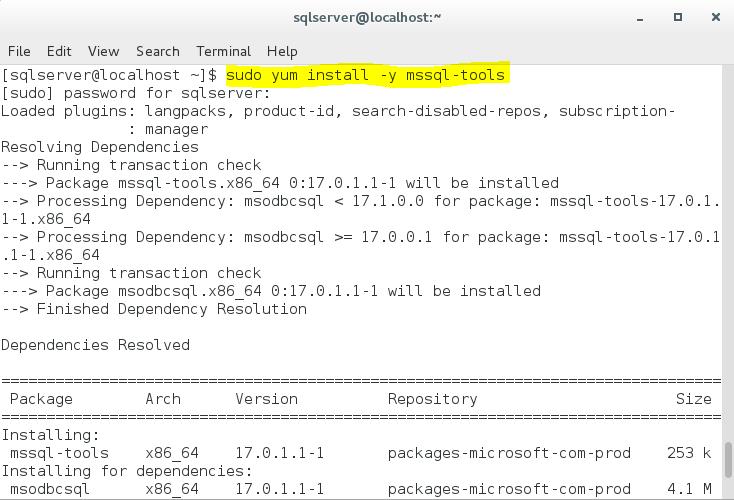
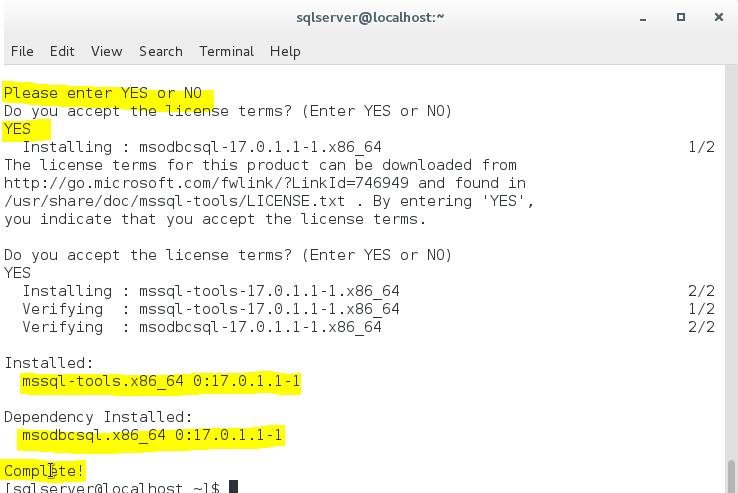
Now I can install the SQL Server command line tools.
sudo yum install -y mssql-tools
Everything went smoothly. I accepted the license and the installation completed successfully.
I added the path, ‘/opt/mssql-tools/bin’, into the ‘PATH’ variable in my profile file in order to avoid typing the full path when I need sqlcmd.
echo 'export PATH="$PATH:/opt/mssql-tools/bin"' >> ~/.bash_profile
echo 'export PATH="$PATH:/opt/mssql-tools/bin"' >> ~/.bashrc
source ~/.bashrc

This sounds strange, but I can try ‘sqlcmd’ on Linux.
sqlcmd -S localhost -U SA
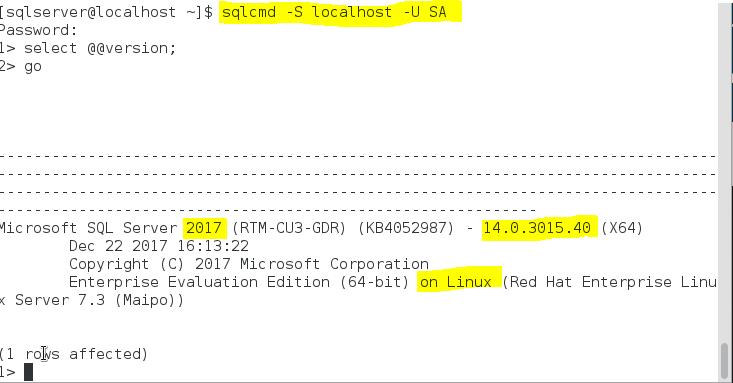
It works. I can confirm that I have successfully installed SQL Server 2017 14.0.3015.40 on Red Hat Linux 7.3.
Install SQL Server 2017 Agent
For some reason SQL Server 2017 is a separate product for SQL Server 2017 on Linux. Let’s install it.
sudo yum install mssql-server-agent
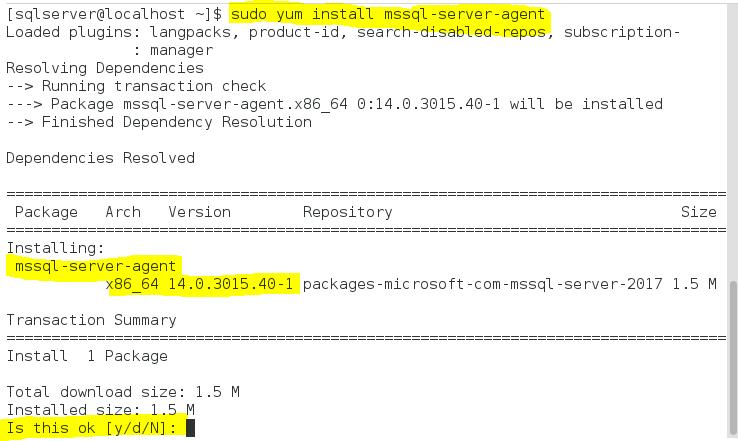
The installation will ask you to confirm your choice and it will notify you that you need to restart the SQL Server instance.
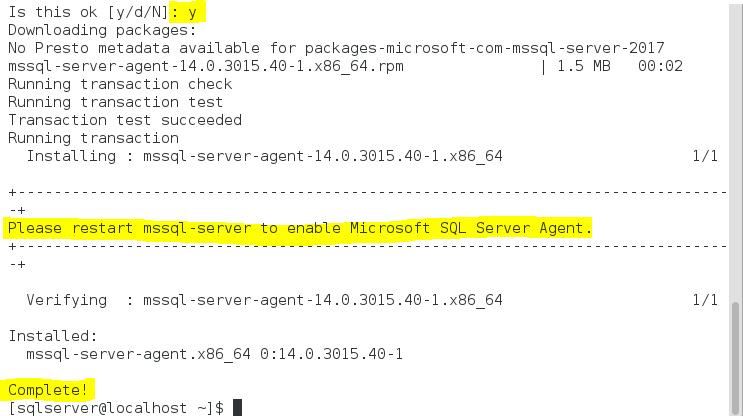
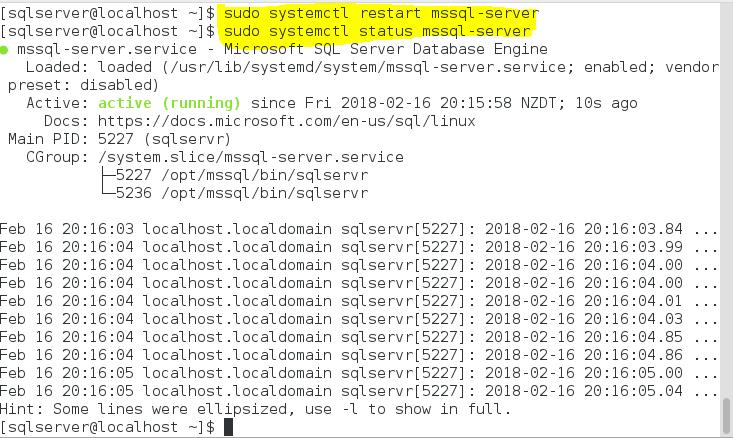
Restart the instance as requested.
sudo systemctl restart mssql-server
systemctl status mssql-server
Install SQL Operations Studio
Download the rpm distribution package of SQL Operations Studio from the Microsoft web site - https://go.microsoft.com/fwlink/?linkid=868001. Install the prerequisite package for Red Hat Linux, which is ‘libXScrnSaver’. You can use the following command in a Linux terminal window:
yum install libXScrnSaver 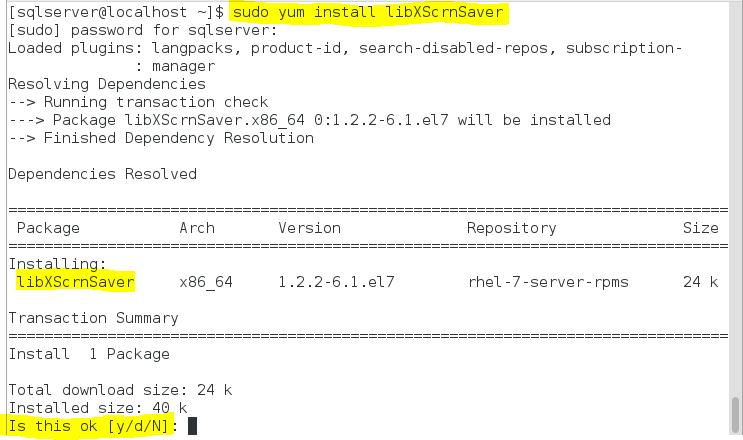
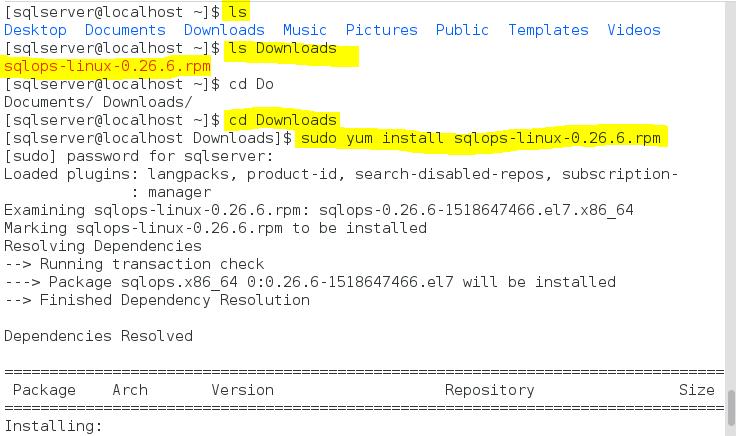
When the prerequisite package is installed, you can install the rpm package SQL Operations Studio. Presumable you stored the downloaded rpm package in the ‘Downloads’ folder in your home directory. You can switch to that directory using the following terminal command:
cd Downloads
In order to check what is in that directory you can use the ‘ls’ command. In my case the name of the rpm file is ‘sqlops-linux-0.26.6.rpm’. In order to install that rpm package I used the following command:
sudo yum install sqlops-linux-0.26.6.rpm
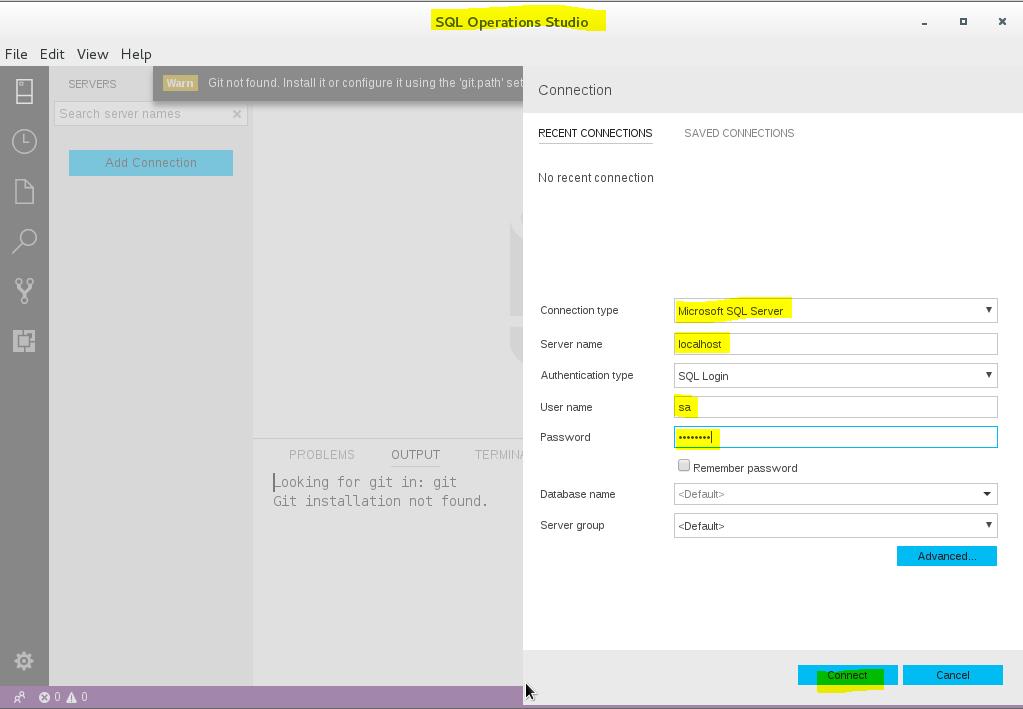
The executable file ‘sqlops’ was installed in the ‘/usr/bin’ directory so I can invoke the application by executing the command ‘sqlops’ in a Linux terminal window.

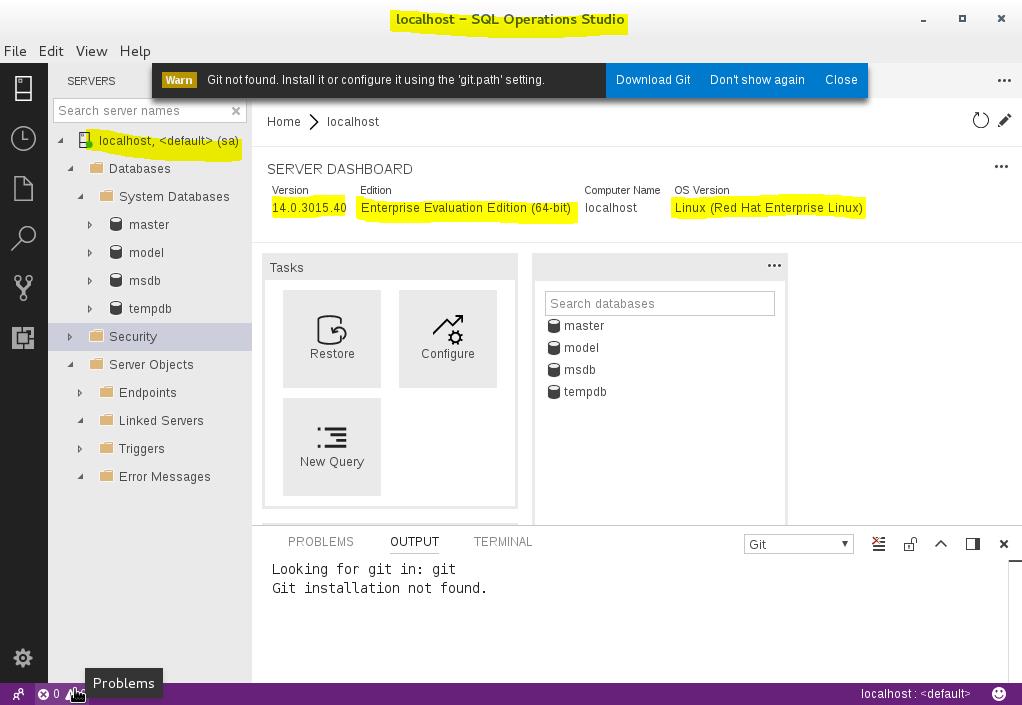
It starts a GUI application – ‘SQL Operations Studio’. The application asks me to create a connection to a SQL Server instance. I created a connection to the default instance on the local computer.
Now I can see databases on the instance and execute T-SQL commands in SQL Operations Studio against that SQL Server instance.
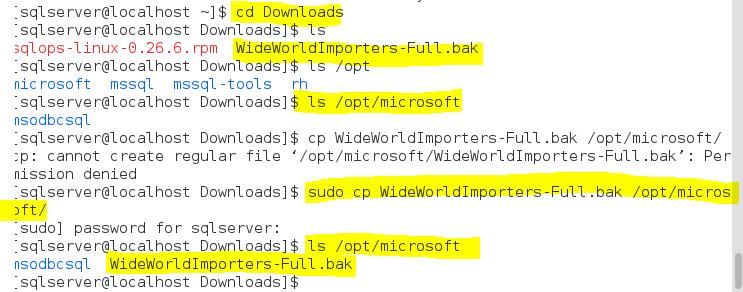
I also downloaded a backup of the Microsoft example database, ‘WideWorldImporters’, which I want to deploy on my Linux box. First, I copied the backup file in the directory where my MS SQL Server instance has access – ‘/opt/microsoft’. Then I used the following command:
sudo cp WideWorldImporters.bak /opt/microsoft/
Then I used the database restore tool from SQL Operations Studio, which is very similar to one you can see in SQL Server Management Studio.
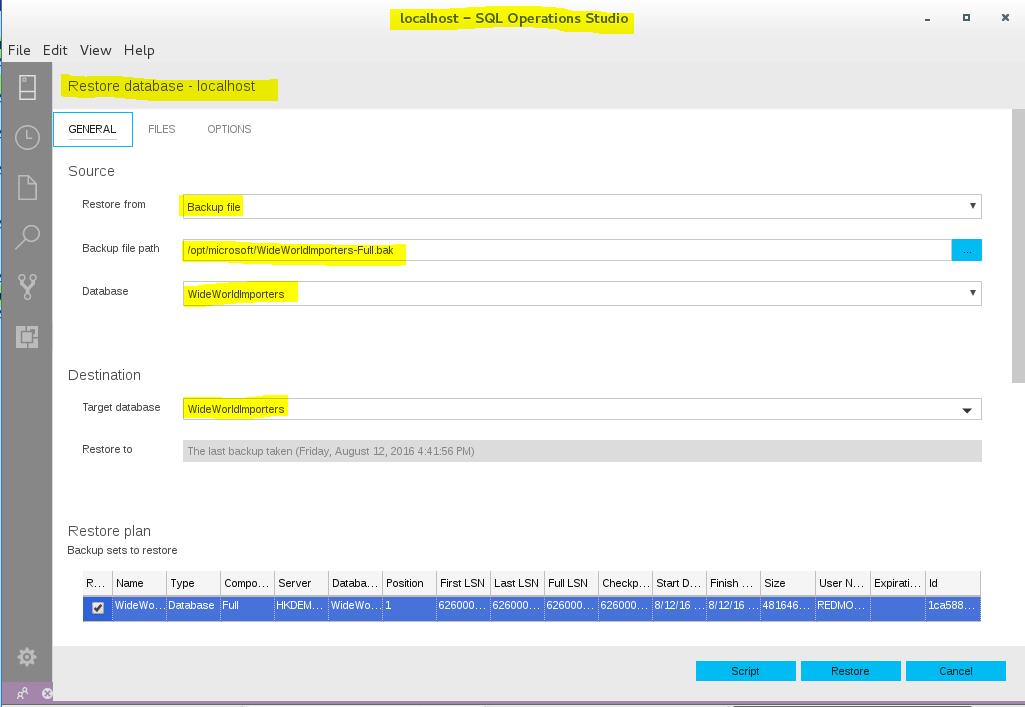
The only difference I have noticed is this dialog uses Linux file paths instead of Windows paths.

When the restore is complete, you need to refresh the list of databases in the SQL Operations Studio, and you will see the ‘WideWorldImporters’ database.
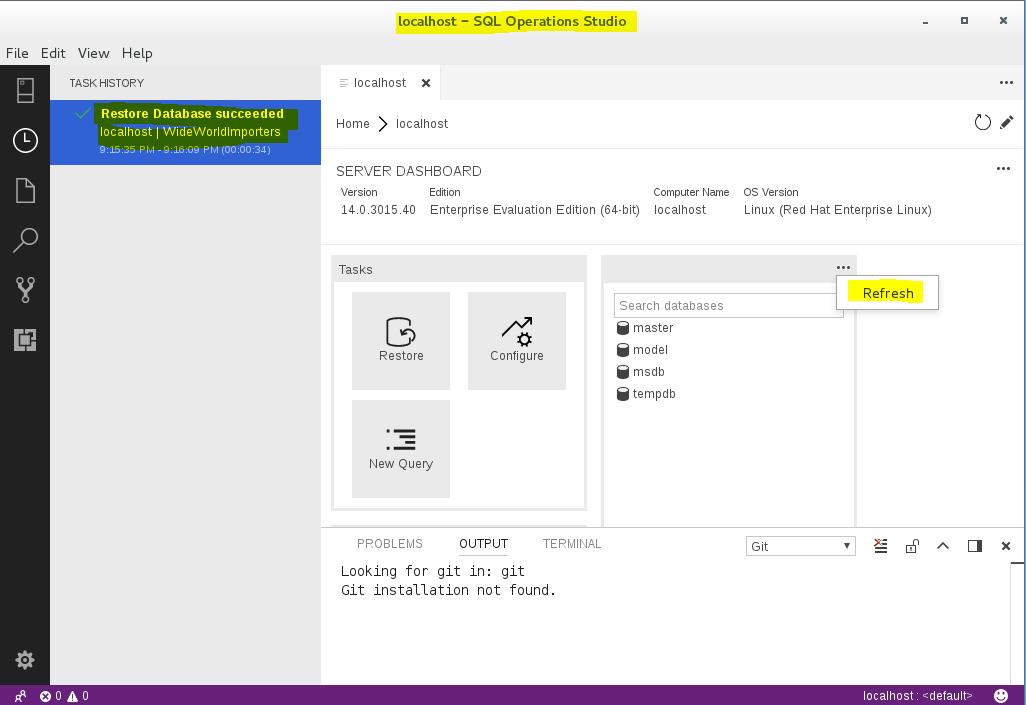
You can run a query against that database in the similar way as in SQL Server Management Studio.

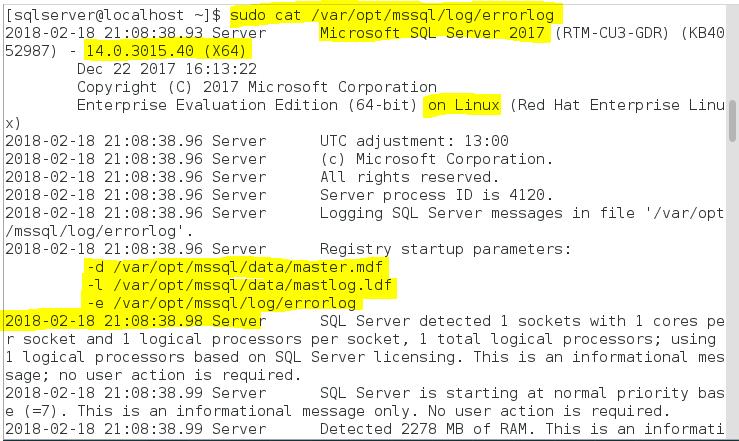
On my Linux box the error logs are located in the directory ‘var/opt/mssql/log/’.

The Error log on my Linux box looks very similar to what I see on a SQL Server instance on a Windows host.
Conclusion
It has become possible to deploy SQL Server in a Linux environment, but there are many limitations. The list of all features which are not supported by SQL Server on Linux is published on the Microsoft web site. Also, many supported features have limitations. Only certain versions of Linux are supported for MS SQL Server deployment, and the full list of supported platforms is published on the Microsoft web site.
What I personally didn’t like that the installation process is not unified with the Windows version. For example the rival company, which is Oracle, has so called universal installer that is unified among all platforms. I hope that will be taken into account and fixed in the feature versions.
Apart from limitations, SQL Server 2017 on Linux functions exactly the same way as SQL Server 2017 on Windows. If for some reason you cannot deploy Windows Server in your environment, you can always install SQL Server 2017 on Linux.

