

From SQL Server 2012 onwards, Microsoft introduced a new deployment model in SSIS, called the project deployment model. This new model has many benefits in managing SSIS project deployments, executions, and configurations. Every new version of SQL Server also upgrades the SSIS Catalog with new features. In this article, I will describe how we can migrate the SSIS Catalog from one SQL Server instance to another using the SSIS Catalog Migration Wizard.
The SSIS Integration Services Catalog consists of the following artifacts:
- SSIS Builds (.ispac files) - Contains several SSIS packages with project and package parameters.
- Environments - Stores configurations of SSIS projects. These variables are used to configure the SSIS project and package parameters of SSIS projects.
The need for this activity might arise when:
- you are migrating your SQL server to a new host OS.
- upgrading the SQL server to a newer version on a different machine.
- setting up a new SSIS environment from the existing setup, etc.
- you want to automate routine SSIS catalog migrations.
This quick utility will help you migrate the SSIS catalog in a just few clicks.
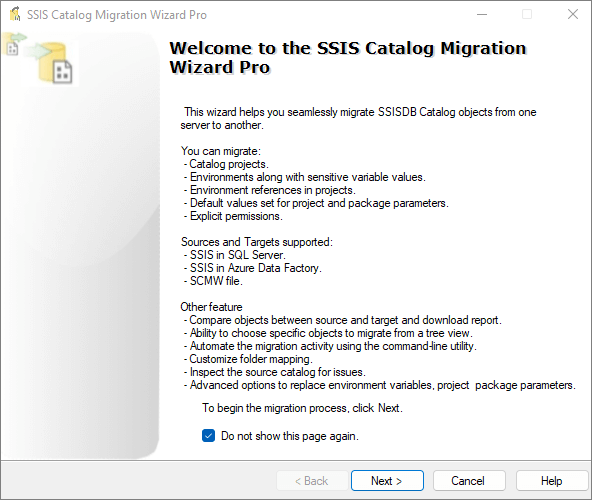
SSIS Catalog Migration Wizard
The welcome screen for the wizard is shown below:
The wizard supports the following source and target types.
- SSIS for SQL Server - SSIS catalog enabled in SQL Server ( versions 2012, 2014, 2016, 2017, 2019, 2022(preview)).
- SSIS for Azure Data Factory - This is used when you want to run SSIS packages in Azure using Azure data factory pipelines or Azure SQL managed instance.
- SCMW export - This is a special export format for SSIS Catalog items.
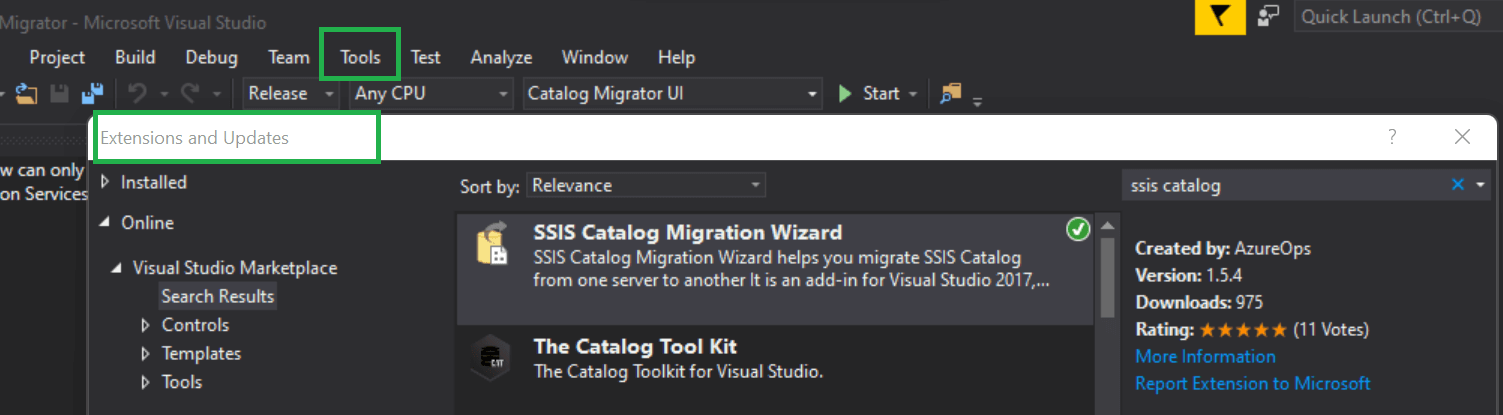
Installation
SSIS Catalog Migration Wizard can be installed as an extension to:
- Visual Studio 2017, Visual Studio 2019 & Visual Studio 2022.
- SSMS 18, SSMS 19(preview).
You can also install this wizard as a standalone tool in case you don’t have any of the above tools. More details are available in this tutorial.
The extension for Visual Studio 2017 /2019/2022 is available at Visual Studio Marketplace. This can be also downloaded directly from the Visual Studio 2017/2019/2022 Tools and Extensions and Updates. For other tools, you can get it from the product website.
Migrate the SSIS Catalog from an on-premise SQL Server to Azure SSIS Runtime.
We will see now how SSIS Catalog Migration Wizard migrates on-premises SSIS Catalog in SQL Server to SSIS in Azure Data Factory in just a few clicks. I also have a video demo available to watch.
To start, launch the wizard from your preferred location.
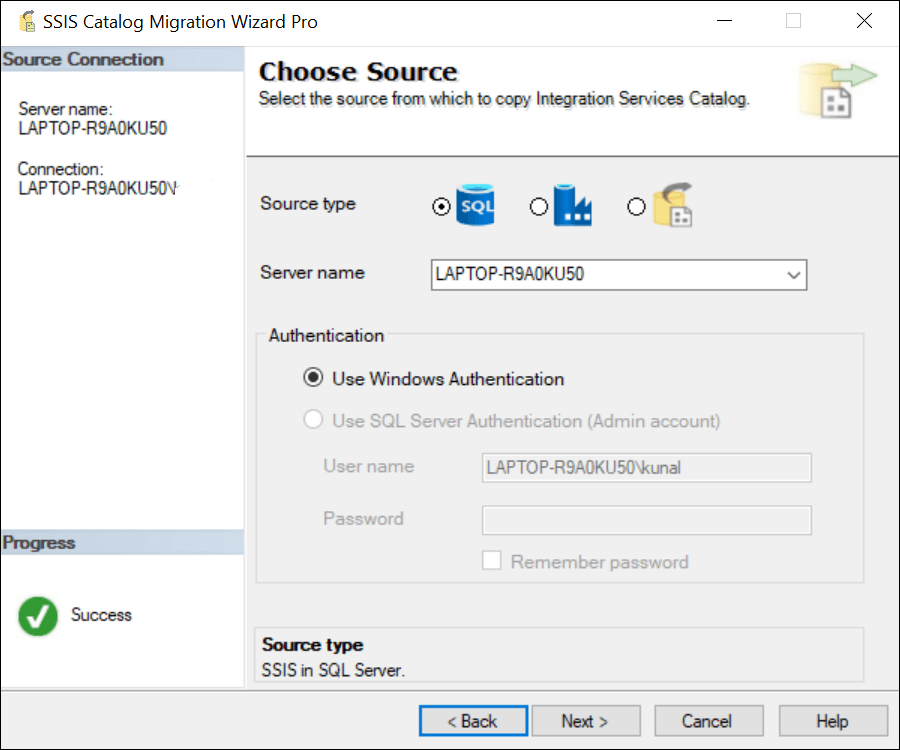
Choose Source
Choose the SQL Server radio button and then provide the SQL Server instance name. To perform operations on the SSIS catalog, we have to use Windows Authentication, and the user running this should have the ssis_admin role.
Choose Target
Choose the Azure data factory radio button for the target. Provide the Azure SQL Server hostname, admin SQL server authentication user name, and password.
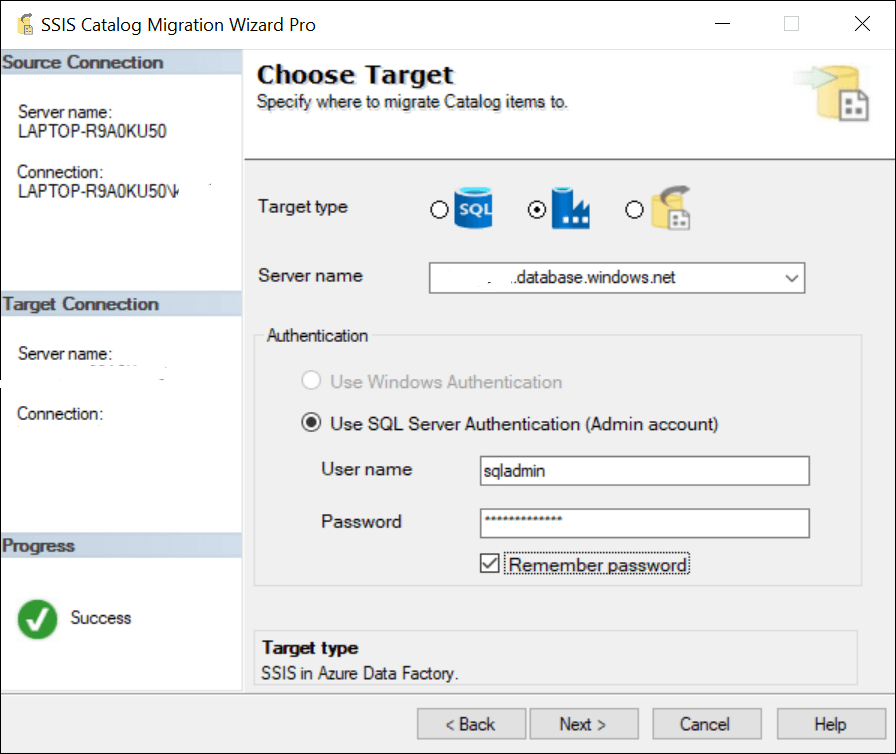
Note: This utility only supports SQL authentication for the Azure SQL Server connection.
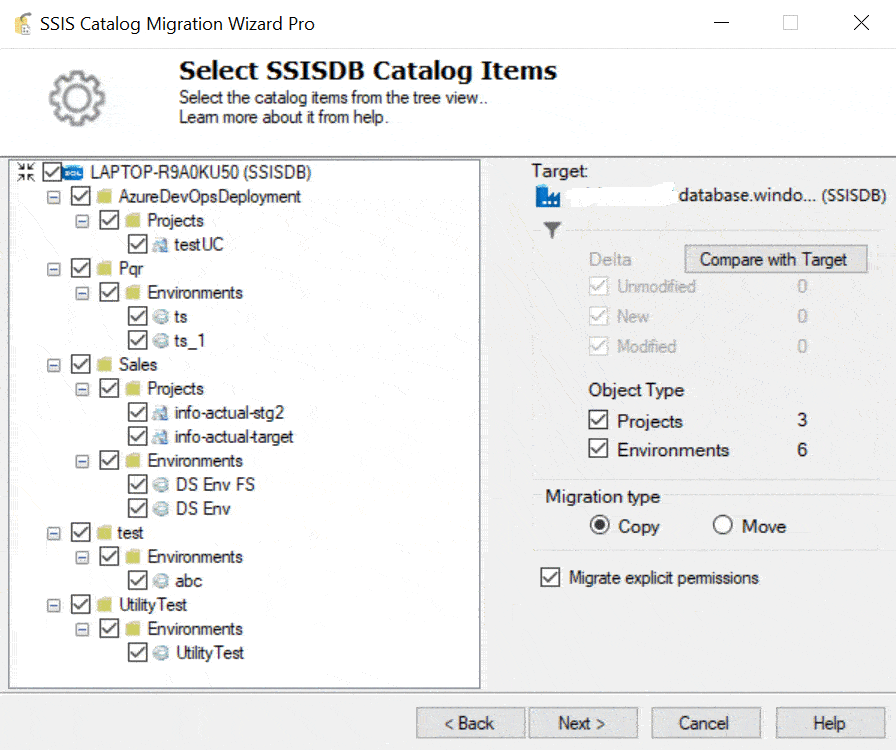
Select SSISDB Catalog Items to Migrate
Choose the catalog items from the treeview that you wish to migrate.
Compare the source and target and choose to migrate only what has changed. For example, in the image below:
- Green items are present in the source and not present in the target.
- Red items mean source and target items are not the same.
- Unmodified items are displayed in the original color and these objects are identical in the source and target.
You can download the Catalog comparison report in CSV format. The report provides Project’s latest deployment date, SSIS package count, project parameter count, and environment variable count comparison.
You can also inspect your source catalog for any critical issues before the migration using the Inspect feature.
Migration type
Migration types are ‘copy’ and ‘move’. Select the’ move’ radio button if you wish to delete the source catalog after the migration is done. The default type is ‘copy’.
Catalog folders, projects, and environments have explicit permissions. If you want to migrate these permissions to the target, check the checkbox ‘Migrate explicit permissions' on this screen.
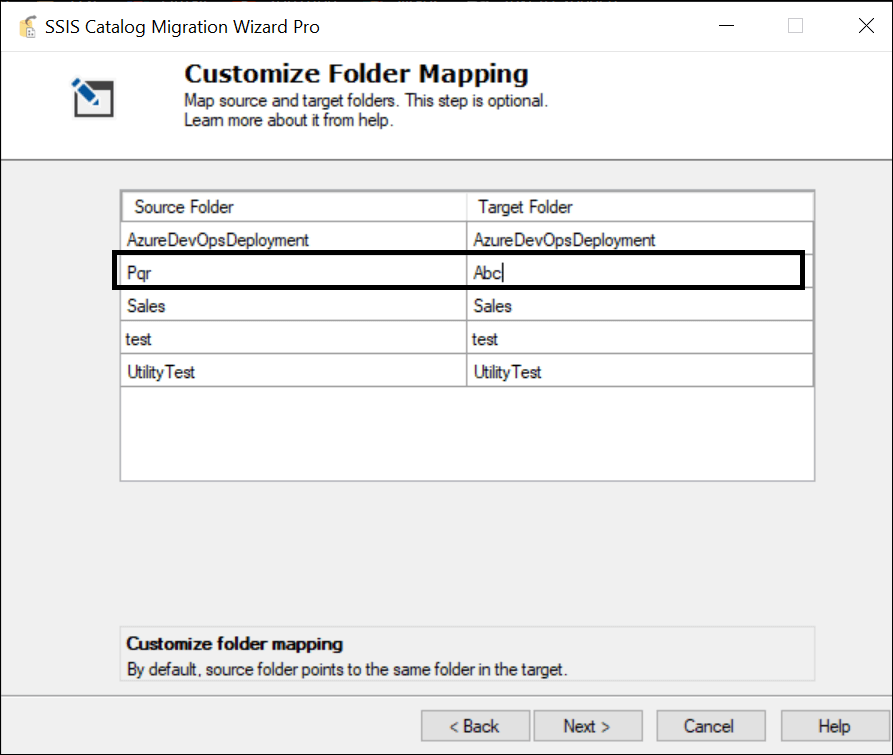
Customize folder mapping
Easily map source and target folder names. The wizard populates all selected folder names in the Source and Target folder columns. If you wish to customize the folders, edit the value in the ‘Target Folder’ column.
For instance, as shown in the above image, the wizard will copy the content of the source catalog folder Pqr to the target catalog folder Abc. This step is optional.
Replace your environment variable values
Configure the key-value pairs that you would like to replace in the environment variable and parameter values. Suggest button will list suggestions for replacing values based on the selected Replace Scope. Click on the Ref column to view the affected environment variables and parameters as shown in the below image.

Advanced
Click on Advanced to manage replace settings.
Replace Scope
There are 3 types of Replace Scopes as shown in the below image:
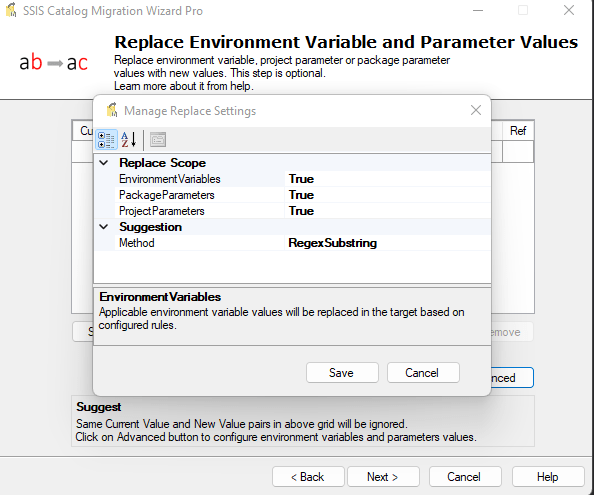
EnvironmentVariables: Applicable environment variable values will be replaced in the target based on configured replace rule. The Suggestion feature will include all environment variables from selected environments for replacement suggestions.
ProjectParameters: Applicable project parameter values will be replaced in the target based on configured replace rule. The Suggestion feature will include all project parameters from selected projects for replacement suggestions.
PackageParameters: Applicable package parameter values will be replaced in the target based on configured replace rule. The Suggestion feature will include all package parameters from selected projects for replacement suggestions.
Suggestion Method
RegexSubstring: This is the default suggestion method. It uses (?[^=;]+)=(?[^;]+) regular expression to list replace suggestions based on selected replace scope (Project, package, environment). This method is recommended when you want to replace part of database connection strings with new values. When this suggest method is selected, Wizard will replace all occurrences of the key with a value in the selected replace scope.
ActualValue: This method lists all values of environment variables, projects and package parameters in replace suggestions based on the selected replace scope. When this suggest method is selected, Wizard will replace the exact match of the environment variable, project, or package parameter with the value in the selected replace scope.
Overwrite environment variable and parameter server-side values.
‘Overwrite environment variable and parameter server side values’ will:
- recreate the environment variables that are already present in the target based on the latest source environment variables,
- overwrite server-side default values if already set in target project and package parameters. These values appear in bold and are meant to be specific to an SSIS catalog server.
It is recommended to keep this checkbox unchecked for incremental migration of the SSIS catalog from one server to another. In this case, the wizard will only migrate new parameter design values and environment variables that do not exist in the target.
Export sensitive data
This option is applicable when you are exporting SSIS Catalog to the SCMW file. If you want to export sensitive variables and parameter values in the SSIS catalog, check the checkbox ‘Export sensitive data’.
Note: SCMW export file is not encrypted. If you set the checkbox ‘Export sensitive data’, sensitive information will be stored in the export file as free text.
Complete the Wizard
In the end, you can view the summary based on your selections.
With the command-line utility, we can now automate routine migrations in a matter of a few clicks. The migration script can run using any scheduler like SQL Server Agent job. Here, the Script button at this step will generate a command-line script based on the choices made in previous steps.
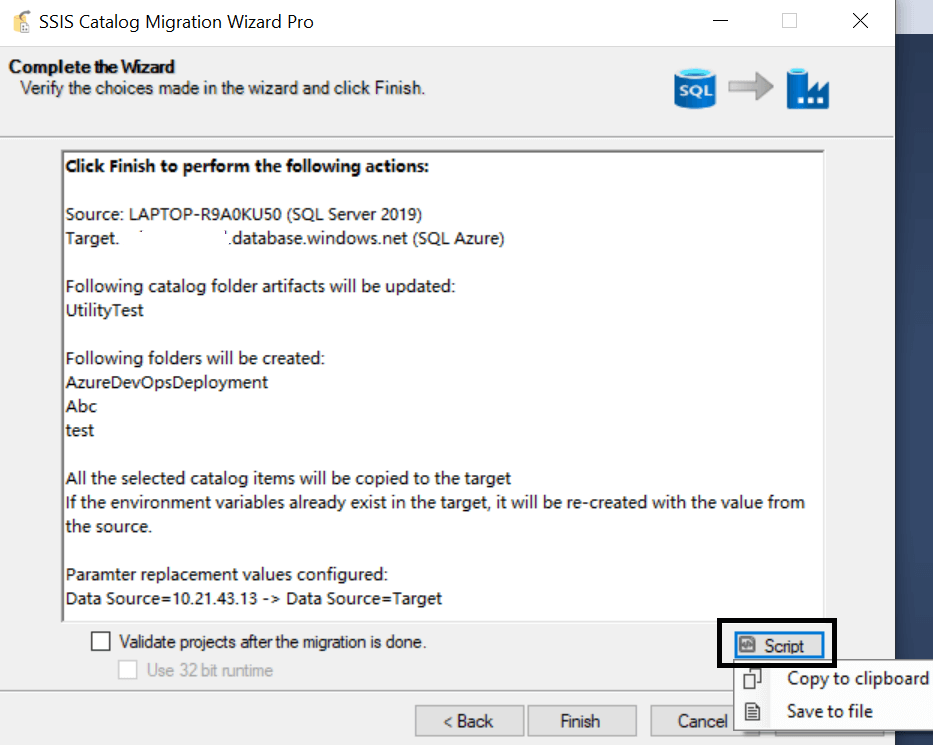
For example, in the current case, the command-line script will look like the one below.
SSIS.Cataloger.Pro.exe /st:0 /ssn:SQLServerInstance /tt:1 /tsn:azuresql.database.windows.net /items:"[{"FolderName":"Azure test","Projects":[],"Environments":["env1"]},{"FolderName":"AzureDevOpsDeployment","Projects":["testUC"],"Environments":[]},{"FolderName":"Sales","Projects":["sales-stg2"],"Environments":[]}]" /fm:"{"Azure Test":"Azure Prod"}" /fm:"{"Pqr":"Abc"}" /oev:trueMore information about the command-line utility parameters and usage examples is available here.
Review the deployment summary. And if everything looks ok, click Finish.
Monitor the migration
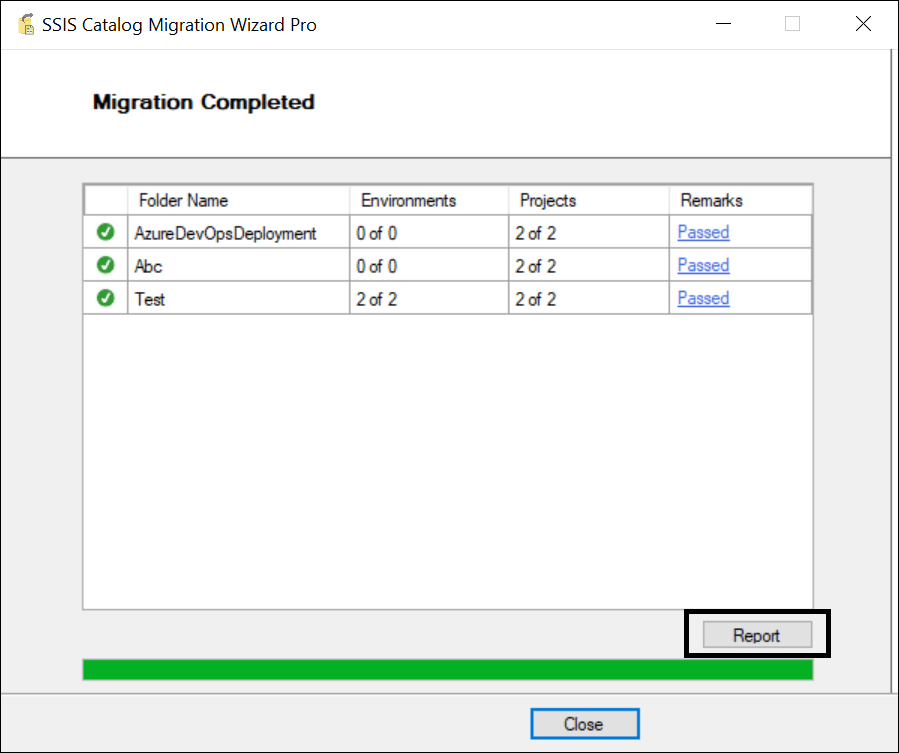
Any warning or error during the migration gets shown next to the respective folder in the Result column tooltip of the grid. The success items are all noted as "Passed" in the above image.
