

As DBA I always excited to know what is happening when I am executing the backup and restore commands in SQL Server. I have known how to check the progress of backup and restore commands using the sys.dm_exec_requests DMV, which will give us some details about progress. There are also a few SQL traces flags, like 3213 and 3004, that help to provided information about backup/restore. Even with these techniques, it is very difficult to find out what is happening in background and exactly where the backup or restore process is taking a long time.
To more detailed information about backup/restore process, Microsoft has introduced below two new Extended Events in SQL Server 2016:
- backup_restore_progress_trace : Give detailed information during the backup process and restore operation
- database_backup_restore_throughput : Give different throughput about backup/restore process
These above events will give you more detailed information about backup andrestore operations and will show what is happening in background when the operations are in progress. In this session, I am going to cover the how to check detail information about backup process.
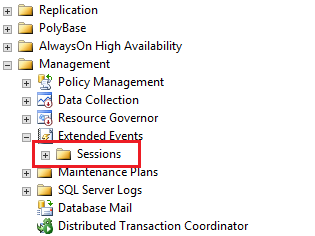
Let see how to configure and use these events in SQL Server 2016 step by step. First, go to Management Studio, connect to the SQL Server 2016 instance and expand the Management folder. Then expand the Extended Events folder where you can find the Session folder, as shown in the below figure:
Right click on the Sessions folder and click on "New Session Wizard":

This will open the New Session Wizard window shown below. Here you need to click Next.

In this next window you need to give the session a name. For example, the session name given here is: Extended_Backup_Test_Event.

On the next page, Choose Template, you have the option to either use a pre-configured events session, or you can create your own template. Here I have selected the default – do not use a template option. Then click Next.

On the next page, you can see many events in the events library, with a search box below the Event library.

In the search box you need to type "backup", and it will show the new extended events. This is shown in the below figure which you need to select and add it in selected events box.

In next page SQL server allows you to global fields for more precise details.Here I have selected client_hostname and database_name to get infromation about the client hostname and the connection current database name.

The below screen provides you the option to set filters if you are looking for specific infrormation only, which will also help you to limit the data in your output.

The next screen provides you options for how and where to store the session data.Here i am going to save the Extended Events output data on the T drive and set the maxsize of file to 1 GB with a file rollover option. The rollover option will help to limit the number of files as in my case it will create 5 files with 1 GB of size each. After reaching the 1 GB writing limit of the 5th file, it will start writing to the 1st file again.

All of the above steps can be performed using this script instead.
CREATE EVENT SESSION [Extended_Backup_Test_Event] ON SERVER
ADD EVENT sqlserver.backup_restore_progress_trace(
    ACTION(sqlserver.client_hostname,sqlserver.database_name)),
ADD EVENT sqlserver.databases_backup_restore_throughput(
    ACTION(sqlserver.client_hostname,sqlserver.database_name))
ADD TARGET package0.event_file(SET filename=N'T:\Test_extended_bkp_event\Extended_Backup_Test_Even.xel')
WITH (STARTUP_STATE=OFF)
GO
After clicking on Finish, you will see your sessions successfully created.

Now connect to the SQL Server using Management Studio and start the session created above.

Also you can start the session using the below script:
ALTER EVENT SESSION [Extended_Backup_Test_Event] ON SERVER STATE = START
After starting the session, let’s start the backup for one database. It will show the output like below:

After the backup is complete, click on the Extended Events session and choose “Watch Live Data”.

The below window will appear, which will show you default information with default columns.

To get detailed information, right click on the above screen and then click on choose columns.

After selecting the desired columns, click OK, and you can see the detailed information as below:

Right click on the above screen and select Filter by this value. Here I have set a filter on "trace_message is not Null", which will removes trace_messges will null values.

After applying the filter, you can see the exactly what happened during the backup command execution.

In the above figure you can see what are all background operations happened , please find the detail information as below:
- BACKUP DATABASE started - backup operation start.
- Opening the database with S lock - database is opened in shared lock to start reading the data.
- Acquiring bulk-op lock on the database - the database lock taken by the backup database.
- Synchronizing with other operations on the database is complete - this step will make sure that if there is another operation running on the database it will be in sync.
- Opening the backup media set - in this step SQL Server starts verification of the backup directory where the backup will be created as well as ensure there is space to create the backup file.
- The backup media set is open - if verification in above step is ok then the backup set is open to write.
- Effective options: Checksum = 0, Compression= 1, Encryption = 0, BufferCount = 7, MaxTransferSize = 1024 KB - This lets you know which backup options are set like checksum, compression, etc.
- Clearing differential bitmaps - Here SQL Server clears the differential bitmaps, so the next differential backup will reference this full backup.
- Writing a checkpoint and checkpoint is complete - Before the start of the actual backup process, SQL Server fired checkpoint in this step.
- Start LSN: 400:48211:37, SERepl LSN: 0:0:0 - Starting LSN noted down after checkpoint.
- Scanning allocation bitmaps - a scan is performed for the allocation of pages for space calculation purposes and backup size.
- Calculating expected size of full data - Performing expected total size of data to be copied.
- FID=1, ExpectedExtents=42104, IsDifferentialMapAccurate=0 - total number of expected extents required to be backed up.
- TotalSize=2759327744 bytes - Total size of backup file.
- Estimated total size = 2759336448 bytes (data size = 2759327744 bytes, log size = 8704 bytes)
- Work estimation is complete - Here all work estimation is completed. After this SQL Server starts writing into the backup file.
- Writing history records is complete (elapsed = 23 ms) - once the backup operation is complete, it writes data in the MSDB table to maintain a history of backup process.
- BACKUP DATABASE finished - this indicates that backup operation is completed.
Using above details you can find out where exactly the backup process is taking long time. This will help the DBA to provide more clarity to users about delays in the backup process.
Summary
Backup and restore are common, daily jobs for every DBA. By adding such great features with SQL server 2016, we can easily view the internal backup events. Such functionality will help a DBA to explain to a user how the backup is happening as well as why and where it is taking the most time to complete. In my next article will look at the restore events .


