

Microsoft has been talking about the Modern Data Platform for a long time. I first heard about this concept about seven years ago in which there were two architectural designs: either store data in Azure SQL Database and transform data using stored procedures; or land data in Azure Data Lake Storage Gen 1 and transform data with USQL. Roll forward seven years, many things have changed. Most people are transitioning to Microsoft Fabric. How can we use data pipelines to land data into raw zone tables and make the most recent data available in the refined zone views? This four-part series of articles will help you on your way.
Business Problem
Our manager has asked us to create the raw zone tables in Fabric Warehouse for the Adventure Works LT database. The transformation of the CREATE TABLE statements from SQL Server to Fabric Warehouse syntax can be done by hand. Since the sample database only has twelve tables, this can be done in less than one hour. But in real life, most source systems have hundreds of tables. Automating the transformation of the T-SQL database script into Fabric T-SQL notebook will be extremely helpful on a large project. Today, we will talk about a couple ways to interact with ChatGPT to help transform English prompts into Python code.
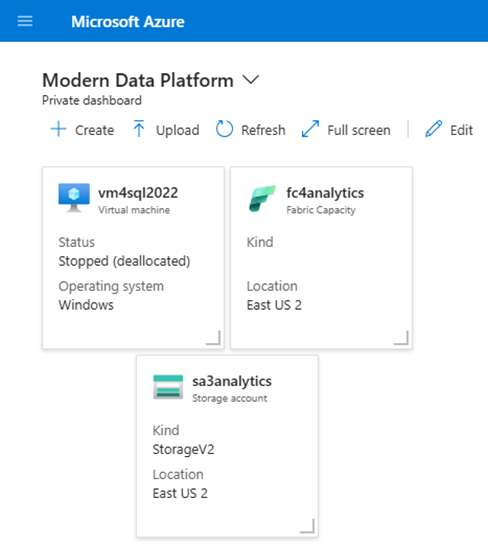
The image below shows three main components we will be working with in Azure. First, we need a source system (SQL database). This source can be either in-cloud or on-premises. The image below shows an Azure Virtual Machine running SQL Server 2022 database engine. Second, we need a target system (Fabric Warehouse). Choosing the right capacity for your Fabric Workloads can be found using the Fabric Capacity Metrics App. Finally, external staging might be needed by the “copy” activity.
Generate Source Script
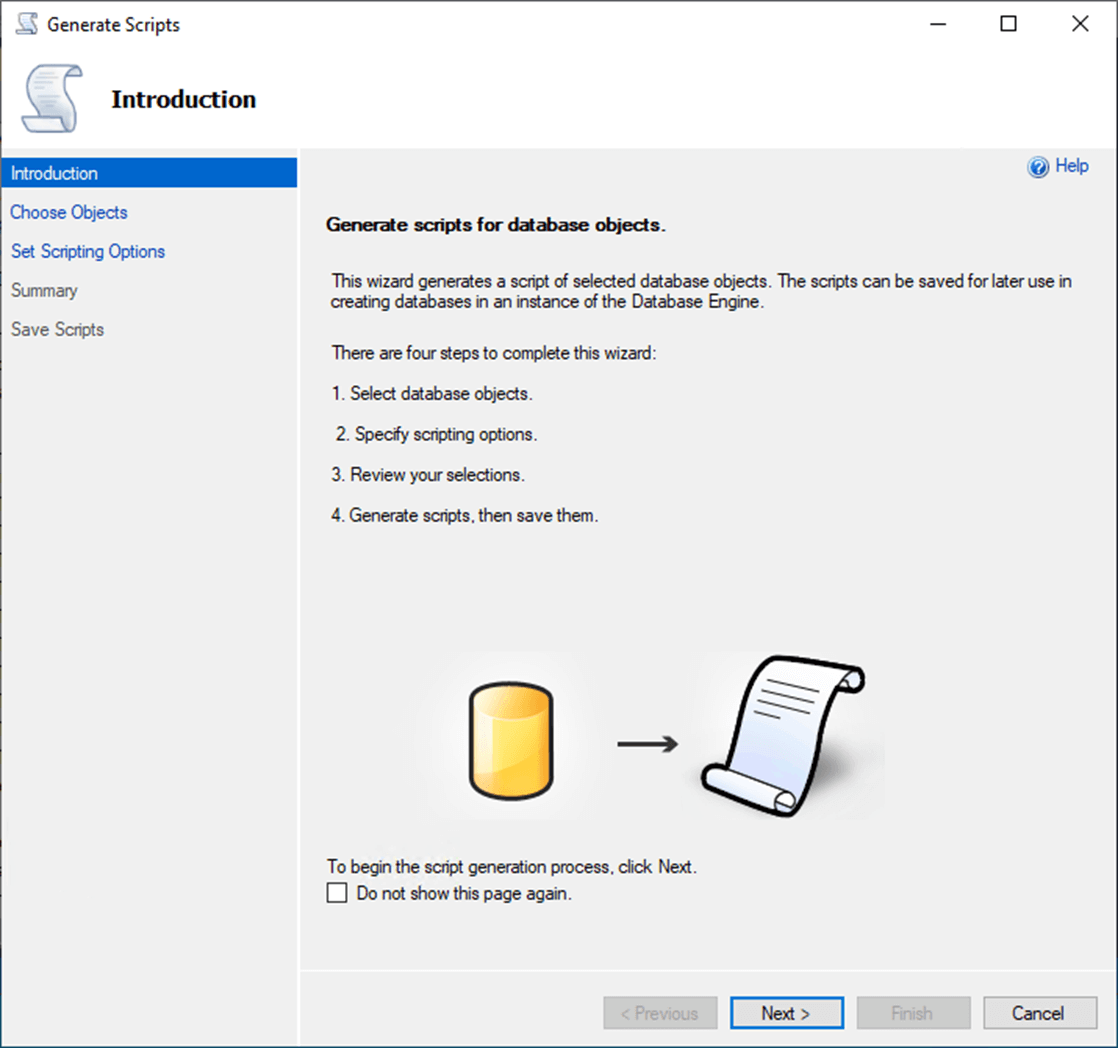
Adventure Works Sales LT 2012 database resides with in our VM4SQL2022 virtual machine. The SQL Server Management Studio has an option to script out a database and save the results to a file. Just right click on the database in the object explorer and select a generate script to start the process.
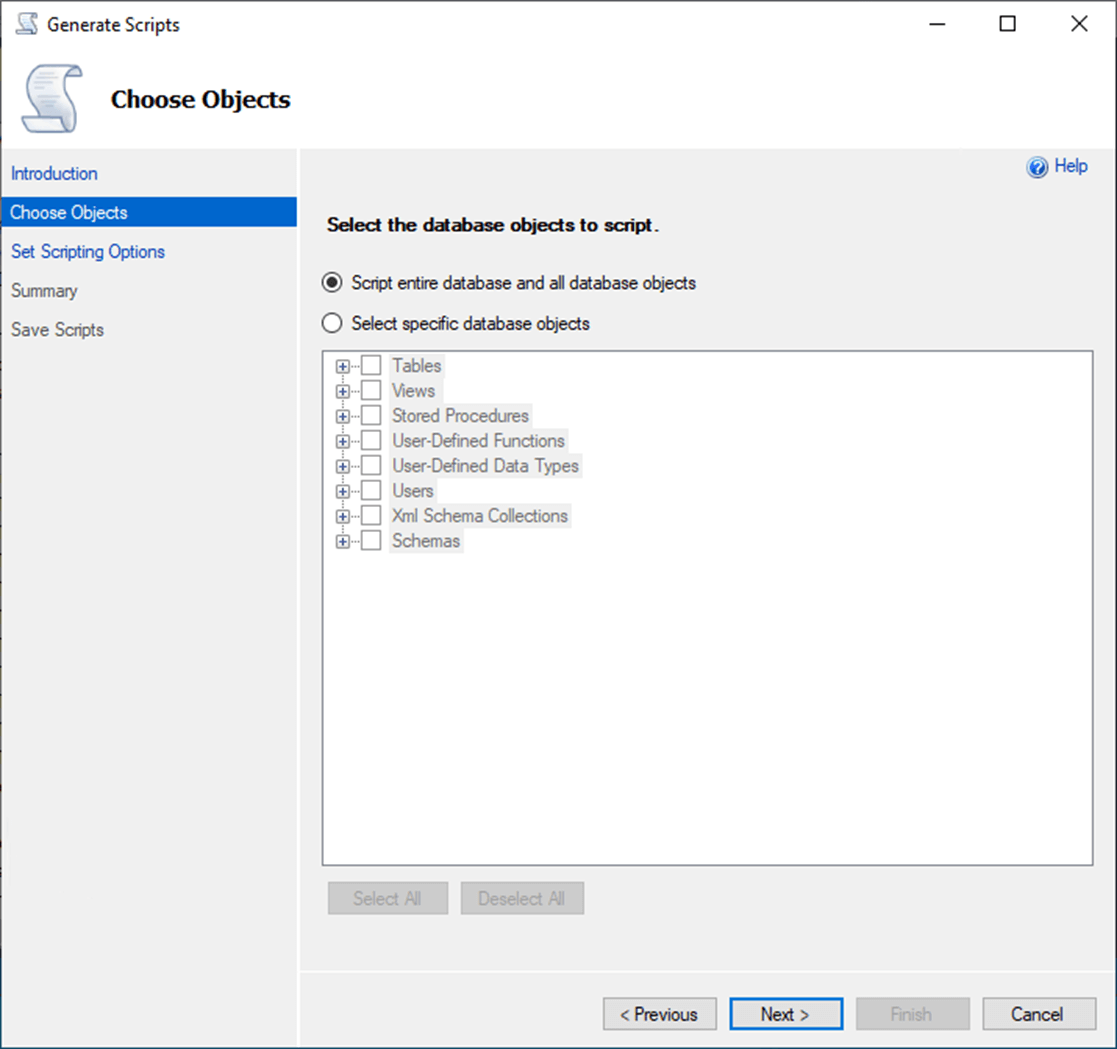
We can generate a script for the entire database or just for supported object type such as tables. Let us take the default option at this time.
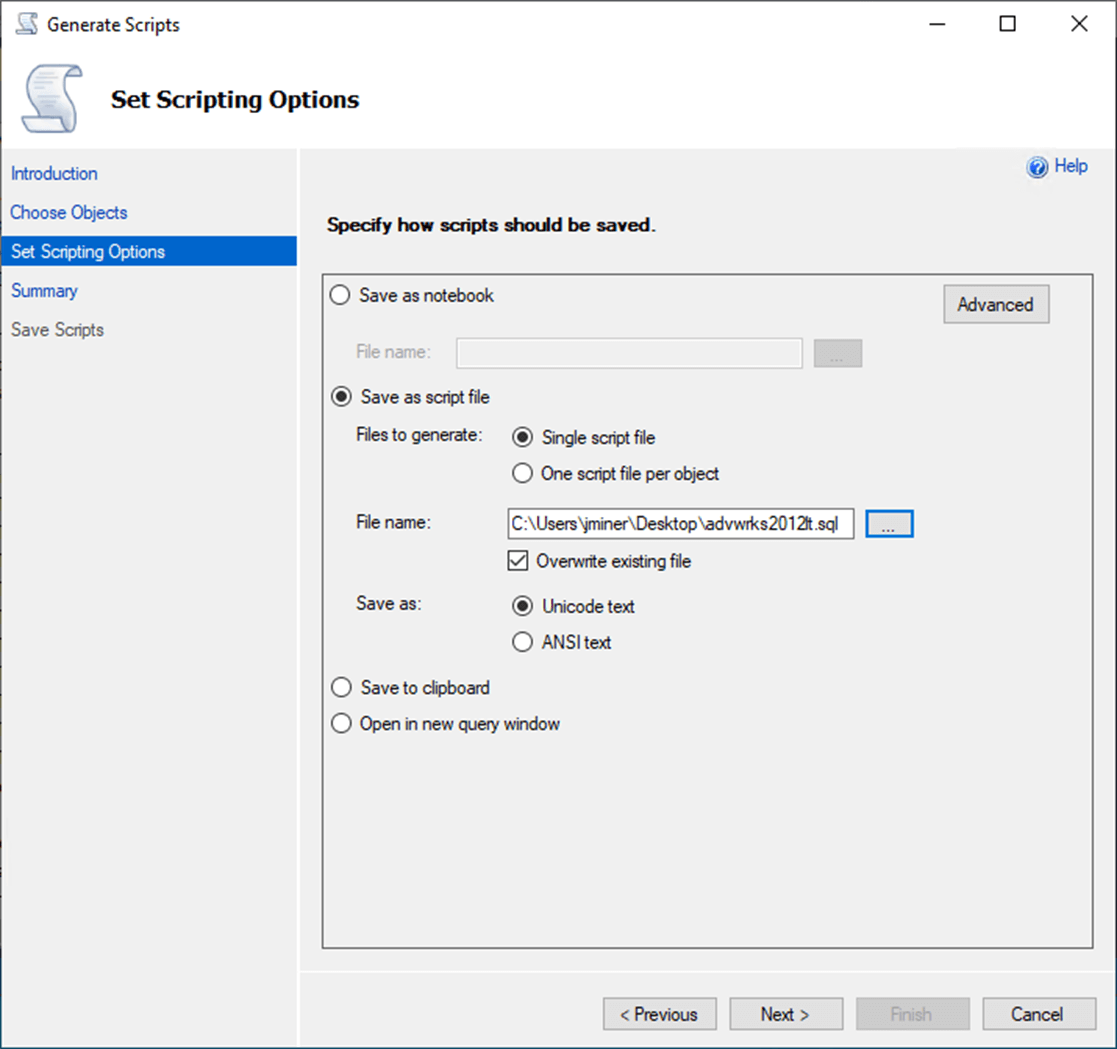
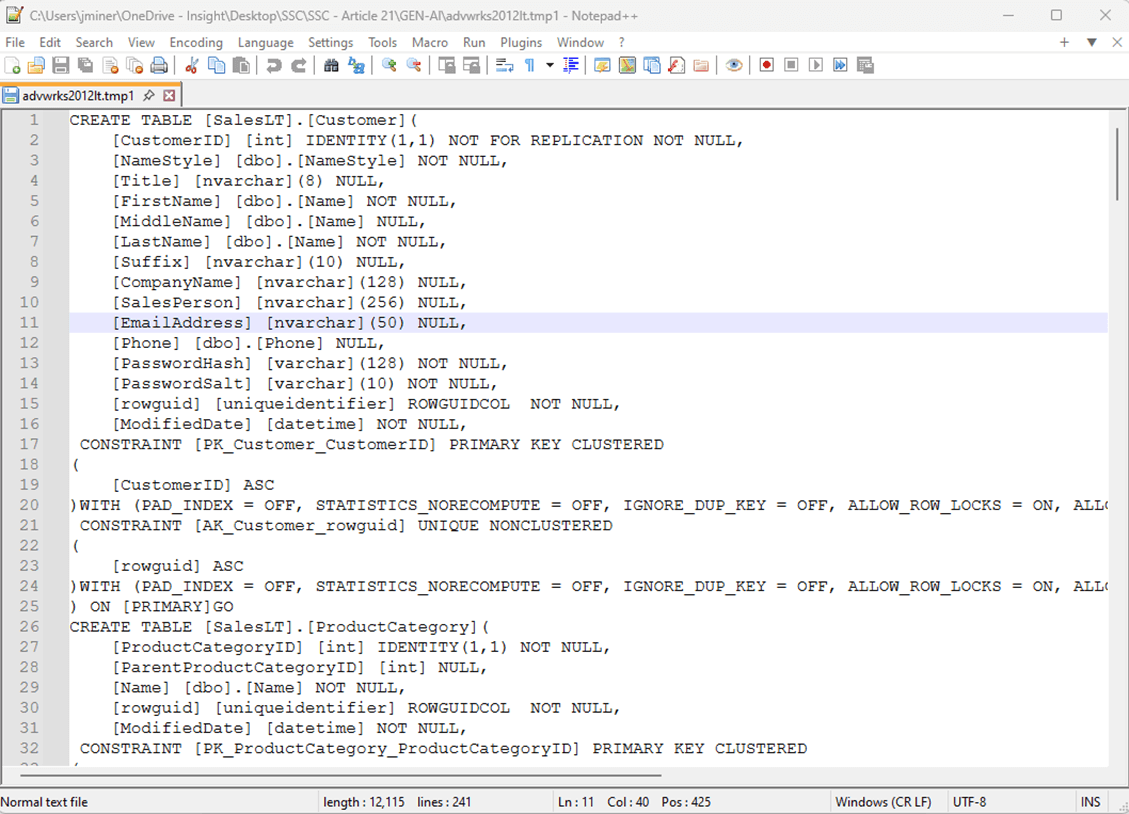
The final script can be saved to a file. I choose to save script to my desktop and name the file “advwrks2012lt.sql”.
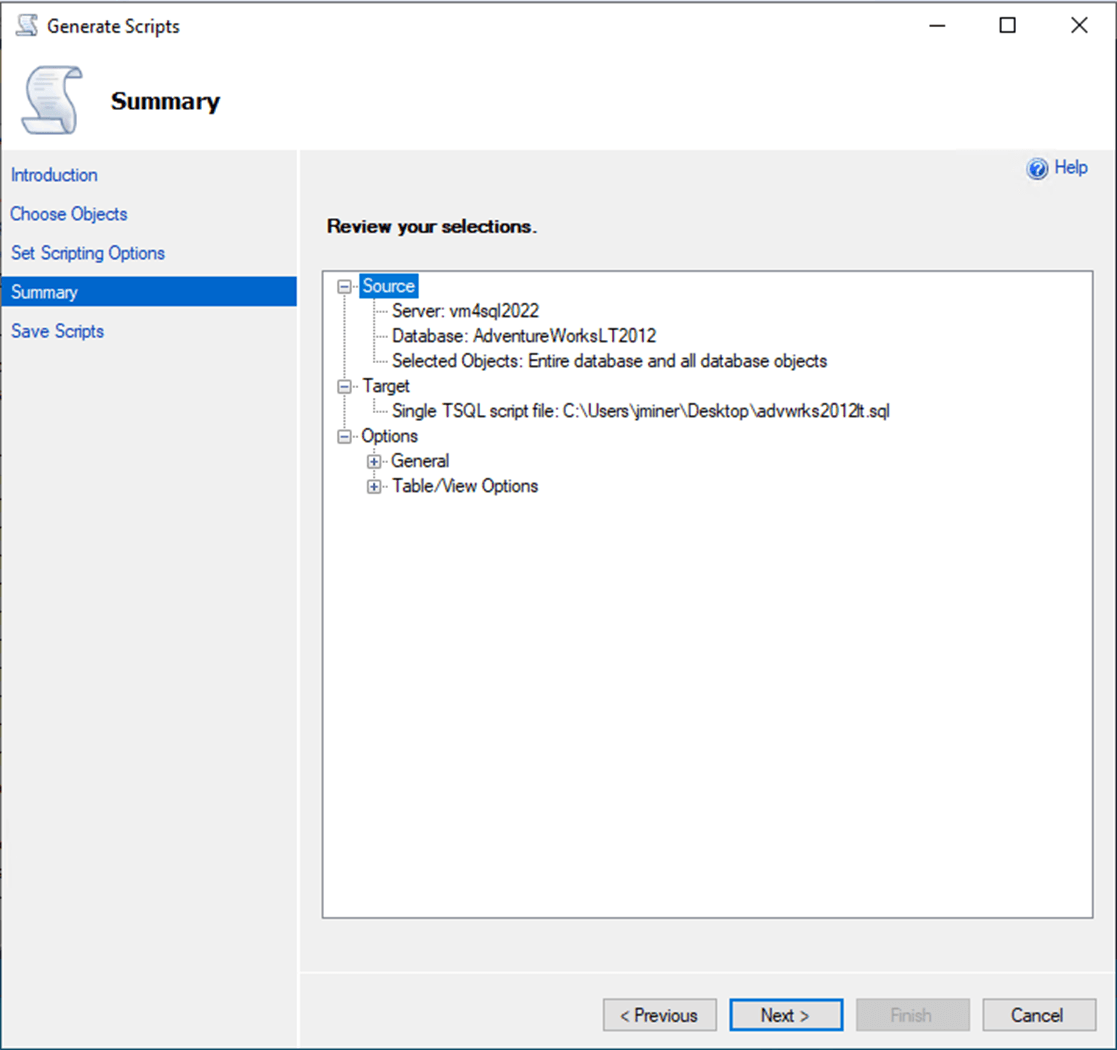
Like many Microsoft utilities, a summary of the requested actions is shown below. Click the next button to start the scripting process.
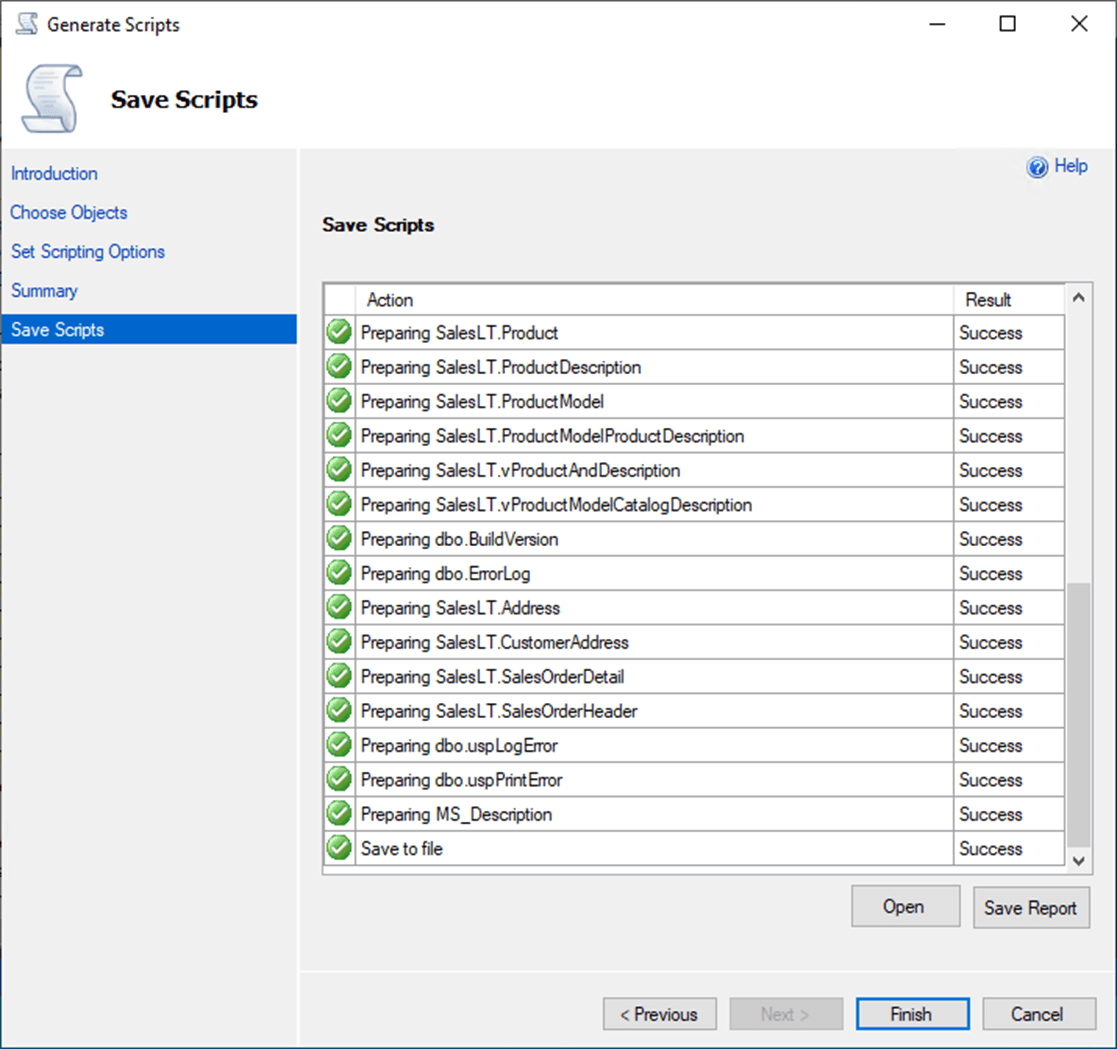
It is always important to review the results of each object that was scripted. Green check boxes represent success. Red crosses represent failures.
In short, I now have the T-SQL script waiting to be processed by a Python program.
Generative AI
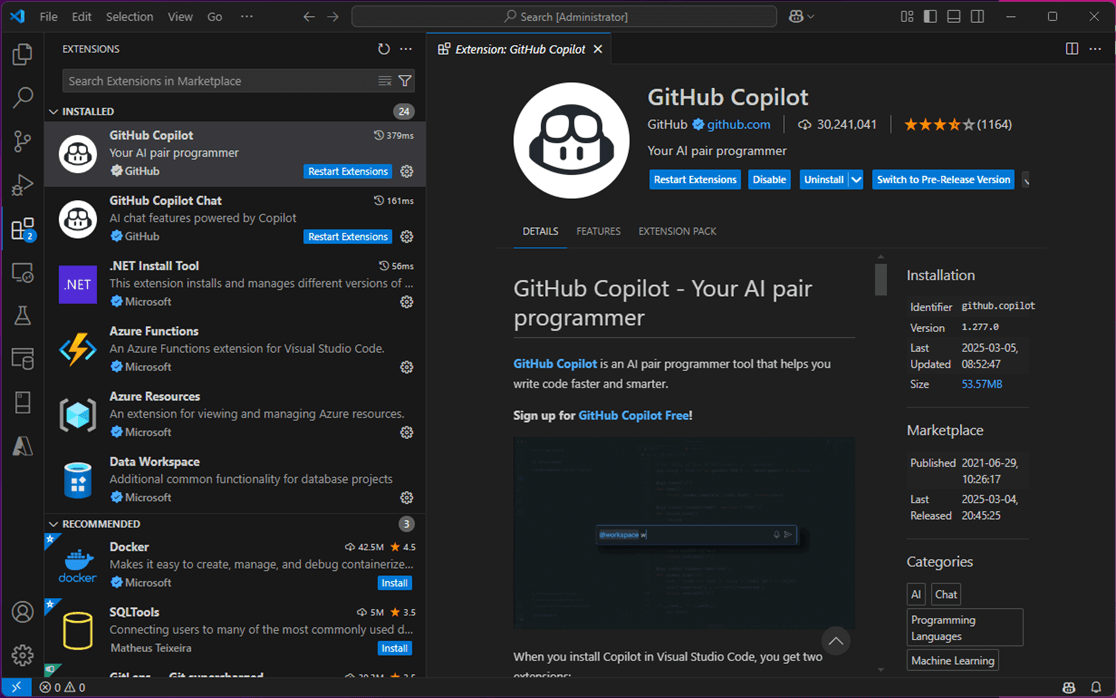
Generative AI learns patterns and relationships from large datasets and then uses that knowledge to generate new, original content that mimics the data it was trained on. Since we are creating a Python program to transform the source T-SQL script into a Jupyter Notebook, we need to have a code editor. Visual Code is a free editor that has many plugins. My company supplies me with a subscription to GitHub Copilot. Please see the Microsoft documentation on how to configure the plugin.
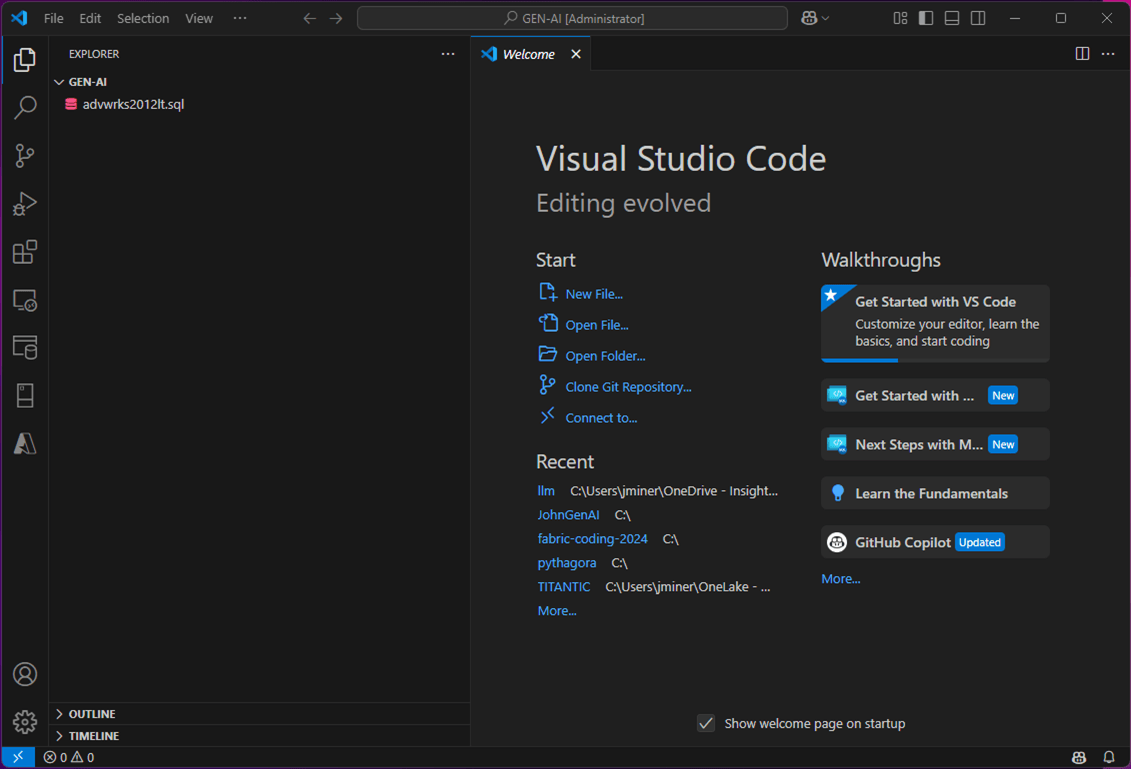
The next step is to create a working directory. In my case, I created a sub-directory called GEN-AI and placed the T-SQL script in that directory. Also, VS Code opened that folder as the current working directory.
To use co-pilot, just press ctrl + I to enter an English prompt. The large language model will try to answer the question.
I find it best to use an organized approach when parsing the source file into the target file. Having temporary files in between allows for debugging of the program. The table below is a list of files in this solution.
| File Name | File Purpose |
| sample-code.py | The snippets of code put together as a solution. |
| copilot-prompts.txt | English phrases to convert to code. |
| advwrks2012lt.sql | Original script generated from SSMS. |
| advwrks2012lt.tmp1 | Just create table statements. |
| advwrks2012lt.tmp2 | Fabric data types and raw schema. |
| advwrks2012lt.ipynb | Final notebook file to upload into Fabric. |
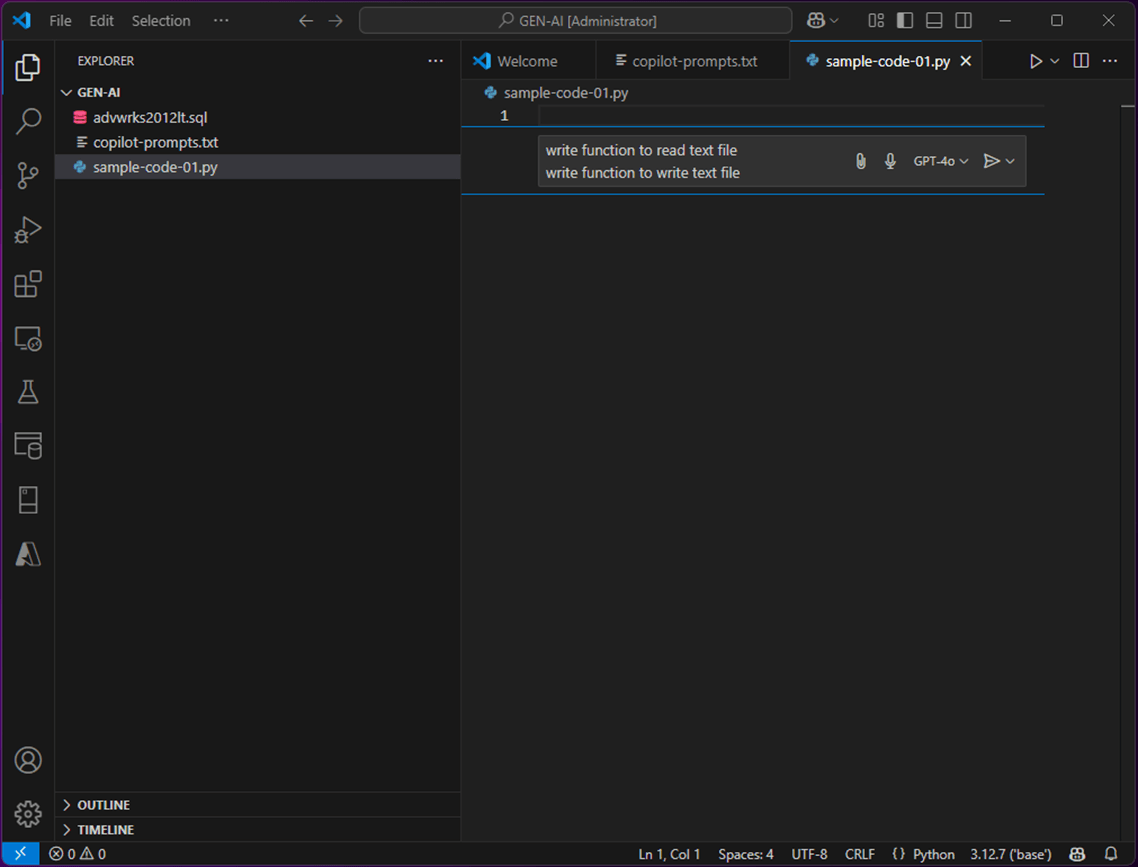
Here is our very first prompt. “Create two functions. One to read a text file and one to write a text file”.
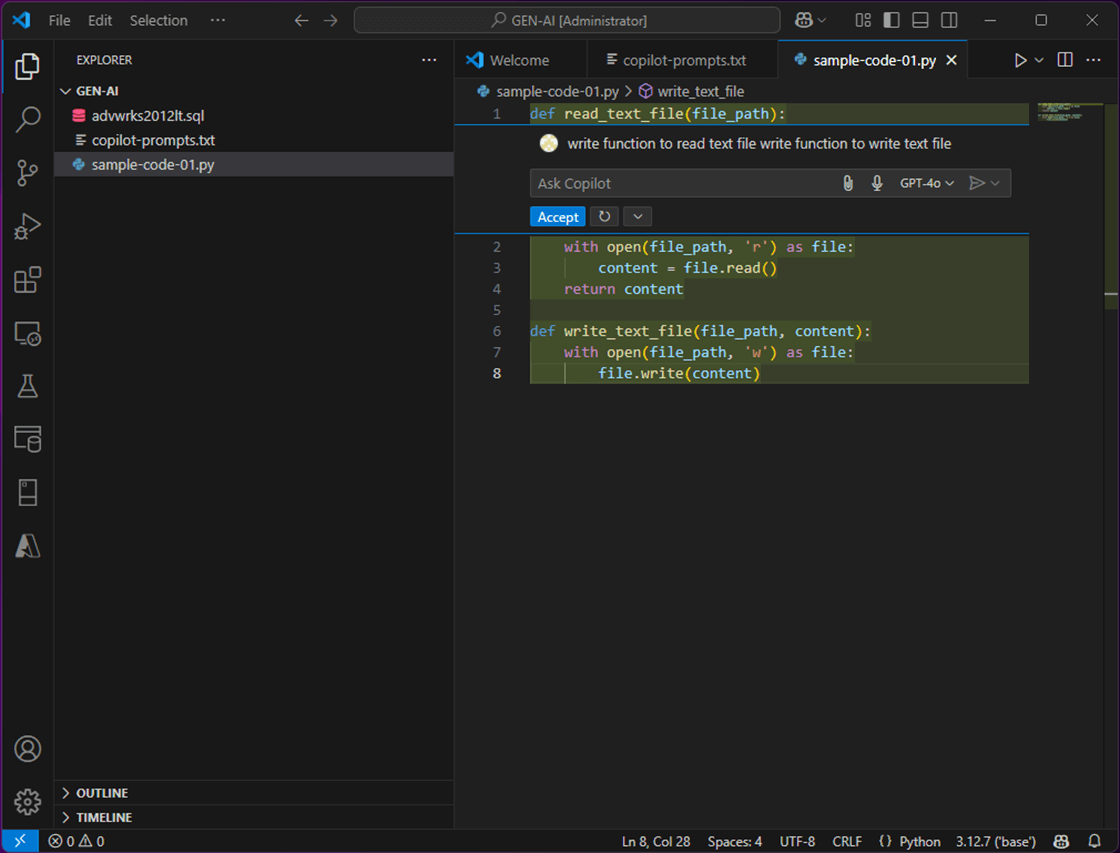
Here is our very first response. We can accept the code or reject it.
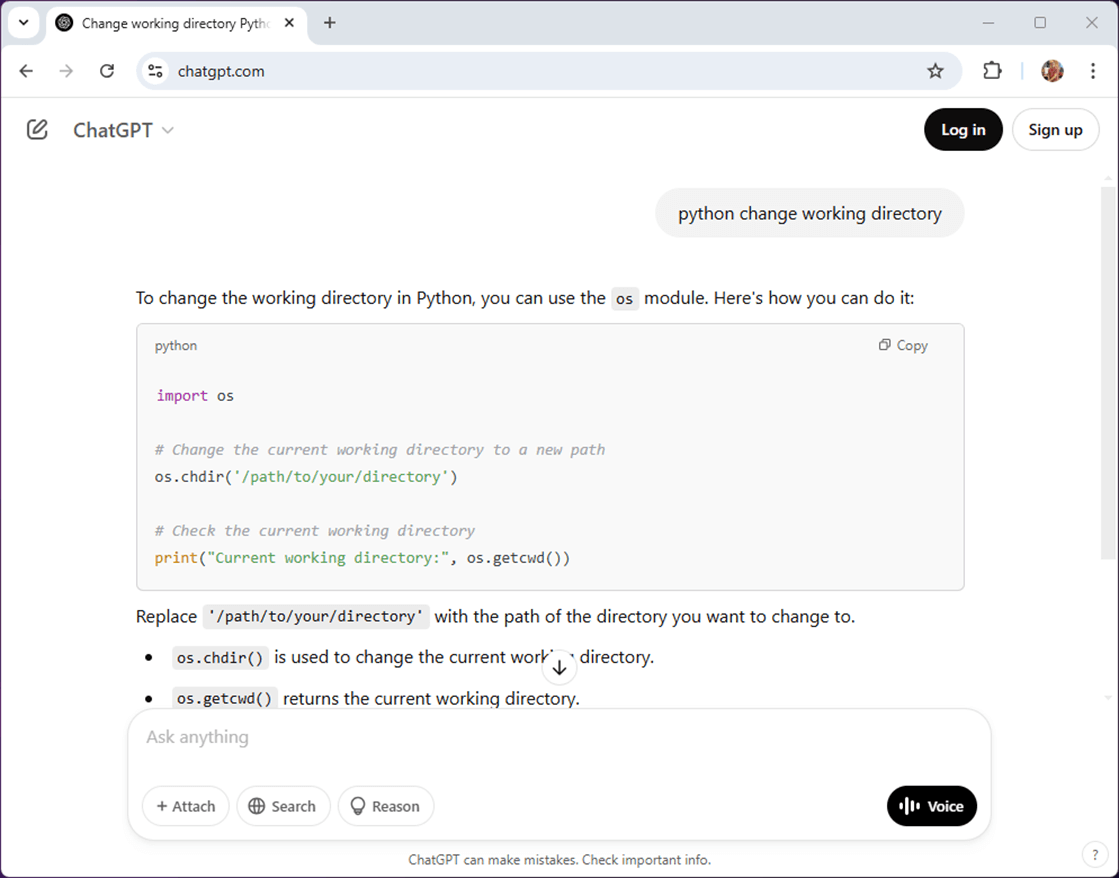
Don’t worry if you don’t have a GitHub Copilot license, you can also use the chatgpt website.
The prompt below asks for Python code to change the current working directory.
Here is another prompt and response for replacing a file extension on a file name. I decided not to use this one in the final program.
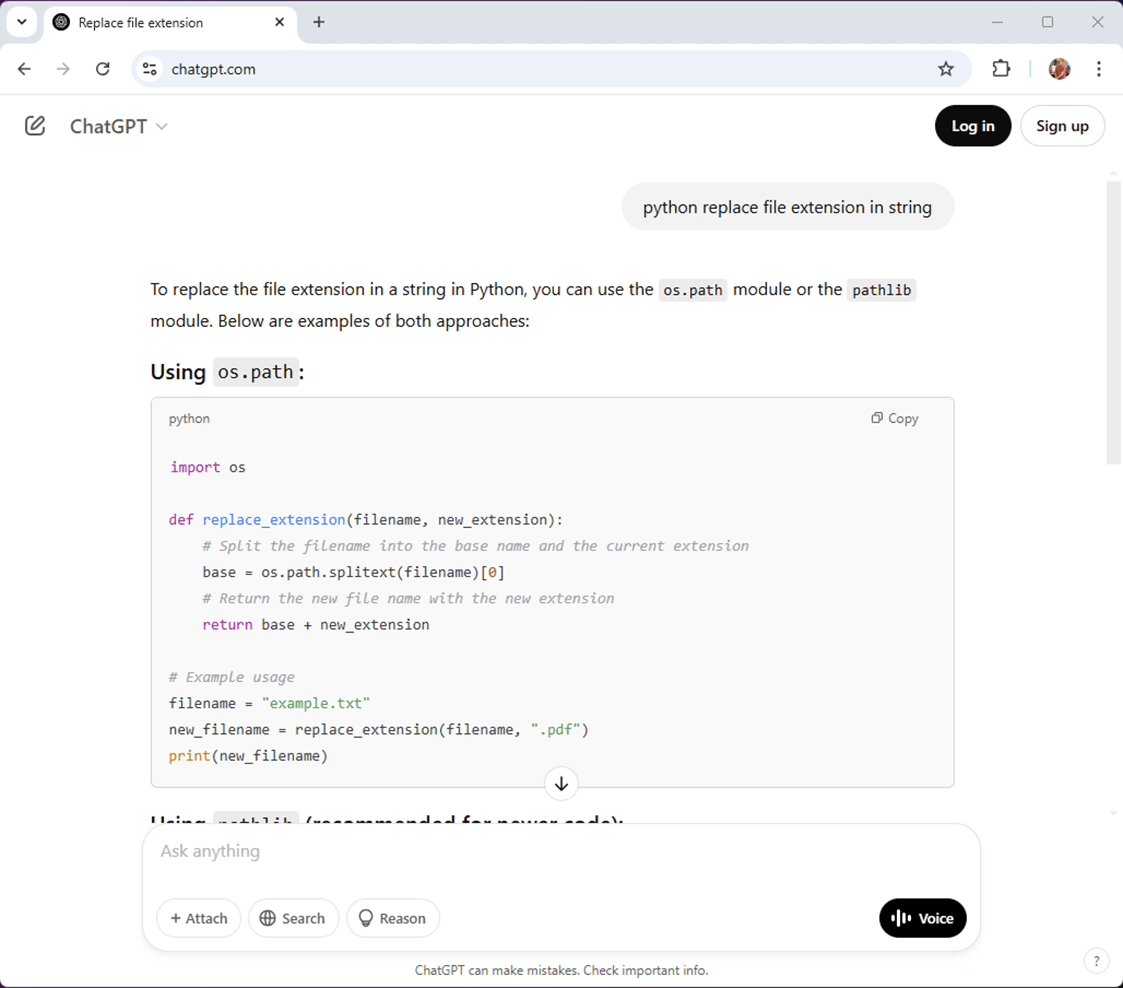
Generating python code from English prompts is very easy to do. Are the answers to the prompts always correct?
Extract Create Table Statements
The first step is to read in the file. Here we extract just create table statements and write out the file with a tmp1 extension. The image below shows testing of the read text file function. It does not read in the file correctly. That is because the file is encoded as utf-16.
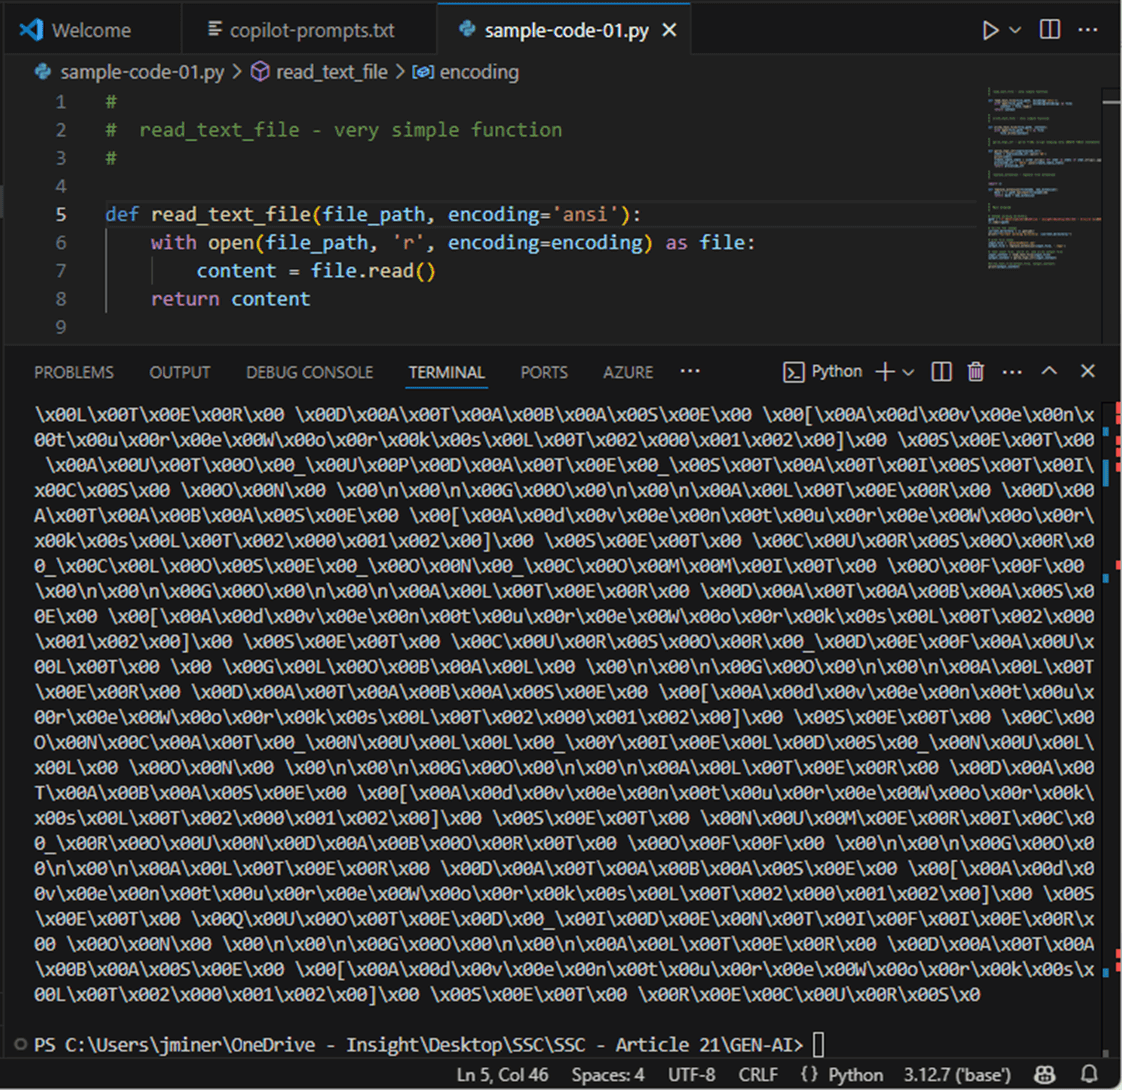
As a designer, I did not tell the LLM that I wanted the code to handle different text encoding schemes. It was not that hard to change the python code for text file encoding.
The next few paragraphs will go over the prompts and responses I obtained from GitHub Copilot.
~
~  Prompt 1
~

write function to read text file
write function to write text file
The first question (prompt) is shown above, and the first answer is shown below.
#
#  read_text_file - very simple function
#

def read_text_file(file_path, encoding='ansi'):
    with open(file_path, 'r', encoding=encoding) as file:
        content = file.read()
    return content

#
#  write_text_file - very simple function
#

def write_text_file(file_path, content):
    with open(file_path, 'w') as file:
        file.write(content)
The second question (prompt) seen below seems to be a lot more complicated.
~
~  Prompt 2
~

write parse TSQL function
input unprocessed string
break input  into statements using keyword GO
filter in CREATE TABLE statements
combine statements using keyword GO
output processed string
The second answer is very simplistic. The whole file is split on the GO keyword into elements of a list. The list is filtered with only CREATE TABLE statements being retained. The result is a string with the GO statements re-inserted as dividers.
#
#  parse_tsql_str1 - parse T-SQL script keeping only CREATE TABLE statements
#

def parse_tsql_str1(unprocessed_str):
    stmts = unprocessed_str.split('GO')
    create_table_stmts = [stmt.strip() for stmt in stmts if stmt.strip().upper().startswith('CREATE TABLE')]
    processed_str = '\nGO\n'.join(create_table_stmts)
    return processed_str
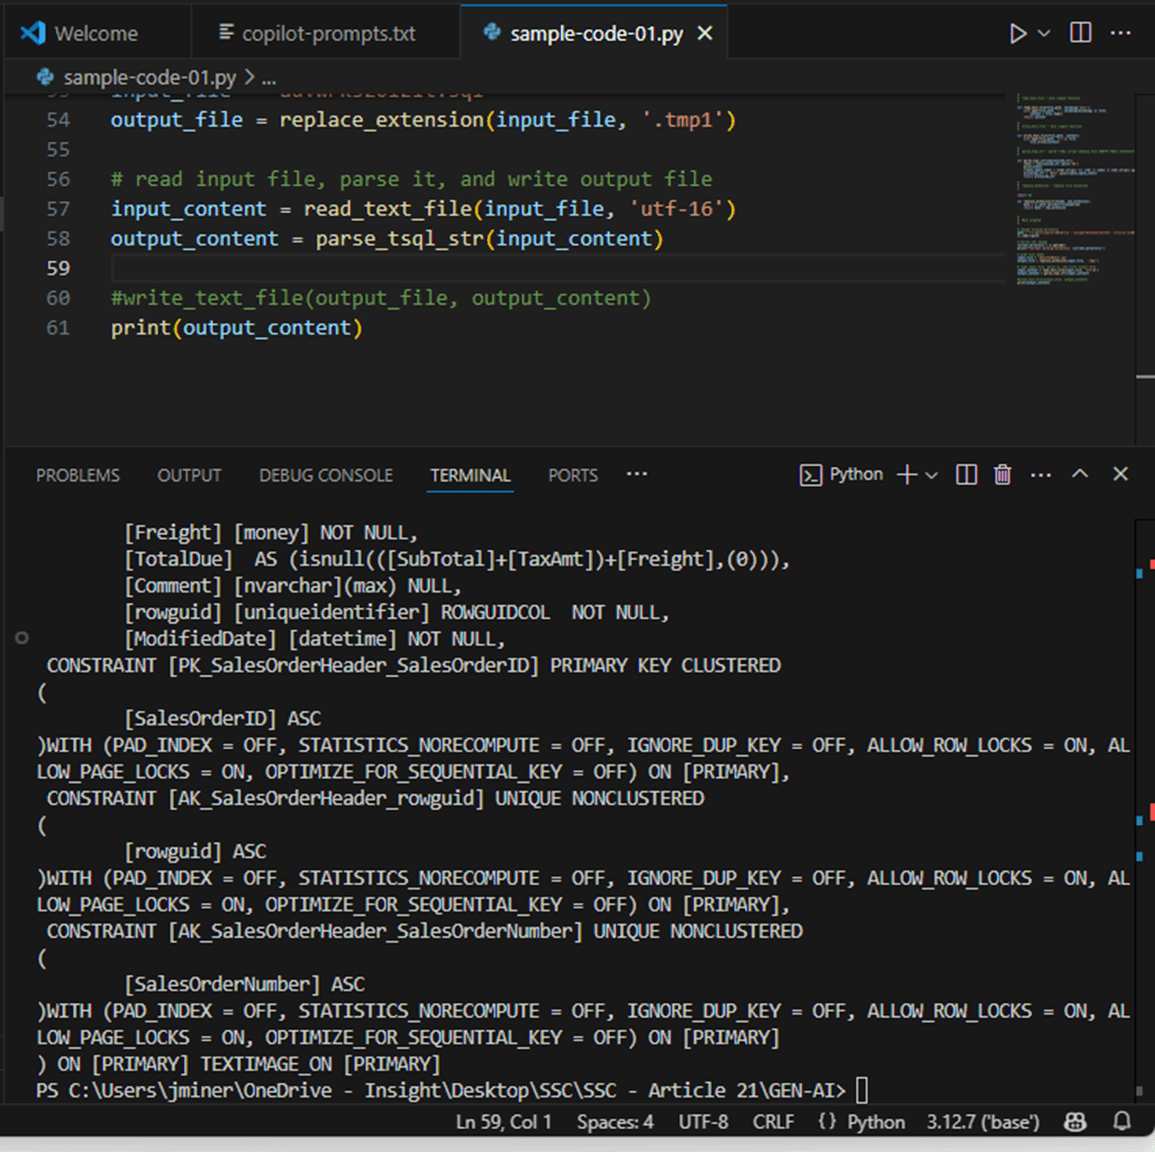
The last step is to call these three functions in the correct sequence with the correct variables. I will let you examine the final program enclosed at the end of the article for details. The image below shows the output from step 1 of processing.
The key take away from this section is that Generative AI can help the engineer pick a direction for writing code. However, not all answers are correct, and many iterations of the questions (prompts) might be required until a final solution is choosen.
Adjust SQL Code For Fabric Warehouse
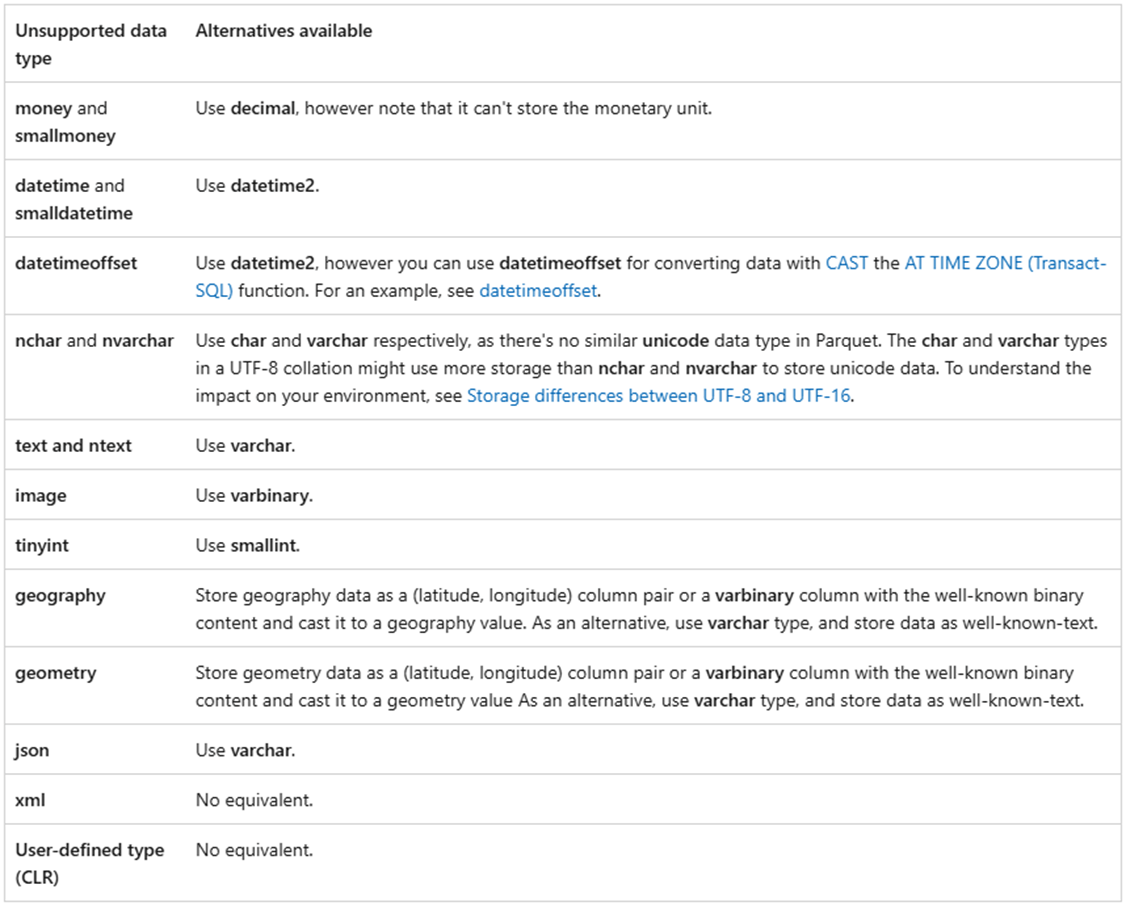
The Fabric Warehouse is built on top of the common storage layer called One Lake. The key file format for objects natively stored in the service is the delta file format. Thus, the data types that are supported by Fabric Warehouse SQL are different than those in SQL Server. The image from Microsoft Documentation shows which data types are not supported between the two. Thus, we need a step to translate the source column data type to the target column data type. Additionally, all tables will reside in the raw schema.
The size of this prompt is quite huge. The code produced by GitHub Co-Pilot was not 100 percent accurate. But after some manual intervention and some of my time, it worked out just fine.
~
~  Prompt 3
~

-- Main Functionality
create function with raw tsql string as input.
return processed tsql string as output.
break string on GO keyword into statements.
use regex to do the following using case insensitive matches:

-- Remove extra clauses
remove "on [primary]" clause from statement.
remove "textimage_on [primary]" clause from statement.
remove "with" clause from statement.
remove "identity" clause from statement.
remove "ROWGUIDCOL" option from statement
remove "NOT FOR REPLICATION" option from statement

-- Translate columns (T-SQL to Fabric-SQL)
replace "[nvarchar]" with "[varchar]" in statement.
replace "[nchar]" with "[char]" in statement.
replace "(max)" with "(4000)" in statement.
replace "[datetime]" with "[datetime2](6)" in statement.
replace "[datetimeoffset]" with "[datetime2]" in statement.
replace "[money]" with "[decimal](18, 4)" in statement.
replace calculated columns "as ()" with "[varchar](4000)"

-- Replace custom data types
replace "[dbo].[AccountNumber]" with "[varchar](15) NULL".
replace "[dbo].[Flag]" with "[bit] NOT NULL".
replace "[dbo].[Name]" with "[varchar](50) NULL".
replace "[dbo].[NameStyle]" with "[bit] NOT NULL".
replace "[dbo].[OrderNumber]" with "[varchar](25) NULL"
replace "[dbo].[Phone]" with "[varchar](25) NULL"
replace "NOT NULL" with "NULL"

-- Remove constraints
constraints can span multiple lines
remove "default" constraints defined in statement.
remove "unique" constraints defined in statement.
remove "primary key" constraints defined in statement.
remove "foreign key" constraints defined in statement.
We can further refine our code by creating a couple common utility functions: “split_statements” – break string into array elements on key word and “join_statements” – join array elements into string using key word.
#
#  split_statements - split T-SQL script into individual statements
#

def split_statements(tsql_string):
    statements = tsql_string.split('GO\n')
    return [stmt.strip() for stmt in statements if stmt.strip()]

#
#  join_statements - join T-SQL individual T-SQL statements into a string
#

def join_statements(statements):
    processed_str = '\nGO\n'.join(statements)
    return processed_str
The function below will be called to clean up the CREATE TABLE statements for insertion into a Fabric T-SQL notebook.
#
#  process_tsql_str2 - rules to convert T-SQL to Fabric SQL
#

import re

def process_tsql_str2(tsql_string):

    # split string
    statements = split_statements(tsql_string)

    # final statements
    processed_statements = []

    # translate code
    for statement in statements:

        # Remove unwanted clauses and options
        statement = re.sub(r'ON \[PRIMARY\]', '', statement, flags=re.IGNORECASE)
        statement = re.sub(r'\bTEXTIMAGE_ON \[PRIMARY\]\b', '', statement, flags=re.IGNORECASE)
        statement = re.sub(r'\)WITH.*$', ')', statement, flags=re.IGNORECASE | re.DOTALL)
        statement = re.sub(r'\bIDENTITY\b\(\d,\s?\d\)', '', statement, flags=re.IGNORECASE | re.DOTALL)
        statement = re.sub(r'\bROWGUIDCOL\b', '', statement, flags=re.IGNORECASE)
        statement = re.sub(r'\bNOT FOR REPLICATION\b', '', statement, flags=re.IGNORECASE)

        # Replace data types and options
        statement = re.sub(r'\[tinyint\]', '[smallint]', statement, flags=re.IGNORECASE)
        statement = re.sub(r'\[sysname\]', '[varchar](128)', statement, flags=re.IGNORECASE)
        statement = re.sub(r'\[nvarchar\]', '[varchar]', statement, flags=re.IGNORECASE)
        statement = re.sub(r'\[nchar\]', '[char]', statement, flags=re.IGNORECASE)
        statement = re.sub(r'\(max\)', '(4000)', statement, flags=re.IGNORECASE)
        statement = re.sub(r'\[datetime\]', '[datetime2](6)', statement, flags=re.IGNORECASE)
        statement = re.sub(r'\[datetimeoffset\]', '[datetime2]', statement, flags=re.IGNORECASE)
        statement = re.sub(r'\[money\]', '[decimal](18, 4)', statement, flags=re.IGNORECASE)
        statement = re.sub(r'\bas\b.*', '[varchar](4000),', statement, flags=re.IGNORECASE)
        statement = re.sub(r'\[xml\].*,', '[varchar](4000),', statement, flags=re.IGNORECASE)

        # Replace specific column definitions
        statement = re.sub(r'\[dbo\]\.\[AccountNumber\]', '[varchar](15)', statement, flags=re.IGNORECASE)
        statement = re.sub(r'\[dbo\]\.\[Flag\]', '[bit]', statement, flags=re.IGNORECASE)
        statement = re.sub(r'\[dbo\]\.\[Name\]', '[varchar](50)', statement, flags=re.IGNORECASE)
        statement = re.sub(r'\[dbo\]\.\[NameStyle\]', '[bit]', statement, flags=re.IGNORECASE)
        statement = re.sub(r'\[dbo\]\.\[OrderNumber\]', '[varchar](25)', statement, flags=re.IGNORECASE)
        statement = re.sub(r'\[dbo\]\.\[Phone\]', '[varchar](25)', statement, flags=re.IGNORECASE)

        # Remove all constraints
        statement = re.sub(r'CONSTRAINT\s+\[.*?\]\s+CHECK\s+\(.*?\)', '', statement, flags=re.IGNORECASE)
        statement = re.sub(r'CONSTRAINT\s+\[.*?\]\s+DEFAULT\s+\(.*?\)', '', statement, flags=re.IGNORECASE)
        statement = re.sub(r'CONSTRAINT\s+\[.*?\]\s+UNIQUE\s+NONCLUSTERED\s+\(\s*(?:\[(\w+)\] (\w+),\s*)*(?:\[(\w+)\] (\w+))\s*\)', '', statement, flags=re.IGNORECASE)
        statement = re.sub(r'CONSTRAINT\s+\[.*?\]\s+UNIQUE\s+CLUSTERED\s+\(\s*(?:\[(\w+)\] (\w+),\s*)*(?:\[(\w+)\] (\w+))\s*\)', '', statement, flags=re.IGNORECASE)
        statement = re.sub(r'CONSTRAINT\s+\[.*?\]\s+FOREIGN\s+KEY\s+\(.*?\)\s+REFERENCES\s+\[.*?\]\.\[.*?\]\(.*?\)', '', statement, flags=re.IGNORECASE)
        statement = re.sub(r'CONSTRAINT\s+\[.*?\]\s+PRIMARY\s+KEY\s+CLUSTERED\s+\(\s*(?:\[(\w+)\] (\w+),\s*)*(?:\[(\w+)\] (\w+))\s*\)', ')', statement, flags=re.IGNORECASE)
        statement = re.sub(r'CONSTRAINT\s+\[.*?\]\s+PRIMARY\s+KEY\s+NONCLUSTERED\s+\(\s*(?:\[(\w+)\] (\w+),\s*)*(?:\[(\w+)\] (\w+))\s*\)', ')', statement, flags=re.IGNORECASE)

        # Change schemas (saleslt + dbo -> raw)
        statement = re.sub(r'CREATE TABLE \[SalesLT\]', 'CREATE TABLE [raw]', statement, flags=re.IGNORECASE)
        statement = re.sub(r'CREATE TABLE \[dbo\]', 'CREATE TABLE [raw]', statement, flags=re.IGNORECASE)

        # Clean up alignment, commas, and spaces
        statement = re.sub(r'NOT NULL', 'NULL', statement, flags=re.IGNORECASE)
        statement = re.sub(r'\]\(\s', ']\n(', statement)
        statement = re.sub(r',\s \)', '\n)', statement)
        statement = re.sub(r'[ ]+', ' ', statement)
        processed_statements.append(statement)

    # Return single string
    return join_statements(processed_statements)
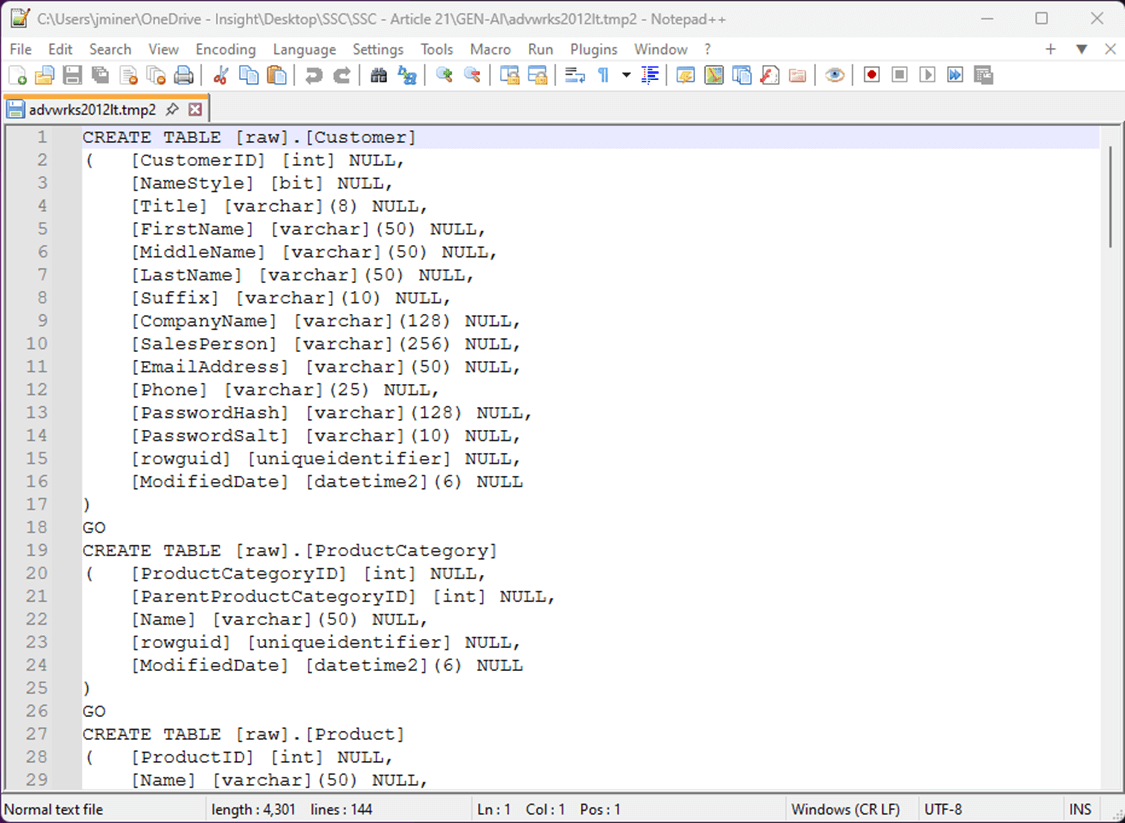
The image below shows the second intermediate file. The T-SQL statements have been adjusted for the Fabric Warehouse and the schema has been changed to “[raw]”.
At this point, we could connect SSMS to the SQL Analytic Endpoint of the Fabric Warehouse and execute the T-SQL script. However, we want this to be a native artifact that we can save in Microsoft Fabric. In the next section, we will create a function to transform the T-SQL script into a T-SQL notebook.
Creating Fabric T-SQL Notebooks
The prompt for the last function is seen below. I am going to use a Hell’s Kitchen analogy to explain how I think of Generative AI. The co-pilot feature is the sue chef who does most of the work. However, the master chef needs to refine the dish for consumption. In terms of coding, AI will create a framework to solve the problem. The developer must refine code so that the output is correct. Shown below is our fourth prompt.
~
~  Prompt 4
~

create a function
break string on GO keyword into statements.
create a new Jupyter notebook.
create a new cell for each statement.
The function below takes three parameters: the T-SQL statements in an array (list) format, the code template for each cell, and the name of the final notebook file. Please see the fabric meta data dictionary in the code below. This is required so that the Fabric service recognizes the notebook. Otherwise, you must manually change the tagging for the notebook and all code cells.
#
#  create_notebook - write out ipython notebook
#

import nbformat as nbf

# create a jupyter notebook from the tsql statements
def create_notebook(statements, code_snippet, notebook_file):

    # tagging for fabric
    fabric = {
        'language_info': {'name': 'sql'},
        'microsoft': {'language': 'sql', 'language_group':'sqldatawarehouse'},
        'kernel_info': {'name':'sqldatawarehouse'},
        'kernelspec': {'name':'sqldatawarehouse', 'language':'sqldatawarehouse', 'display_name':'sqldatawarehouse'}
    }

    # new notebook
    nb = nbf.v4.new_notebook(metadata=fabric)

    # start with empty notebook
    nb['cells'] = []

    # number code blocks in markdown
    cnt = 1

    # for each statement, create a markdown and code cell
    for stmt in statements:

        # grab first line of code block, split on spaces
        first = stmt.split('\n')[0]
        parts = first.split(' ')

        # make up orginal table name
        org_table_name = parts[2:][0]

        # create a title
        title = '<font size="5"> Table ' + str(cnt) + ' - ' + org_table_name + '</font>'

        # add markdown
        nb['cells'].append(nbf.v4.new_markdown_cell(title))

        # add extra code
        code = code_snippet.replace("{x}", org_table_name).replace("{y}", stmt)

        # add code cells
        nb['cells'].append(nbf.v4.new_code_cell(code, metadata={'language_info': {'name': 'sql'}}))

        # increment the counter
        cnt += 1

    # overwrite the notebook
    with open(notebook_file, 'w') as f:
        nbf.write(nb, f)
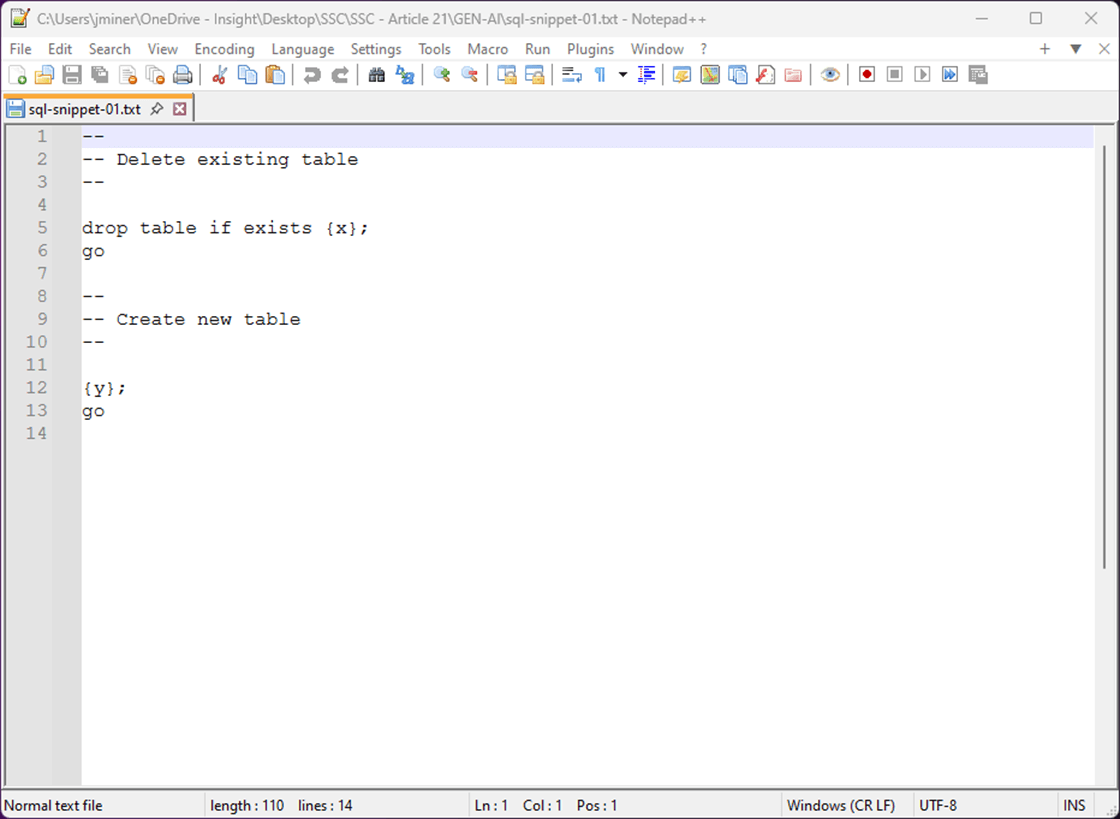
The code template shown below has two tokens (x + y) that will be replaced with the name of the current table and the current T-SQL statement.
Let us jump into creating a Fabric Warehouse and using the T-SQL notebook in the next section.
Build Fabric Warehouse
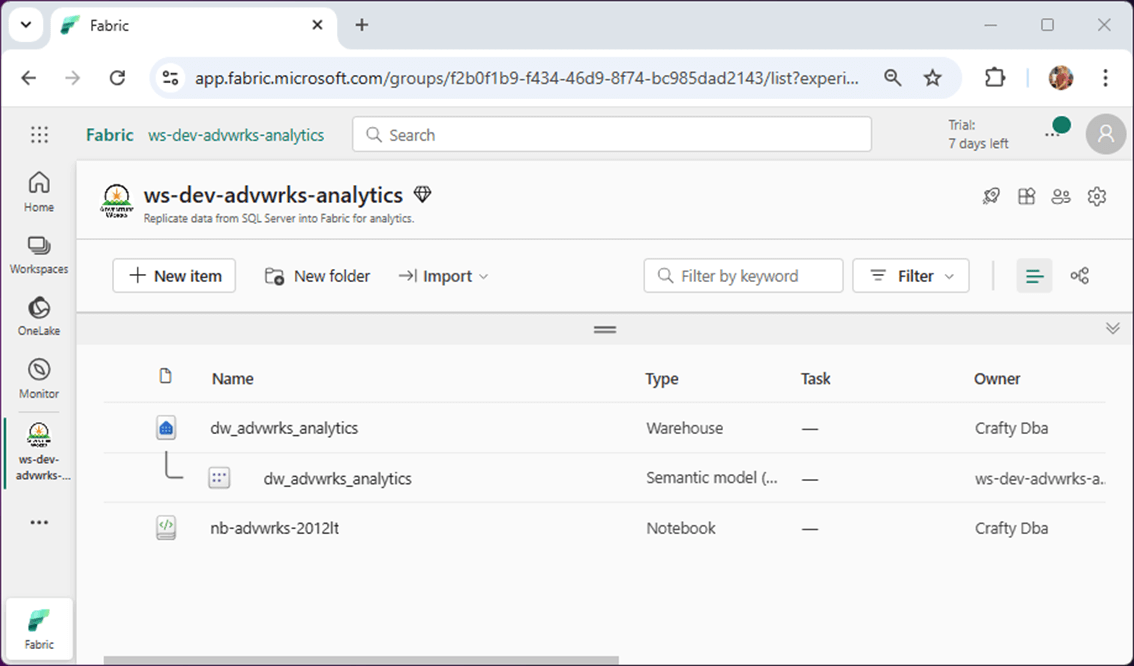
The image below shows that I already created a workspace named “ws-dev-advwrks-analytics”, created a warehouse named “dw_advwrks_analytics”, and uploaded our T-SQL notebook renamed as “nb-advwrks-2012lt”. Workspaces have properties that you can customize. For instance, I added a description and a custom icon to polish it off.
If you double click the notebook, you will open the designer. Due to the existing tagging, it knows it is a T-SQL notebook. However, we need to choose a warehouse at this time. Click the “add” button to complete the process.
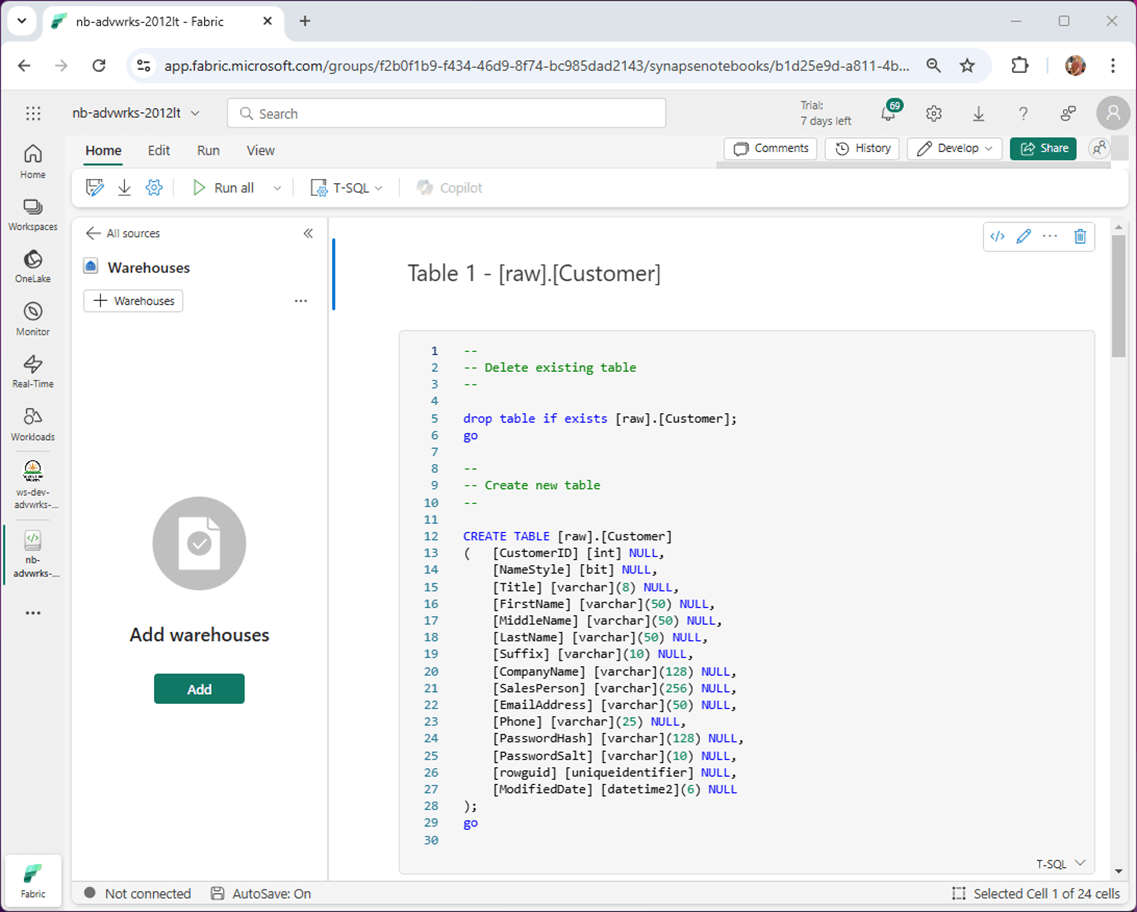
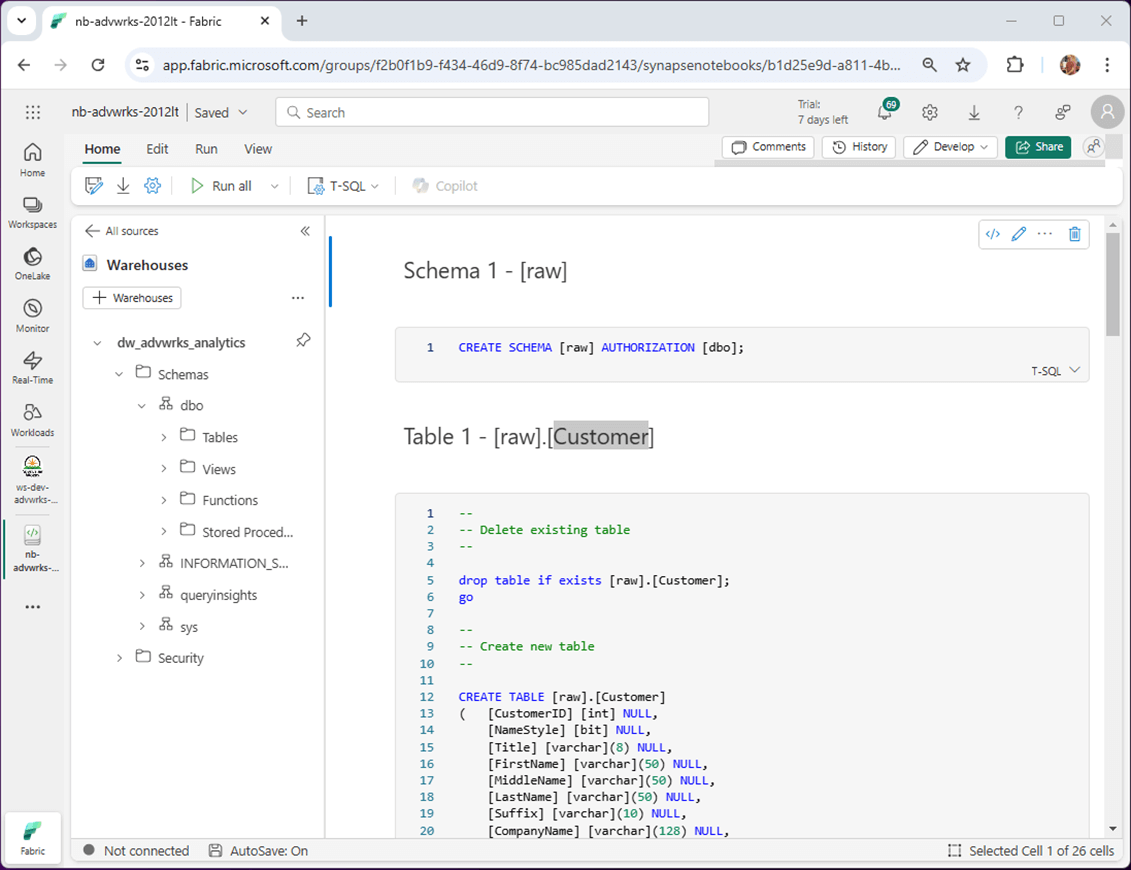
One thing we forgot to add to the notebook is a statement to create the “[raw]” schema. Let us fix that issue by adding both a mark down and code cell.
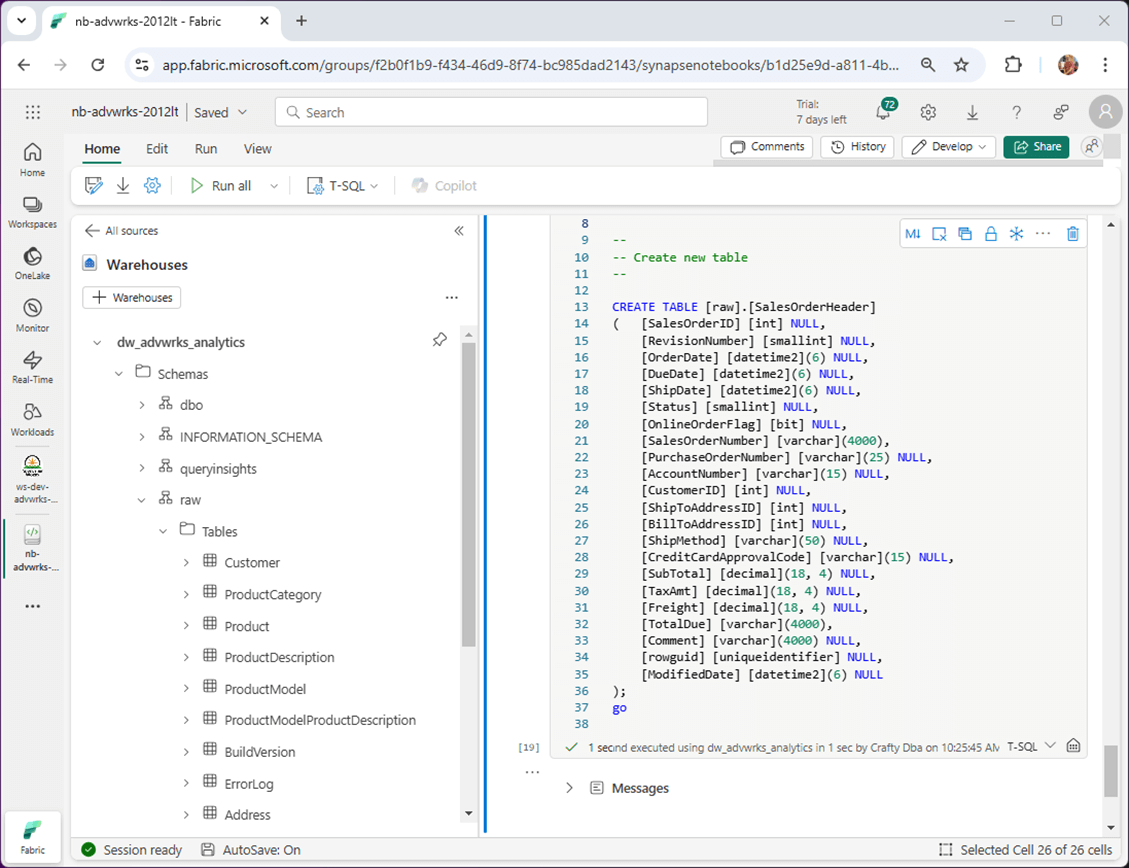
Click the “run all” button to execute the whole notebook. We can refresh the tables in the object viewer to see the results. I have noticed interesting results with the table list. Sometimes, it takes a while to be updated. Other times the names of the tables are out of order. Always use the sys.objects system view to see the up-to-date list.
There is a debate on when to use T-SQL notebooks and when to use stored procedures. Both objects can be called from a data pipeline. I really like T-SQL notebooks since both markdown cells and charting output to be added to the artifact as additional information.
Summary
The era of Artificial Intelligence (AI) has arrived. Please get on board the AI train or be left in the dust! Today, we talked about how Large Language Models (LLMs) collect information from the internet and how Co-Pilot can translate English prompts into Python programs. Your results might vary on how you phrase the question. The more information you can supply the Generative AI service, the better the answer will be. Keep track of your work in incremental steps. I have seen a prompt change result in totally different code base.
The technical problem we tackled today was to convert an existing SQL Server schema into a Fabric Warehouse Schema. Fabric does not support full coverage of T-SQL language syntax. I chose to ignore primary keys and foreign keys to make the code easier. However, this relational information is important if you want to use AI Skills. The problem was tackled incrementally in which temporary files at each stage were saved to disk. The final output was a Fabric T-SQL notebook.
The main issue I have with local queries in the Fabric Warehouse is the fact they do not get checked into software version control. Any objects you create in the Warehouse, such as a stored procedure, do get scripted out and saved in the repository. Notebooks are automatically saved into repository. Things in Fabric are not blinding fast since it is distributed processing with abstracted layers (storage and compute). I do not think there is a major execution time difference between the two design patterns.
To recap, I have started using Generative AI for large tasks of repetitive work. One example is the transformation of 500 tables from SQL Server to Fabric syntax. One might ask why on a modern data platform is there a need for meta data driven pipelines? Yes, there are mirroring technologies on the Fabric roadmap, but not all databases will be supported by Microsoft. If a company had an IBM DB2 database located on premises, then a hybrid design using a data gateway and meta data driven pipelines would be one approach to solve the problem.
The enclosed zip file contains all the code from this article. Next time, I will be talking about what tables that I use in my metadata schema and how to create a “job / step” oriented data pipeline.