Introduction
Whether you’re breaking down a complicated process workflow into discrete visualized pieces, reusing packages within a project to remove redundant code, or consolidating multiple steps in a complex SQL Job into a single SSIS project, the Execute Package Task is an important tool in any developer’s belt.
Scenario
To become familiar with using the Execute Package Task, we will be creating an SSIS Project that will scan an input directory for files, import them into a local database, and move the processed files to an archive folder.
- Parent.dtsx: This package will scan the input directory for files to process, and if so, call the child packages to process and archive the files.
- Process.dtsx: This will handle importing files from the input directory.
- Archive.dtsx: This will move the processed files from the input directory to the output directory
Setup
Before we begin actually designing the SSIS Solution, we will need to create some files and directories to work with.
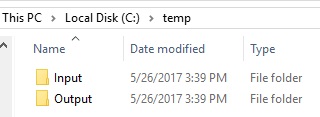
Create Input and Output folders
We need to simulate the directory where files will be dropped off and where we will be generating the output files. In my workstation's C:\temp\ directory I have created two folders: C:\temp\Input\ and C:\temp\Output\.
Now the the easy part out of the way, time to make the input files for our process.
Make Two Member Files
Let's start out by making our memberA.xls file. We'll keep it simple and just make it with a header and 5 records each. First, here is memberA.xls:
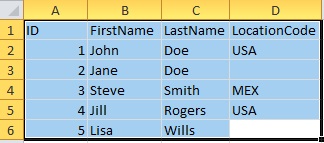
Save memberA.xls C:\temp\Input\ and then create memberB.xls. Here is the data in memberB.xls:
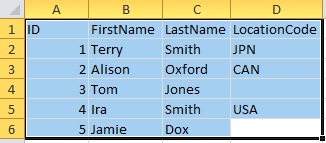
You should now have two input files saved in the C:\temp\input\ folder.
With the file system now setup and some test files created to support our scenario, it is time to design an SSIS solution that can perform the task at hand.
Create Packages
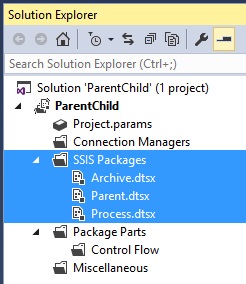
Create a new SSIS Integration Services solution, called ParentChild, and create 3 new packages: Parent.dtsx, Process.dtsx, and Archive.dtsx
Design Parent.dtsx
This is the package we will use to serve as the Parent package to the other two Child packages. This setup will allow us to both control the workflow of the overall solution and pass parameter values from package to package.
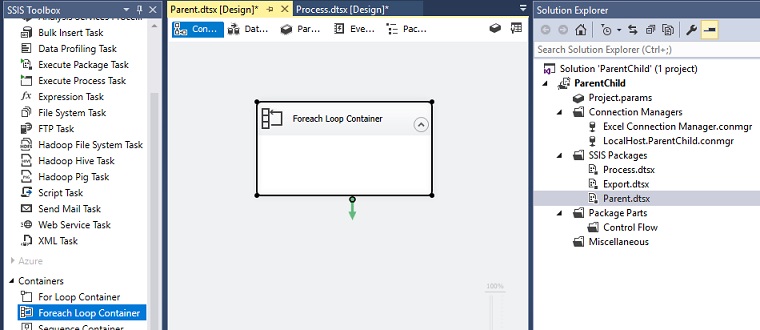
Add a Foreach Loop Container
To make sure we can process all of the files in the C:\temp\Input\ directory in one pass, we will need to drag and drop a Foreach Loop Container into the designer of the Parent.dtsx package. A Foreeach Loop Container will look through a particular directory and perform the the tasks within the container for each of the files it finds. It will also store the filename and path of each of the files in a variable which we will be using later on.
Double-Click on the Foreach Loop Container and select the Collection option on the left.
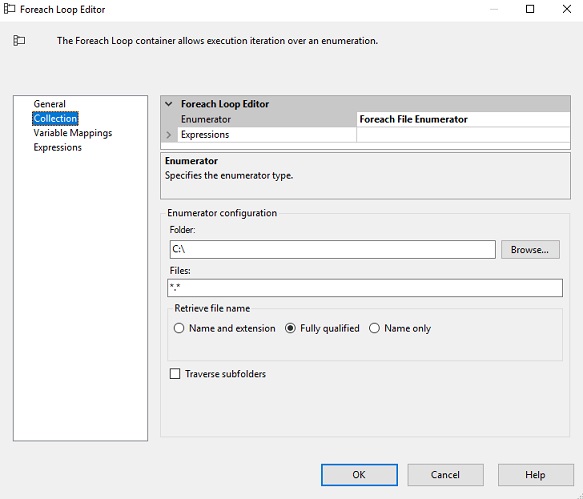
On this screen, modify the following options. In the Enumerator configuration, modify the folder path so that it points to the C:\temp\Input\ directory that has the member Excel files. Under Retrieve file name, each of the available options determines how much of the file path of the files it finds in the directory defined in the Folder option to save.
- Name and extension: As it says, it will store just the filename and extension of each of the files it finds (ex. memberA.xls)
- Fully Qualified: store the full UNC path of each file it finds (ex. C:\temp\Input\memberA.xls)
- Name only: This will store just the name of each file it finds, minus the file extension (ex. memberA)
Then click the Variable Mappings menu option.
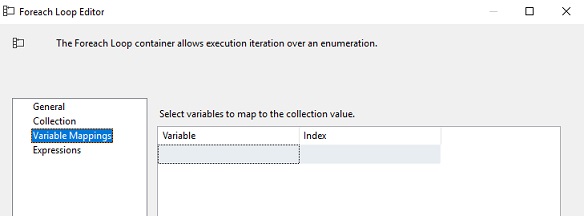
Remember how I said previously that a Foreeach Loop container will store the filename of each of the files it finds in the configured directory? This is where we create the variable for the files to be stored. Click the box under Variable and select <New Variable>...
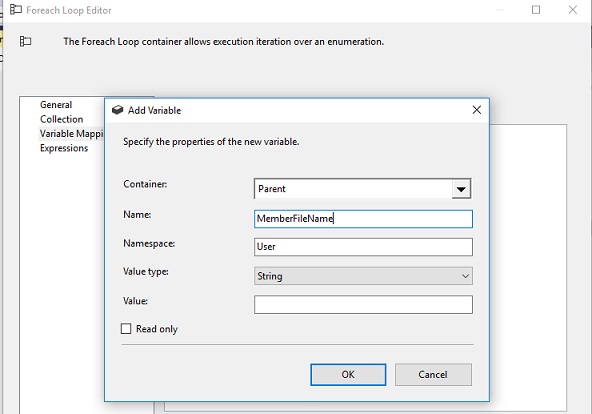
In the new pop-up window, we're going to modify the Name to read as MemberFileName and then click OK to save. Click OK again to save the configuration settings for the Foreach Loop Container. Now that we have created the loop that will cycle through each of the files in the directory, let's define what is going to be done with each of the files.
Add an Execute Package Task for the Process.dtsx Package
Drag an Execute Package Task object from the SSIS toolbox into the previously created Foreeach Loop Container. Double-click on the new package so we can configure it to call the Process.dtsx package.

Rename this task to Execute Process package so that its purpose is clear from the design window. Click on the Package menu option so that we setup which package is being referenced.
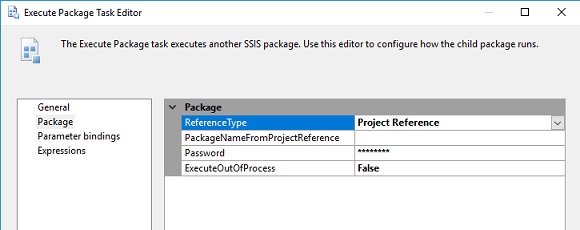
We have several configuration options at our disposal. Here are our options:
- ReferenceType: This defines WHERE the package that we're going to call exists. Project Reference is for packages that exist within the same SSIS Project. External Reference is used for packages that have already been deployed to the server that you would want to reuse. For this tutorial's purpose, leave this set to Project Reference.
- PackageNameFromProjectReference: This is a drop-down menu that will allow us to select any of the packages that are part of the current project. Select Process.dtsx.
- Password: If the package you are referencing is password protected, you would need to enter that package here to decrypt its contents. Since we have not set a password for any of our packages, leave this at its default.
- ExecuteOutOfProcess: Setting this to true will spawn a separate process to run this package outside of the process being used to run the Parent.dtsx package. On the upside, this allows you to run the package with its own server resources independently of the resources being used for Parent.dtsx. On the downside, this makes the success/failure of this package unknown to the parent package. Great for parallelism, bad for workflow tracking. Leave this set to False for now but feel free to experiment with this option in the future.
Instead of having redundant code across multiple packages to store the same values over and over again, we can utilize the Parameter bindings option to pass the value of the MemberFileName variable to the Process.dtsx package. Click on the Parameter bindings option on the left and then click the Add button.
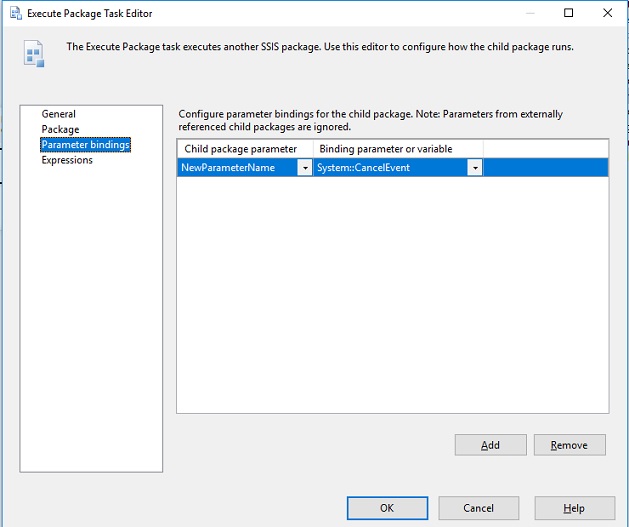
Add these parameters:
- Child package parameter: This sets the name of the parameter that we will be receiving the passed value. Change NewParameterName to Process_MemberFileName.
- Binding parameter or Variable: This drop down contains any package parameters or variables accessible to our current package that we will be passing values from.
Select User:MemberFileName and then click Ok.
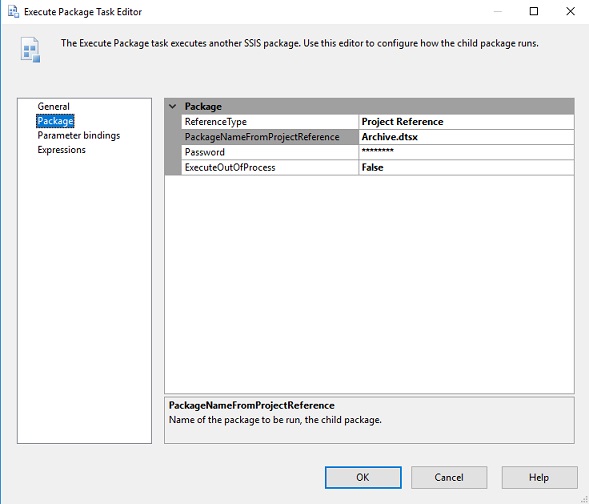
Add an Execute Package Task for the Archive.dtsx Package
Drag another Execute Package Task object into the Foreach Container, but this time configure it to point to the Archive.dtsx package.
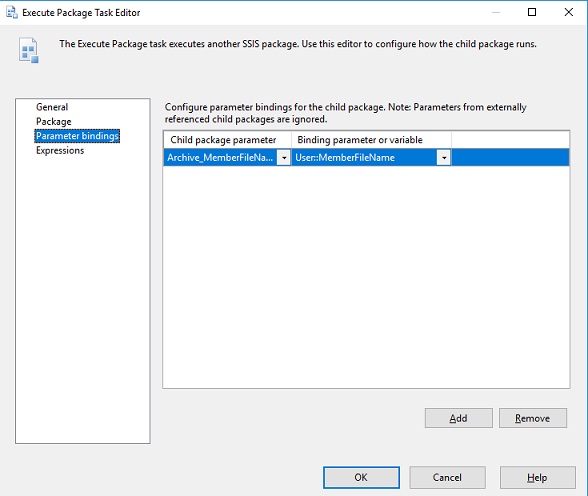
Click on the Parameter bindings option on the left and make the following changes:
- Child package parameter: This sets the name of the parameter that we will be receiving the passed value. Change NewParameterName to Archive_MemberFileName.
- Binding parameter or Variable: This drop down contains any package parameters or variables accessible to our current package that we will be passing values from.
Select User:MemberFileName and then click Ok.
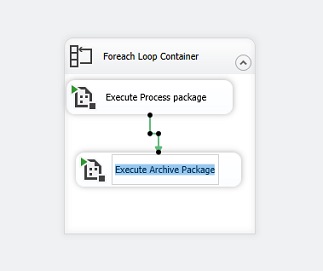
Back in the Design window for Parent.dtsx, connect the Execute Process Package task to the Execute Archive Package task.
Design Process.dtsx
The Parent package has been designed in a way to define our basic workflow. Let's move on to designing the Process.dtsx package to handle the loading of the Excel files into a local database environment.
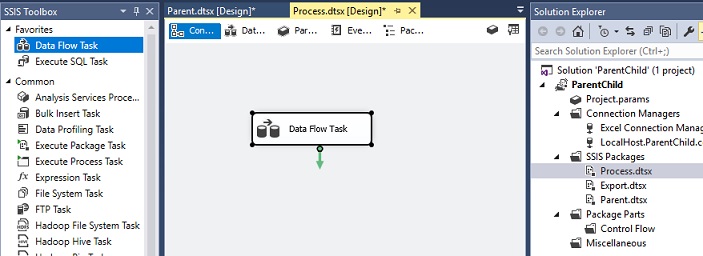
Add Data Flow Task
Open Process.dtsx in the Solution Explorer and then add a Data Flow task to the design window.
Create Excel Data Source Connection
Add an Excel Source from the SSIS Toolbox to the design window and double-click on it.
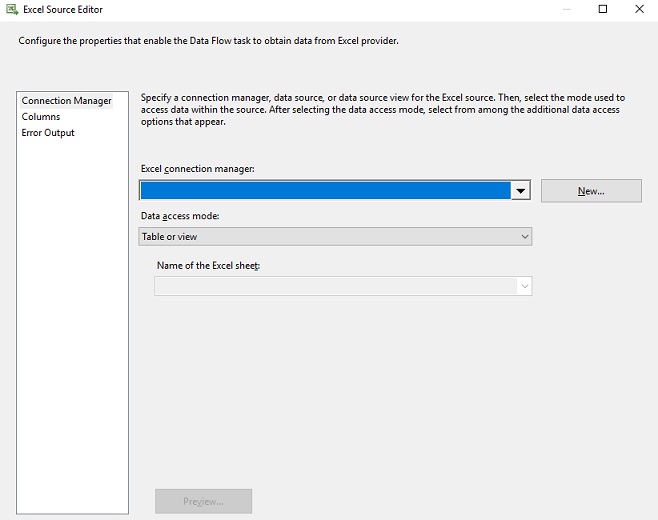
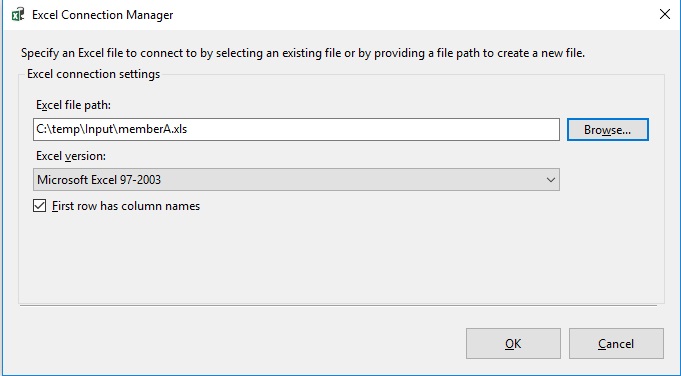
Click the New… button and for the Excel file path, put in the full path to one of the member files.
Click OK and then under Name of the Excel sheet, select Sheet1$. Click the Preview button to make sure that the connection was configured properly.
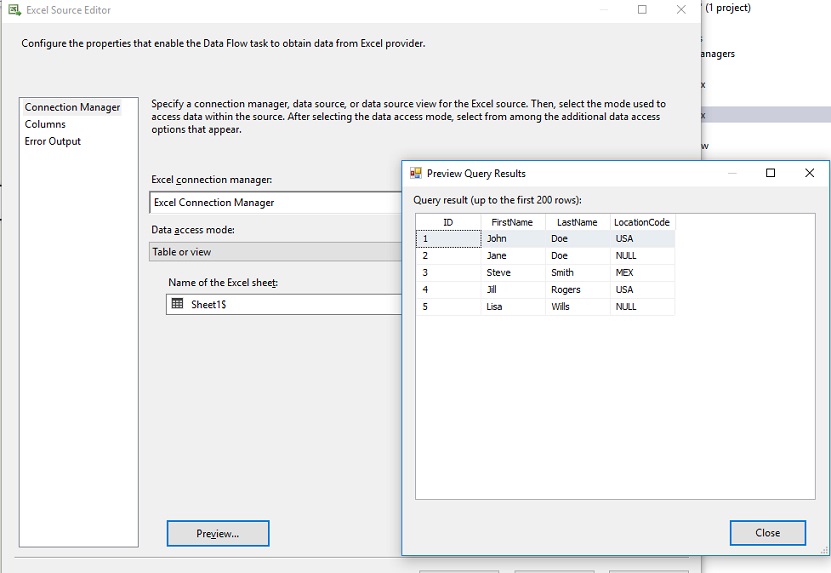
Once confirmed, close the preview window and then click OK on the main Excel Source Editor window to save the configuration settings.
Assign Package Parameter to Excel Data Connection
With the Excel Data Connection defined, we now need to make the file path for the connection dynamic so it will accept any file path that the Foreach Loop Container in the Parent.dtsx package has found. To do this, we will create a Package Parameter using the Process_MemberFileName package name we defined earlier.
At the top of the Design window, click the Parameters tab.

Click the first icon above the Name header to Add a new parameter.

Make the following changes to the new parameter:
- Name: Set the name of the new parameter to Process_MemberFileName
- DataType: Set the datatype to string
- Value: Set the value to the full path to one of the member Excel files that were created earlier (ex. C:\temp\Input\memberA.xls)
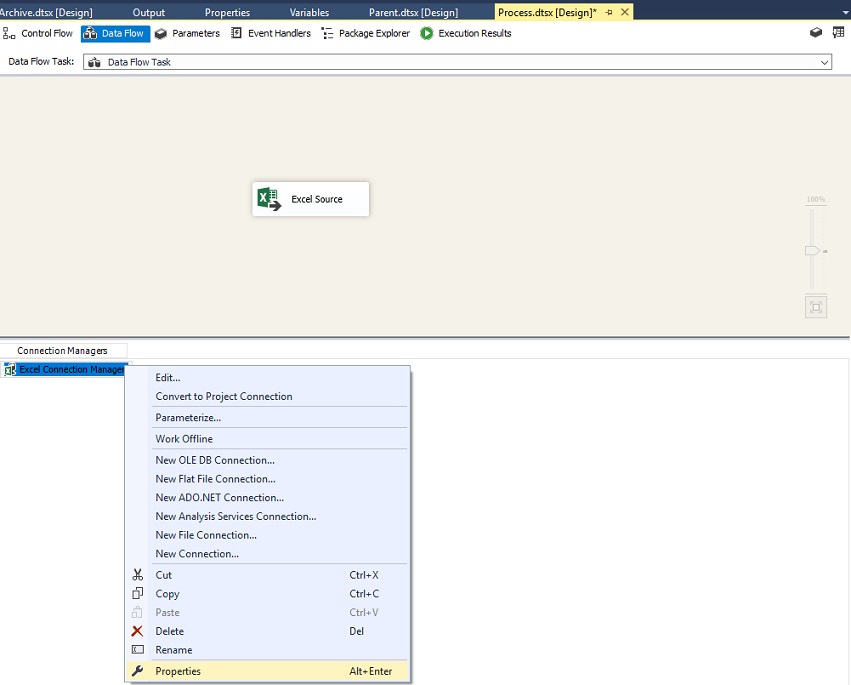
Once configured, click the Data Flow tab to return to the previous screen. Right-click the Excel Data Connection in the Connection Managers docked at the bottom and select Properties.
In the Properties window, click into the empty box next to Expressions, and then click the button with the ellipsis at the right-most edge of the box
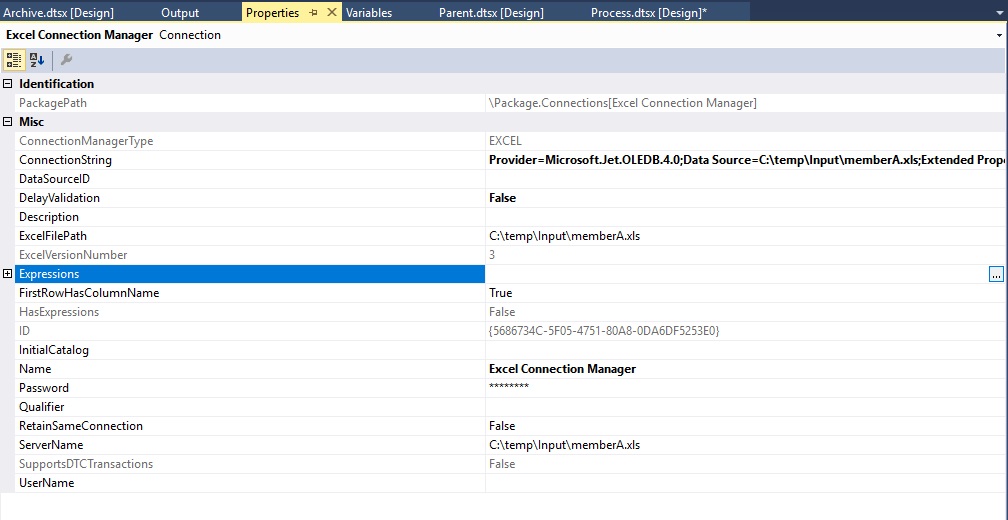
In the Properties Expression Editor window, configure the following:
- Property: Set to Excel File Path
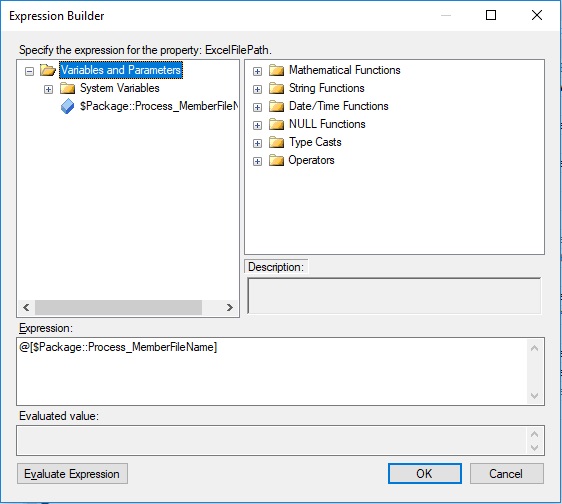
- Expression: Either enter the property @[$Package::Process_MemberFileName] or click the ellipsis button and do the following:

- Expand the Variables and Parameters folder in the upper-left window
- Drag the Parameter @[$Package::Process_MemberFileName] into the expression window
- 3. Click Ok
This will override the initial setting for the Excel File Path that was previously to now take whatever value is defined in the Process_MemberFileName package variable.
Import Excel File into a Local Database.
Navigate back to the Design window for the Process.dtsx package and add a OLDEDB Destination object from the SSIS toolbox to the Design window. Connect the Excel Source object to the OLEDB Destination object that was just added.
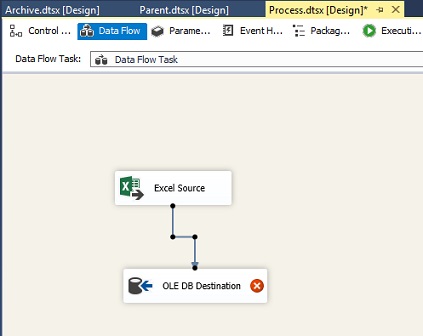
Right-click on the OLEDB Destination object and select Edit to configure it.
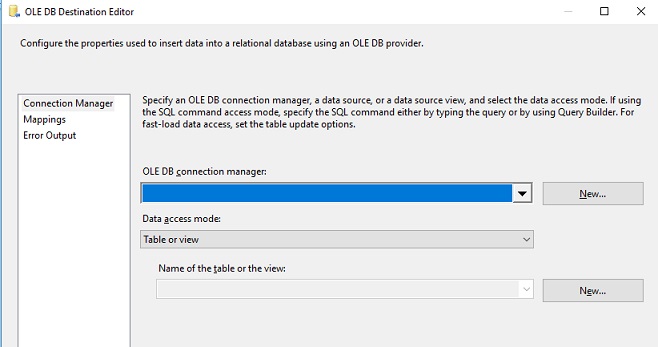
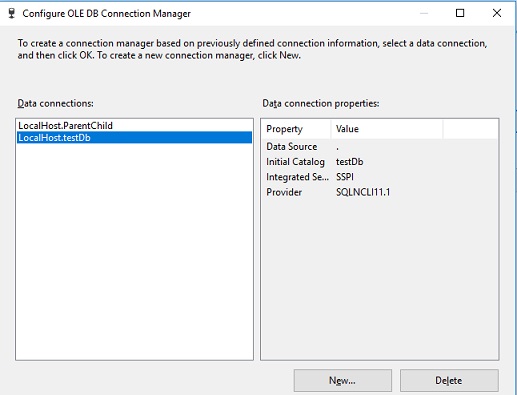
Click the New… button next to the OLE DB Connection Manager and configure it to point to a testing/sandbox database that you have access to and are able to create tables within. I created one for my local testDb database.
Once selected, click OK to save the settings. Edit the SQL Connection Manager again to create a new table to import the data into. Click the New button to the right of the dropdown under Use a table or view to create a new table.
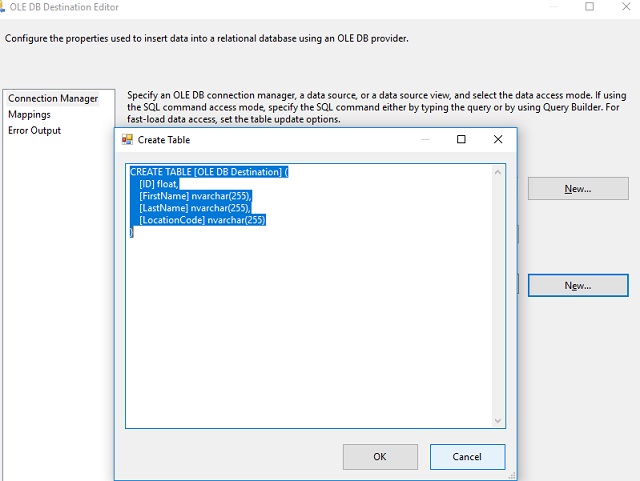
Normally we would change the name of the table to something friendlier but for now we can leave it at its default and click both OK buttons to save our settings.
Click on the Mappings menu option on the left so that the columns from the Excel Source Connection can be automatically related to the columns in the table we just created.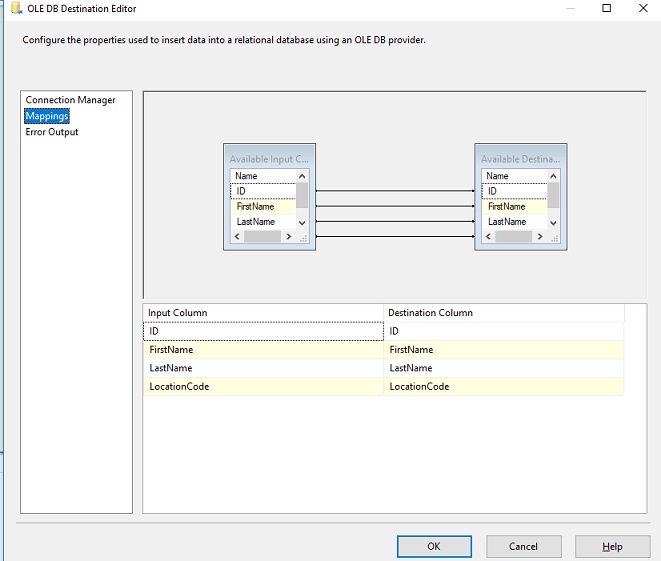
Click Ok to save the configuration.
Design Archive.dtsx
The Archive.dtsx package will handle moving the member files from the Input directory to the Output directory after they have been loaded into the database
Create Package Parameter
Open Archive.dtsx in the Solution Explorer and click the Parameters tab across the top.

Click the Add Parameter button on the left side above the Name header and configure the following values:
- Name: Set this to Archive_MemberFileName. This is the child parameter we configured to receive file paths in our Parent.dtsx package
- Data type: Set this to string
- Value: Set the value to the full path to one of the member Excel files that were created earlier (ex. C:\temp\Input\memberA.xls)
Add File System Task
Drag a File System Task object from the SSIS Toolbox into the Design window.
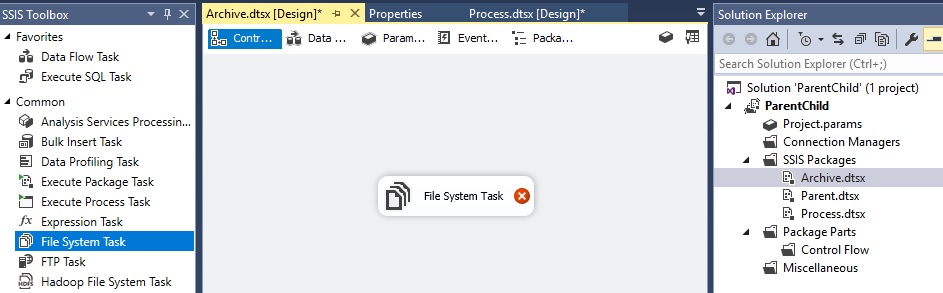
Right-click on the File System Task object and click Edit.
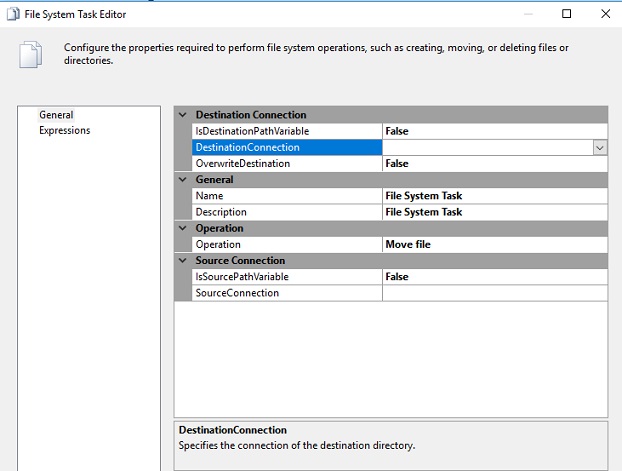
From here, we will need to configure the following options. For the DestinationConnection:
1. Click the dropdown and select New connection
2. Change the Usage Type to Existing folder and for the Folder option, put in the path to our Output directory (ex. C:\temp\Output)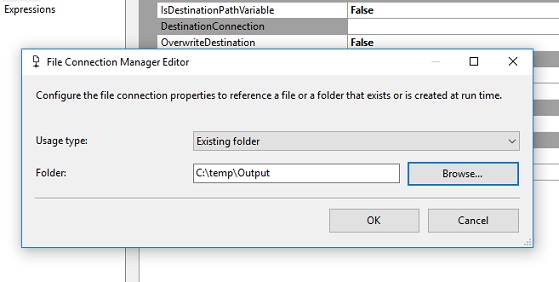
3. Click OK to save the settings
For Operation, set this to Move File. For IsSourcePathVariable, set this to Yes. For SourceVariable, in the dropdown, select the $Package::Archive_MemberFileName variable we created earlier. This will only move the files that are being reference by the Package Variable.
Once configured, click OK to save the settings
Execution
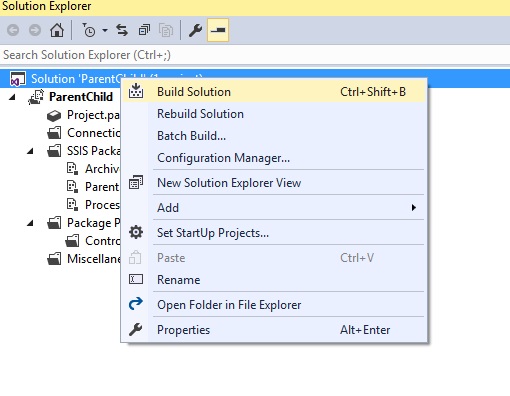
Right-click the Solution at the top of the Solution Explorer and click the Build Solution option. This will save all of the changes we have made and propagate the values for the parameters we have set through all of the data connections that have been established.
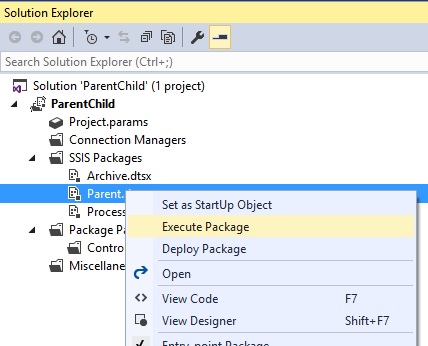
Once the Solution has built successfully, right-click on the Parent.dtsx package and select Execute Package.
Verification
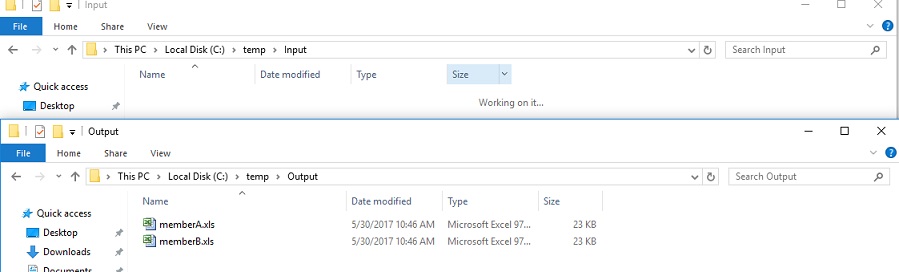
Once completed successfully, we can verify that everything ran as intended by checking the Input and Output directories that we were moving our member files to and from.
We should also check the database we created to make sure that the contents of the files imported properly as well. Connect to your Local Environment and run a query to return all of the contents of the table we created. In my case I would run the following code:
USE [Testdb]
GO
SELECT [ID]
      ,[FirstName]
      ,[LastName]
      ,[LocationCode]
FROM [Testdb].[dbo].[OLE DB Destination] 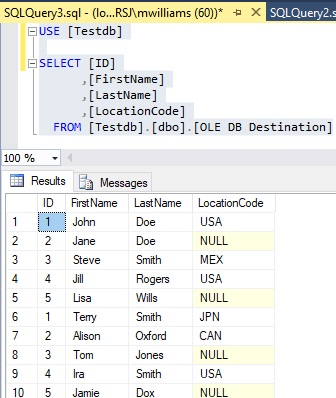
Conclusion
So what did you just do? You successfully created an SSIS Solution that utilized the Execute Package Task to control the workflow of multiple packages and to pass parameters defined in a parent package to separate child packages. As stated in the introduction, the Execute Package task is a very handy tool that you will find yourself using time and time again in your professional life.