

Introduction
This time we will use the the command line to create tables and alter the Azure SQL Data Warehouse (ASDW) database. Sqlcmd is the command line that you can use to access to your ASDW from your local machine. This is a popular tool to handle a local SQL Server, but in ASDW it has some limitations that we will explain in this article. This command line utility is very useful if you have some batch file that automate some processes or you have some tools that can call the command line to automate tasks.
Requirements
- An Azure Subscription.
- An Azure SQL Server and an Azure Data Warehouse Database already created (if you do not know how to create a Data Warehouse, go to our article "Azure Machine Learning - Your first experiment" and go to the Creating an Azure SQL Data Warehouse close to the getting started section.
- Visual Studio 2013 or later. In this example, we are using VS2015.
- SQLCMD installed.
Get Started
In this article, we will do the following:
- Connect to ASDW
- Learn how to verify which T-SQL statements are supported in ASDW
- Learn how to run a T-SQL script
- Learn how to insert data in a table.
- Learn how the change the price tier
- Learn how to modify ASDW database size with sqlcmd
1. Connect to ASDW:
We will first login in the local machine to our ASDW using the following command:
sqlcmd -S sqlcentralserver1.database.windows.net -d sqlcentralwarehouse -U daniel -P MyPassw=rd! -I
This will login and connect to Azure. -S is used to specify the server name. This name can be obtained in the Azure Portal. We are assuming that the ASDW is already installed according to the steps specified in the requirements section. In this example the SQL Server name is sqlcentralserver1.
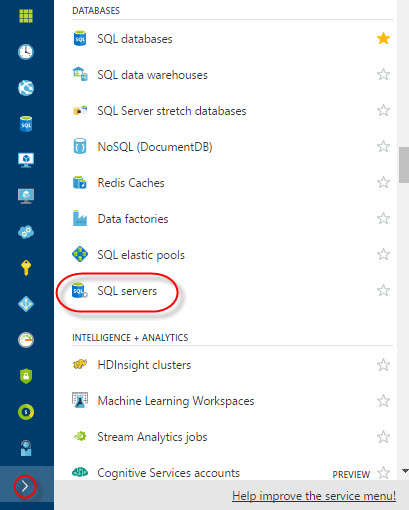
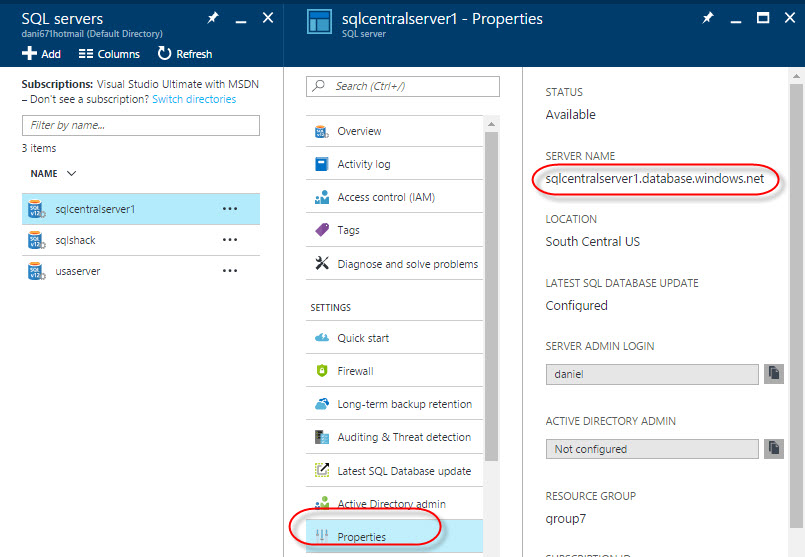
In this example, the ASDW Server name is sqlcentralserver1.database.windows.net. You can get this name in the Azure Portal. Click the > icon and select SQL Servers:
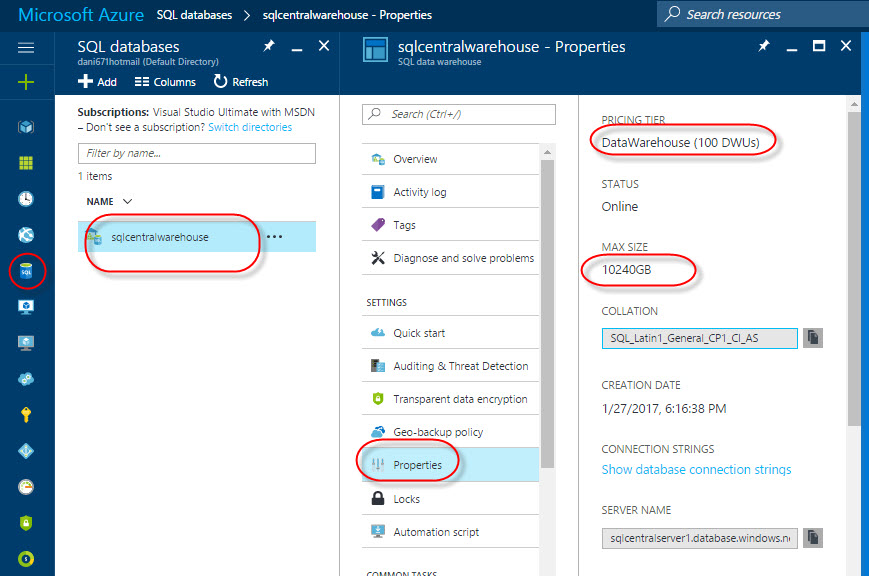
Press properties and you can get the server name there:
-d is the database name. In this example, the database name is sqlcentralwarehouse. -U -P are used to specify the user name and Password. Read the requirements if you do not know how to create the username and password. -I is used to enable quote identifiers. If it connects successfully, you will see the 1> in the command prompt like this:

2. How to verify which T-SQL statements are supported in ASDW
There are several commands that are supported in a local SQL Server that are not supported in ASDW. Here we will explain how to know which commands are supported.
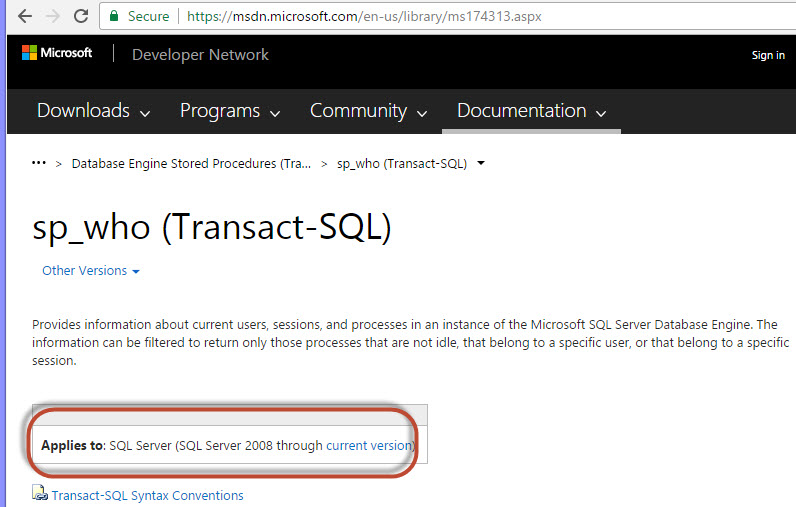
Let's start with the sp_who command. Run the sp_who stored procedure in sqlcmd:

Note that sp_who does not exist in ASDW. If you go to the sp_who online help, you will find that it only applies to SQL Server and not to Azure SQL or ASDW:
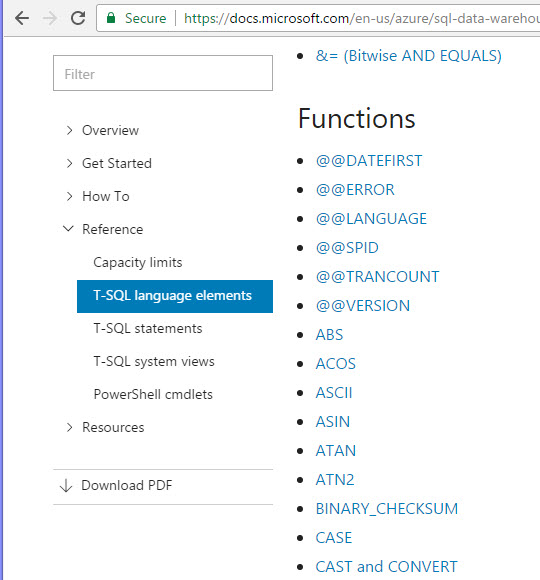
You can find the list of language elements, statements and system views supported for ASDW in the following links:
In T-SQL language elements, you will find functions, operators, control flow, variables, functions, procedures and other elements:
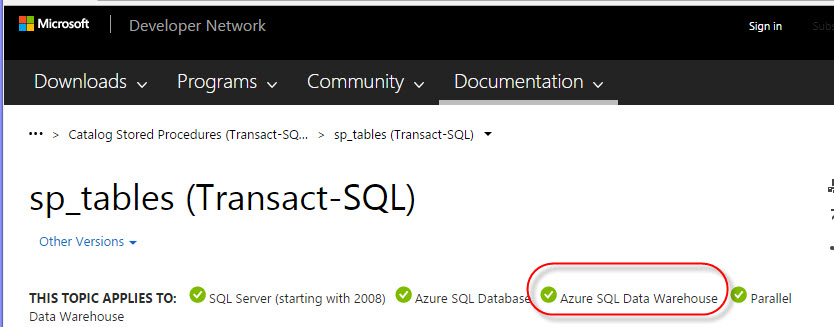
Let's click sp_tables:

As you can see, sp_tables is a system stored procedure that is applicable to ASDW:
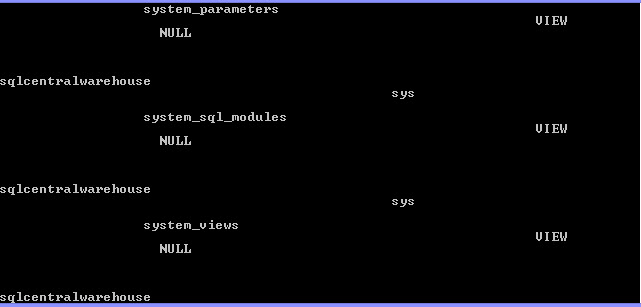
If we run the system procedure in sqlcmd, we will be able to see results:

sp_tables shows the objects that can be queried:
3. How to run a T-SQL script
You can create a T-SQL script and run it using sqlcmd. The following example will run a script named createble.sql, which can be downloaded at the bottom of this article in the resource files section. The script has the following sentences:
create table dim_customer
(
ID int,
Firstname varchar(50),
Lastname varchar(50)
)
It will create a table named dim_customer.
To run the createtable.sql script, in the cmd run the following commands:
sqlcmd -S sqlcentralserver1.database.windows.net -d sqlcentralwarehouse -U daniel -P MyPassw=rd! -I -i c:\sql\createtable.sql
Where -i is to specify the script as an imput and c:\sql\createtable.sql is the path where the script is stored.
You can verify in Visual Studio (VS) that the table dim_customer was created successfully (for more information about connectiong ASDW with VS, refer to our article Get Started with ASDW:
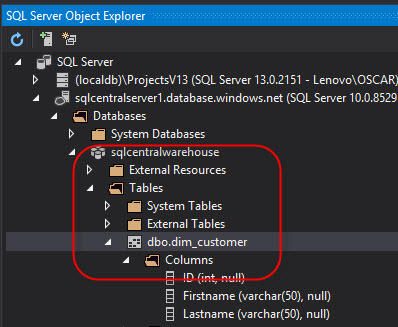
You can also run a select to the new table in sqlcmd:

4. How to insert data in an ASDW table:
Run a simple insert using sqlcmd (make sure you are still connected to ASDW):
1> insert into dim_customer values(1,'John','Smith')
2> GO
You just inserted the ID, Firstname and lastname. If we run a select again, you will be able to see the row inserted:

5. How to change the price tier
1> ALTER DATABASE sqlcentralwarehouse MODIFY ( SERVICE_OBJECTIVE= 'DW200' )
2> GO
If you have a message similar to this one:
Message 103005, Level 16, Status 1, Server sqlcentralserver1, Línea 1Parse error at line: 1, column: 16: Expected SCOPED but encountered sqlcentralwarehouse instead.1> Exit
sqlcmd -S sqlcentralserver1.database.windows.net -d master -U daniel -P MyPassw=rd! -I
1> ALTER DATABASE sqlcentralwarehouse MODIFY ( SERVICE_OBJECTIVE= 'DW200' )
2> GO
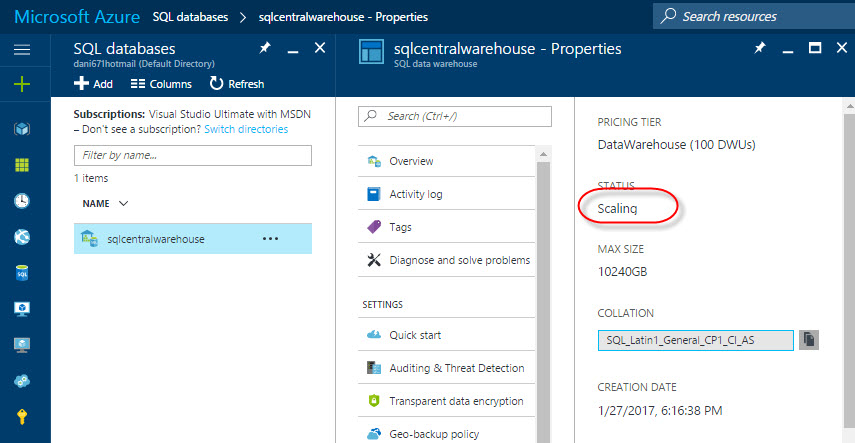
It will take some minutes to scale. The Status in the Azure portal will be scaling which means that the scale from 100 DWUs to 200 DWUs is in process:
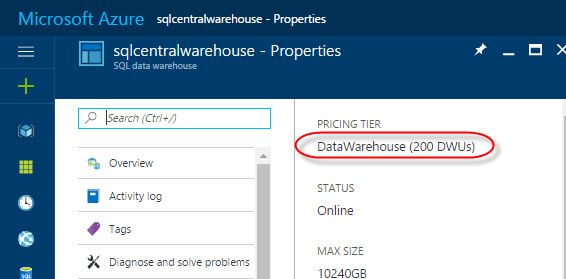
After some minutes, you will notice that the pricing tier changed from 100 to 200 DWUs:
6. Modify the ASDW database size with sqlcmd
To modify the database size, in the sqlcmd, run the following statements:
1> ALTER DATABASE sqlcentralwarehouse MODIFY ( MAXSIZE=250 GB );
2> GO
You can verify that the sqlcentralwarehouse database was changed in the Azure Portal to 250 GB:

Conclusion
In this article, we learned how to access to ASDW using sqlcmd. We noted the T-SQL limitation and we verified how to use the documentation. In the long run we expect that more T-SQL statements will be supported. We also learned how to run, scripts in sqlcmd and how to verify the modifications using the Azure Portal or VS.
References