

One of the main questions asked about Amazon RDS SQL Server is “How do I import data from my on-premise SQL Server to RDS?”, and closely behind that question is this one: “How can I export data from RDS back to my on-premise SQL Server?”. The answer is simple: use native SQL Server .bak formatted backup files for both purposes. Amazon RDS SQL Server can both read and create the .bak files you’re probably already used to working with in SQL Server. To use .bak backup files on RDS requires only a short configuration process on your RDS instance, and a couple of simple stored procedures already included by Amazon on every RDS SQL Server instance.
Now, please note that native SQL Server-type backups are not the only options for backing up data on RDS SQL Server. There’s the built-in automatic snapshot feature that will enable you to backup and restore data automatically on a schedule you choose within RDS, and this option allows for point-in-time restores to RDS for disaster recovery and other purposes. And, if you’re looking to import data from an on-premise SQL Server to RDS, you might consider using Amazon’s DMS (Database Migration Service) which can allow you to basically mirror and synchronize your on-premise database into RDS, which can reduce the downtime required when cutting over your applications. Neither of these options require the use of .bak backup files.
However, there are many reasons why you may want to use the native SQL Server .bak formatted files for backups and restores. These could include populating an on-premise test or development database with RDS data or updating databases that haven’t yet been migrated to the cloud from databases that have. Probably the most appealing reason is that you are likely already familiar with the process of taking and restoring .bak SQL Server backups, and using these skills in RDS can increase your confidence and decrease the time it takes to move into the cloud.
Let’s see how easy it is to backup and restore databases on SQL Server RDS using Native SQL Server backup.
For this article, we assume the following:
- You have access to SQL Server Management Studio and can connect to an RDS Instance
- You have permissions in your AWS account to create or modify an IAM role, and an S3 bucket
- You have basic familiarity with running a native SQL Server backup and restore outside of RDS
We’ll cover:
- Setting Up RDS to use native SQL Server backups
- Backing Up an RDS SQL Server Database to a .bak file
- Restoring a .bak Backup File to an RDS SQL Server Database
- Monitoring the Status of your RDS SQL Server Backup Query
- RDS SQL Server Database Import-Export Scenarios
Setting Up RDS to use native SQL Server Backups
There are 2 basic steps to setting up your Amazon RDS for SQL Server instance to create and read native SQL Server .bak files:
- Add the SQLSERVER_BACKUP_RESTORE option to an Option Group (creating a new option group if you chose)
- Associating the Option Group with your RDS SQL Server instance
These steps need only be completed once for each SQL Server instance. Once completed, any new databases you add or create in that instance will be able to use the .bak files.
Create a new Option Group
In the AWS console, navigate to the RDS service, and select “Option Groups”. Here is where we create the Option Group. Optionally, you can use default option group if you wish. At creation, every RDS SQL Server instance is assigned a default option group, and you can modify the default group instead of creating a new one; however, this will also enable this option on all the other instances using this group, and on any new instances created of this type. This may or may not be what you desire, so consider carefully before deciding.
For this example, we’re going to create a new option group and configure it to use an S3 bucket.

Next select “Create Group”. This will open the dialogue box where you can specify details for the new group:

Add a name for your option group and add a description, if desired. Next, select the proper Engine – for the SQL Server engine type of your RDS instance. Your choices are:
- sqlserver-ex = express edition,
- sqlserver-web = web edition,
- sqlserver-se = standard edition,
- sqlserver-ee = enterprise edition
Choose the major engine version that matches your RDS SQL Server instance:
- 10.50 for SQL Server 2008 R2
- 11.00 for SQL Server 2012
- 12.00 for SQL Server 2014
- 13.00 for SQL Server 2016
- 14.00 for SQL Server 2017
Click Create to set this up.
Add the SQLSERVER_BACKUP_RESTORE Option
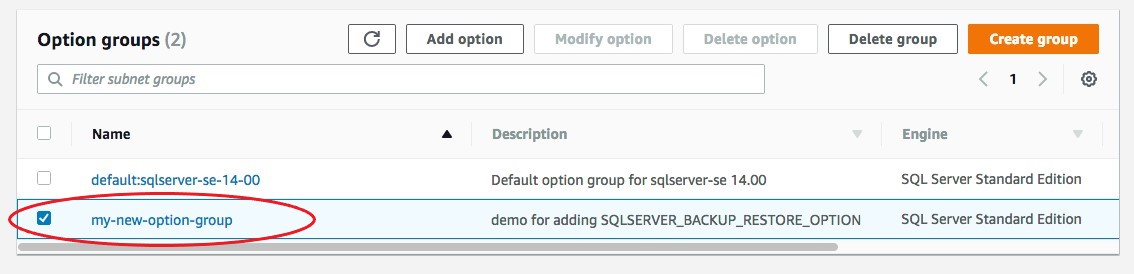
Next we need to select our option group in the list. Click the checkbox next to the name of the group you just created, then click “Add option”
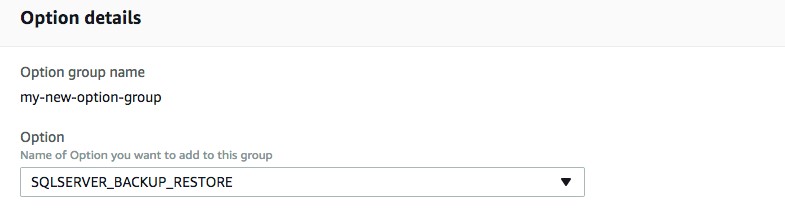
Select “SQLSERVER_BACKUP_RESTORE” from the drop-down box as the option you want to add to the option group.
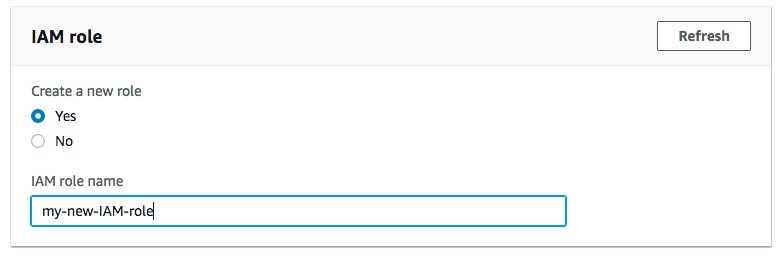
You’ll need an IAM role that will be used to grant access to the S3 bucket where you store your .bak backup files. You can use an existing role or create a new role for this purpose. Click yes or no for the “Create a new role” option, then enter or select the name of the IAM role.
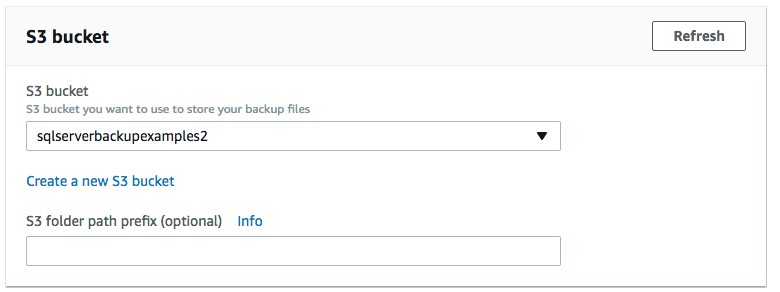
In the S3 section, select the name of the S3 bucket you’ll use to store the .bak backup files -or- select the option to create a new S3 bucket, which you’ll use to hold the .bak files.
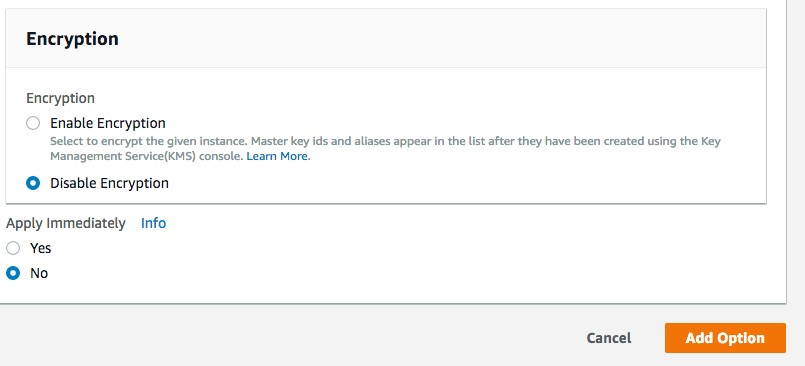
Enable Encryption – Selecting “yes” will encrypt the .bak backup files. If you select “yes”, you’ll need to choose a Master Key (see more details here http://docs.aws.amazon.com/kms/latest/developerguide/getting-started.html. If you want this option applied to the group Immediately, chose “Yes” for “Apply Immediately”. Or you could select No, and the change will not be applied until the next scheduled maintenance window.
For this article, click “Add Option”.
Apply the Option Group to the RDS SQL Server instance
If the instance already exists, you can modify the instance to use the option group. If you create a new instance after setting up the option group, you can apply it at creation by selecting the desired option group.
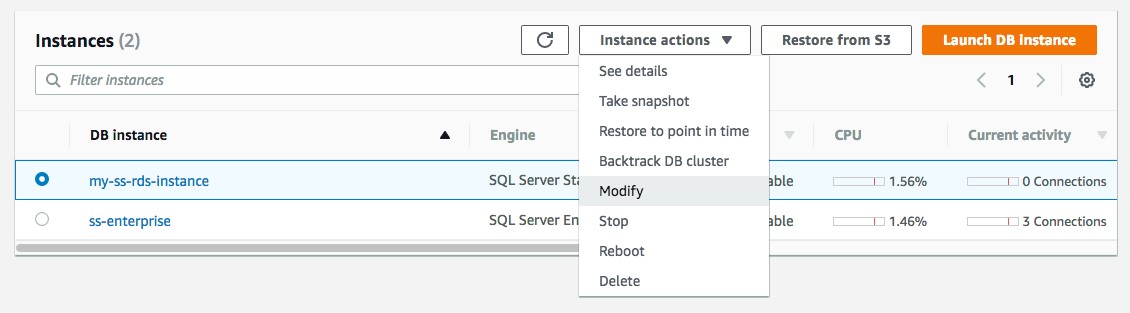
To modify an existing instance to use the option group, in the AWS console, navigate to Amazon RDS. Click on Instances. Select the instance you want to use and under Instance actions, choose Modify
Scroll down to the Database Options section. In the “Option group” setting, choose the name of the Option Group where you added the SQLSERVER_BACKUP_RESTORE option and select "Continue".

Under Scheduling of Modifications, choose whether to apply the changes immediately or at the next scheduled maintenance window. Click Modify DB Instance

The Instance dashboard will show a status of ‘modifying’ while the changes are being processed, which will change back to ‘available’ when the changes are done:

That’s it! Your instance is now configured to backup and restore databases in the .bak file format.
Backing Up an RDS SQL Server Database to a .bak file
To back up a database from Amazon RDS SQL Server to a .bak file, you’ll use an Amazon provided stored procedure, instead of running the T-SQL commands you may already be used to. The stored procedure for creating a backup is named msdb.dbo.rds_backup_database. It’s included by Amazon for use in every RDS SQL Server instance, and as long as you’ve set up the database options as outlined above, it can be run on your database.
| T-SQL Backup Command | Amazon RDS SQL Server Backup Stored Proc |
| BACKUP DATABASE | msdb.dbo.rds_backup_database |
To back up a database using this stored procedure, use SSMS (or your favorite tool) to connect to the RDS SQL Server instance. The query that runs the stored procedure looks like this:
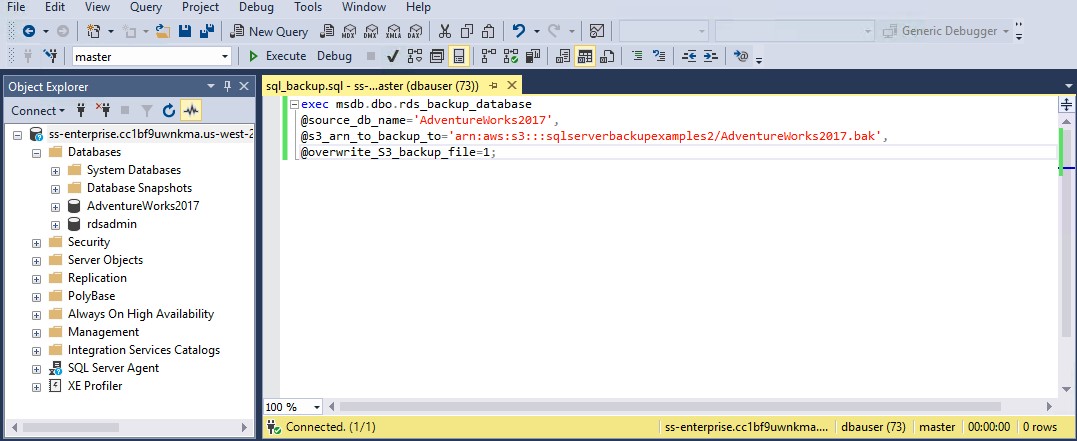
  exec msdb.dbo.rds_backup_database
  @source_db_name='database_name',
  @s3_arn_to_backup_to='arn:aws:s3:::bucket_name/file_name_and_extension',
  @overwrite_S3_backup_file=1;
You’ll need to change the ‘database name’ to match the name of the database to be backed up, and also add the bucket name and file name & extension for where you’d like the .bak file to be stored, as seen in this example:
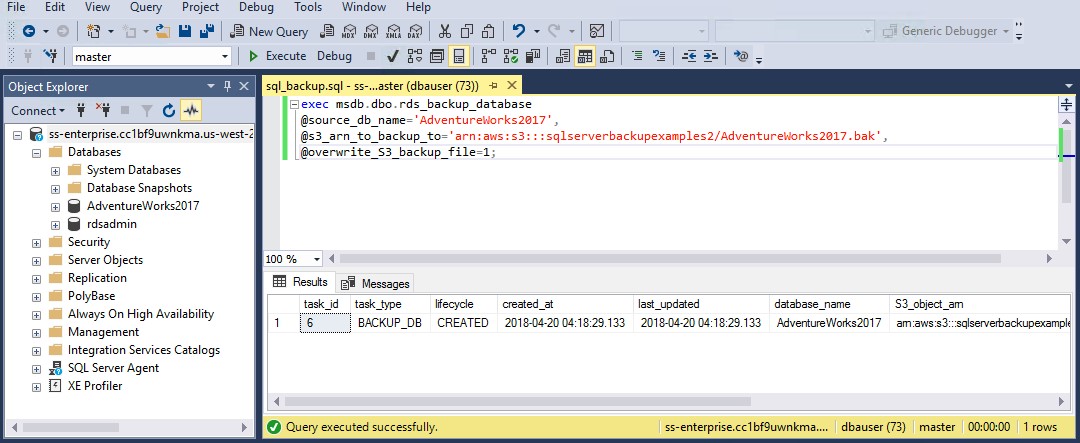
Then just execute the query, and the backup process will start. Note that the message in the Results pane just confirms that the backup job has been launched; it may not be completed as soon as you see this message. How long the backup job takes to complete will depend on the size of the database to be backed up, the instance type in use, and other jobs that may be processing on your instance at the same time.
Tip: more powerful instance types can usually complete backup and restore jobs more quickly but cost more per hour to operate. For instructions on how to monitor the progress of the backup job, see the Monitoring section below.
Tip: If you don’t want the .bak file to overwrite an existing file with the same name, change the @overwrite_S3_backup_file parameter to =0;
The query above is for backing up a non-encrypted database; if your database is encrypted, the query is only slightly different as you need to include information about the encryption key:
exec msdb.dbo.rds_backup_database @source_db_name='database_name', @s3_arn_to_backup_to='arn:aws:s3:::bucket_name/file_name_and_extension', @kms_master_key_arn='arn:aws:kms:region:account-id:key/key-id', @overwrite_S3_backup_file=1;
Restoring a .bak Backup File to an RDS SQL Server Database
Again, instead of the usual RESTORE DATABASE T-SQL command you may be familiar with, you’ll use an Amazon provided stored procedure, named msdb.dbo.rds.restore.database.
| T-SQL Backup Command | Amazon RDS SQL Server Backup Stored Proc |
| RESTORE DATABASE | msdb.dbo.rds_restore_database |
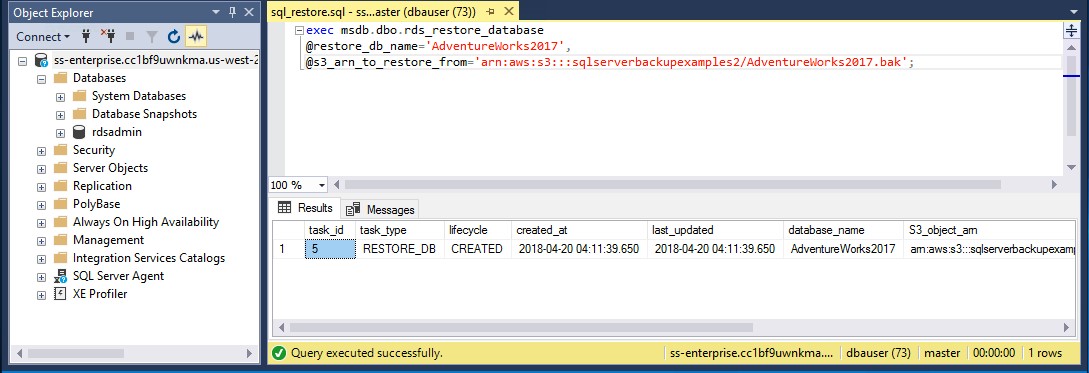
The query to execute this stored proc looks like this:
exec msdb.dbo.rds_restore_database
  @restore_db_name='database_name',
  @s3_arn_to_restore_from='arn:aws:s3:::bucket_name/file_name_and_extension';
You’ll need to change the parameters in the query to include the name you want the database to use when it is restored to RDS, and the path to the S3 bucket where the .bak file is stored. Then execute the query to start the restore process.
To monitor the status of the restore job, see the Monitoring section below.
To restore an encrypted database, the query is slightly different as it needs to include details for the encryption key:
exec msdb.dbo.rds_restore_database
  @restore_db_name='database_name',
  @s3_arn_to_restore_from='arn:aws:s3::: bucket_name/file_name_and_extension', @kms_master_key_arn='arn:aws:kms:region:account-id:key/key-id';
Monitoring the Status of your RDS Backup Query
When you start a backup or restore procedure using the queries described above, the message return by SQL Server to the query window only confirms that the command to start the stored procedure has been sent. It’s doesn’t tell you if the process is complete, or how long it’s been running. Amazon provides a stored procedure that will allow you to track the status of a task running on the database. It’s called msdb.dbo.rds_task_status and can be executed from SSMS using this command:
exec msdb.dbo.rds_task_status @db_name='database_name';
Just replace ‘database_name’ with the name of the database you want to monitor. The query is the same for monitoring BACKUP or RESTORE jobs.
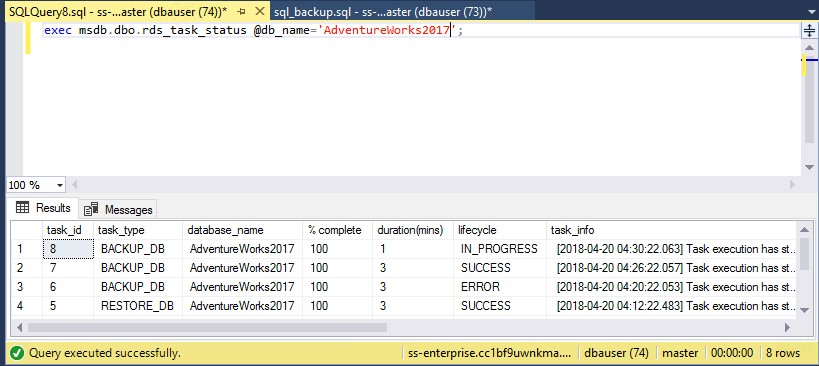
Note that this query returns the status of our currently running backup job, which has a task_id of 8. The lifecycle field for this task shows IN_PROGRESS, which means the backup is still running, even though the ‘% complete’ field says 100. The duration shows that this process has been running for one minute.
Tip: You can run this query as often as you like, but the status is only updated approximately every two minutes; the results are not specifically real-time.
Tip: If you only want to see results for the status of a specific task, you can use the @task_id parameter. For the example above, this query:
exec msdb.dbo.rds_task_status @db_name='AdventureWorks2017', @task_id=8;
would return results only for the job running under that id.
You can cancel a task if you know the task_id number or the name of the database the task is running on:
exec msdb.dbo.rds_cancel_task @task_id=1234;
or
exec msdb.dbo.rds_cancel_task @db_name=’database_name’;
RDS SQL Server Database Import-Export Scenarios
The ability of RDS SQL Server to process and create .bak backup files is essential for many database tasks, especially for those involving the importing of SQL Server databases from on-premise SQL Servers into RDS, as well as exporting RDS SQL Server databases to an on-premise server. Amazon RDS SQL Server can help you complete each of these scenarios:
| Source Database | Destination Database | Process |
| On-premise SQL Server instance | RDS SQL Server Instance | 1. Run a native SQL Server backup on the on-premise database 2. Copy the .bak file to S3 3. Run the msdb.dbo.rds.restore_database stored procedure in RDS 4. Note that Amazon DMS is another option that doesn’t require .bak files and offers mirroring & synchronization benefits. |
| RDS SQL Server Instance | On-Premise SQL Server Instance | 1. Run the msdb.dbo.rds.backup_database stored procedure on RDS 2. Ensure the on-premise SQL Server can access the .bak file (may need to copy it from S3 to a file share) 3. Run the native SQL Server restore on the on-premise server |
| RDS SQL Server Instance | RDS SQL Server Instance | 1. Consider using the built-in RDS SQL Server snapshot and restore process (see documentation) – you don’t have to create or use .bak files for RDS to RDS backups/restores. 2. If you choose to use .bak files, run the msdb.dbo.rds.backup_database stored proc on the source database, and then run the msdb.dbo.rds.restore_database stored proc on the target RDS instance. |
