

Intro
On July 9, 2019, support for SQL Server 2008 and 2008 R2 will end. That means the end of regular security updates. However, if you move those SQL Server instances to Azure, Microsoft will give you three years of Extended Security Updates at no additional charge. If you are currently running SQL Server 2008/2008 R2 and you are unable to update to a later version of SQL Server before the July 9th deadline, you will want to take advantage of this offer rather than running the risk of facing a future security vulnerability. An unpatched instance of SQL Server could lead to data loss, downtime or a devastating data breach.
One of the challenges you will face when running SQL Server 2008/2008 R2 in Azure is ensuring high availability. On premises you may be running a SQL Server Failover Cluster (FCI) instance for high availability, or possibly you are running SQL Server in a virtual machine and are relying on VMware HA or a Hyper-V cluster for availability. When moving to Azure, none of those options are available. Downtime in Azure is a very real possibility that you must take steps to mitigate.
In order to mitigate the possibility of downtime and qualify for Azure’s 99.95% or 99.99% SLA, you have to leverage SIOS DataKeeper. DataKeeper overcomes Azure’s lack of shared storage and allows you to build a SQL Server FCI in Azure that leverages the locally attached storage on each instance. SIOS DataKeeper not only supports SQL Server 2008 R2 and Windows Server 2008 R2 as documented in this guide, it supports any version of Windows Server, from 2008 R2 through Windows Server 2019 and any version of SQL Server from from SQL Server 2008 through SQL Server 2019.
This guide will walk through the process of creating a two-node SQL Server 2008 R2 Failover Cluster Instance (FCI) in Azure, running on Windows Server 2008 R2. Although SIOS DataKeeper also supports clusters that span Availability Zones or Regions, this guide assumes each node resides in the same Azure Region, but different Fault Domains. SIOS DataKeeper will be used in place of the shared storage normally required to create a SQL Server 2008 R2 FCI.
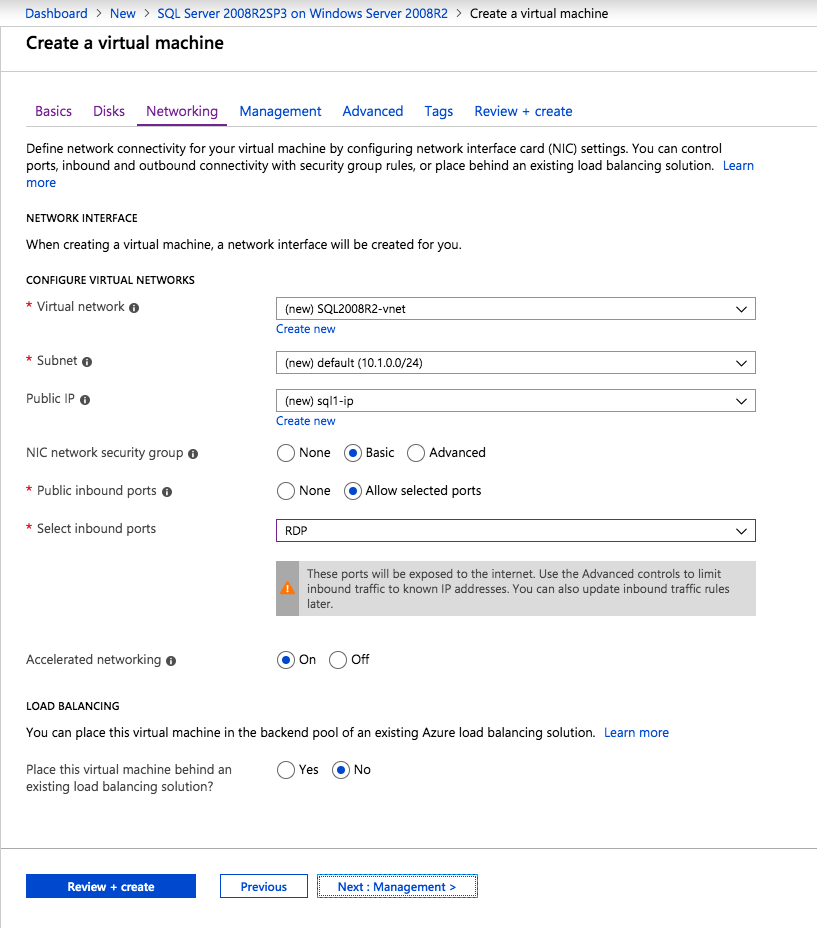
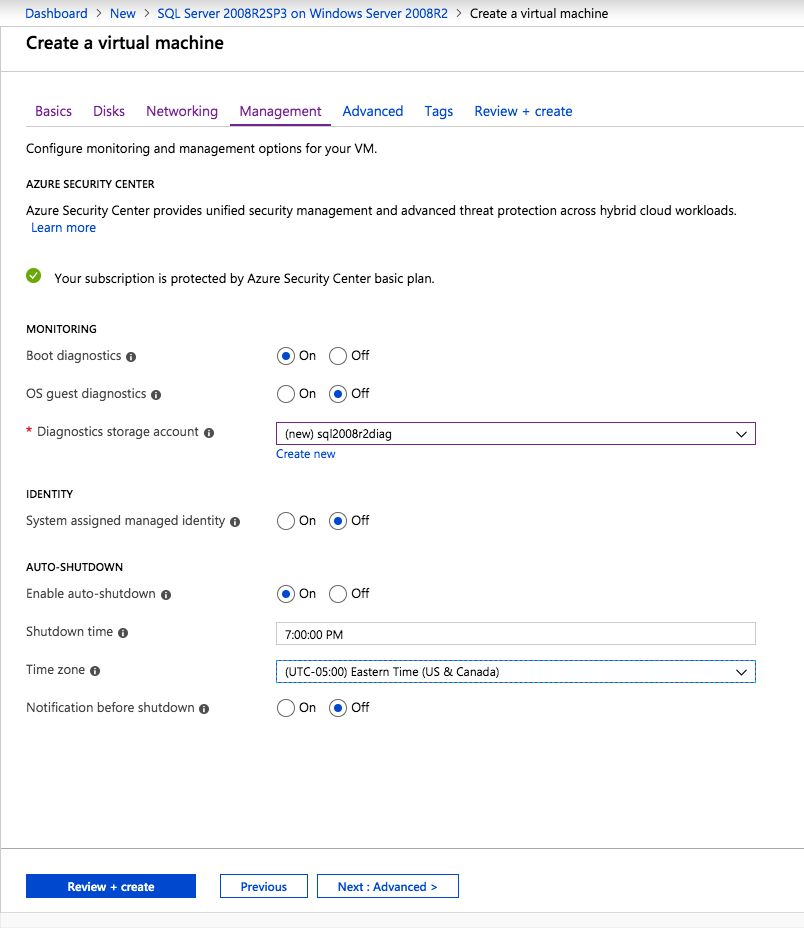
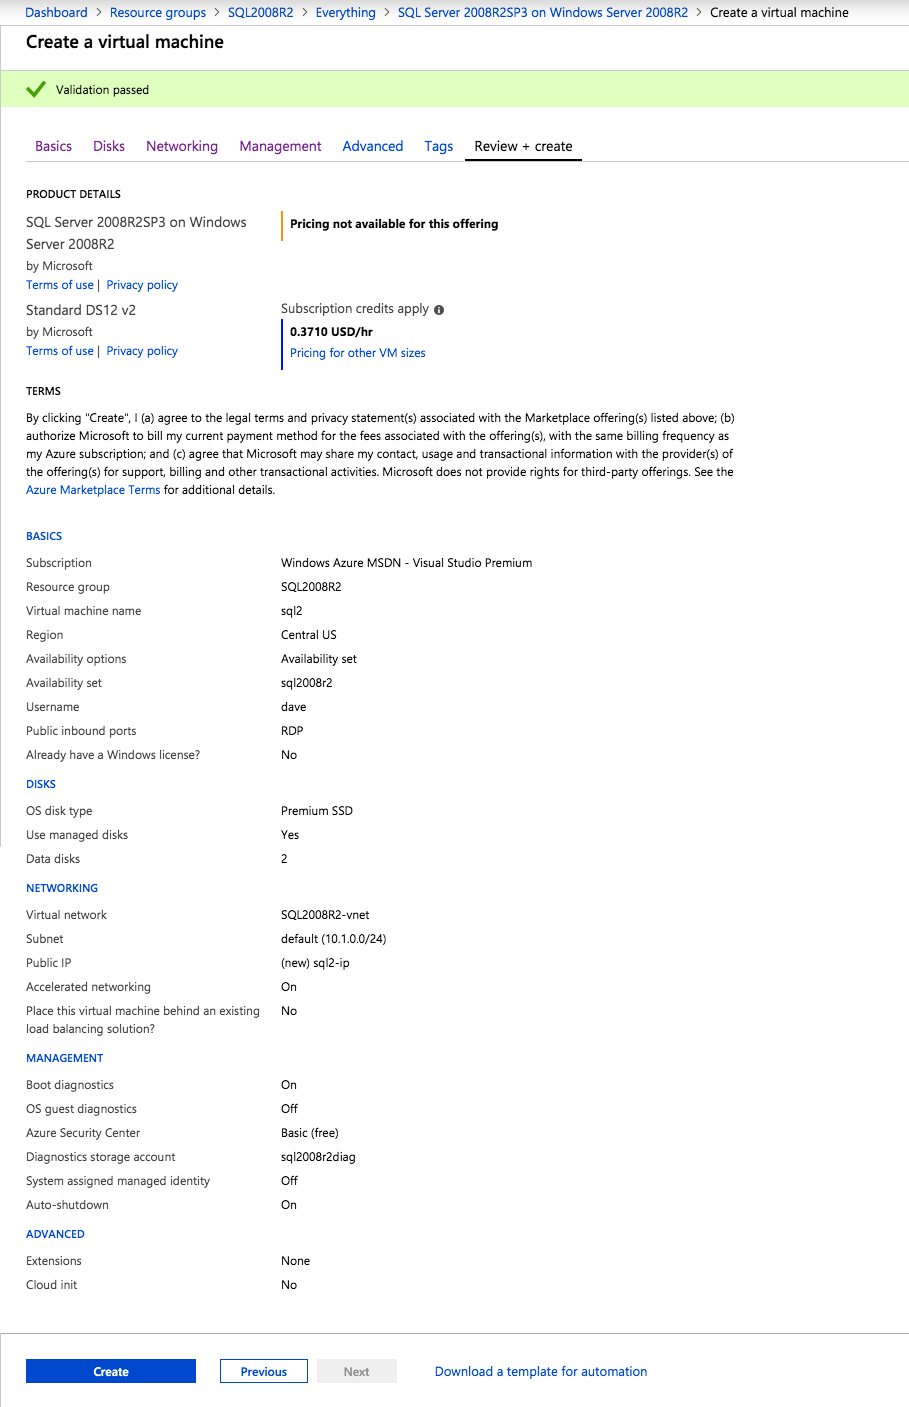
Create the first SQL Server Instance in Azure
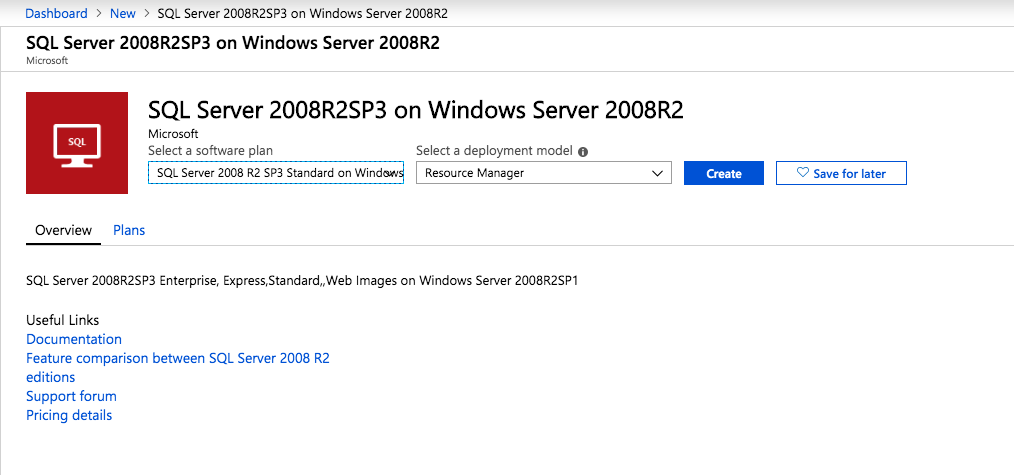
This guide will leverage the SQL Server 2008R2SP3 on Windows Server 2008R2 image that is published in the Azure Marketplace.
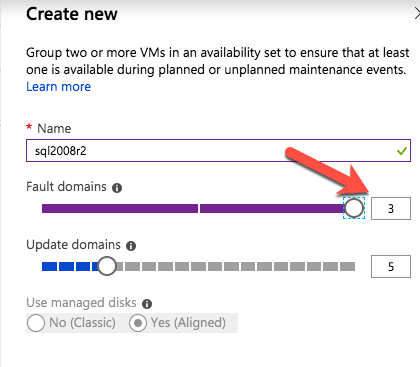
When you provision the first instance you will have to create a new Availability Set. During this process be sure to increase the number of Fault Domains to 3. This allows the two cluster nodes and the file share witness each to reside in their own Fault Domain.
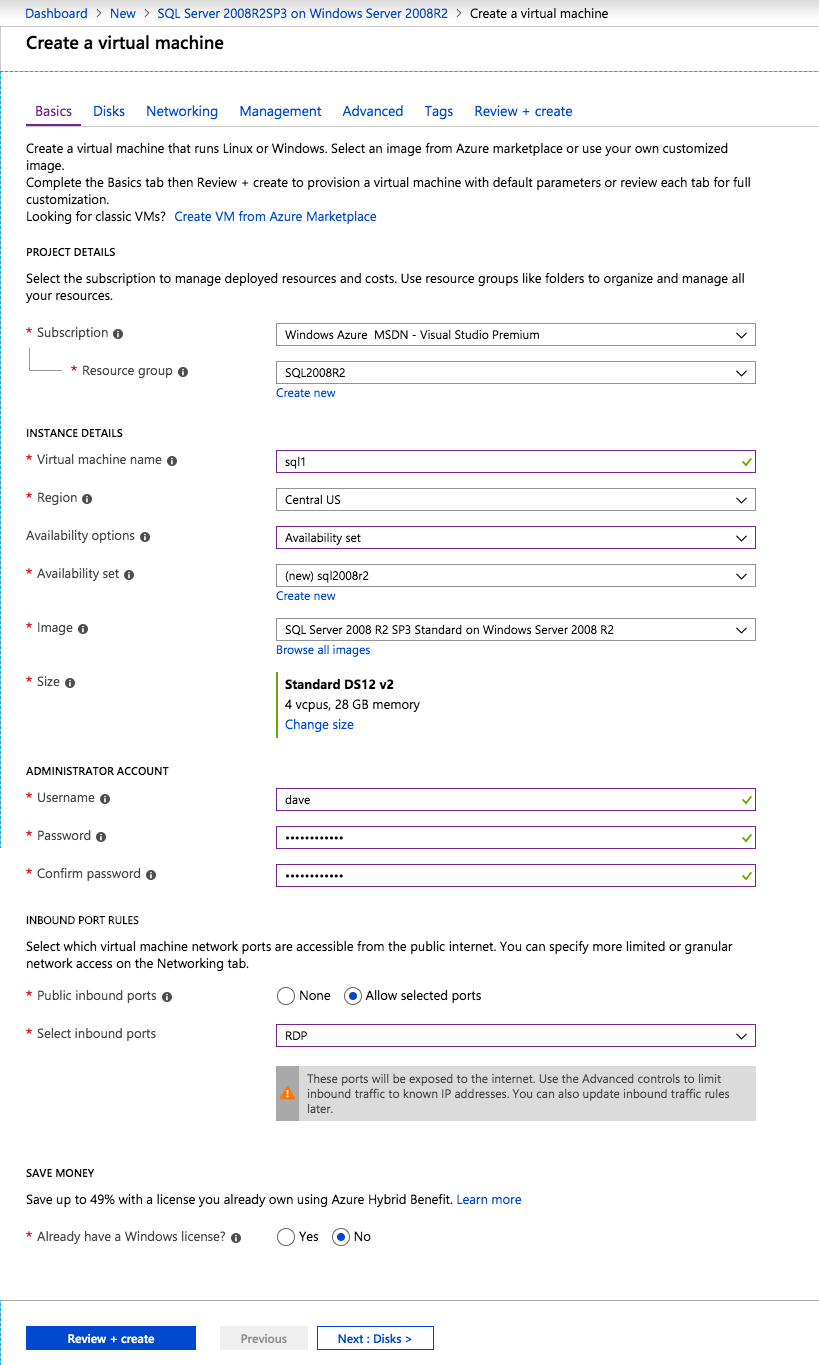

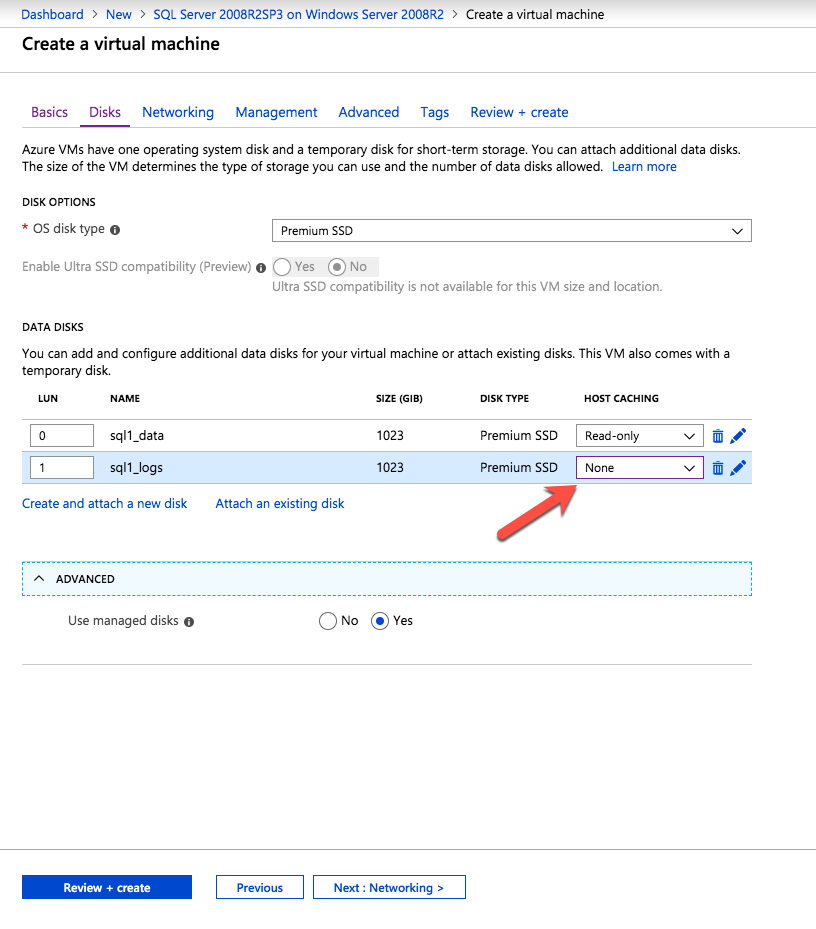
Add additional disks to each instance. Premium or Ultra SSD are recommended. Disable caching on the disks used for the SQL log files. Enable read-only caching on the disk used for the SQL data files. Refer to Performance guidelines for SQL Server in Azure Virtual Machines for additional information on storage best practices.
If you don’t already have a virtual network configured, allow the creation wizard to create a new one for you.
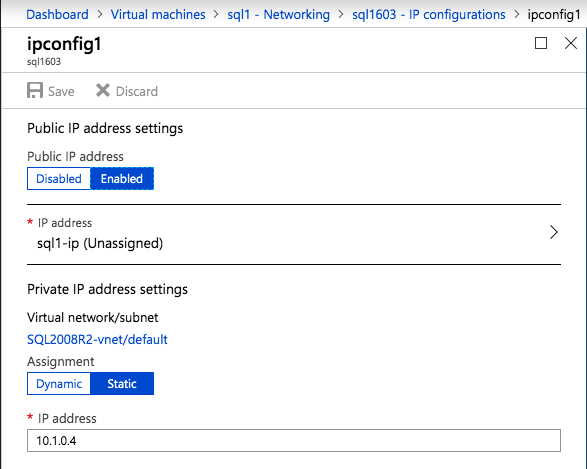
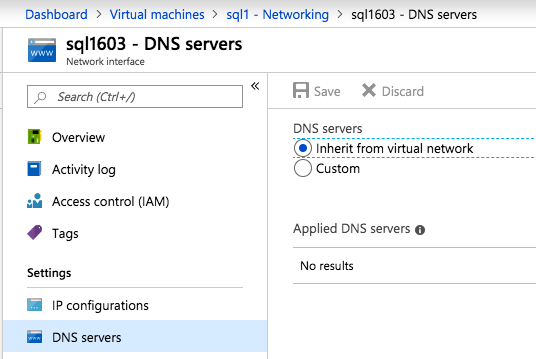
Once the instance is created, go in to the IP configurations and make the Private IP address static. This is required for SIOS DataKeeper and is best practice for clustered instances.
Make sure that your virtual network is configured to set the DNS server to be a local Windows AD controller to ensure you will be able to join the domain in a later step.
Create the 2nd SQL Server Instance in Azure
Follow the same steps as above, except be sure to place this instance in the same virtual network and Availability Set that you created with the 1st instance.
Create a File Share Witness (FSW) Instance
In order for the Windows Server Failover Cluster (WSFC) to work optimally you are required to create another Windows Server instance and place it in the same Availability Set as the SQL Server instances. By placing it in the same Availability Set you ensure that each cluster node and the FSW reside in different Fault Domains, ensuring your cluster stays on line should an entire Fault Domain go off line. This instances does not require SQL Server, it can be a simple Windows Server as all it needs to do is host a simple file share.
This instance will host the file share witness required by WSFC. This instance does not need to be the same size, nor does it require any additional disks to be attached. It’s only purpose is to host a simple file share. It can in fact be used for other purposes. In my lab environment my FSW is also my domain controller.
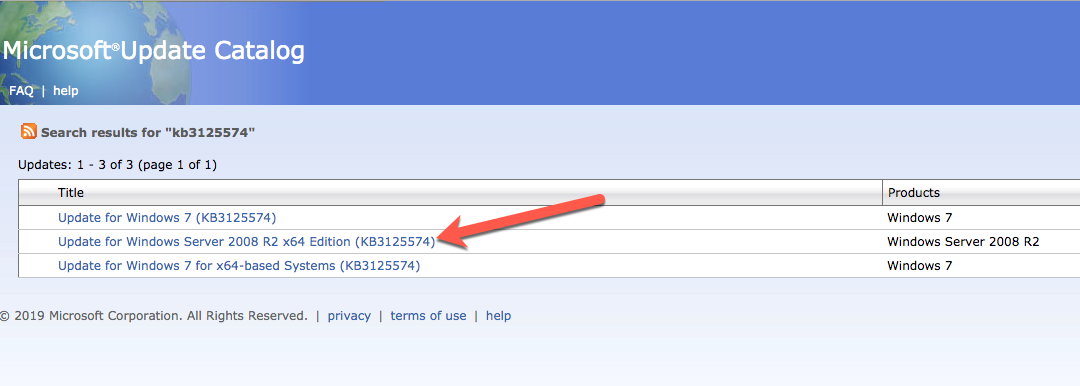
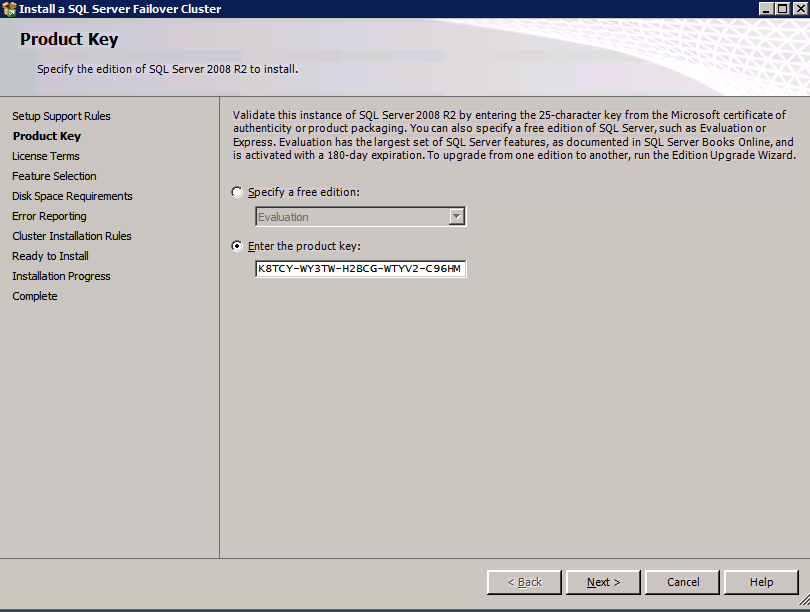
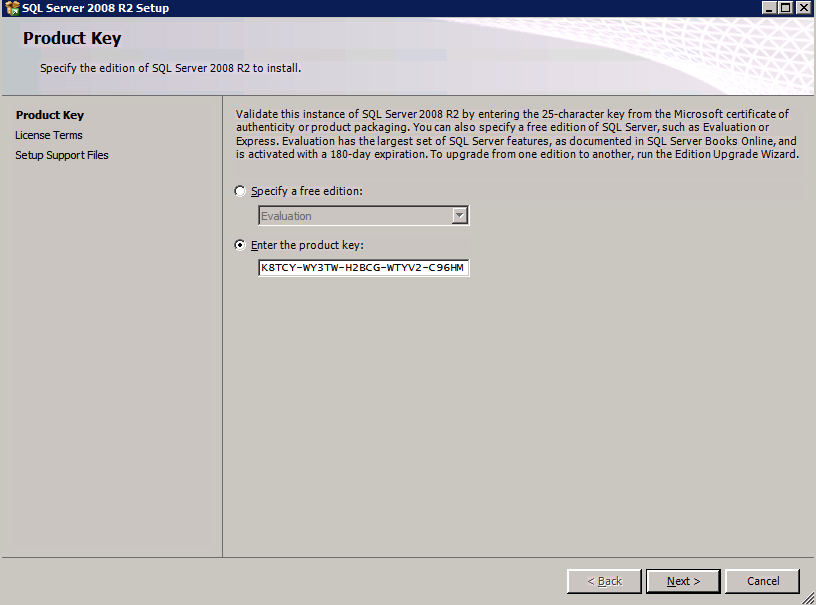
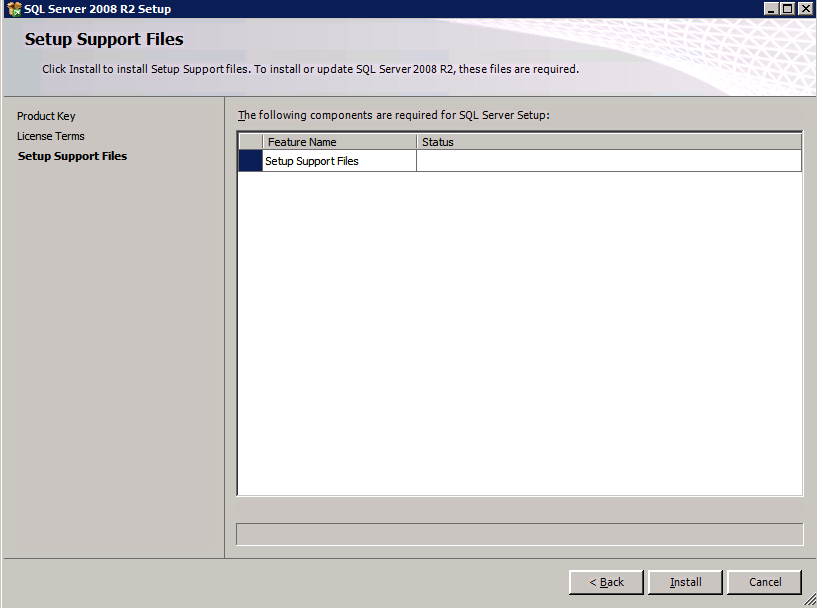
Uninstall SQL Server 2008 R2
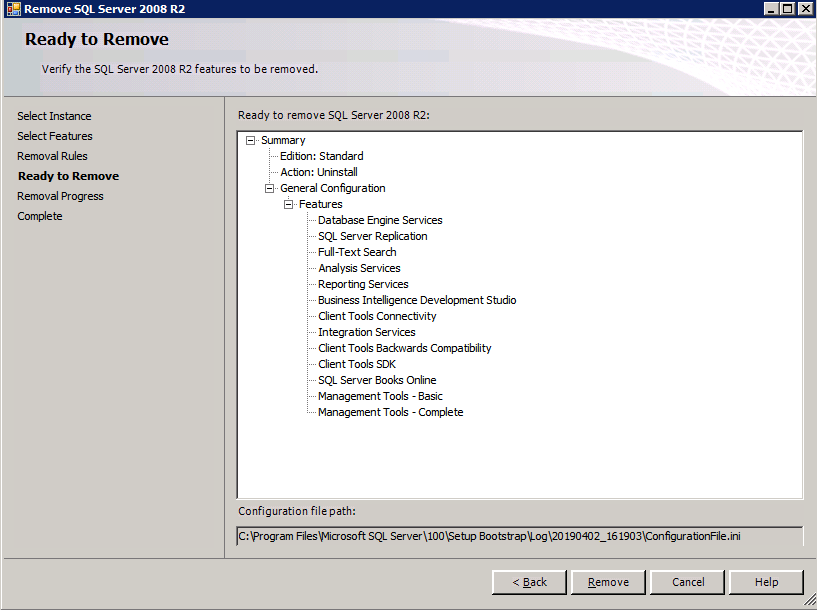
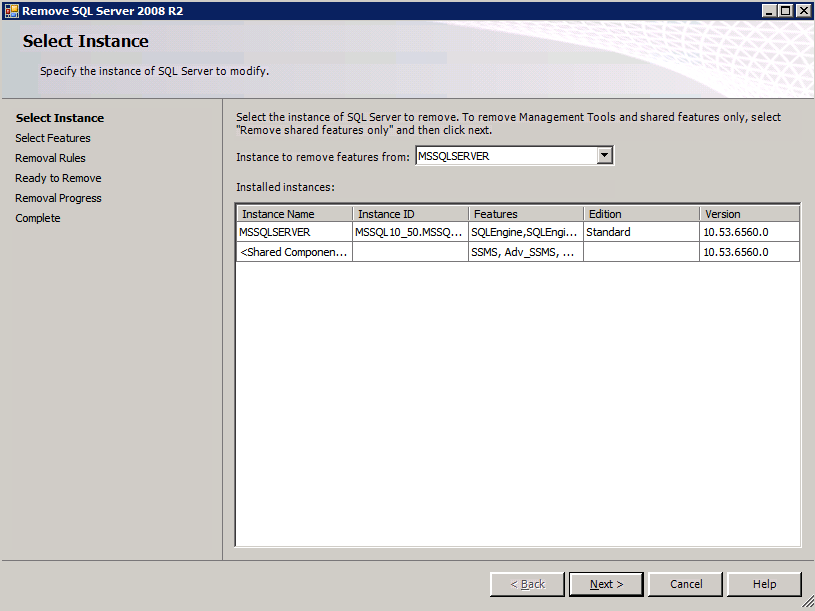
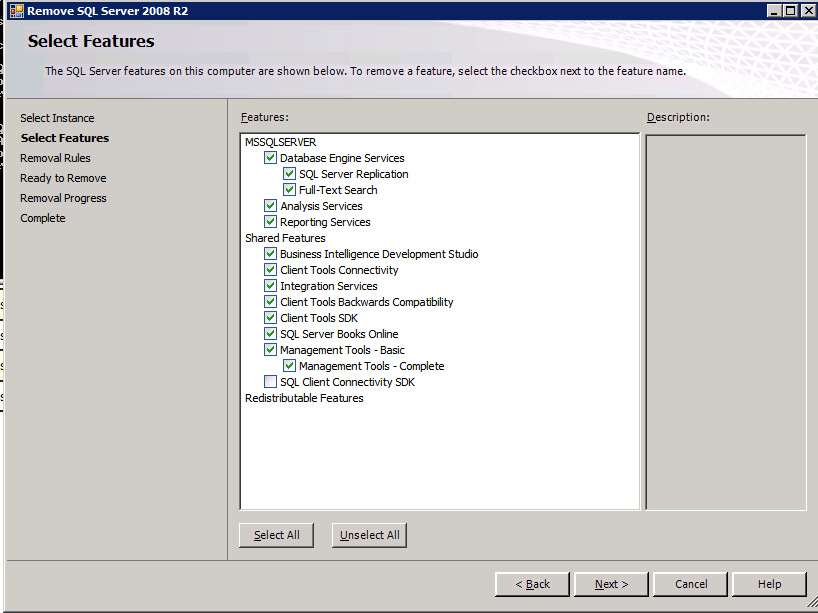
Each of the two SQL Server instances provisioned already have SQL Server 2008 R2 installed on them. However, they are installed as standalone SQL Server instances, not clustered instances. SQL Server must be uninstalled from each of these instances before we can install the cluster instance. The easiest way to do that is to run the SQL Setup as shown below.
When you run setup.exe /Action-RunDiscovery you will see everything that is preinstalled
setup.exe /Action-RunDiscovery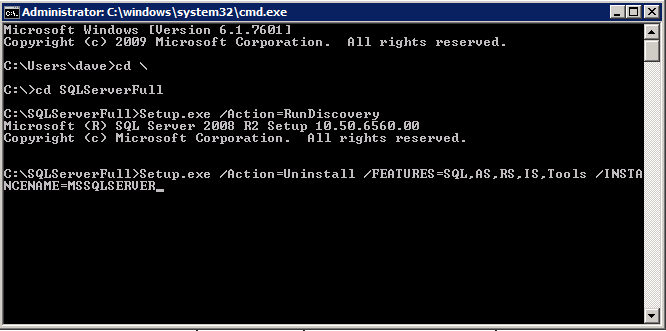

Running setup.exe /Action=Uninstall /FEATURES=SQL,AS,RS,IS,Tools /INSTANCENAME=MSSQLSERVER kicks off the uninstall process
setup.exe /Action=Uninstall /FEATURES=SQL,AS,RS,IS,Tools /INSTANCENAME=MSSQLSERVER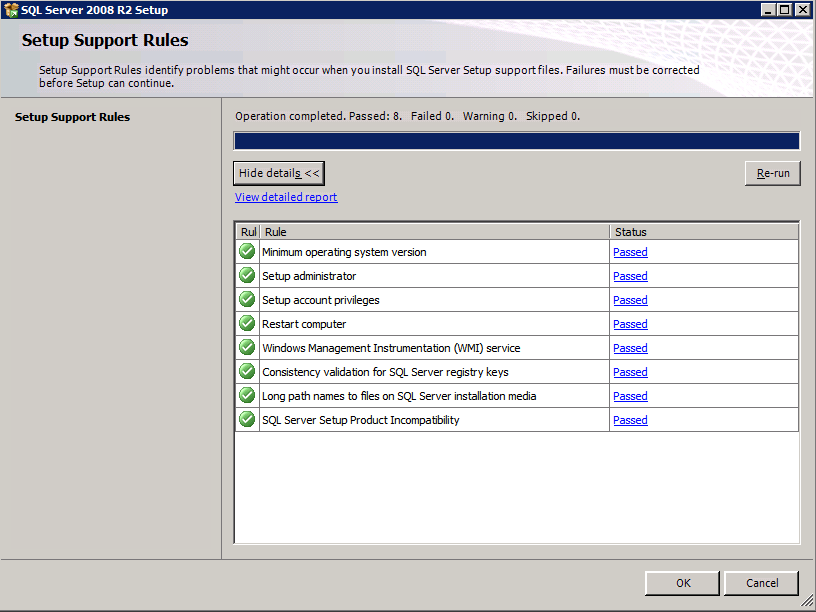
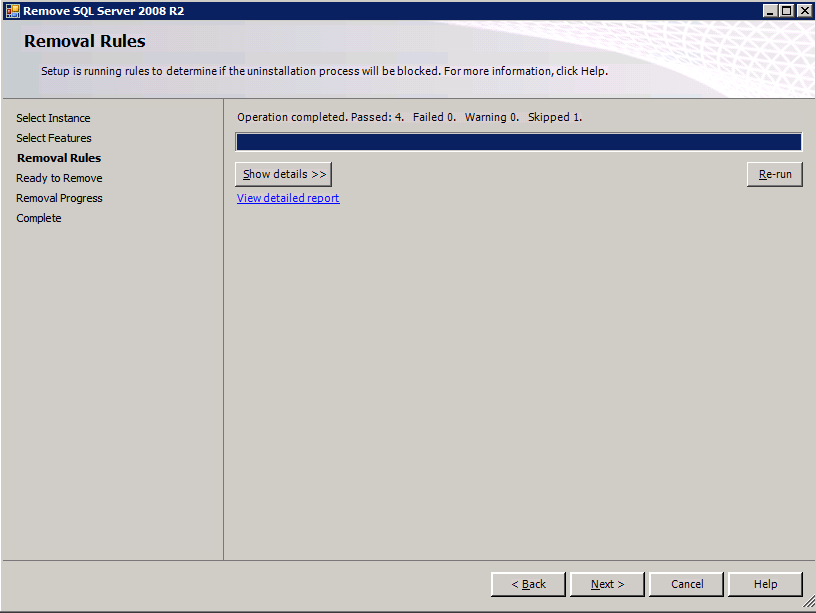
Running setup.exe /Action-RunDiscovery confirms the uninstallation completed
setup.exe /Action-RunDiscovery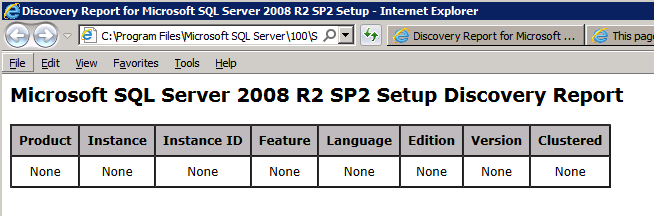
Run this uninstallation process again on the 2nd instance.
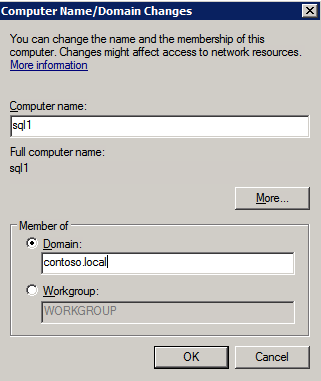
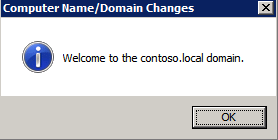
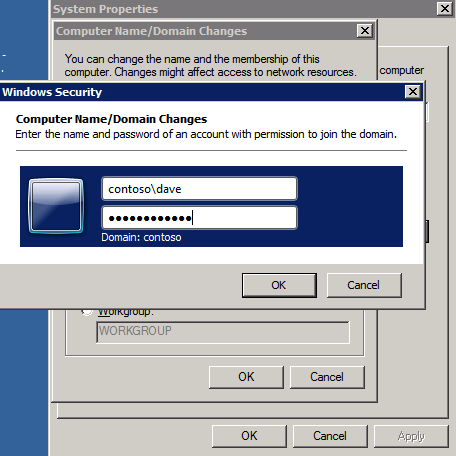
Add instances to the Domain
All three of these instances will need to be added to a Windows Domain.
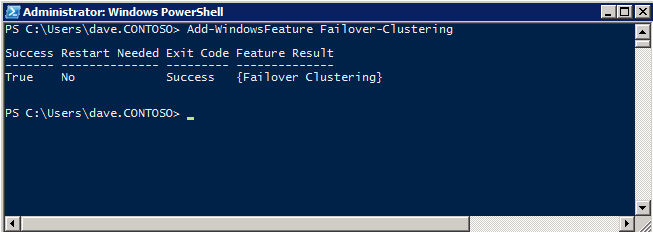
Add Windows Failover Clustering Feature
The Failover Clustering Feature needs to be added to the two SQL Server instances
Add-WindowsFeature Failover-Clustering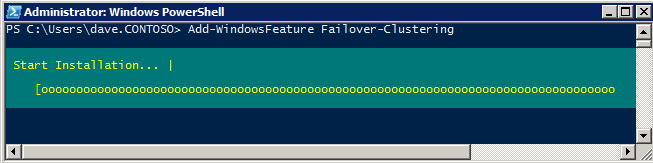
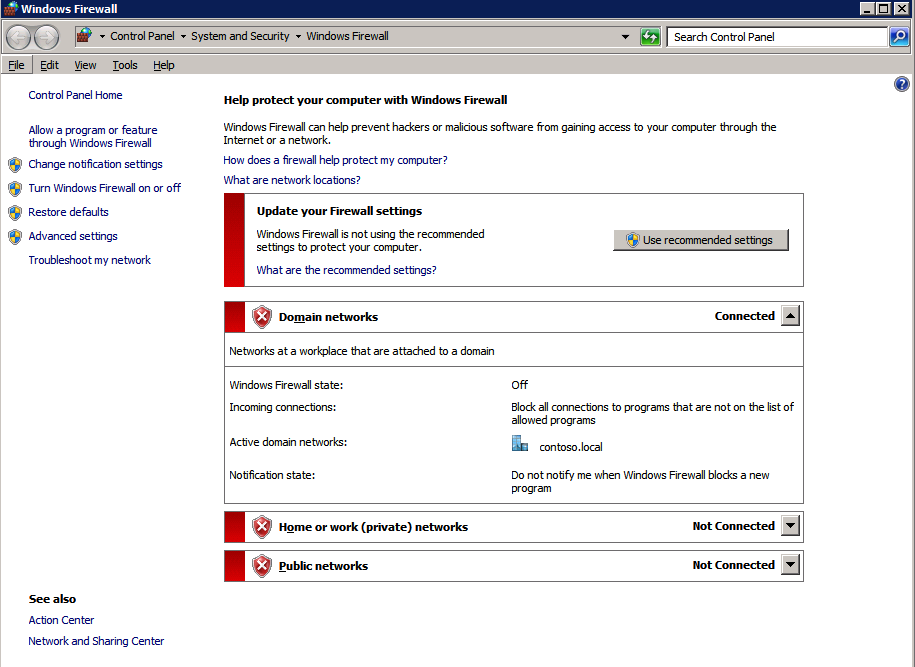
Turn of Windows Firewall
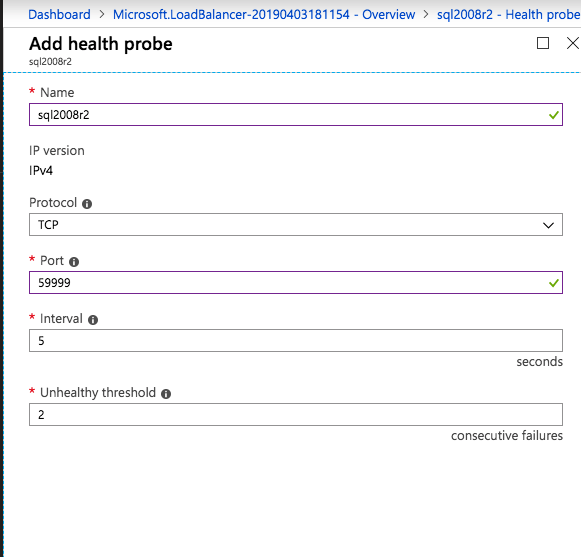
For simplicity sake, turn off the Windows Firewall during the installation and configuration of the SQL Server FCI. Consult Azure Network Security Best Practices for advice on securing your Azure resources. Details on required Windows ports can be found here , SQL Server ports here and SIOS DataKeeper ports here, The Internal Load Balancer that we will configure later also requires port 59999 access, so be sure to account for that in your security configuration.
NetSh Advfirewall set allprofiles state off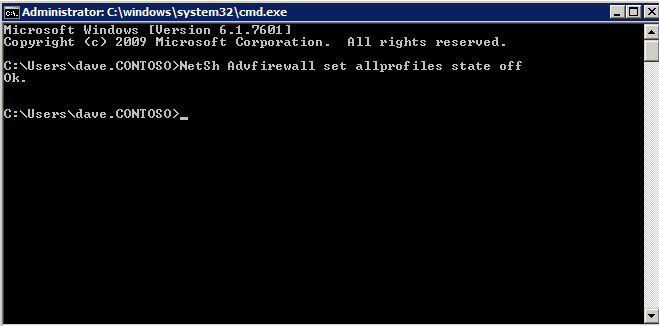
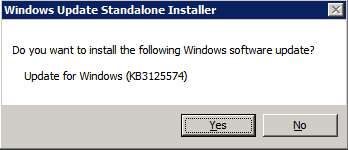
Install Convenience Rollup Update for Windows Server 2008 R2 SP1
There is a critical update ( kb2854082) that is required in order to configure a Windows Server 2008 R2 instance in Azure. That update and many more are included in the Convenience Rollup Update for Windows Server 2008 R2 SP1. Install this update on each of the two SQL Server instances.
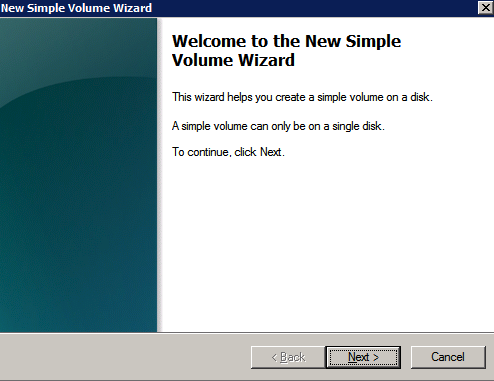
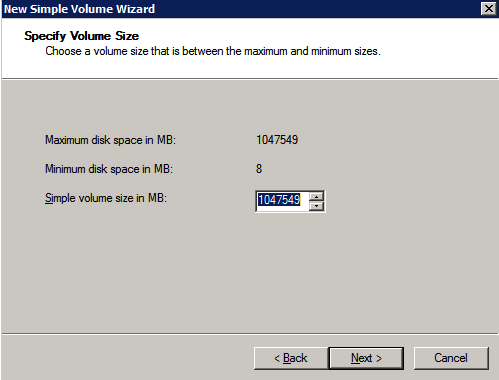
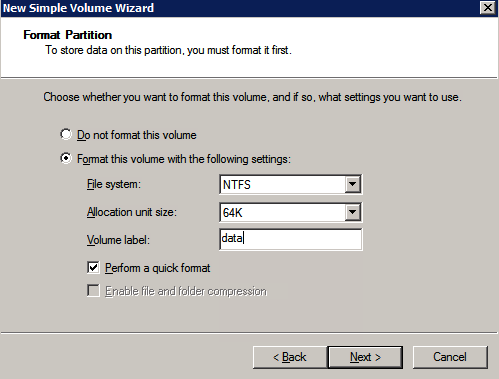
Format the Storage
The additional disks that were attached when the two SQL Server instances were provisioned need to be formatted. Do the following for each volume on each instance.
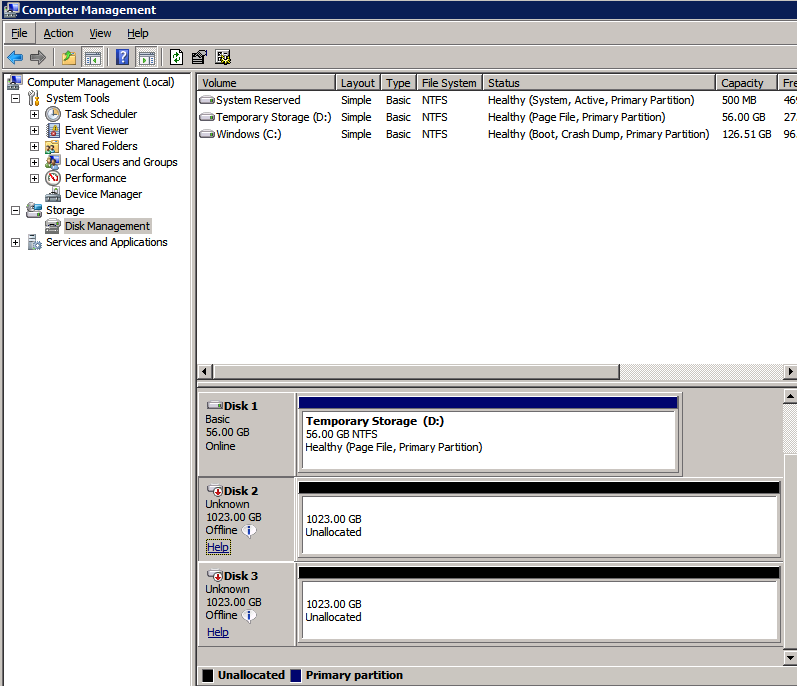
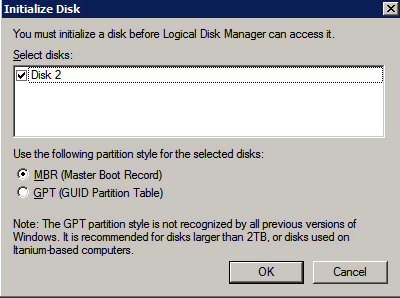

Microsoft best practices says the following…
“NTFS allocation unit size: When formatting the data disk, it is recommended that you use a 64-KB allocation unit size for data and log files as well as TempDB.”
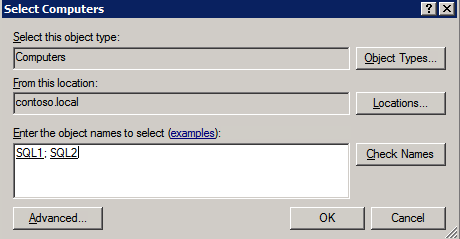
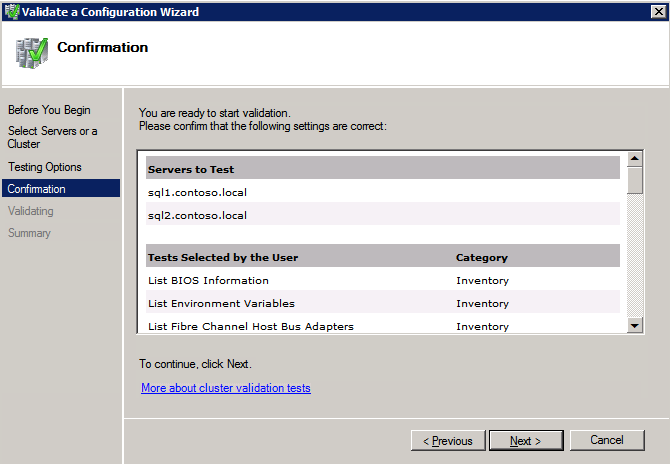
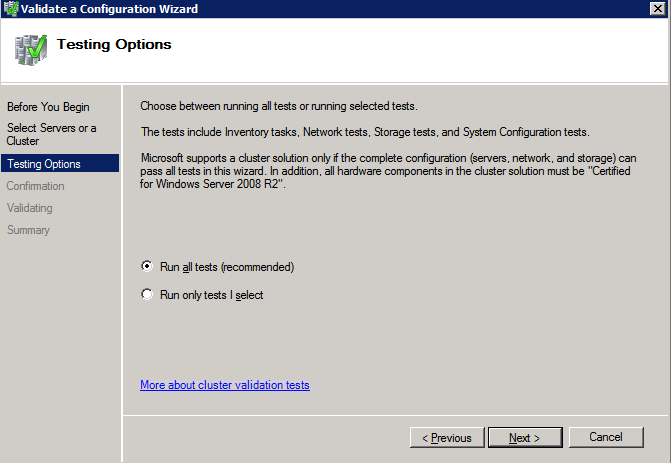
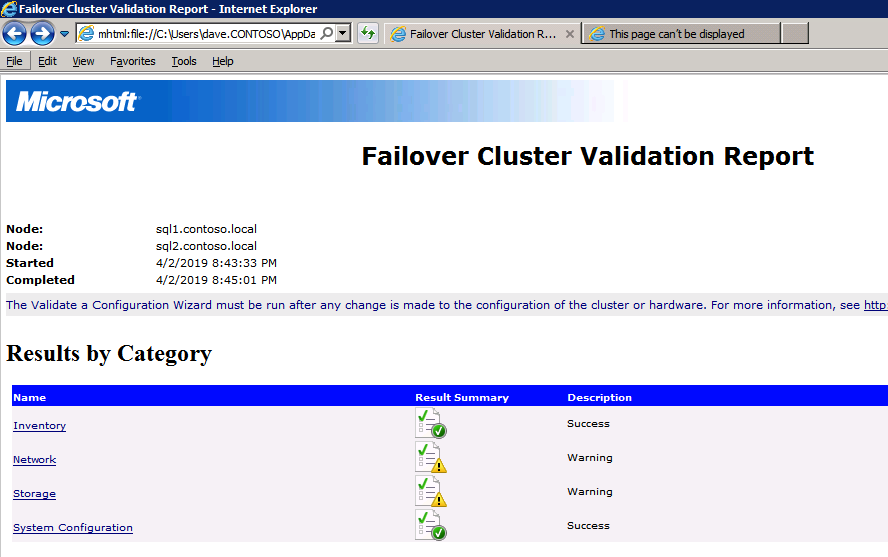
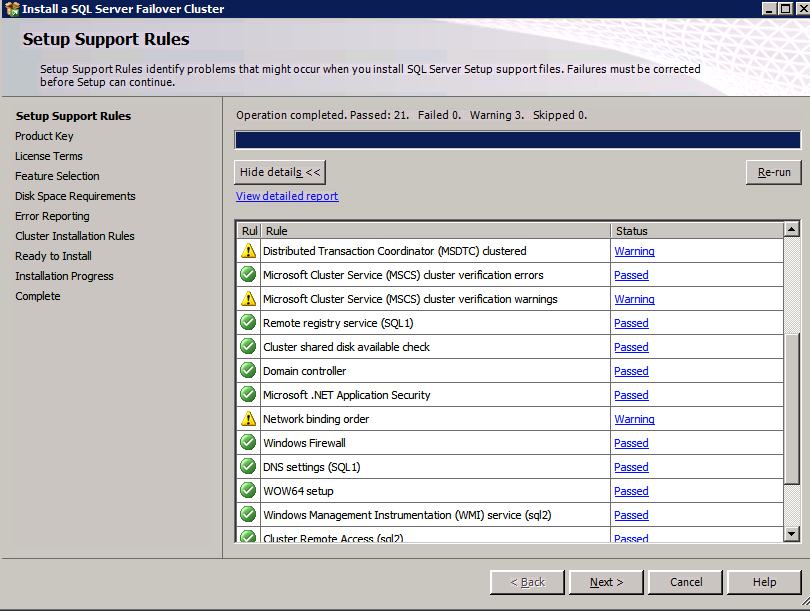
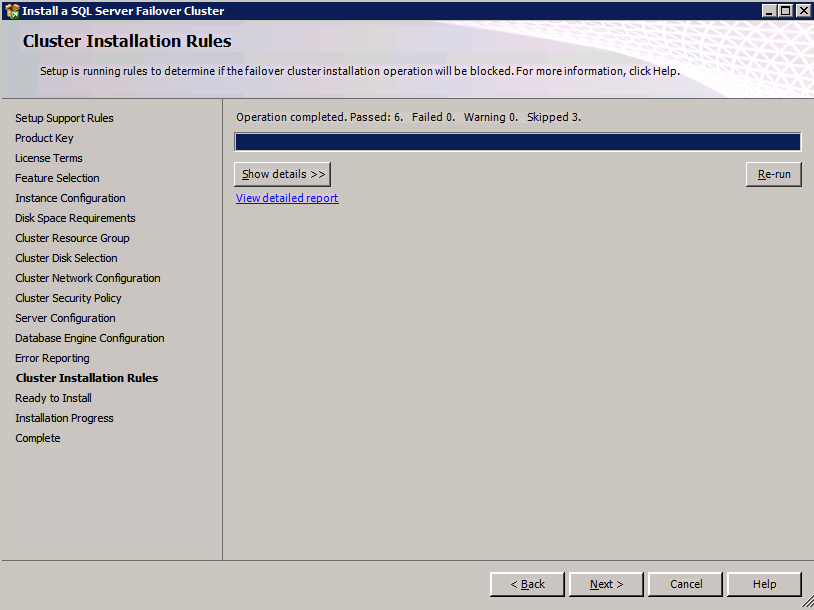
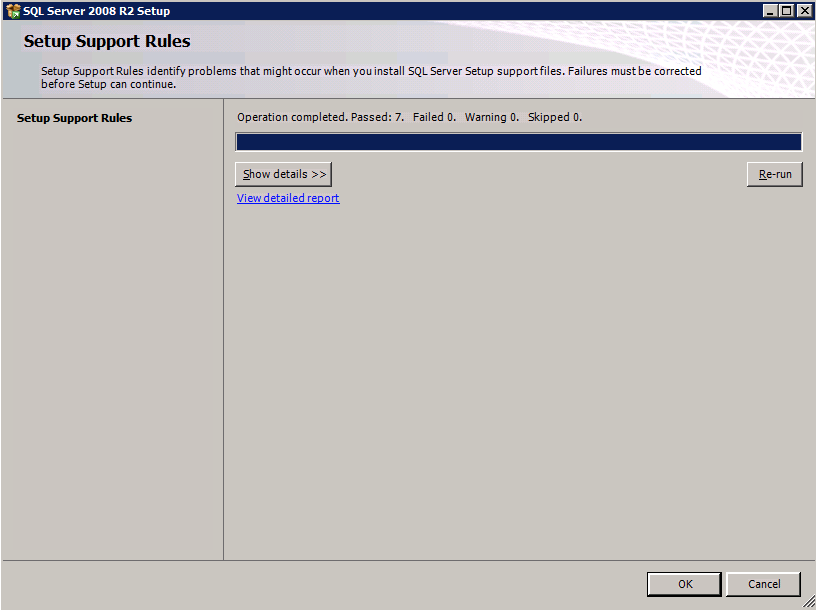
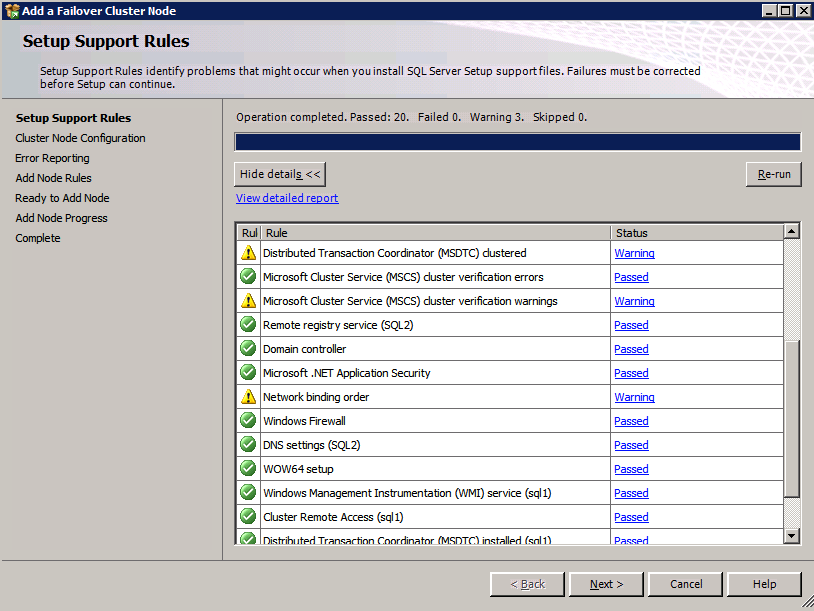
Run Cluster Validation
Run cluster validation to ensure everything is ready to be clustered.
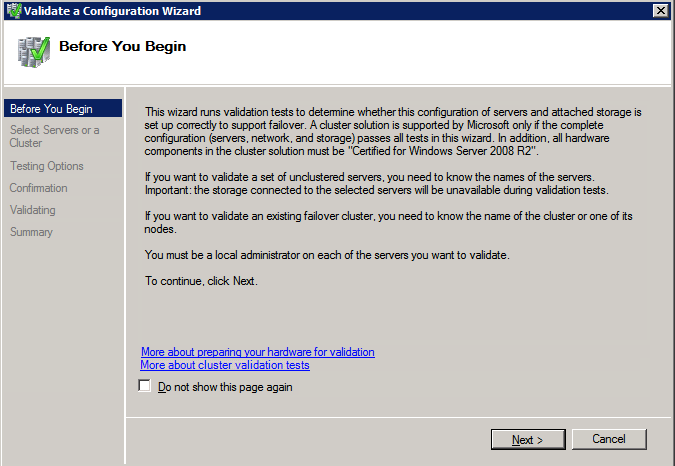
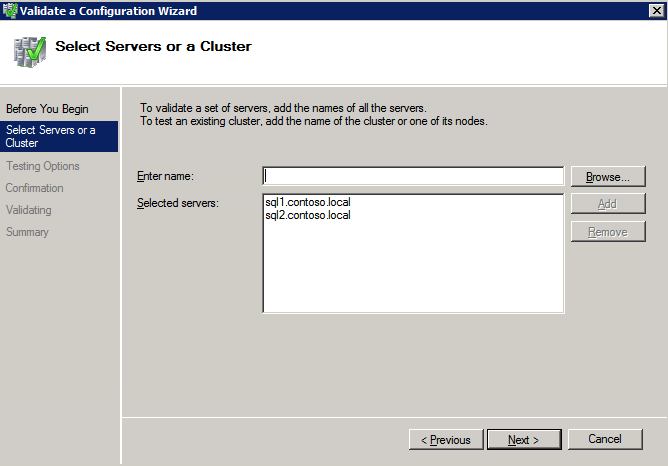
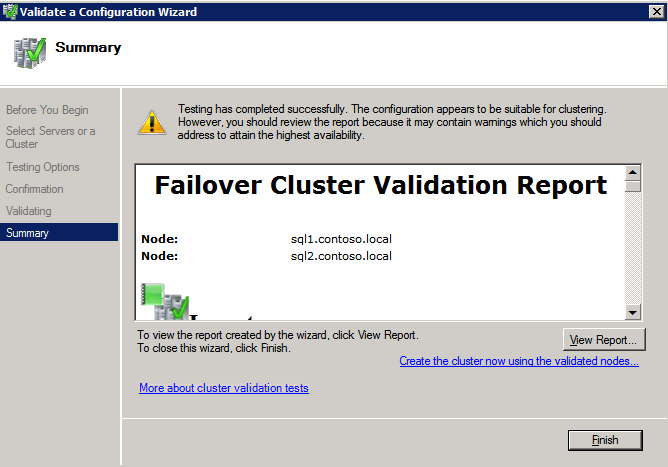
Your report will contain WARNINGS about Storage and Networking. You can ignore those warnings as we know there are no shared disks and only a single network connection exists between the servers. You may also receive a warning about network binding order which can also be ignored. If you encounter any ERRORS you must address those before you continue.
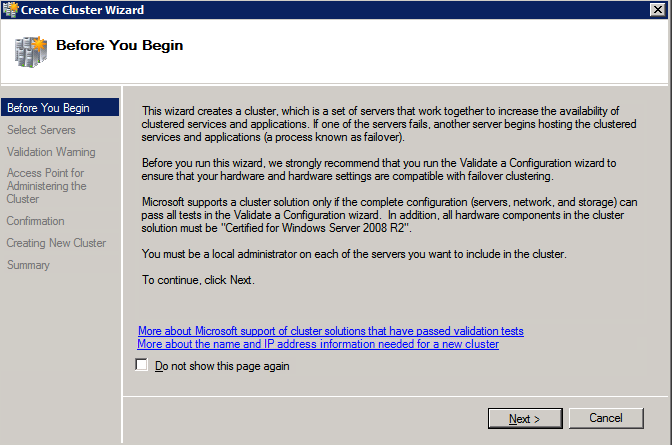
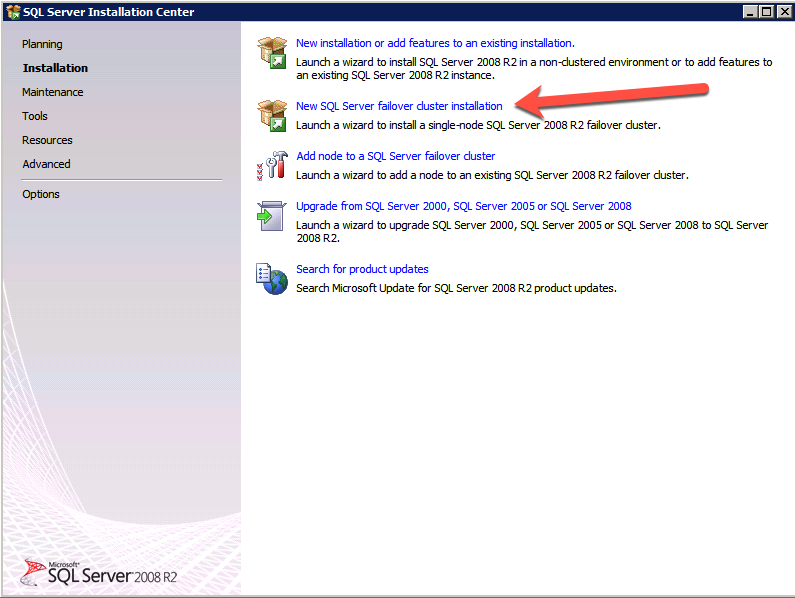
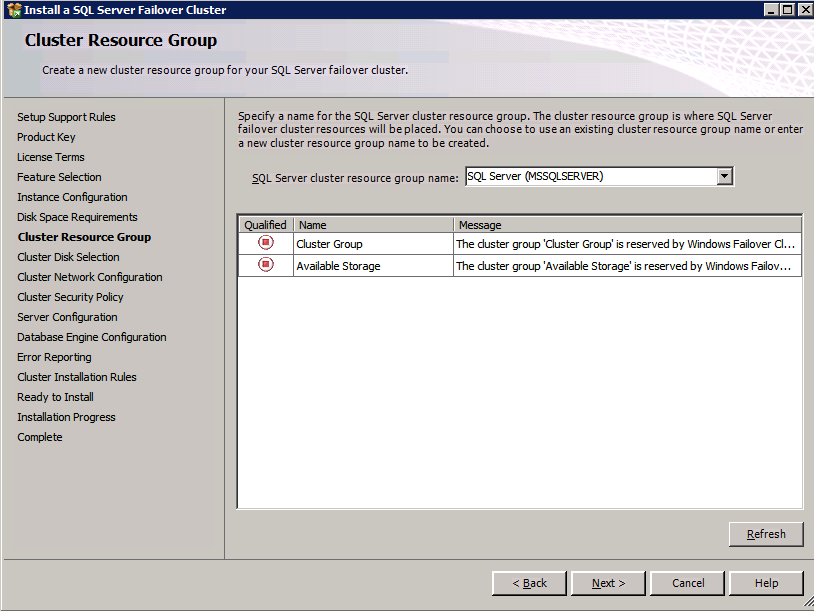
Create the Cluster
Best practices for creating a cluster in Azure would be to use Powershell as shown below. Powershell allows us to specify a Static IP Address, whereas the GUI method does not. Unfortunately, Azure’s implementation of DHCP does not work well with WSFC, so if you use the GUI method you will wind up with a duplicate IP address as the CLuster IP Address. It’s not the end of the world, but you will need to fix that as I show.
As I said, the Powershell method generally works best, but for some reason it seems to be failing on Windows Server 2008 R2 as shown below.
New-Cluster -Name cluster1 -Node sql1,sql2 -StaticAddress 10.1.0.100 -NoStorage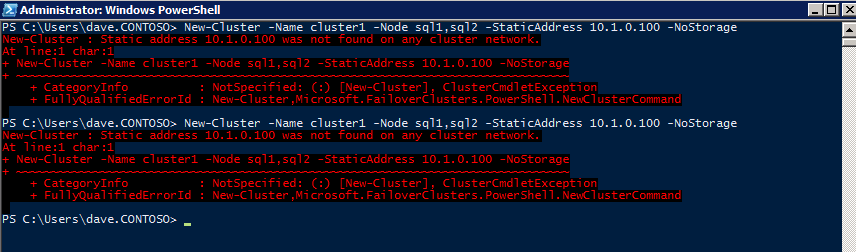
You can try that method and if it works for you – great! I need to go back and investigate this a bit more to see if it was a fluke. Another option I need to explore if Powershell is not working is Cluster.exe. Running cluster /create /? gives the proper syntax to use for creating clusters with the deprecated cluster.exe command.
However, if Powershell or Cluster.exe fails you, the steps below illustrate how to create a cluster via the WSFC UI, including fixing the duplicate IP address that will be assigned to the cluster.
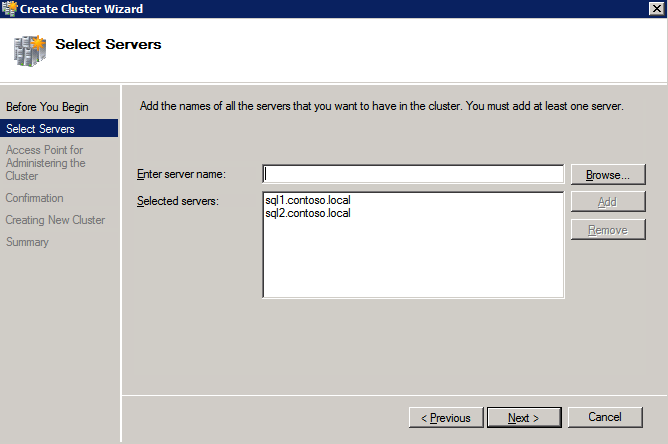
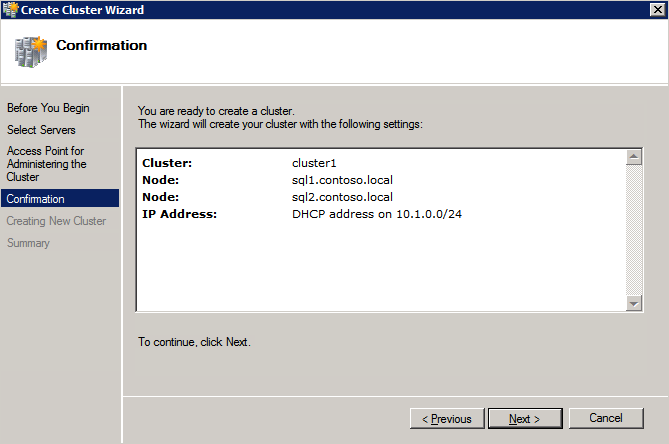
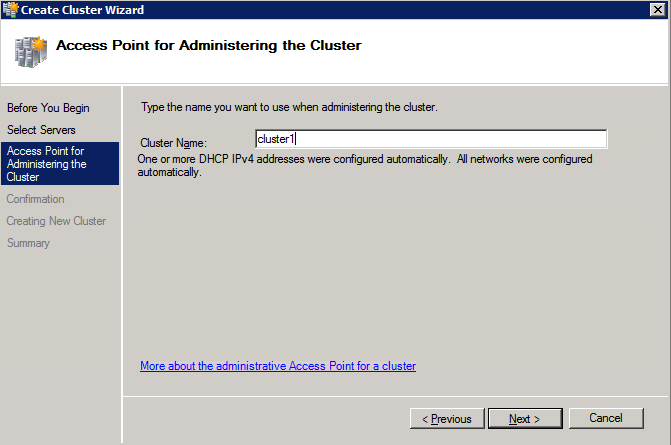
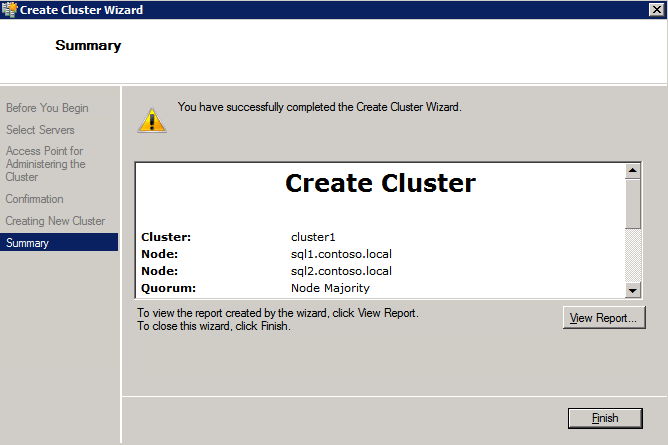
Remember, the name you specify here is just the Cluster Name Object (CNO). This is not the name that your SQL clients will use to connect to the cluster; we will define that during the SQL Server cluster setup in a later step.
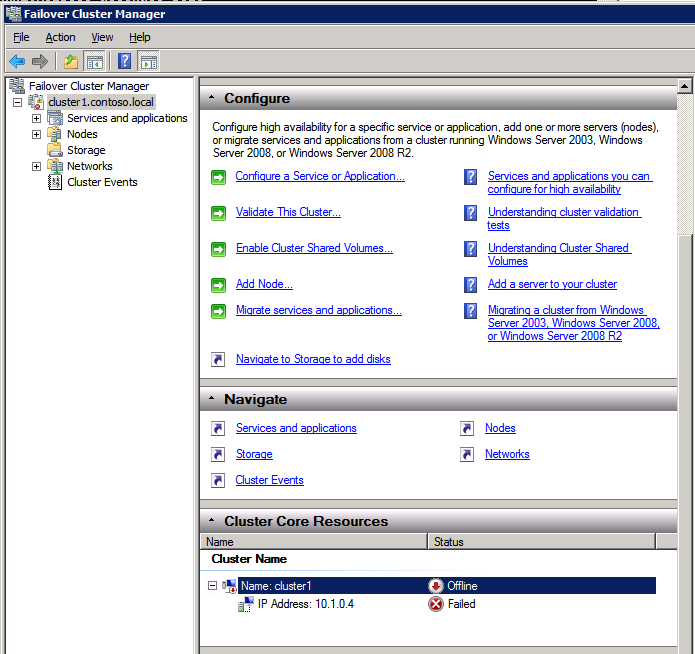
At this point, the cluster is created, but you may not be able to connect to it with the WSFC UI due to the duplicate IP address problem.
Fix the Duplicate IP Address
As I mentioned earlier, if you create the cluster using the GUI, you are not given the opportunity to choose an IP address for the cluster. Because your instances are configured to use DHCP (required in Azure) the GUI wants to automatically assign you an IP address using DHCP. Unfortunately, Azure’s implementation of DHCP does not work as expected and the cluster will be assign the same address that is already being used by one of the nodes. Although the cluster will create properly, you will have a hard time connecting to the cluster until you fix this problem.
To fix this problem, from one of the nodes run the following command to ensure the Cluster service is started on that node.
Net start clussvc /fq
On that same node you should now be able to connect to the WSFC UI, where you will see the IP Address has failed to come online.
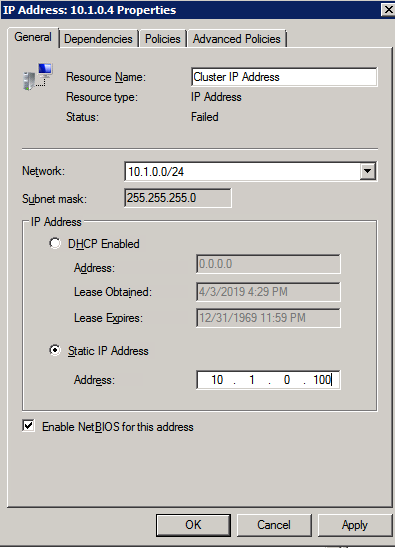
Open the properties of the Cluster IP address and change it from DHCP to Static, and assign it an unused IP address.
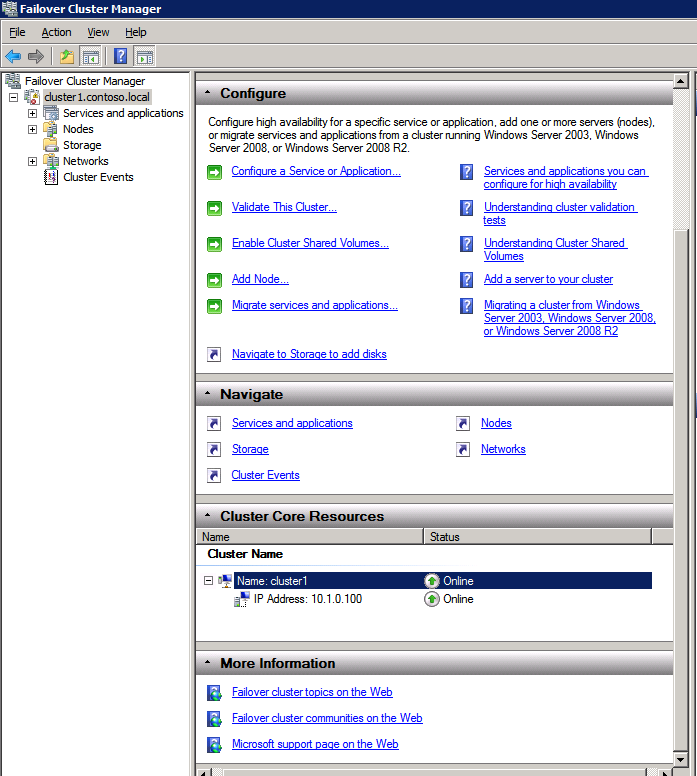
Bring the Name resource online
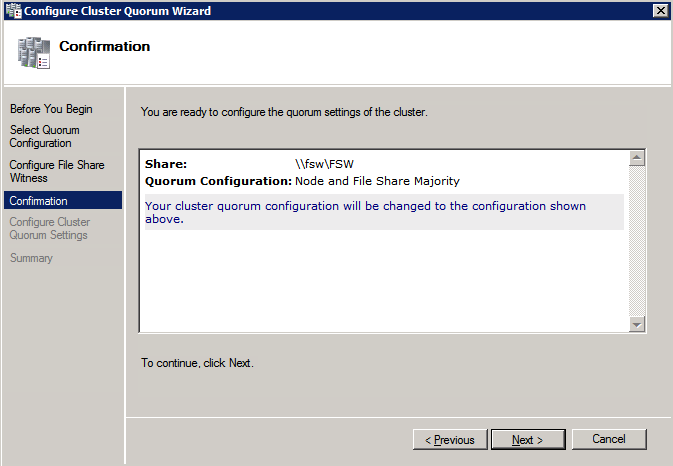
Add the File Share Witness
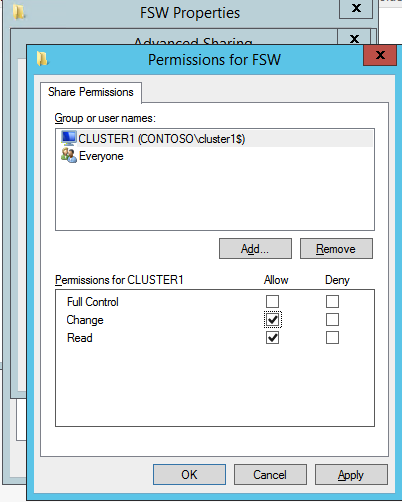
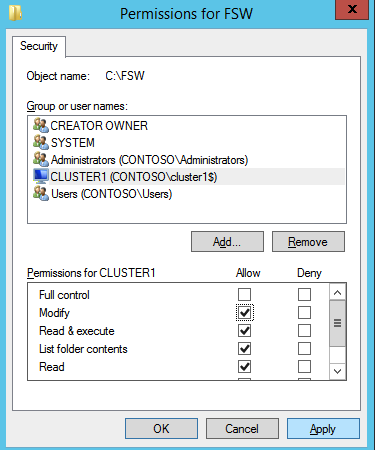
Next we need to add the File Share Witness. On the 3rd server we provisioned as the FSW, create a folder and share it as shown below. You will need to grant the Cluster Name Object (CNO) read/write permissions at both the Share and Security levels as shown below.
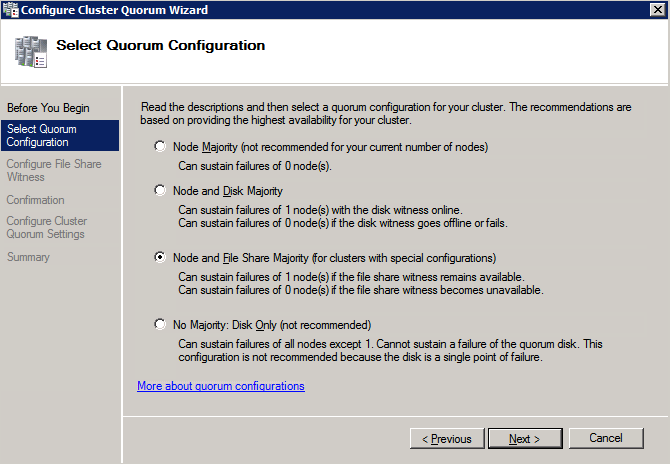
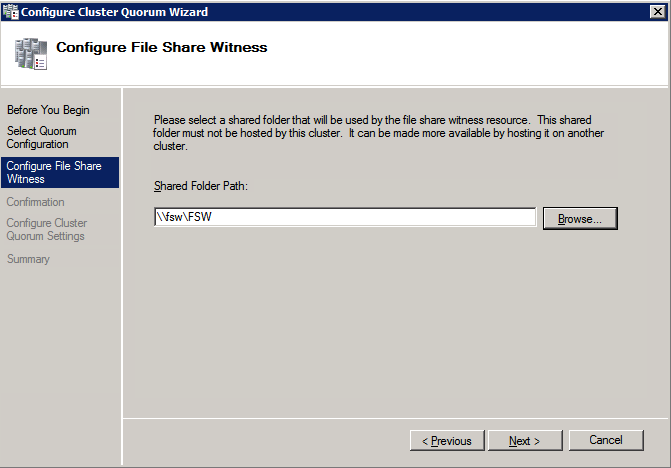
Once the share is created, run the Configure Cluster Quorum wizard on one of the cluster nodes and follow the steps illustrated below.

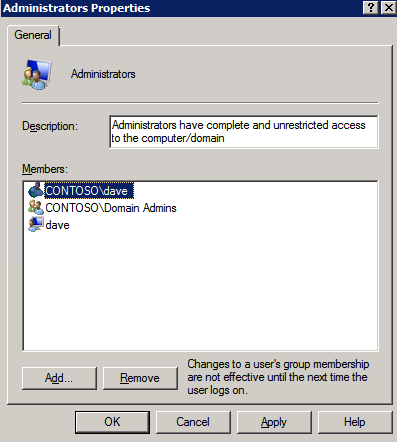
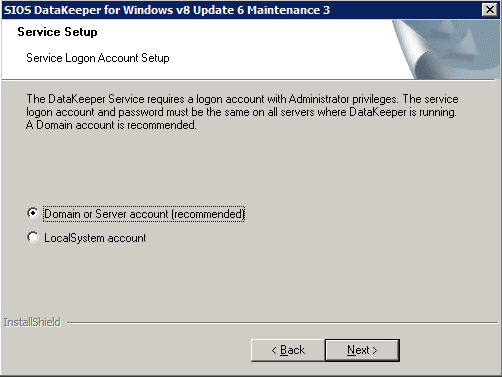
Create Service Account for DataKeeper
We are almost ready to install DataKeeper. However, before we do that you need to create a Domain account and add it to the Local Administrators group on each of the SQL Server cluster instances. We will specify this account when we install DataKeeper.
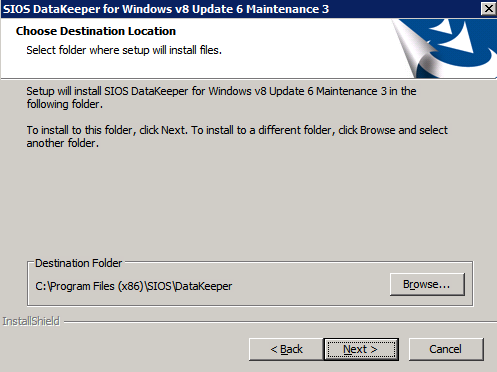
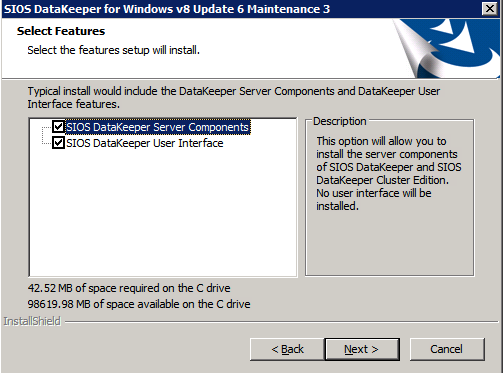
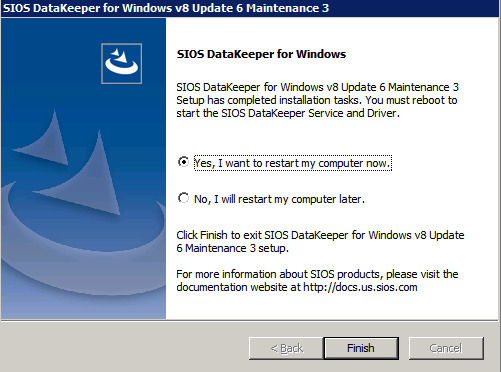
Install DataKeeper
Install DataKeeper on each of the two SQL Server cluster nodes as shown below.
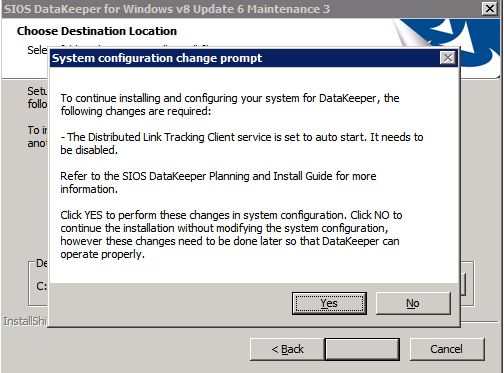
This is where we will specify the Domain account we added to each of the local Domain Administrators group.
Configure DataKeeper
Once DataKeeper is installed on each of the two cluster nodes you are ready to configure DataKeeper.
NOTE – The most common error encountered in the following steps is security related, most often by pre-existing Azure Security groups blocking required ports. Please refer to the SIOS documentation to ensure the servers can communicate over the required ports.
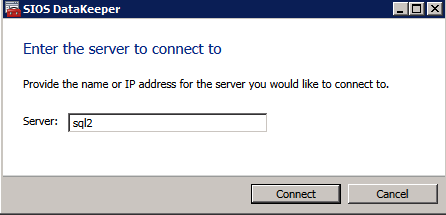
First you must connect to each of the two nodes.
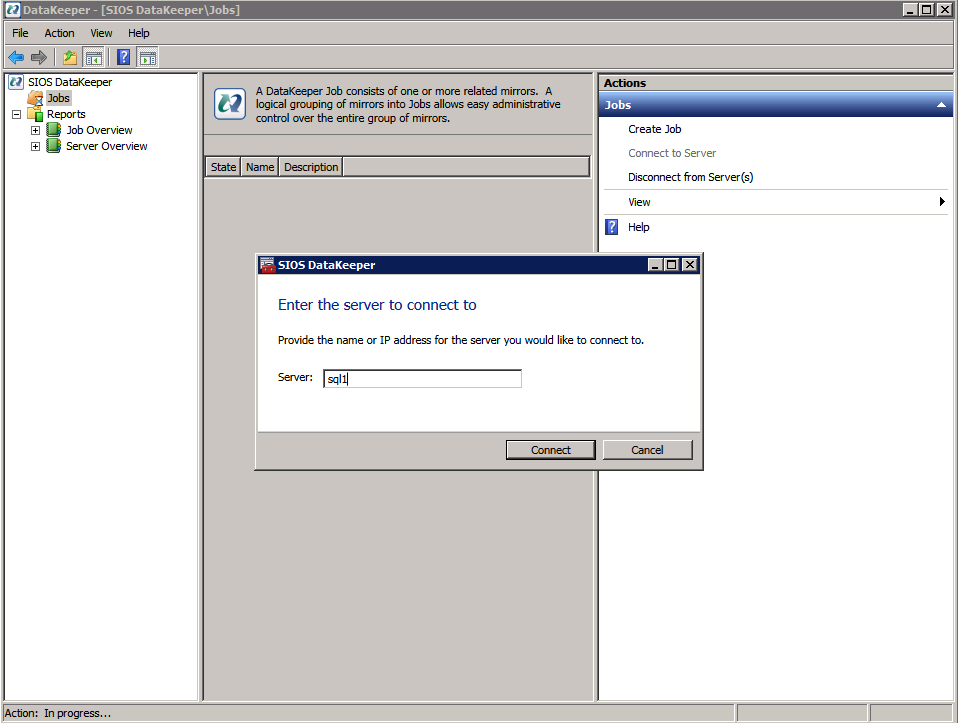
If everything is configured properly, you should then see the following in the Server Overview report.

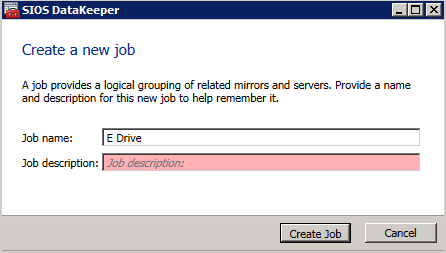
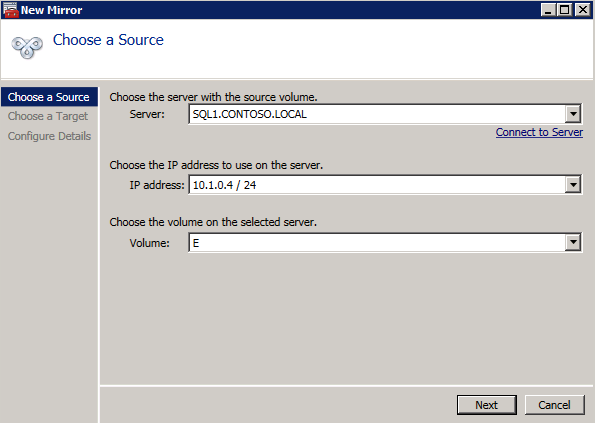
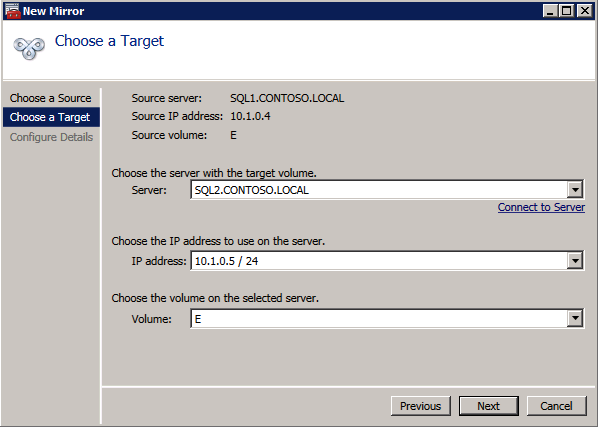
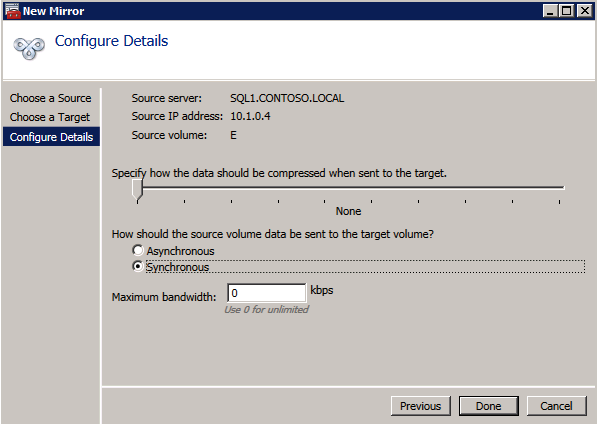
Next, create a New Job and follow the steps illustrated below
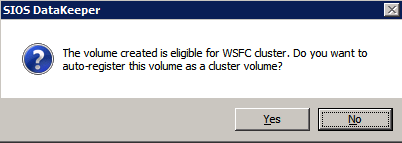
Choose Yes here to register the DataKeeper Volume resource in Available Storage
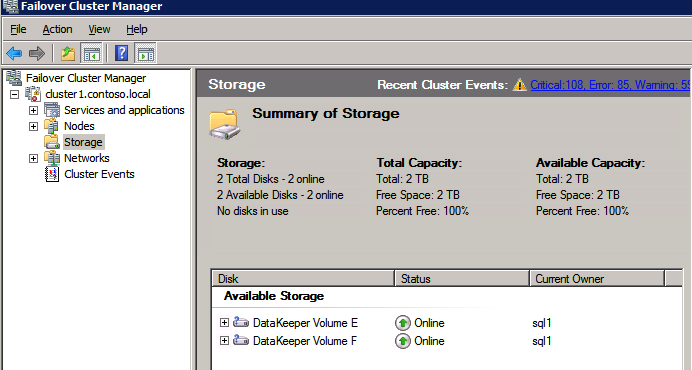
Complete the above steps for each of the volumes. Once you are finished, you should see the following in the WSFC UI.
You are now ready to install SQL Server into the cluster.
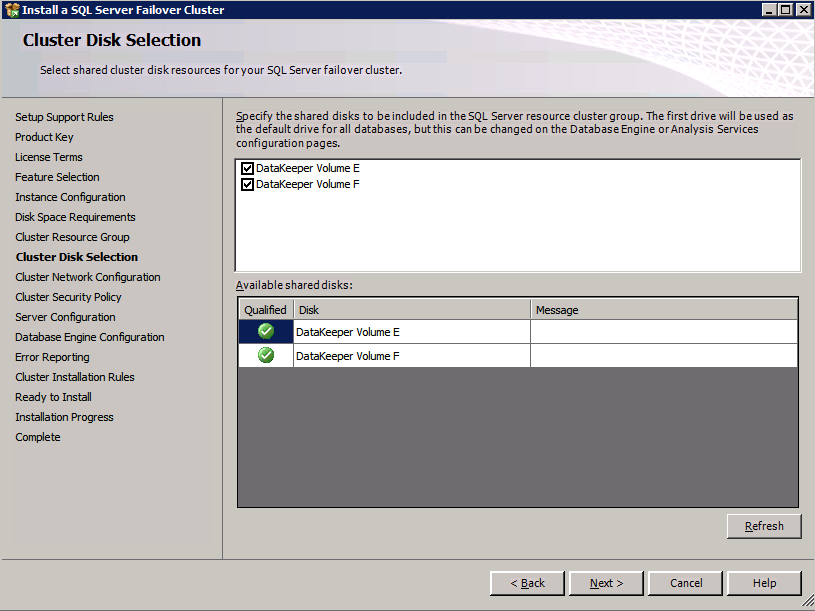
NOTE – At this point the replicated volume is only accessible on the node that is currently hosting Available Storage. That is expected, so don’t worry!
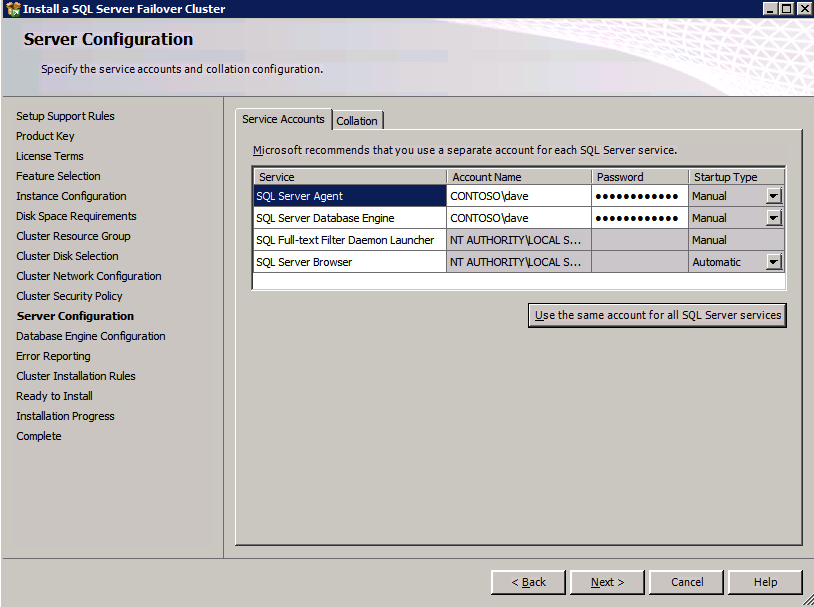
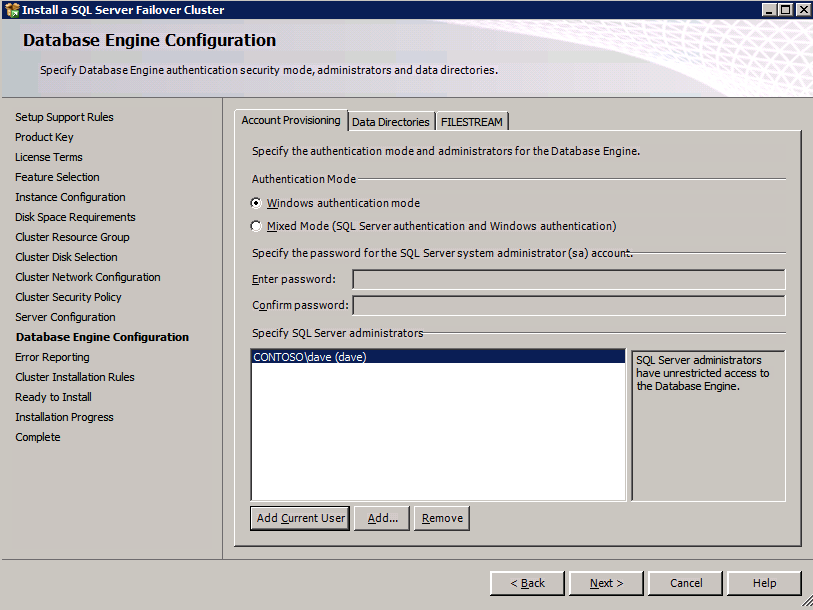
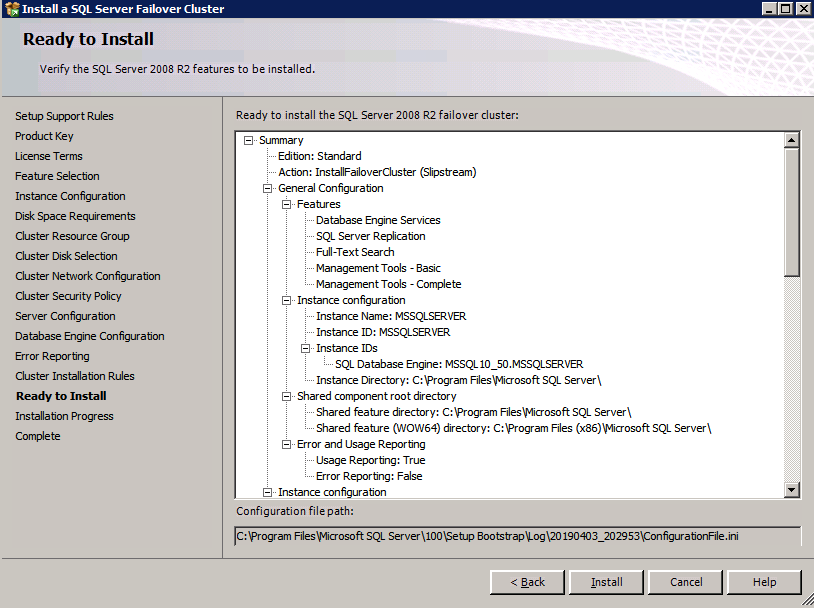
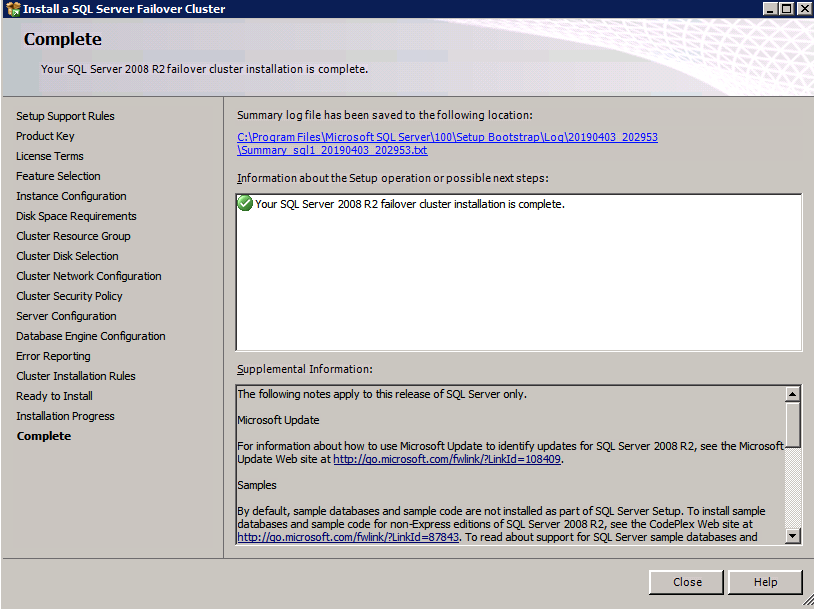
Install SQL Server on the first node
On the first node, run the SQL Server setup.
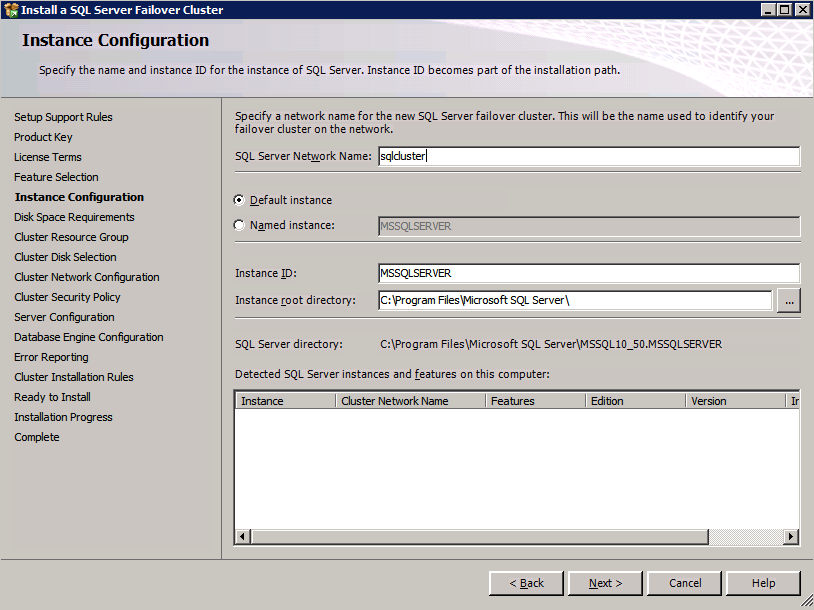
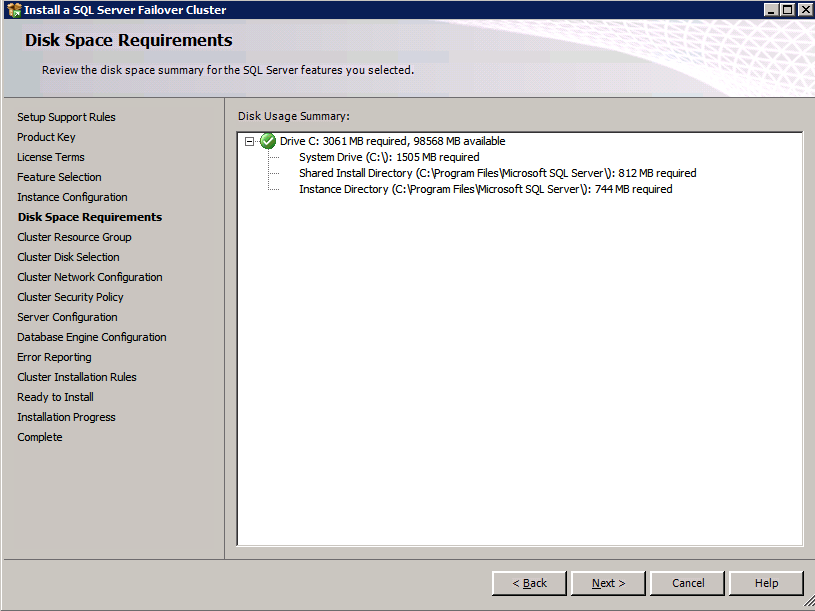
Choose New SQL Server Failover Cluster Installation and follow the steps as illustrated.
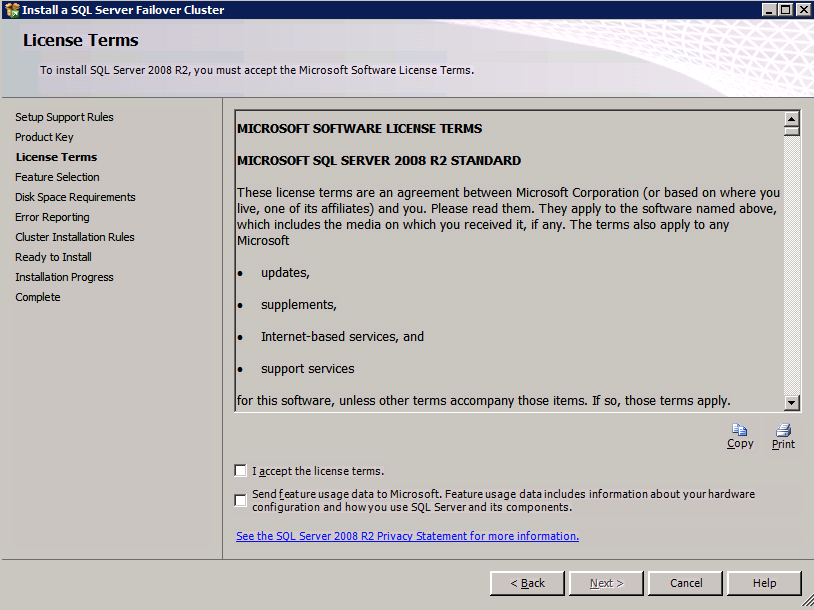
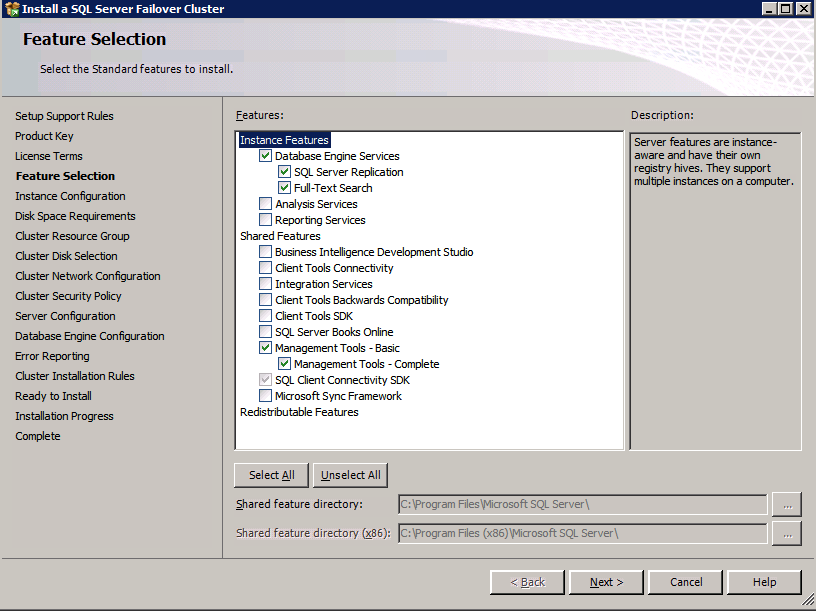
Choose only the options you need.
Please note, this document assumes you are using the Default instance of SQL Server. If you use a Named Instance you need to make sure you lock down the port that it listens on, and use that port later on when you configure the load balancer. You also will need to create a load balancer rule for the SQL Server Browser Service (UDP 1434) in order to connect to a Named Instance. Neither of those two requirements are covered in this guide, but if you require a Named Instance it will work if you do those two additional steps.
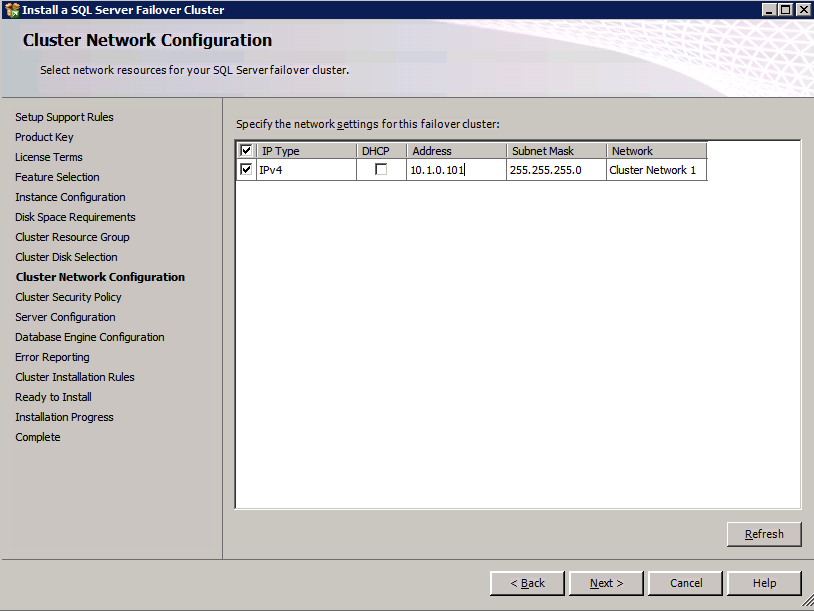
Here you will need to specify an unused IP address
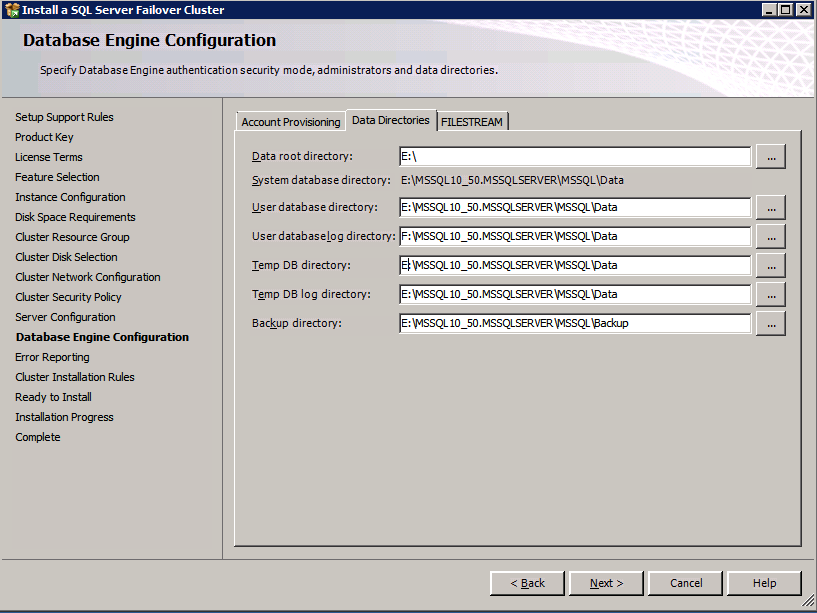
Go to the Data Directories tab and relocate data and log files. At the end of this guide we talk about relocating tempdb to a non-mirrored DataKeeper Volume for optimal performance. For now, just keep it on one of the clustered disks.
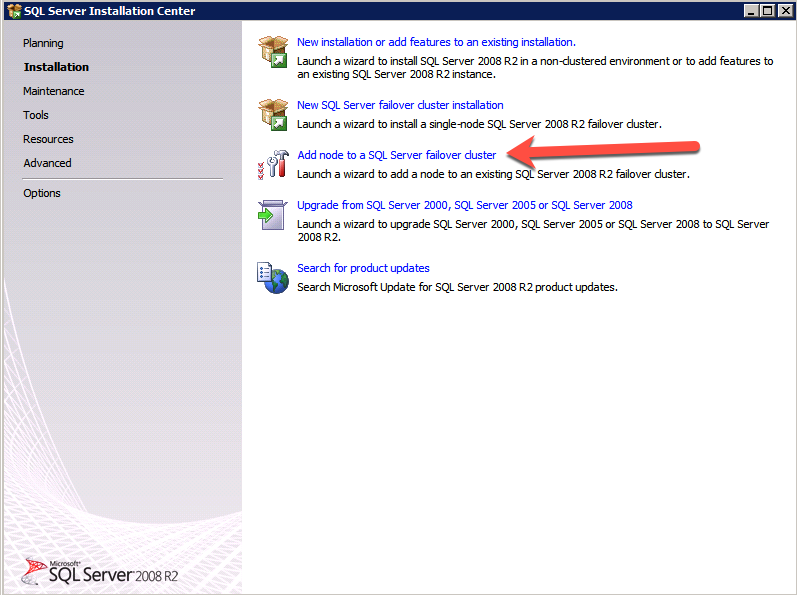
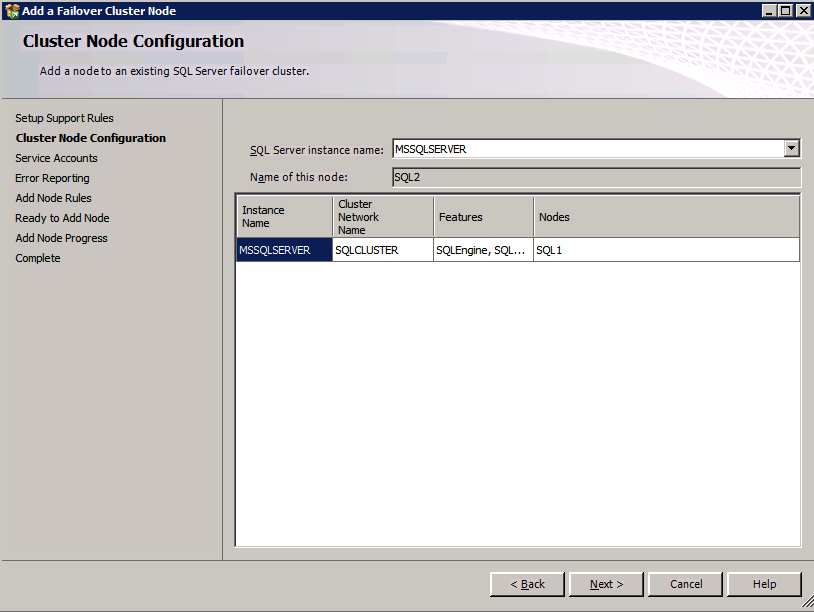
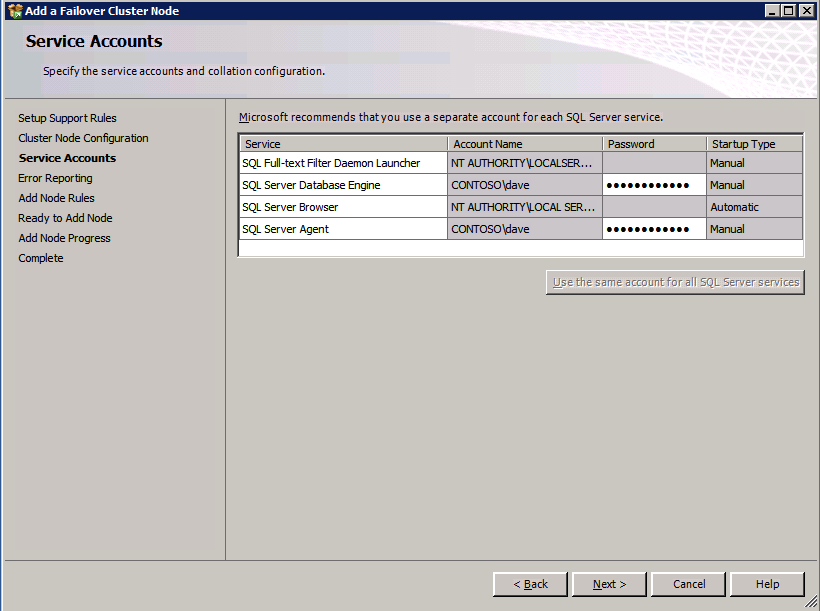
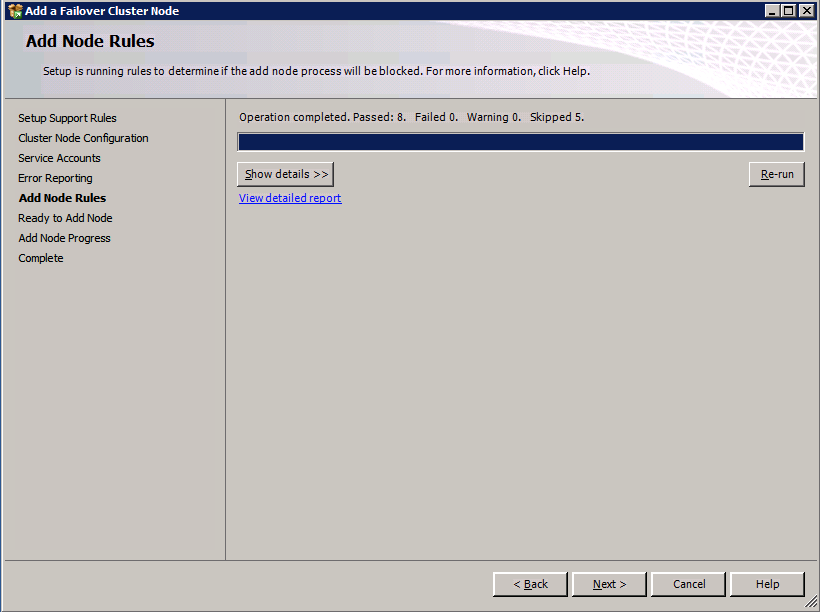
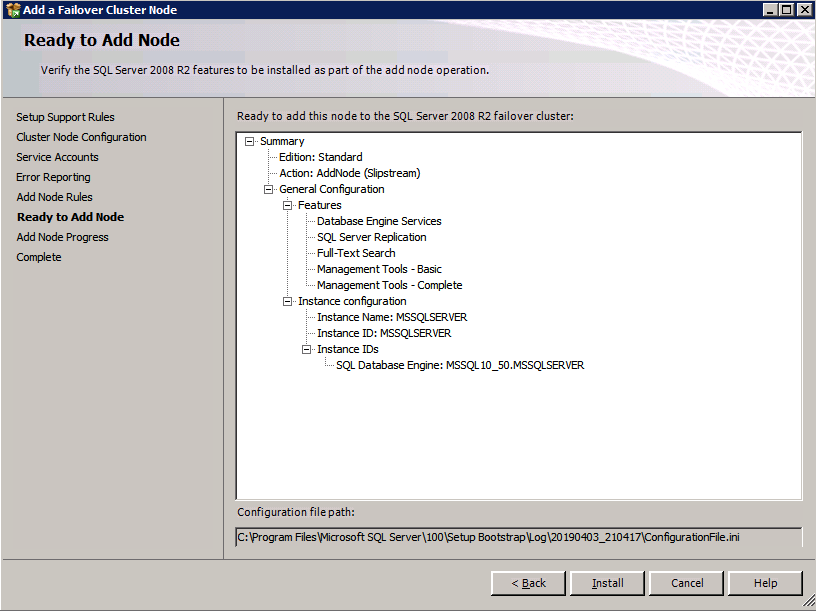
Install SQL on second node
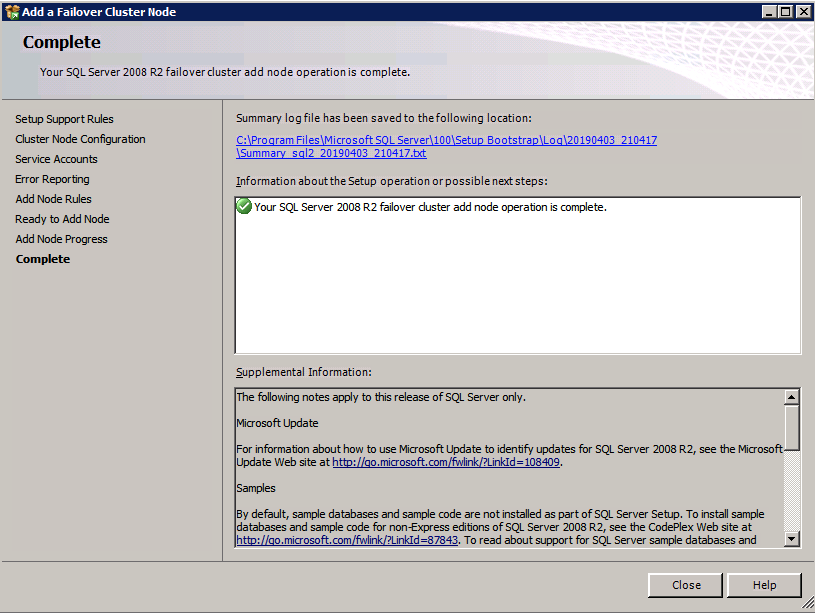
Run the SQL Server setup again on the second node and choose Add node to a SQL Server Failover Cluster.


Congratulations, you are almost done! However, due to Azure’s lack of support for gratuitous ARP, we will need to configure an Internal Load Balancer (ILB) to assist with client redirection as shown in the following steps.
Update the SQL Cluster IP Address
In order for the ILB to function properly, you must run run the following command from one of the cluster nodes. It SQL Cluster IP enables the SQL Cluster IP address to respond to the ILB health probe while also setting the subnet mask to 255.255.255.255 in order to avoid IP address conflicts with the health probe.
cluster res <IPResourceName> /priv enabledhcp=0 address=<ILBIP> probeport=59999 subnetmask=255.255.255.255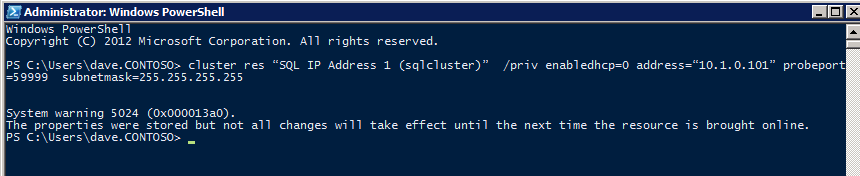
NOTE – I don’t know if it is a fluke, but on occasion I have run this command and it looks like it runs, but it doesn’t complete the job and I have to run it again. The way I can tell if it worked is by looking at the Subnet Mask of the SQL Server IP Resource, if it is not 255.255.255.255 then you know it didn’t run successfully. It may simple be a GUI refresh issue, so you can also try restarting the cluster GUI to verify the subnet mask was updated.
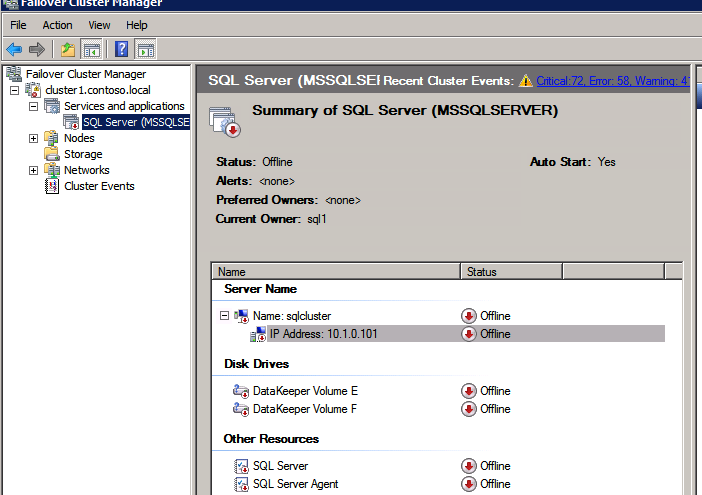
After it runs successfully, take the resource offline and bring it back online for the changes to take effect.
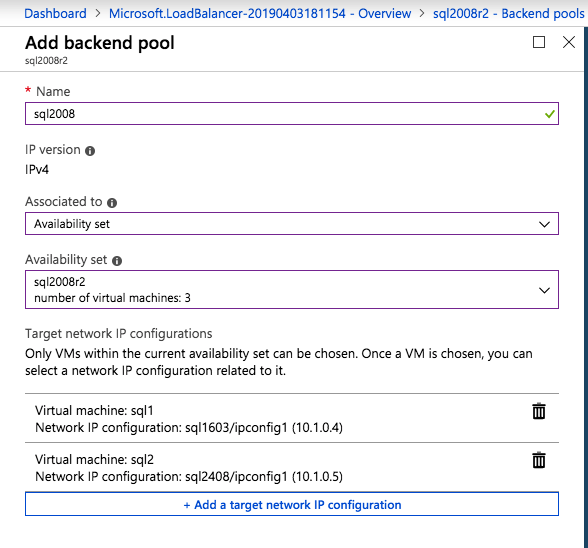
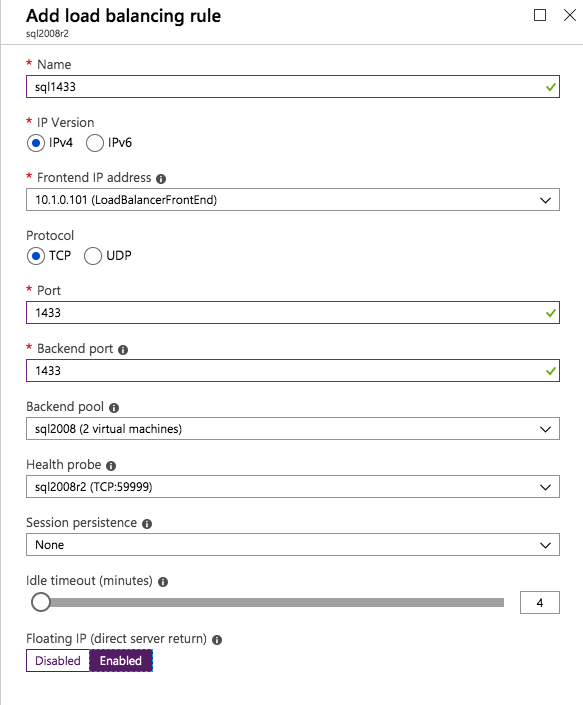
Create the Load Balancer
The final step is to create the load balancer. In this case we are assuming you are running the Default Instance of SQL Server, listening on port 1433.
The Private IP Address you define when you Create the load balancer will be the exact same address your SQL Server FCI uses.

Add just the two SQL Server instances to the backend pool. Do NOT add the FSW to the backend pool.
In this load balancing rule you must enable Floating IP
Test the Cluster
The most simple test is to open SQL Server Management Studio on the passive node and connect to the cluster. If you are able to connect, congratulations, you did everything correct! If you can’t connect don’t fear, you wouldn’t be the first person to make a mistake. I wrote a blog article to help troubleshoot the issue. Managing the cluster is exactly the same as managing a traditional shared storage cluster. Everything is controlled through Failover Cluster Manager.
Optional – Relocate Tempdb
For optimal performance it would be advisable to move tempdb to the local, non replicated, SSD. However, SQL Server 2008 R2 requires tempdb to be on a clustered disk. SIOS has a solution called a Non-Mirrored Volume Resource which addresses this issue. It would be advisable to create a non-mirrored volume resource of the local SSD drive and move tempdb there. However, the local SSD drive is non-persistent, so you must take care to ensure the folder holding tempdb and the permissions on that folder are recreated each time the server reboots.
After you create the Non-Mirrored Volume Resource of the local SSD, follow the steps in this article to relocate tempdb. The startup script described in that article must be added to each cluster node.
For More Information
As always, if you have questions or comments you can leave them in the comment section below or reach me on Twitter @daveberm