

WARNING: do not do this in production.
A quick blog post on a SSMS trick: how to quickly edit data. Sometimes you directly want to manipulate data without having to write a SQL statement. For example, in the development environment you want to modify a value in a column to test out a scenario, or you are creating a table with some dummy data.
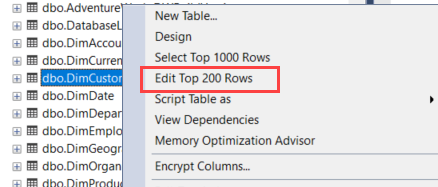
In SSMS, you can do this by right-clicking the table and selecting “Edit top 200 rows”.
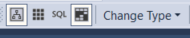
You’ll be taken to a grid where you can modify the value of each cell.

But you only have access to 200 rows. What if you can’t find the row you want to modify? Luckily, you can adapt the SQL query that fetches those 200 rows. In the toolbar, you have the following buttons (screenshot taken with SSMS 18.4):
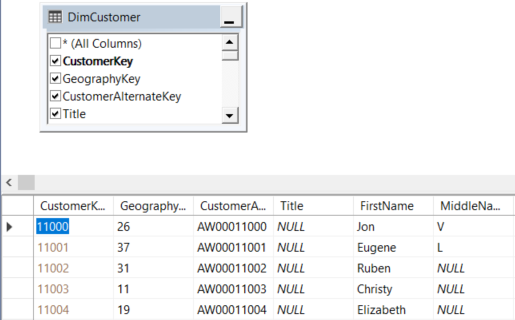
When you click the left button, you’ll see a diagram of the table:
Just like in the graphical query and view designer (please do not ever use this, it creates abominations of queries). But this view let’s you easily deselect columns to get a less cluttered view. If you click the second button, you get the full query designer:
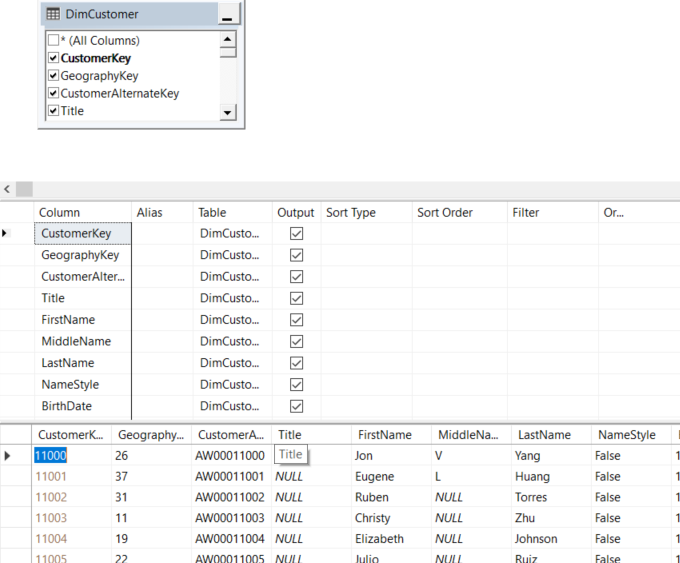
Aside from deselecting columns, you can now also filter and sort columns. But what I’m really after is the little SQL button, which will just show you the actual query:

You can edit the query to suit your needs. You can remove the top 200 clause, sort the data, remove columns, you name it. One disadvantage though: there’s no autocomplete, no intellisense, nothing. Even if you have a tool like Redgate SQLPrompt installed, it will not work in this designer. An alternative is to write the query in a query window and then copy paste it into the designer. But once you run the query (F5, Alt-X or whatever your favorite shortcut is), the editor will re-format it.
For example, if we have this query:
SELECT
     [CustomerKey]
    ,[GeographyKey]
    ,[CustomerAlternateKey]
    ,[Title]
    ,[FirstName]
    ,[MiddleName]
    ,[LastName]
    ,[NameStyle]
    ,[BirthDate]
    ,[MaritalStatus]
FROM dbo.[DimCustomer]
WHERE [FirstName] = 'Lauren'
ORDER BY CustomerAlternateKey;
It will result in the following:
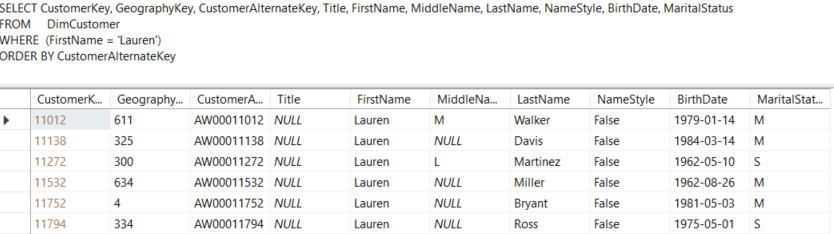
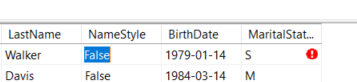
Now we can easily find and modify the row we need. Remember, once you change a value in the grid and select another row, the change is auto-committed. If you’re still in the current row, you can use escape to reverse your change. As long as the row is not committed, there will be a little red icon:
Entering new data can be done using the last “empty” line, with all the NULL values:

If you have an IDENTITY column, the next value is reserved once you start typing in this row. If you rollback or an error occurs, you will have a gap in your identity values.
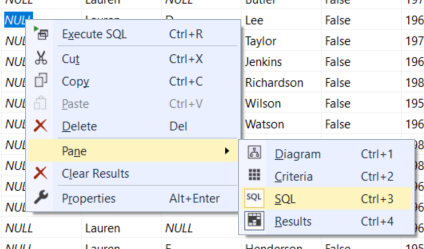
Finally, if you cannot find the buttons in the toolbar to get the designer (which is actually the motivation behind this blog post since I couldn’t find them earlier :), you can right-click anywhere in the grid, choose pane and then SQL.
As you can see, there are also some new shortcuts for you to memorize 