I presented at the virtual Minnesota SQL Server User Group meeting on June 16, 2020. The topic was data classification with SQL Server 2019 and Azure SQL Database.
Data Classification Basics
Data classification in both SQL Server and Azure allow you to discover and label data based on information type and sensitivity. Information type is a way to describe the content of the data at high level. This includes types such as Address, Name, Networking, and Credit Card. By tagging your columns with types you will be able to easily see the types of data stored in your tables. You can also label the sensitivity. This includes labels such as Confidential and Confidential-GPDR.
Using SQL Server 2019 and SSMS 18.4+
For on premises implementations, you can use SQL Server Management Studio. I would recommend that you use SSMS 18.4 or greater. This has the most capability. SQL Server 2019 includes the sys.sensitivity_classifications system catalog view so you can query to see what field have been labeled.
To get started, open up SSMS. Right click the database and choose Tasks > Data Discovery and Classification > Classify Data. This will allow you to

view the Data Classification window in SQL Server. You will get a list of recommendations and the ability to add custom classifications in your SQL Server database.

Once you have classified some of your data, you are able to view a report that shows the coverage of the classification work you have done.

Adding Data Classification in Azure SQL Database
Azure SQL Database supports similar functionality for discovering and classifying data. The primary differences are (1) it requires Advanced Data Security which costs $15/month per server and (2) audit logging support is built in.
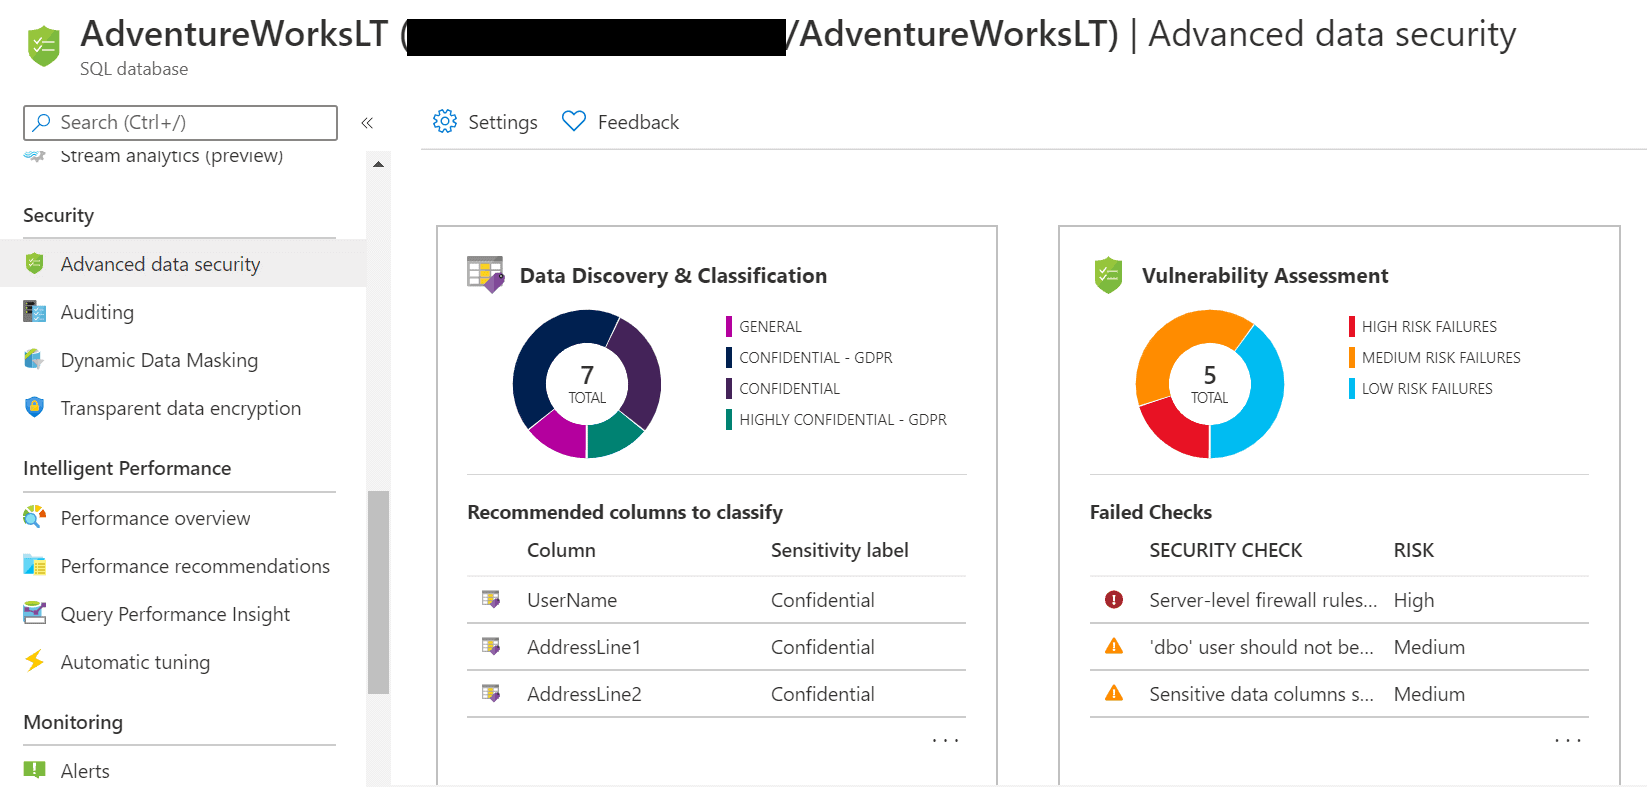
You can find this in the Azure portal with your SQL Database.

As you can see above, you get a visual here initially. Click the Data Discovery & Classification panel to open a similar classification window that we see in SSMS. This will allow you to discover and classify your data.
The key difference is turning on auditing and logging information about people querying the classified data. In the Security section in your SQL Database view in the Azure portal, choose Auditing. You can now add auditing to your server or database. (Click here for information about setting up Auditing.) I chose to use Log Analytics which is in preview. Log Analytics has a dashboard which shows activity in your database with this data.

You can click into the dashboard to dig into details. You can also use the Log Analytics query features to build your own queries to further analyze the data. The details contain who accessed the information, their IP address, and what was accessed. You can build more reports from that information to support more sophisticated auditing.
Final Thoughts
I think that there is still work to be done on SQL Server to better support auditing. Azure is ahead of the game in this area. More importantly, Azure logging is a platform level solution. You should be able to integrate your logging from the applications to the database in Azure.
You do have the ability to update the policy in SQL Server with a JSON file. I recommend you export the file and modify it. In Azure, you can update the information policy in the Security Center. Updating this policy allows you to discover data or information that you want to classify based on rules you set up. This should be part of your data governance plan.
One other follow up from the meeting. The question was raised about Visual Studio support in database projects. The answer is “sort of”. First, you need to make sure your project is targeting SQL Server 2019 or Azure SQL Database. Once that is set, you can use the following code to add the classification manually or you can apply it to your database and do a scheme compare to bring it in.
ADD SENSITIVITY CLASSIFICATION TO
    [SalesLT].[Customer].[FirstName]
    WITH (LABEL = 'Confidential - GDPR', LABEL_ID = 'fe62dcde-72c0-475c-b1af-fb8de4c8fc7e', INFORMATION_TYPE = 'Name', INFORMATION_TYPE_ID = '57845286-7598-22f5-9659-15b24aeb125e', RANK = MEDIUM);
You will need to know the GUIDs for the labels and types in your solution to do this manually. However, once this is done, you can see the information in the Properties window for the field as well.

The key thing to be aware of is that the properties are read only. You have to use the code to change them or do the changes in the database and use Schema Compare to bring them in.
Thanks again to those of you who joined us at the meeting. Here is the slide deck from that meeting. I look forward to sharing more with all of you later.

![]()