

In this post, I will guide you on how to deploy a dockerized simple flask-based TODO application to Azure Container Apps using Pulumi. You will Dockerize the Python application, securely store the Docker Hub credentials (username and token) in Azure Key Vault, and automate the deployment process using Pulumi. The Pulumi script will build and push your containerized TODO application to DockerHub and deploy the app on Azure Container Apps.
What is Pulumi? Pulumi is an Infrastructure as a Code (IaC) tool that allows developers to define and manage infrastructure using familiar programming languages. Developers can still use their existing Programming language to create infrastructures, unlike Terraform and CloudFormation which require Developers to learn new syntax. Pulumi allows you to write infrastructure code in your favorite programming language such as TypeScript, JavaScript, Python, Go, and C#.
Azure Container Apps is a serverless container platform provided by Microsoft Azure that allows you to deploy and run microservices and containerized applications without the need for complex infrastructure such as Kubernetes.
Azure Key Vault is a cloud service from Microsoft Azure that allows you to securely store and manage sensitive information like:
- Secrets: (Connection strings (for example Database connection string), API Keys, Tokens, passwords)
- Certificates: (SSL / TLS certificates for web applications)
- Keys: (encryption keys for data protection or key management)
Below is a step-by-step guide on how to deploy a Dockerized Python TODO Application to Azure Container Apps using Pulumi and Azure Key Vault.
Let us get started as you deploy a Dockerized Python TODO application to Azure Container Apps using Pulumi for infrastructure as code (IaC) and Azure Key Vault for secure secret management.
Step 1: Install Pulumi
Firstly, you should ensure you have Pulumi installed in your development environment. Pulumi can be installed in Linux, macOS, or Windows.
The command below can be used to install Pulumi
#How to install Pulumi on Linux
curl -fsSL https://get.pulumi.com | sh

#How to install Pulumi using Brew on macOS
brew install pulumi/tap/pulumi
#How to install Pulumi on Windows
Download and run the Pulumi installer on this link https://www.pulumi.com/docs/install/
Step 2: Set Up Your Environment
Secondly, you need to set up your environment and install the Python dependencies. Kindly follow the steps below in setting up your environment.
- Create an Account: Sign up for a Pulumi account here to store your stack state.
- Install Dependencies: Install Python and pip on your workstation. Since we are using Python for creating infrastructure. However, if you are using another programming language, you can use this method to install the software.
Step 3: Create Your secrets in Azure Key Vault
Your credentials need to be created in Azure Key Vault and the key vault name will be added to Pulumi.dev.yaml file. Create a secret with the secret name dockerUsername and generate a tokenwith dockerToken this will contain the actual username for Docker Hub and the token.

Step 4: Create Pulumi.dev.yaml file
Create a new file Pulumi.dev.yaml file which will contain the configurations for creating your Azure resources for the dev environment. Having a Pulumi.dev.yaml will inform Pulumi to create the infrastructure in the dev namespace or environment.
config:
  azure_container_pulumi_docker_python:location: eastus
  azure_container_pulumi_docker_python:environment: dev
  azure_container_pulumi_docker_python:key_vault_name: demo-key-vault-pulumi
  azure_container_pulumi_docker_python:subscription_id: <your azure subscription>
  azure_container_pulumi_docker_python:resource_group_name: demo-dev-rg
  azure_container_pulumi_docker_python:docker_username: talk2toks
  azure_container_pulumi_docker_python:app_name: todo
Step 5: Authenticate with Your Cloud Provider (Azure)
You will need to authenticate with your cloud provider before deploying or managing your resources with Pulumi. For this use case, you will be using Azure as the Cloud Provider. By running command az-login this will allow you to authenticate with Azure.
Step 6: Install the Azure CLI (If not already installed)
To be able to run the command az-login you will need to make sure you have Azure CLI installed. You can install it by using the following command below.
curl -sL https://aka.ms/InstallAzureCLIDeb | sudo bash
Alternatively, check this link on how to install Azure CLI on different Operating System (OS).
Step 7: How to Authenticate Azure Using Azure CLI
Run the following command below to authenticate with Azure. After running the command, it will open a web browser where you can sign in with your Azure credentials. Once the authentication is successful, the Azure CLI will cache your credentials locally. Please note: if you have multiple subscriptions, you have the flexibility of selecting the one you want.
az login
Step 8: Create the Python applications (Dockerfile, flask app)
In this step, you will build a simple Flask-based TODO API and package it using Docker so it can run in Azure Container Apps.
- app.py: The main Flask application handles basic CRUD operations for a TODO list
- requirements.txt: Flask as the only dependency
- Dockerfile: Defines how to containerize the application using Pulumi
Pulumi can build and push the image to Docker Hub automatically.
# Dockerfile

# Use official Python image
FROM python:3.9.22-alpine3.21

# Set work directory
WORKDIR /app

# Copy files
COPY requirements.txt .
RUN pip install --no-cache-dir -r requirements.txt

COPY . .

# Expose port
EXPOSE 8082

# Run the app
CMD ["python", "app.py"]
# Flask App

from flask import Flask, request, jsonify

app = Flask(__name__)
todos = []

@app.route('/')
def index():
    return "Welcome to the TODO app!"

@app.route('/health')
def health():
    return "The app is working fine!"


@app.route('/todos', methods=['GET'])
def get_todos():
    return jsonify(todos)

@app.route('/todos', methods=['POST'])
def add_todo():
    data = request.get_json()
    todo = {
        'id': len(todos) + 1,
        'title': data.get('title', 'Untitled Task'),
        'done': False
    }
    todos.append(todo)
    return jsonify(todo), 201

@app.route('/todos/<int:todo_id>', methods=['PUT'])
def update_todo(todo_id):
    for todo in todos:
        if todo['id'] == todo_id:
            todo['done'] = request.get_json().get('done', todo['done'])
            return jsonify(todo)
    return jsonify({'error': 'Todo not found'}), 404

@app.route('/todos/<int:todo_id>', methods=['DELETE'])
def delete_todo(todo_id):
    global todos
    todos = [t for t in todos if t['id'] != todo_id]
    return jsonify({'message': 'Deleted'}), 204

if __name__ == "__main__":
    app.run(host='0.0.0.0', port=8082)
# requirement.txt file
flask==2.3.3
Step 9: Create the Pulumi code
Create a file with filename _main_.py and copy and paste code below. The Pulumi Python code automates the deployment of a Dockerized Flask TODO app to Azure Container Apps, build and push the Docker image to Docker Hub using the credentials stored in Azure Key Vault.
import os
import pulumi
import pulumi_docker as docker
import pulumi_azure_native as azure_native
import pulumi_azure as azure

from pulumi import Config, export
from pulumi_azure_native.resources import ResourceGroup, get_resource_group

# === Load configuration ===
config = Config()
env = pulumi.get_stack()
appname = pulumi.get_project()

location = config.require("location")
key_vault_name = config.require("key_vault_name")
subscription_id = config.require("subscription_id")
resource_group_name = config.require("resource_group_name")
app_name = config.require("app_name")

# === Create or Get Resource Group ===
def create_or_get_rg(name):
    try:
        existing_rg = get_resource_group(resource_group_name=name)
        return ResourceGroup.get("existingResourceGroup", id=existing_rg.id)
    except Exception:
        return ResourceGroup("resourceGroup",
            location=location,
            resource_group_name=name
        )

resource_group = create_or_get_rg(resource_group_name)

# === Get secrets from Azure Key Vault ===
key_vault_id = f"/subscriptions/{subscription_id}/resourceGroups/{resource_group_name}/providers/Microsoft.KeyVault/vaults/{key_vault_name}"

docker_username = azure.keyvault.get_secret(name="dockerUsername", key_vault_id=key_vault_id)
docker_token = azure.keyvault.get_secret(name="dockerToken", key_vault_id=key_vault_id)

docker_username = docker_username.value
docker_token = docker_token.value

image_name = f"{docker_username}/{app_name}:latest"

# Docker Image Build and Push
built_image = docker.Image("todo",
    build=docker.DockerBuildArgs(
        context="./todo-app/app",  # Path to Dockerfile directory
        platform="linux/amd64"
    ),
    image_name=image_name,
    registry=docker.RegistryArgs(
        server="docker.io",
        username=docker_username,
        password=docker_token,
    ))

# Container App Environment
env_name = f"{app_name}-env"
managed_env = azure_native.app.ManagedEnvironment("env",
    resource_group_name=resource_group.name,
    location=location
    )

# Container App referencing Key Vault secret (via secret ref)
# Step 1: Add secrets to Container App configuration
container_app = azure_native.app.ContainerApp("app",
    resource_group_name=resource_group.name,
    managed_environment_id=managed_env.id,
    configuration=azure_native.app.ConfigurationArgs(
        secrets=[
            azure_native.app.SecretArgs(
                name="dockerhub-password",
                value=docker_token  # from Key Vault
            )
        ],
        registries=[
            azure_native.app.RegistryCredentialsArgs(
                server="index.docker.io",
                username=docker_username,
                password_secret_ref="dockerhub-password"  # Refers to the secret defined above
            )
        ],
        active_revisions_mode="Single",
        ingress=azure_native.app.IngressArgs(
            external=True,
            target_port=80
        ),
    ),
    template=azure_native.app.TemplateArgs(
        containers=[azure_native.app.ContainerArgs(
            name="todo",
            image=built_image.image_name,
        )],
        scale=azure_native.app.ScaleArgs(
            min_replicas=1,
            max_replicas=2,
        ),
    ))

# Export Container App URL
pulumi.export("containerAppUrl", container_app.configuration.apply(
    lambda cfg: cfg.ingress.fqdn if cfg and cfg.ingress else "No Ingress"))
Step 10: Preview Your Infrastructure
By running the command below. This will allow you to preview the changes Pulumi will make to your infrastructure.
pulumi preview

Step 11: Deploy Your Infrastructure
By running the command below. This will allow you to apply the changes to deploy your infrastructure.
pulumi up
The pulumi script will build the Dockerfile and push the docker image to Docker Hub and create ContainerApp on Microsoft Azure.

This is a copy of the Docker Image on Docker Hub

This is a copy of the Container App in Microsoft Azure

The app is now up and running and can be accessible on https://app56619563.mangosea-db72ccba.eastus.azurecontainerapps.io/
Below is a screenshot of the running app from Container App

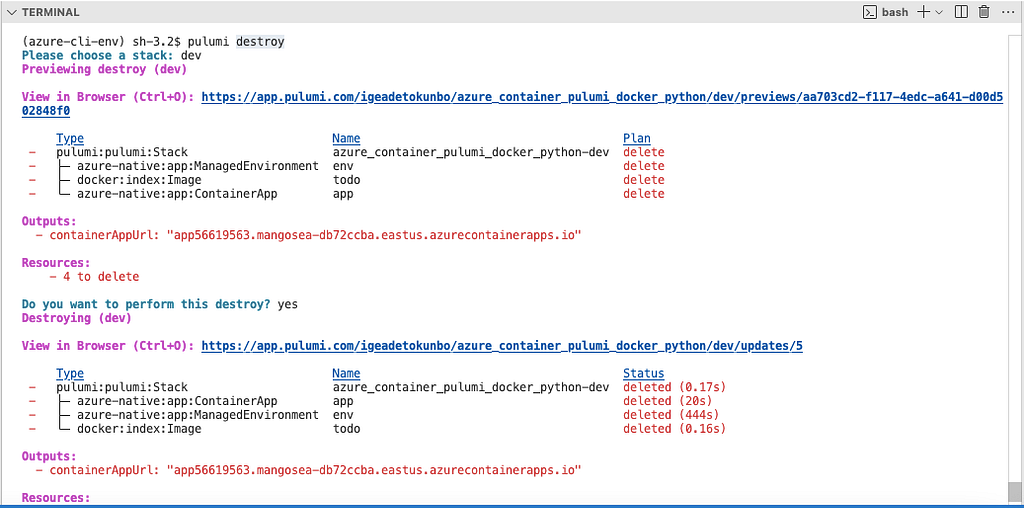
To destroy the infrastructure. Run command below
pulumi destroy
Conclusion
I hope you can now deploy a Dockerized Python TODO application to Azure Container Apps using Pulumi and Azure Key Vault, this offers a modern, scalable, and secure way to manage cloud-native applications. By leveraging Pulumi’s powerful infrastructure-as-code capabilities, you will gain full control over our Azure resources while maintaining a developer-friendly workflow. Integrating Azure Key Vault ensured that sensitive configuration values like API keys were never exposed in our source code. The Pulumi code also build the dockerfile and deploy the docker image to Docker Hub.
Check out the completed code on GitHub
Whether you’re just getting started with Pulumi or exploring Azure Container Apps for lightweight deployments, this project provides a great foundation to build and scale more complex applications in the cloud.
![]()