

This is the third post in a series about modern Data Lake Architecture where I cover how we can build high quality data lakes using Delta Lake, Databricks and ADLS Gen2. Once again it builds on the previous posts in the series, so you may want to give that a look.
In this post I’ll do an introduction to Delta Lake and how this works in Databricks with ADLS Gen2 as the storage layer. We’ll be using a simple relational table in Azure SQL Database as the source for the data pipeline.
As the name suggests, we’re using Databricks for building the data engineering pipelines, and ADLS Gen2 as the underlying storage layer, so you’ll need to get that set up first if you’ve not done so already. In this example, we’ll use an ADLS Gen2 storage account mounted to the Databricks File System (DBFS) to simplify the code in the Notebook. I have written a blog post on how to do this in the past, you can find it here.
You’ll also need to set up an Azure SQL Database. You can follow these steps as per the Microsoft docs to do so. I used a “Serverless” version so I only pay for what I use. I set up the AdventureWorks sample in my database, but you don’t need it. The blog GitHub repo for this post contains all the scripts you need to create the objects and data used in this post.
We’ll be using the JDBC to connect to the Azure SQL Database in this example, though I’d highly recommend you use the Apache Spark Connector for SQL Database instead for production implementations.
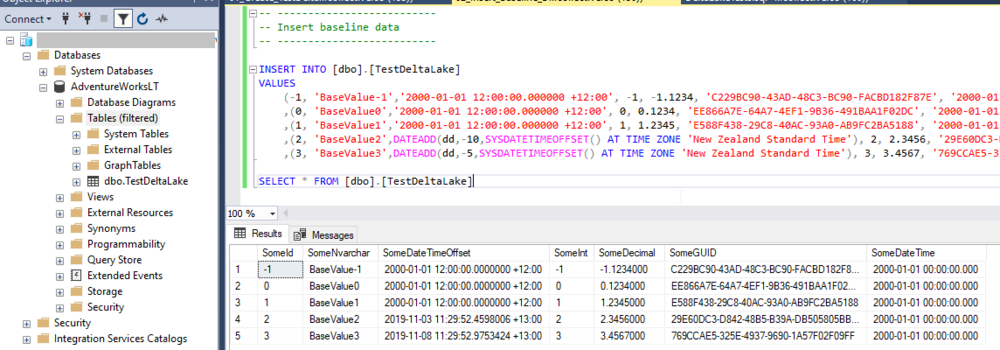
First let’s create a table we can use a data source. Connect to your new Azure SQL Database and set create the TestDeltaLake table using the script in the repo.

Next, let’s add some baseline data to it.
From here we dive into Databricks to ingest this data to our Persisted Data Lake zone. You’ll recall from the previous post that the Transient zone can be skipped in some cases. In this particular example, we can read data directly from the SQL Database, so there is no need to stage the data temporarily in the Transient zone. You could if you wanted to, but that’s an extra write and read which doesn’t make for good blogging!
First step is to set the Notebook variables

As you can see from the image, I’ve created a few variables and set their values:
jdbcUsername: The SQL account to use in the connection
jdbcHostname: The Azure SQL logical server fully qualified domain name
jdbcDatabase: The Database name, because I used the sample in my SQL Database setup, it’s AdventureWorksLT in my case
query: The custom query to push to the Azure SQL Database. Note that the query selects all records where the SomeId attribute is greater than -1.
jdbcPort: The port used to connect to the server, in this case the default SQL port of 1433
secretScope: The name of the KeyVault backed secret scope I set up to store secrets
secretName: The name of the secret in Azure KeyVault that stores the password for the user name used in the connection.
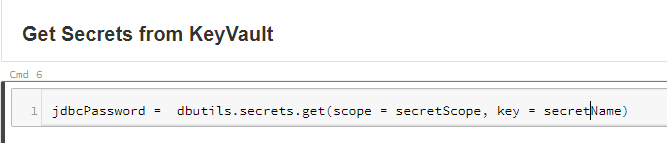
The next cell retrieves the password from the KeyVault secret and stores it in the jdbcPassword variable
We then build the JDBC URL and set the connection properties.

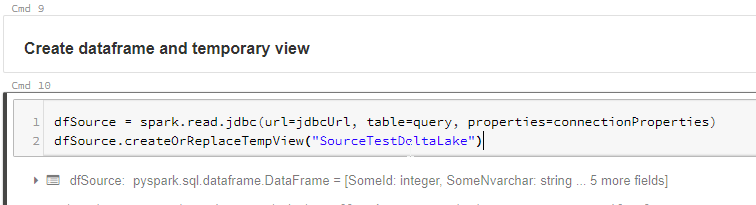
The next cell uses the JDBC connection and reads the data into a dataframe. It also creates a temporary view called SourceTestDataLake from the dataframe, which we can query using Spark SQL.
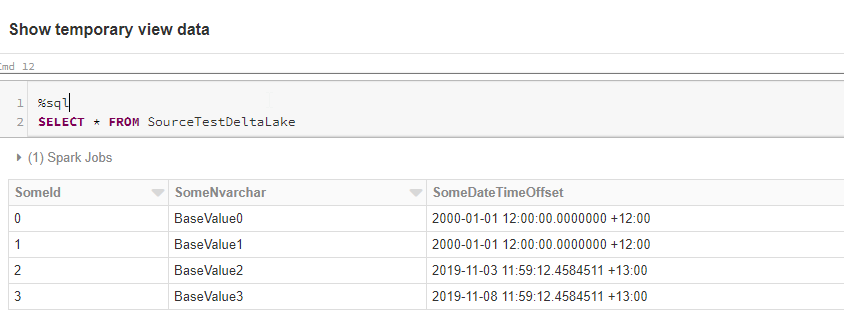
We can now query the temporary view. As you can see, the query returns the result of the SQL query we specified in the Notebook variables.
In the next set of cells, we create the “Persisted” Databricks database if it doesn’t exist. All this means is that the logical “database” in Databricks points to the persisted zone in our Data Lake. Consistent naming and all that…
We then use a CREATE TABLE AS SELECT or CTAS statement to create the dbo_TestDeltaLake Delta table in the persisted database. The “Location” for file storage is in the persisted ADLS Gen2 files system we mounted to the DBFS earlier.
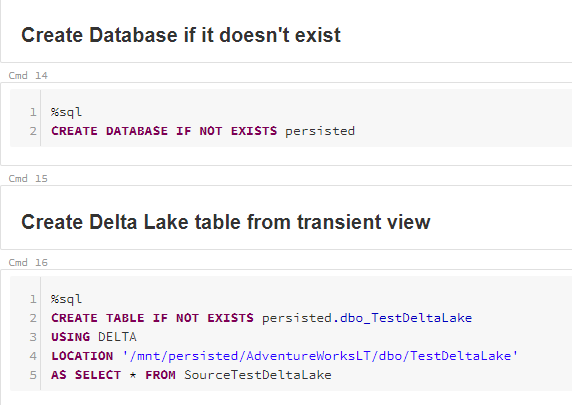
Once you’ve run the CREATE TABLE cell, you should see the snappy.parquet file and delta log folder created in the specified location within your ADLS Gen2 account.

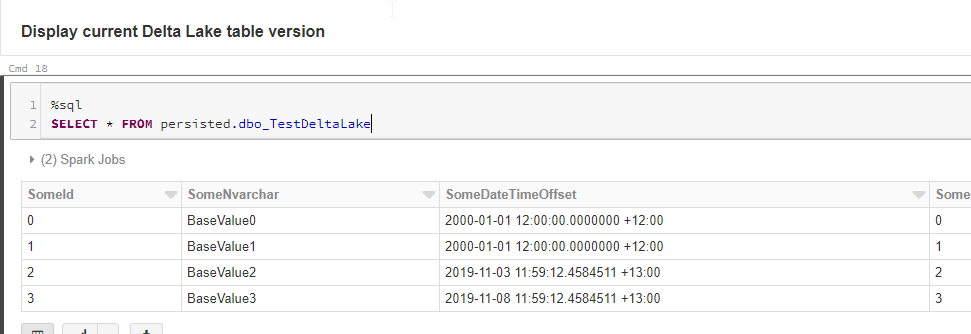
As you can see when running the next cell, our Delta table contains the same data as our SQL table.
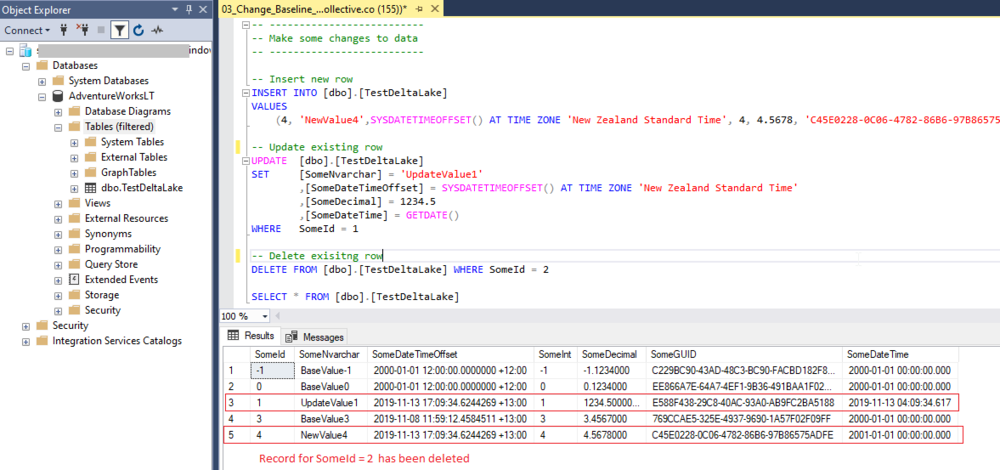
Now let’s make some changes in the source system data.
In order to refresh our temporary view data, we need to run all the cells in the notebook up to and including “Show temporary view data”. Technically speaking you can run the Create Database and Create Table cells again, they will just do nothing, so there is no point.

As you can see, our dataframe and temporary view is the same as our SQL table data. We can now run the next two cells which does a MERGE and DELETE respectively.
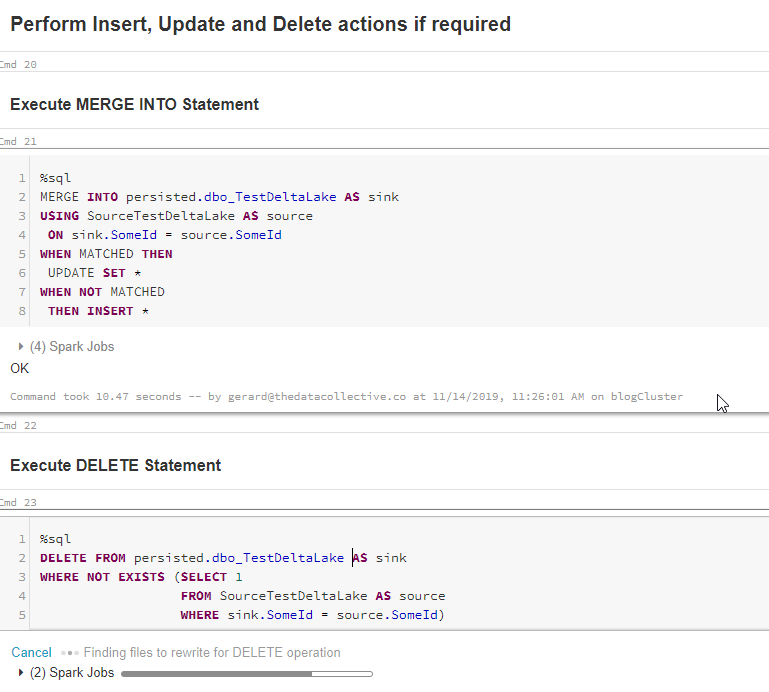
Note: As you can see, I did not need to specify any field names for the MERGE, only the key to merge on. Delta Lake is smart enough to match columns automatically where they have the same name. This is extremely useful when you want to build dynamic ETL/ELT pipelines! But more on this in the next post when we make things a little more dynamic.
If we now run the next cell, we can see that our Delta table now looks like our SQL source. The records where Merged and Deleted as we expected.
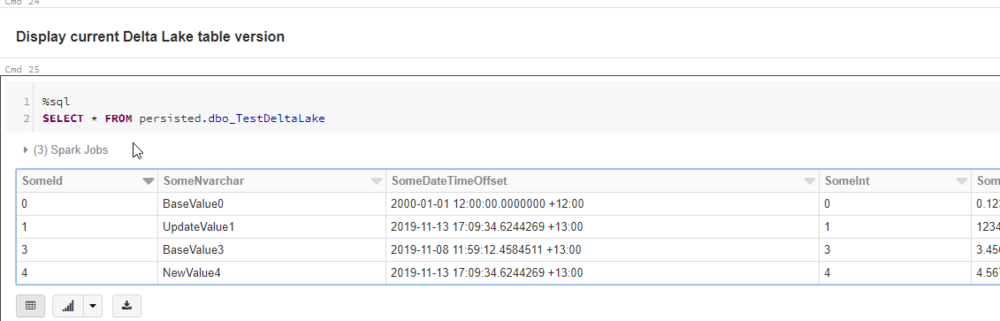
BUT HERE IS WHERE THE MAGIC HAPPENS! If we run the next cell, what do we see?
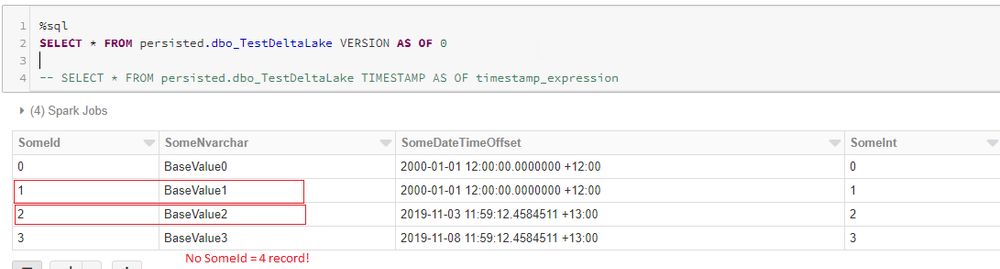
We see the version of the data prior to the changes being applied, a.k.a. Time Travel. So we can query data in the table as at any version when using Delta Lake.
In this example, I used the Delta Log version index to indicate the table data version I’m after, but you can also query this using a timestamp expression instead (as per the code that has been commented). Far more likely in real world queries than using the version number.
Now I know what you’re thinking, how far can I go back? Well, by default, 30 days, but you can configure this per table, and can keep every version ever created if you really want to. You’ll just need to consider that you’re keeping additional files in you storage account, meaning higher storage costs. So there is a sweet spot, you just need to work out what it is for your scenario.
The good news here is with ADLS Gen2 has tiered storage, so you can just set your accounts up to automatically move older files too cool storage, meaning it costs less. You can also VACUUM out old files no longer used (more on this later), so there are many ways to reduce storage costs. That’s said, we’re talking blob storage here which is practically free anyway.
In the next post, we’ll start looking into how we make the Notebook code dynamic, i.e. how we can use the same Notebook for every relational table. The ultimate goal being a metadata driven ETL/ELT framework which will allow you to ingest and change track any table with zero code change.
Thanks for reading, see you next time.
![]()