

This post is part two in a three-part series that addresses how to use Azure Data Lake Store (ADLS) Gen2 as external storage with Azure Databricks. It builds on Part 1 where we used Databricks to connect directly using a service principal and OAuth 2.0. If you have not read that post, I suggest you do so as there are some concepts and prerequisites you’ll need to understand and configure for Part 2 to provide value.
As we saw in the previous post, there are currently four main options for connecting from Databricks to ADLS Gen2:
Using the ADLS Gen2 storage account access key directly
Using a service principal directly (OAuth 2.0)
Mounting an ADLS Gen2 filesystem to DBFS using a service principal (OAuth 2.0)
Azure Active Directory (AAD) credential passthrough
This post focuses on option 3; mounting an ADLS Gen2 file system to DBFS using a service principal
In Part 1 we asked the question: “Why would we ever mount it to the DBFS if it’s less secure than using a service principal directly?” Well, the answer is simple, automation! Once we know that our notebook code behaves as we need it to, in most cases, we’ll need to automate it as part of some workflow, typically either triggered by an event, or a schedule of some sort.
If you’re like me and you generalise your code to be reusable, for example to process a number of database tables in parallel using multiple instances of the same notebook. You don’t want the authentication step to happen for every execution. Simply put, it’s overhead you don’t need! So if your use case is automation, then mounting the ADLS Gen2 file system to the DBFS is a great solution.
Of course this comes with a word of warning. It means that your automation cluster needs to be secured so only the appropriate, privileged users have access to the cluster. Otherwise, you’ll potentially compromise your data by providing “accidental” access.
So let’s get into it! I’ll assume at this point you have all the prerequisites in place. I.e. you have a ADLS Gen2 storage account and service principal with ACL security already applied, as well as your KeyVault backed secret scope configured. Again, if you’ve not done this yet, you can set these up by following the steps in Part 1 of this series.
If you don’t have Databricks cluster created, you can set one up using these steps. Alternatively you can use the same cluster you created in Part 1.
N.B. You’ll need at minimum 5.2 Databricks Runtime to make this work, but I like to live on the edge, so I used the 5.5 Beta.
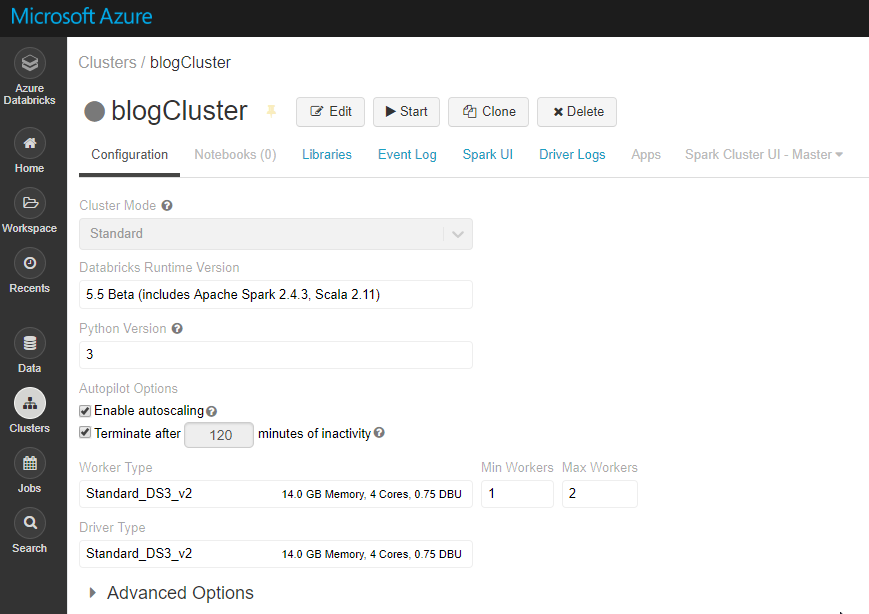
I used the configuration below for my cluster.
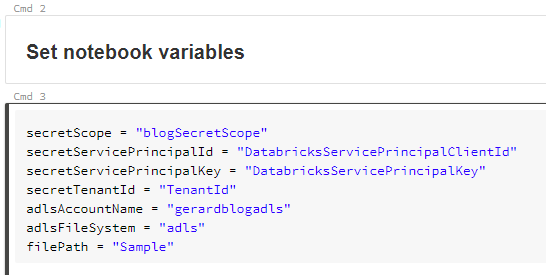
Once your cluster is provisioned and running, create a new Python notebook and attach it to your cluster. First, we set the variables up based on the information we collected as explained in Part 1. We’ll also use our trusty SampleFile.csv file again in this example so ensure it’s upload to your ADLS Gen2 file system. As always, all samples are available in the blog GitHub repo.
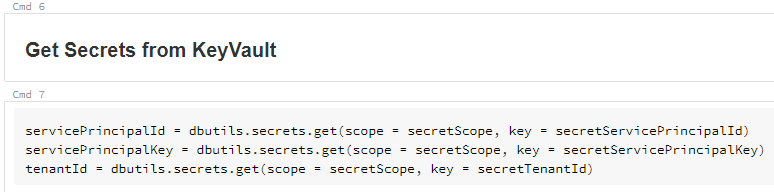
Next we retrieve the secrets from our KeyVault using the secret scope we configured previously.
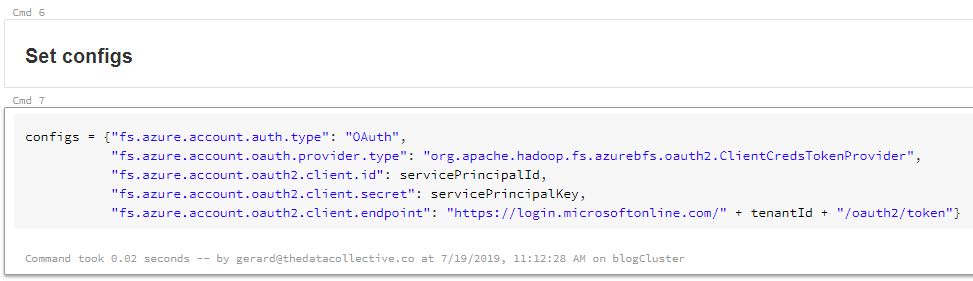
We then use the secret values retrieved from the KeyVault to set the session Spark session configs in a configs variable.
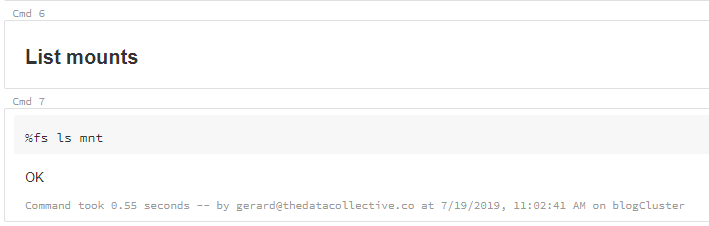
Next we check if there our cluster has anything mounted already. As you can see, I’m checking under mnt in the DBFS.
N.B. It is good practice to use mnt as a prefix for your mount points. A word of warning, it is possible to store files in an “mnt” folder in the DBFS, avoid this at all costs and reserve mnt for mounted storage!
If you have nothing mounted, you should just see an OK.
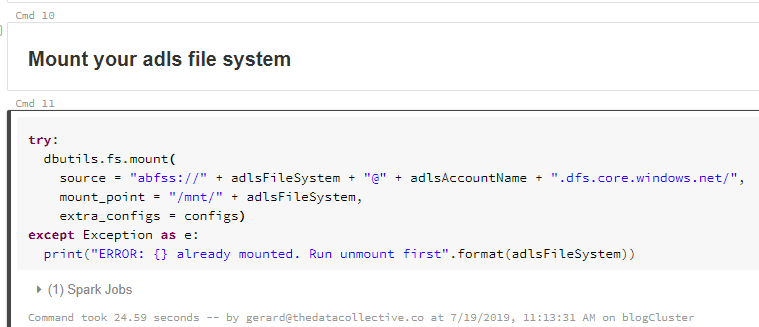
Next we mount the file system. As you can see, based on our variable configuration, this should result in a mount point called “dbfs:/mnt/adls/”.
Now let’s run the list command again.
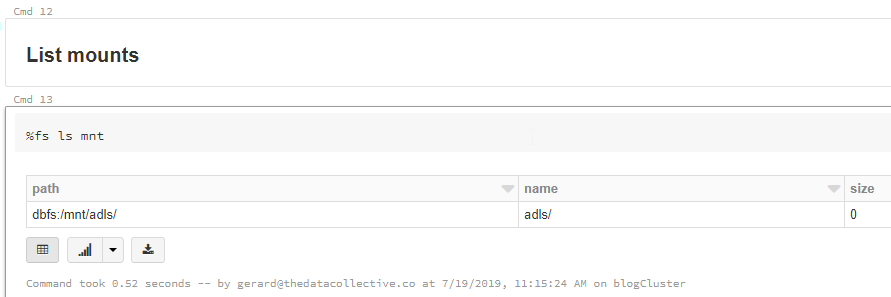
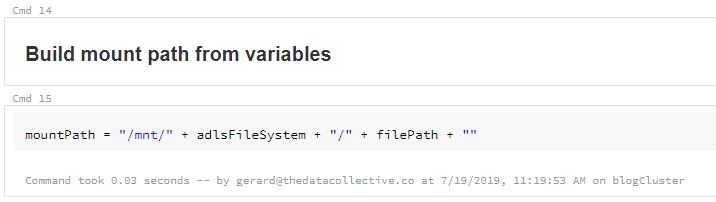
Great, so the ADLS Gen2 file system is now mounted to the DBFS. Let’s see if it works. First we’ll need to build the mount path to use in our Dataframe. As you can see, we no longer have to specify the full path in the the ADLS Gen2 storage account. We simple reference the mount we just created, and append the folder location or exact file location.
Let’s read the SampleFile.csv content from our mount path into a dataframe and display it.
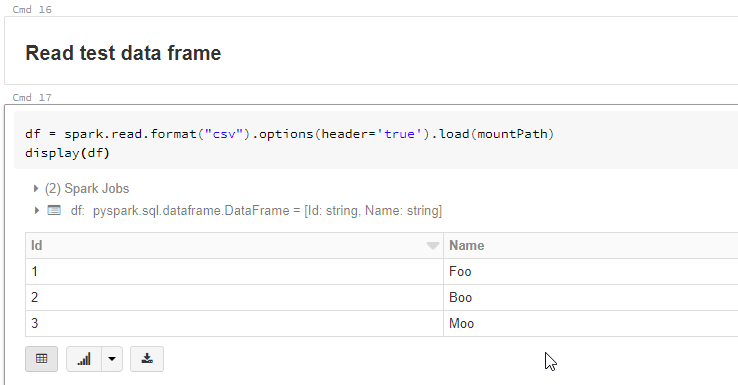
And there you are, you’ve successfully read a sample file from an ADLS Gen2 file system mounted to the the DBFS.
Though we mounted and read data in the same notebook in this post, you’ll separate the mount logic from the logic that reads the data in the real world. To show you how this works, I’ve included another notebook in the blog GitHub repo. Provided you run this notebook against the same cluster to which you mounted the ADLS Gen2 storage, you’ll still be able to read the SampleFile.csv data.
I have also included some code to Unmount the file system in the notebook for completeness. No-one likes messy developers leaving unused stuff lying around… 🙂

And that’s it ladies and gents. Using this method, you’ll be able to automate workloads and can only include the code required to do the actual work.
In the next post, we’ll look at Option 4; Azure Active Directory (AAD) credential passthrough.
![]()