

This blog post is part one in a three-part series that will address how to use Azure Data Lake Store (ADLS) Gen2 as external storage with Azure Databricks. There are a few ways in which to do this, but my intention here is not just show how it’s done, but also provide some context around which method best suits what scenario. This is my experience of course, but as always, happy to be challenged. It makes us all better data engineers!
The series of posts assume you already have an Azure account and Databricks workspace configured. If you don’t, you’ll need to follow these steps to create an Azure account, set up an Azure Databricks workspace, and launch that workspace.
You’ll also need an ADLS Gen2 account. There are a few ways to do this, the Azure portal guide can be found here.
There are currently four options for connecting from Databricks to ADLS Gen2:
Using the ADLS Gen2 storage account access key directly
Using a service principal directly (OAuth 2.0)
Mounting an ADLS Gen2 filesystem to DBFS using a service principal (OAuth 2.0)
Azure Active Directory (AAD) credential passthrough
Option 1, using storage account access key directly, is listed for completeness. I do not recommend using it unless you have no other choice. It defeats the purpose of one of the biggest benefits of ADLS Gen2, which is more granular access control (POSIX-style ACLs) through AAD authentication. So, for the purpose of this series of posts, we will only consider only options 2 through 4. More information on access control in ADLS.
This post focuses on option 2; using a service principal directly
Personally I have found this to be the best method to use during development and experiments. This is because the Spark config is set at runtime, meaning that even with shared notebooks, users don’t “accidentally” get access to data they shouldn’t. This is in stark contrast with mounting the ADLS Gen2 file system to the DBFS on a cluster (option 3 which we will cover in a subsequent post), where anyone with access to the cluster can access the data. You might ask; so why would we ever mount it to the DBFS then? There is a very valid use case, more on this in the next post.
Now that you have some basics covered, let’s get into setting it up. You’ll need the following things:
Service Principal Object Id (a.k.a. Client Id)
Service Principal Key
Azure Active Directory Tenant Id (a.k.a. Directory Id)
ADLS Gen2 Account name
ADLS Gen2 File System name (a.k.a. the Container name)
A Sample File uploaded to a folder in your ADLS Gen2 File System
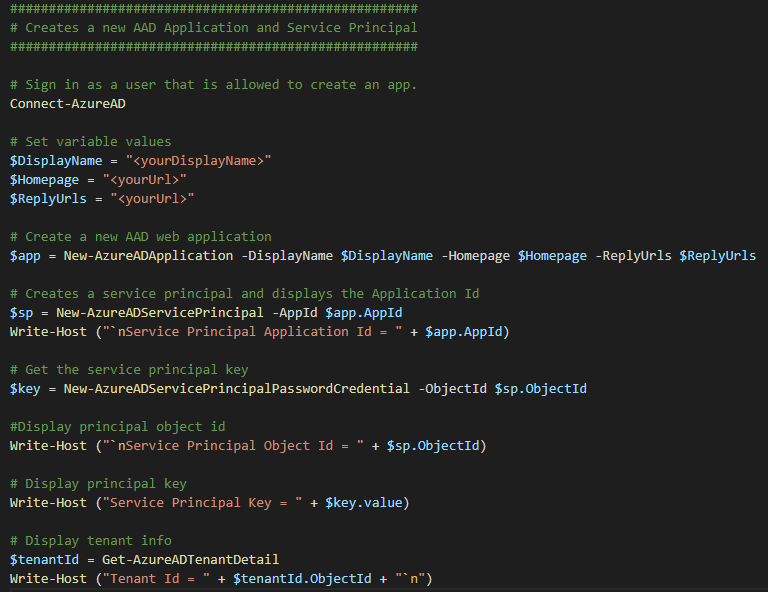
If you don’t have a Service Principal set up yet, you can do so using the PowerShell script below. It’s an image, because we learn through doing, not copying and pasting… Nah, just messing with you, you can find the code samples for all my blogs in my blog GitHub repository.
To securely store and retrieve these secrets, I use an Azure KeyVault backed secret scope. Instructions for setting up both the Azure KeyVault and secret scope can be found here.
You’ll then add the Service Principal Application Id, -Key, as well as the Tenant Id returned by the script to your KeyVault. There are a number of ways to add secrets to KeyVault, but you can find how that’s done, plus how to grant secret access to other groups and users (called secret workflow).
N.B. Take note that the script returns the Application Id and the Service Principal Object Id. These are NOT the same thing and trip a lot of people up when it comes to setting up the ACLs. Store the Application Id in your KeyVault, and use the Service Principal Object Id when assigning ACLs below.
Next, you’ll need to grant the service principal access to your file system at the folder/directory level of you choosing. For the purposes of this example, we’ll grant read, write and execute permissions at the file system level. In the real world however, you’ll apply only what is required for the given role, i.e. think role-based access control (RBAC). Therefore you’re likely apply this at a lower level in the folder hierarchy.
We’ll use Azure Storage Explorer to set the access control up in this example, which you can download here if you don’t have it installed already. You can of course also use the ADLS Gen2 REST API if you prefer.
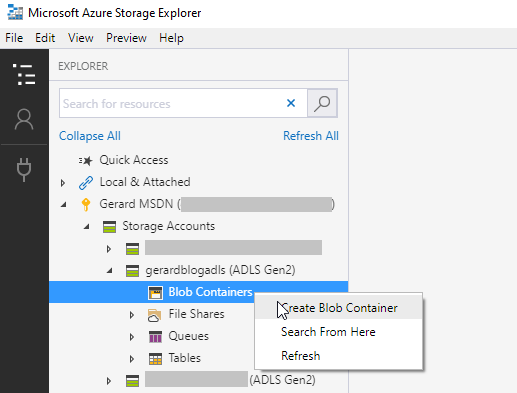
Once you have navigated to your ADLS Gen2 account in Storage Explorer, click the expand icon, right click, and select Create Blob Container from the menu. Pick a name and Save, I chose adls for this example. This creates your ADLS Gen2 file system.
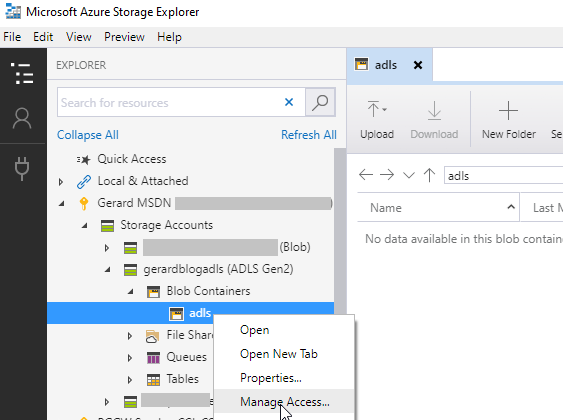
Next, right click on the new container and select Manage Access.
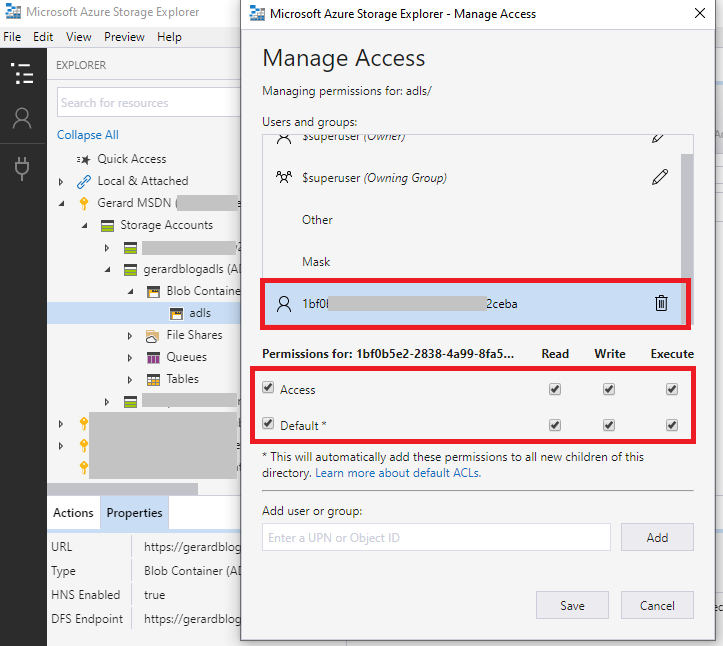
In the Manage Access menu, add your Databricks Service Principal Object Id in the Add user or group dialog box and click Add.
N.B. Again, this is the Service Principal Object Id, not the Application Object Id
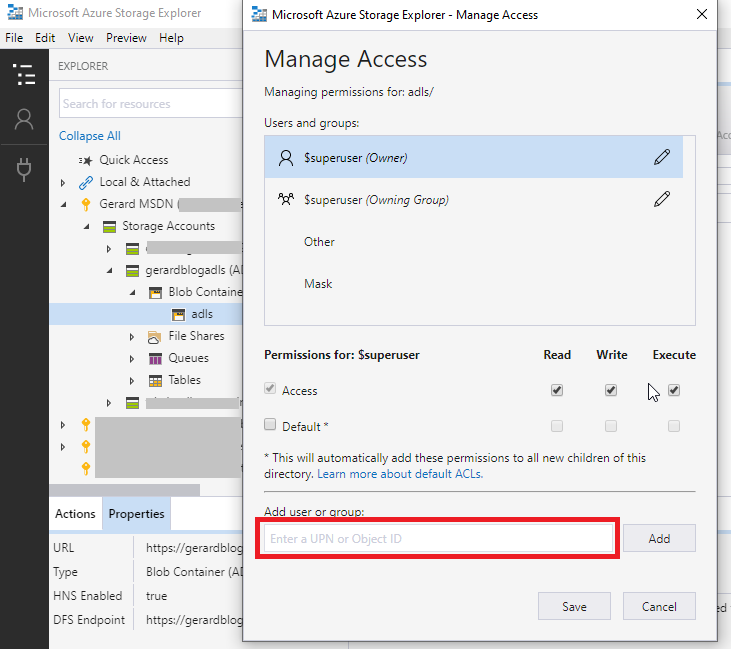
You will now see your Service Principal Object Id in the list, select it and set it up as below, click Save.
N.B. See the * remark under the “Default” ACL checkbox. When selected, all new folders and files created under the selected folder or file system will automatically inherit permissions set at this level. This is important, because if you upload a file first, and then set the permissions, it is not retrospectively applied unless you go and force it! Hence, we do this before we add files!
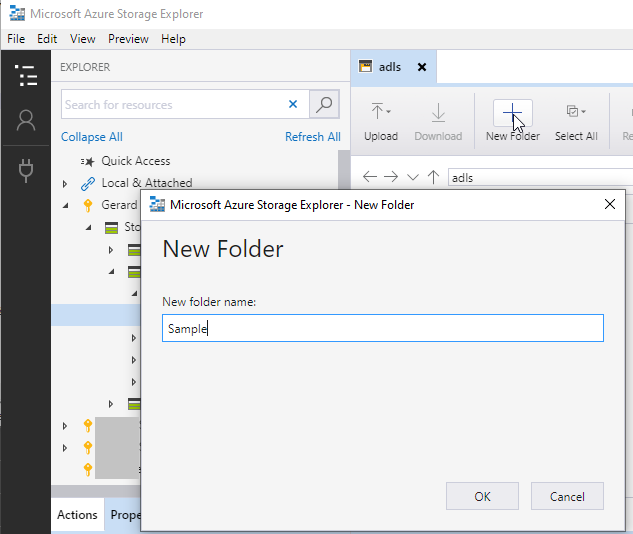
Now we’ll create a folder under our file system. You do this by clicking on the New Folder icon. I’ve gone with Sample for this example. This folder will now inherit the permissions set for the file system.
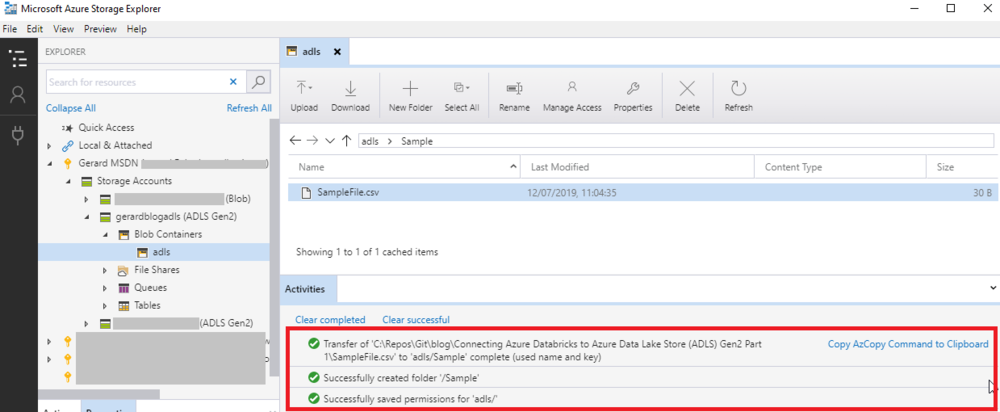
Next we upload SampleFile.csv (available in the blog GitHub repo) by clicking on the Upload menu icon. Click the Ellipses and browse to you file location, then click Upload. Again, this file inherits permissions.

Once the file is uploaded, you should see that permissions were applied correctly, the folder created, and the file uploaded using AzCopy. This is a good opportunity to grab the AzCopy command that was used to upload the file if you’re interested. For more about AzCopy, see here.
Right, the prep work is now done and we’re ready to dive into Databricks. If you don’t have cluster created, you can set one up using these steps.
N.B. You’ll need at minimum 5.2 Databricks Runtime to make this work, but I like to live on the edge, so I used the 5.5 Beta.

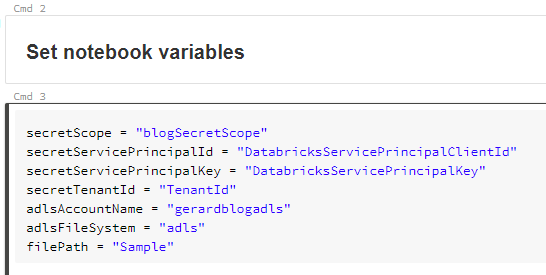
Once your cluster is provisioned and running, create a new Python notebook and attach it to your cluster. First, we set the variables up based on the information we collected above. Note that the names for the Service Principal Client Id, -Key and Tenant Id are the names for the KeyVault secrets. Also note the file path does not contain the file name, only the folder (Sample) in which it’s stored. This configuration will read all files in that path provided the schemas match. Feel free to test this by adding copies of the SampleFile.csv file. I could also have specified the file name explicitly; “Sample/SampleFile.csv“ which would only read only the specified file.
We then build the full path using the variables above.

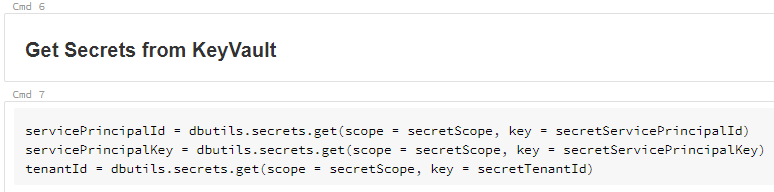
Next we retrieve the secrets from our KeyVault.
N.B. This is where the magic happens! The user running the notebook will need to be authorised to retrieve the secrets. If the user is not permitted to do this, this command will fail and therefore the data is protected.
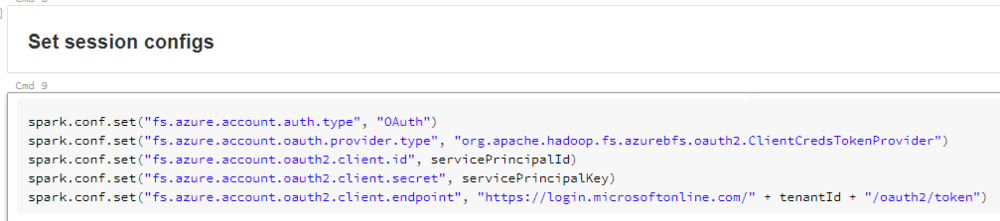
We then use the secret values retrieved from the KeyVault to set the session Spark session configs.
The command below loads our sample file into a Databricks dataframe and displays the contents.

And there you have it, this method will allow authorised users to interact with data securely based on their role, even if notebooks are shared.
In the next post, we’ll look at Option 3; Mounting an ADLS Gen2 filesystem to DBFS using a service principal.
![]()