Introduction
The Service Broker framework provides a Transact-SQL interface for sending and receiving messages, combined with a set of guarantees for message delivery and processing. It guarantees that a program receives each message in a conversation exactly once in the order in which the message is sent, not the order in which the message enters the queue. Service Broker is designed around the basic functions of sending and receiving messages. Each message forms part of a conversation, which is a reliable, persistent communication channel. Its queuing and communication mechanism plays a crucial role in SQL Server high-availability solutions and thus is a key part of the database engine since version 9. It is important to understand how all components fit together in order to create working solutions.
Configuring SQL Server Service Broker
In order to use Service Broker framework you have to create the following six types of objects:
Message, Contract, Queue, Service, Route, Endpoint. Each of these components fulfills a specific function within the Service Broker configuration. Most of these objects should be created in pairs to ensure both communication sides. The data that is sent within a message can be of any type. It is kept in a binary state while it is in transit and while it is stored in the queue. When data is sent via the Service Broker, it is typically sent within an XML document for the most flexibility. By default Service Broker feature is disabled on a new database. To enable it execute ALTER DATABASE commands with switches NEW_BROKER and ENABLE_BROKER:
--run sql statements twice in sqlcmd mode with correct source and target db server names
:on error exit
:setvar DatabaseName SourceDB
:setvar ServerName SourceServer
:CONNECT $(ServerName)
GO--sql code to enable service broker
USE master
ALTER DATABASE $(DatabaseName) SET NEW_BROKER;
ALTER DATABASE $(DatabaseName) SET ENABLE_BROKER;
GO
You can check whether the Service Broker is enabled by querying the system view:
SELECT name, is_broker_enabled FROM sys.databases
Result:

Before you can send and receive messages via Service Broker, you have to set a database master key, if it does not exist in the database. Below is t-sql code to create the master key that will be used as the session key for all service-broker conversations.
--sql code to create master key on a database
USE $(DatabaseName)
GO
CREATE MASTER KEY ENCRYPTION BY PASSWORD = 'MyPa$$w0rd'
GO
Message Type
The first object to configure is the Message type. The message tells db engine what sort of validation is required for the data that is being sent within the message. Message types are created by using the CREATE MESSAGE TYPE statement. When you use this statement, you tell the message type what kind of validation should be performed. Use the following code to create the message:
--sql code to create service broker message type
USE $(DatabaseName)
GO
CREATE MESSAGE TYPE [SampleMessage]
AUTHORIZATION [dbo]
VALIDATION = WELL_FORMED_XML;
GO
Contract Type
The second object to configure is the Contract type. The contract tells the SQL Server instance what message types can be used within the conversation dialog. Conversation dialog protocol provides reliable and sequenced transmission of messages across transactions, server restarts, and even disasters without requiring you to write large volumes of custom code. You can bind one or more messages within a single contract. Contracts are created by using the CREATE CONTRACT statement. Only a single contract is required. However, you can use more than one contract if you want. Multiple contracts can be used when multiple applications need to send data into a single queue or when there is a need to show the data from multiple processes. Use the following code to create the contract:
  --sql code to create service broker contract
USE $(DatabaseName)
GO
-- Creates Contract
CREATE  CONTRACT [SampleContract]
( [SampleMessage] SENT BY ANY ) ;
Queue Type
Message queue is required to store outgoing and incoming messages. There is an option to set an internal activation procedure in order to process messages in the queue automatically. Also, you can set a filegroup to separate stored physical data and improve performance. We will need to create two queues: one for the source and another for the destination databases. Once messages are retrieved and processed on the target db queue, an acknowledgement will be sent back to the initiator side or source db. Therefore, a separate queue is required to hold and process these messages.
--run sql statements twice in sqlcmd mode with correct source and target db server names
:on error exit
:setvar DatabaseName SourceDB
:setvar ServerName SourceServer
--sqlcmd command to open connection to a db server
:CONNECT $(ServerName)
GO
--sql code to create a service-broker queue
USE $(DatabaseName)
GO
CREATE QUEUE [dbo].[SampleQueue]
WITH STATUS = ON,
RETENTION = OFF;
Service Type
Service object binds the queue to the contract for the purposes of sending messages. A message is sent to a specific service. That service is configured by the queue to which the message is delivered and also by the contracts that can be used to send that message. The contract defines which message types are available when you send the message. The contract is bound to the service. A service, in turn, is bound to a single queue, but it can be bound to more than one contract. Below code shows how to create the service-broker service on both communication sides:
--run sql statements in sqlcmd mode with correct source db and server names
:on error exit
:setvar DatabaseName SourceDB
:setvar ServerName SourceServer
--sqlcmd command to open connection to a db server
:CONNECT $(ServerName)
GO
--sql code to create a service and bind the queue with the contract
USE $(DatabaseName)
GO
CREATE SERVICE [SampleServiceSource] ON QUEUE [SampleQueue]([SampleContract]);
GO
--sql code to grant send permission on the service
GRANT SEND on SERVICE::SampleServiceSource to public
GO
This is on the destination side:
--run sql statements in sqlcmd mode with correct destination db and server names
:on error exit
:setvar DatabaseName DestinationDB
:setvar ServerName TargetServer
--sqlcmd command to open connection to a db server
:CONNECT $(ServerName)
GO
--sql code to create a service and bind the queue with the contract
USE $(DatabaseName)
GO
CREATE SERVICE [SampleServiceTarget] ON QUEUE [SampleQueue]([SampleContract]);
GO
--sql code to grant send permission on the service
GRANT SEND on SERVICE::SampleServiceTarget to public
GO
Endpoint Type
Endpoints are required for server-to-server communications. Endpoints are not required for Service Broker solutions that do not send messages between sql server instances. The syntax for creating an endpoint is pretty straight-forward. You specify the IP address, the TCP port, how the authentication should be handled, and what encryption option should be used when passing data between the two instances. You can use the following sample code to create the endpoints:
--run sql statements in sqlcmd mode twice on both sql servers with correct login,server,certificate names.
:on error exit
:setvar LoginName sa
:setvar ServerName SourceServer
--sqlcmd command to open connection to a db server
:CONNECT $(ServerName)
GO
USE master
GO
--sql code to create endpoint based on certificate authentication
CREATE ENDPOINT  [ServiceBrokerEndPoint] AUTHORIZATION $(LoginName)
STATE=STARTED
AS TCP (LISTENER_PORT = 4022, LISTENER_IP = ALL)
FOR SERVICE_BROKER (MESSAGE_FORWARDING = DISABLED
, MESSAGE_FORWARD_SIZE = 10
, AUTHENTICATION = CERTIFICATE $(ServiceBrokerTransportCertificate)
, ENCRYPTION = DISABLED)
GO
or
--run sql statements in sqlcmd mode twice on both sql servers with correct login, server names.
:on error exit
:setvar LoginName sa
:setvar ServerName SourceServer
--sqlcmd command to open connection to a db server
:CONNECT $(ServerName)
GO
USE master
GO
--sql code to create an endpoint based on Windows authentication
CREATE ENDPOINT ServiceBrokerEndpoint AUTHORIZATION $(LoginName)
STATE= STARTED AS TCP
( LISTENER_PORT=4022,  LISTENER_IP= ALL ) FOR SERVICE_BROKER
( AUTHENTICATION = WINDOWS, ENCRYPTION= REQUIRED, ALGORITHM= RC4 )
The listener port is set to 4022 in the provided above SQL code. This is the same port that is specified within the route. The IP address is set to ALL because the endpoint will listen on all active IP addresses of the server. This setting can be limited to a single IP address by changing the LISTENER_IP address to an IP address that the server uses. You can specify either Windows Authentication or certificate-based authentication. Windows Authentication can be used when the instances are on the same domain. Certificate-based authentication must be used when the machines aren’t on the same Windows domain.
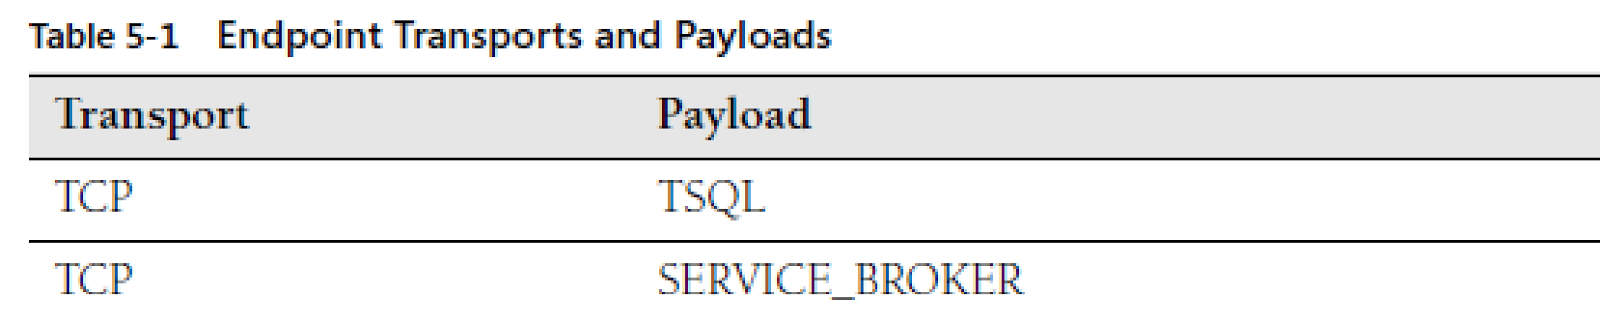
Also, use TCP to configure service broker endpoint transport as below table shows:
It is crucial to grant access to sql server service accounts on newly created service broker endpoints on both peers (source and Target sql instances). The following SQL code is provided as an example:
At Source:
--set initiator or source server name
:setvar ServerName  SourceServer
--set target server sql service account
:setvar TargetServerSVCAccountName DOMAINName\SVCSQLDBEngine
:CONNECT $(ServerName)
GO
use master
--run sql code on SourceServer instance to create remote sql service login
IF NOT EXISTS(select * from syslogins where name = '$(TargetServerSVCAccountName)')
BEGIN
CREATE LOGIN [$(TargetServerSVCAccountName)] FROM WINDOWS WITH DEFAULT_DATABASE = [master]
END
GO
-- sql code to grant permissions to remote sql instance service account
GRANT CONNECT ON ENDPOINT::ServiceBrokerEndpoint to [$(TargetServerSVCAccountName)]
GO
At Target:
--set target server name
:setvar ServerName  TargetServer
--set source server sql service account
:setvar SourceServerSVCAccountName DOMAINName\SVCSQLDBEngine
:CONNECT $(ServerName)
GO
use master
--run sql code on TargetServer instance to create remote sql service login
IF NOT EXISTS(select * from syslogins where name = '$(SourceServerSVCAccountName)') BEGIN
CREATE LOGIN [$(SourceServerSVCAccountName)] FROM WINDOWS WITH DEFAULT_DATABASE=[master]
END
GO
-- sql code to grant permissions to remote sql instance service account
GRANT CONNECT ON ENDPOINT::ServiceBrokerEndpoint to [$(SourceServerSVCAccountName)]
GO
Note:You can find full sql code listing in the attached scripts.
Route Type
You can optionally configure Route object if the source and target services are not on the same database. A route enables messages to flow from one database to another, regardless of whether these databases are stored on the same SQL Server instance, on different instances on the same server, or on different servers. To create a route for server-to-server communication, you will need to create endpoints for the specific use of the Service Broker. You create a route by using the CREATE ROUTE statement. On the source server (SourceServer) that is sending the message, you create a route to the target server (TargetServer). Before creating a route you need to make sure that service broker endpoints exist on both servers and that these endpoints are listening on the TCP port 4022:
--run sql statements in sqlcmd mode once on the source db instance with correct variables values.
:on error exit
:setvar ServerName SourceServer
:setvar DatabaseName SourceDB
--set target db server ip
:setvar TargetServerIP 127.0.0.1
--set target db broker_instance guid
:setvar BROKER_GUID FD111927-71D2-44D0-A62A-5B72EAA18E08
--sqlcmd command to open connection to a db server
:CONNECT $(ServerName)
GO
use $(DatabaseName)
GO
--sql code to create a route to a remote broker instance
CREATE ROUTE [SampleServiceRoute] AUTHORIZATION [dbo]
WITH SERVICE_NAME = N'SampleServiceTarget' , BROKER_INSTANCE = N'$(BROKER_GUID)' , ADDRESS = N'TCP://$(TargetServerIP):4022'
GO
You will have to change the BROKER_GUID variable value to match the BROKER_INSTANCE values from the service_broker_guid column in the sys.databases system catalog view on the remote server to which you are creating the route. You must also create a route pointing back to the source db on the target or destination database:
--run sql statements in sqlcmd mode once on the source db instance with correct parameters.
:on error exit
:setvar ServerName TargetServer
:setvar DatabaseName DestinationDB
--set source db server ip
:setvar SourceServerIP 127.0.0.1
--set source db broker_instance guid
:setvar BROKER_GUID FA8FA68C-F1FA-40A4-AB9C-16FF4FDF4C86
--sqlcmd command to open connection to a db server
:CONNECT $(ServerName)
GO
use $(DatabaseName)
GO
--sql code to create a route to a remote broker instance
CREATE ROUTE [SampleServiceRoute] AUTHORIZATION [dbo]
WITH SERVICE_NAME = N'SampleServiceSource' , BROKER_INSTANCE = N'$(BROKER_GUID)' , ADDRESS = N'TCP://$(SourceServerIP):4022'
GO
The BROKER_INSTANCE setting is an optional field. You can leave it blank or you can configure it by using the broker instance ID value from the sys.databases catalog view on the source and destination databases. If database mirroring is used on the computer at the other end of the route, you can include the MIRROR_ADDRESS parameter to tell the route the location of the database mirror. If you don’t include the MIRROR_ADDRESS parameter, and if the database mirror fails over, the messages don’t move to the destination database. This is because the route won’t have the information to locate the database mirror.
Processing Messages
Prior to sending messages, you must first create a conversation dialog to identify the conversation because messages are transferred from the source to the target snd vice versa. Conversation dialog protocol provides reliable and ordered processing of messages. It ensures that multiple related messages are processed exactly once in order(EOIO) instead of random. To create the conversation dialog use BEGIN DIALOG statement which will map to GUID that is used to identify this service-broker conversation from all other conversations. When it is done then you can send messages over the conversation by using the SEND statement. In the following example, we will send an order wrapped into the XML document. Below code shows how to create the conversation dialog:
At the source:
use SourceDB
GO
-- sql code to create a conversation dialog
DECLARE @convHandle UNIQUEIDENTIFIER
BEGIN DIALOG @convHandle
FROM SERVICE [SampleServiceSource]
 TO SERVICE 'SampleServiceTarget'
 ON CONTRACT [SampleContract]
--sql code to create and send a message to remote service
DECLARE @XMLMessage as XML;
SET @XMLMessage = (SELECT  TOP 1 * FROM [Order] FOR
XML PATH('SampleMessage'), ELEMENTS XSINIL, TYPE
);
SEND ON CONVERSATION  @convHandle MESSAGE TYPE [SampleMessage]  (@XMLMessage) ;
GO
Note: dbo.Order table was created and populated beforehand.You can find full sql code listing in the attached scripts.
At this point, the message has been sent and its content can be viewed by querying the target queue. You can view stored messages by running:
--sql code to query remote service queue to view received messages on the target broker instance
use DestinationDB
GO
SELECT cast(message_body as XML) as SampleMessage, * FROM [SampleQueue]
GO
Result:

You can look at the messages in the queue without causing them to be processed by using the SELECT statement. In order to obtain the contents of the message and remove the message from the queue use the RECEIVE statement. You can receive a single message using the code below
use DestinationDB
GO
DECLARE @message_body XML
DECLARE @conversation_handle UNIQUEIDENTIFIER
RECEIVE TOP (1) @conversation_handle = conversation_handle,
@message_body = cast(message_body AS XML) FROM SampleQueue
END CONVERSATION @conversation_handle;
or you can receive multiple(top 100) messages using the following code:
use DestinationDB
DECLARE @Messages TABLE
(conversation_handle UNIQUEIDENTIFIER,  message_body varbinary(MAX));
RECEIVE TOP (100) conversation_handle,
message_body FROM SampleQueue
INTO @Messages;
END CONVERSATION @conversation_handle;
GO
After you process all messages in a conversation, use the END CONVERSATION statement to close the conversation so that no other message can be sent on the conversation and to dispose allocated service broker resources. Closed conversation can’t be reopened.
Note:if destination queue is empty then you’ll receive an error message stating that the conversation handle is missing.
After the END CONVERSATION statement execution, you will get a message on the source queue. You have to receive/process this message and close the conversation properly on the initiator side of the communication. It will allow Service Broker to clean up all the metadata related to that completed conversation. There is an option to configure internal activation routine on the queue to process automatically all new incoming messages. This functionality eliminates any polling that you would have to create in other message-based applications. Lets create internal activation procedure for our example and configure service-broker queues to process received messages automatically.
--sql code to create routine to process service-broker messages
CREATE proc [dbo].[InternalActivationProcedure]
as
begin
set nocount on;
  -- declaring used variables
  DECLARE @ConversationHandle UNIQUEIDENTIFIER,
            @ConvHandle UNIQUEIDENTIFIER ;
  DECLARE @ReceivedMessage XML ;
  DECLARE @ReceivedMessageName SYSNAME ;
  DECLARE @ReplyMessage XML ;
  DECLARE @Status NVARCHAR(10) ;
  DECLARE @StartTime DATETIME ;
  DECLARE @EndTime DATETIME ;
  DECLARE @Orderdate DATETIME,@ServiceName VARCHAR(50), @CustomerID INT, @OrderID INT;
        BEGIN TRY
BEGIN TRANSACTION ;
--sql code to fetch a new message from the SampleQueue
 WAITFOR
( RECEIVE TOP(1)
@ConversationHandle = [conversation_handle],
@ReceivedMessage = CAST(message_body AS XML),
@ReceivedMessageName = message_type_name
 FROM [dbo].[SampleQueue]
), TIMEOUT 2000 ;
Commit tran
-- sql code to process received messages
            IF @ReceivedMessageName = N'SampleMessage'
                BEGIN
                 --  PRINT N'SampleMessage' ;
;WITH XMLNAMESPACES('http://www.w3.org/2001/XMLSchema-instance' AS xsi)
SELECT @OrderDate =
CASE
WHEN Element.Val.value('(./OrderDate/@xsi:nil)[1]','bit') = 1 THEN NULL
ELSE Element.Val.value('./OrderDate[1]','DATETIME')
END,
@ServiceName =
CASE
WHEN Element.Val.value('(./ServiceName/@xsi:nil)[1]','bit') = 1 THEN NULL
ELSE Element.Val.value('./ServiceName[1]','VARCHAR(50)')
END,
@CustomerID =
CASE
WHEN Element.Val.value('(./CustomerID/@xsi:nil)[1]','bit') = 1 THEN NULL
ELSE Element.Val.value('./CustomerID[1]','INT')
END,
@OrderID =
CASE
WHEN Element.Val.value('(./OrderID/@xsi:nil)[1]','bit') = 1 THEN NULL
ELSE Element.Val.value('./OrderID[1]','INT')
END
FROM @ReceivedMessage.nodes('//SampleMessage')  Element(Val);
--insert sql code here in order to process received message.
    INSERT INTO dbo.[Order]( OrderID, CustomerID, ServiceName, OrderDate  )
   VALUES  ( @OrderID,@CustomerID,@ServiceName,@Orderdate )
  --sql code to close conversation and send EndDialog message to conversation initiator.
   END CONVERSATION @ConversationHandle ;
END  ELSE --in case of error message - close conversation
IF @ReceivedMessageName = N'http://schemas.microsoft.com/SQL/ServiceBroker/Error'
BEGIN
  PRINT N'http://schemas.microsoft.com/SQL/ServiceBroker/Error' ;
  DECLARE @error INT ; DECLARE @description NVARCHAR(4000) ;
  WITH XMLNAMESPACES ('http://schemas.microsoft.com/SQL/ServiceBroker/Error' AS ssb)  SELECT @error = CAST(@ReceivedMessage AS XML).value('(//ssb:Error/ssb:Code)[1]', 'INT'), @description = CAST(@ReceivedMessage AS XML).value('(//ssb:Error/ssb:Description)[1]', 'NVARCHAR(4000)');
 RAISERROR(N'Received error Code:%i Description:"%s"',  16, 1, @error, @description) WITH LOG;
 -- Insert your error handling code here
 END CONVERSATION @ConversationHandle;
 END ELSE
 -- in case of end dialog message - close conversation
 IF @ReceivedMessageName = N'http://schemas.microsoft.com/SQL/ServiceBroker/EndDialog'
 BEGIN
 PRINT N'http://schemas.microsoft.com/SQL/ServiceBroker/EndDialog' ;
 END CONVERSATION @ConversationHandle;
 END
END TRY
BEGIN CATCH
IF (@@TRANCOUNT>0) ROLLBACK TRAN
--error handling code here
END CATCH
end
GO
The following code shows how to reconfigure and set internal activation procedure on both conversation sides:
--run sql statements in sqlcmd mode on the source and target db instances with correct parameters. :on error exit :setvar ServerName:setvar DatabaseName --sqlcmd command to open connection to a db server :CONNECT $(ServerName) GO use $(DatabaseName) GO --sql code to amend the queue to invoke message processing routine. ALTER QUEUE [dbo].[SampleQueue] WITH ACTIVATION ( STATUS = ON , PROCEDURE_NAME = [dbo].[InternalActivationProcedure] , MAX_QUEUE_READERS = 2 , EXECUTE AS N'dbo' )
MAX_QUEUE_READERS option configures the SQL Server system settings to run anywhere from 0 to 32,767 parallel processes. The greater the number of parallel processes that you have running, the faster that messages can be processed. However, you should run no more than one parallel processes per CPU core on the server so that you don’t overload the CPUs.
The following t-sql code shows how to disable/enable internal activation on the queue:
use DestinationDB
GO
--disable internal activation
ALTER QUEUE [SampleQueue] WITH RETENTION = OFF, ACTIVATION ( DROP )
GO
--enable internal activation
ALTER QUEUE [SampleQueue] WITH RETENTION = OFF,
ACTIVATION (STATUS = ON, PROCEDURE_NAME = dbo.InternalActivationProcedure,
MAX_QUEUE_READERS = 2, EXECUTE AS 'dbo' )
GO
Once our previously sent message with order information is processed by dbo.InternalActivationProcedure sp, data will appear on the DestinationDB.dbo.Order table. Lets check the result by querying the table :
use DestinationDB
GO
select * from dbo.[Order]
Result:

Troubleshooting
Use sql server dmvs to check service-broker configuration on both sides of service-broker communication. The following system views can help to troubleshoot your solutions:
--run sql statements in sqlcmd mode on source or target db with correct parameters. :on error exit :setvar ServerName:setvar DatabaseName --sqlcmd command to open connection to a db server :CONNECT $(ServerName) GO use $(DatabaseName) GO SELECT * FROM sys.databases SELECT * FROM sys.routes SELECT * FROM sys.tcp_endpoints SELECT * FROM sys.service_broker_endpoints SELECT * FROM sys.dm_broker_activated_tasks SELECT * FROM sys.dm_broker_connections SELECT * FROM sys.dm_broker_forwarded_messages SELECT * FROM sys.dm_broker_queue_monitors SELECT * FROM sys.transmission_queue SELECT * FROM sys.service_broker_endpoints SELECT * FROM sys.certificates SELECT * FROM sys.conversation_endpoints
Starting SQL Server 2008 R2 , Microsoft provides ssbdiagnose utility that can help to troubleshoot issues in service broker conversations and service configuration.
Conclusion
One of the main challenges with asynchronous application design is to ensure that messages are processed in order. Service Broker dialog protocol ensures the exactly-once-in-order(EOIO) message delivery on a conversation. It allows sql developer to focus on application business logic rather than on message transmission mechanism. In general, Service Broker provides an easy-to-use, asynchronous message processing platform for building highly-scalable applications that do not require an immediate response to the command that is executed. It handles the most difficult tasks involved in writing messaging applications. These difficult tasks include message coordination, reliable message delivery, locking, and starting queue readers, etc. It gives you power to manage the entire infrastructure required to build asynchronous distributed systems. It should be now clear how to configure basic service broker solution in order to harness the power of technically reliable, consistent, robust, efficient, asynchronous message queuing and processing mechanism and start developing highly available, scalable solutions.
Here are the list of useful links that might help you learn more: