

Introduction
In this article, I will discuss SQL Server 2008 R2 installation setup which you can use to install and configure Microsoft SQL Server 2008 Reporting Services. The most of the installation process is managed by the Setup.exe installation wizard, so expect to be prompted for a number of configuration options that determine how, where, and whether each segment of the Reporting Services package will be installed. As we know that there are a variety of ways to install Reporting Services, so I've tried not only to address the common case, but also provide hints and techniques to be used for some of the more sophisticated installation scenarios. In this article I will be covering following sections:
- Installation Prerequisites and Preparation for Installation: This section discusses things you need to consider for the installation of Reporting Services.
- Installing Reporting Services on a Server: This section walks through the Setup wizard and discusses how to respond to each dialog.
- After Installation Configuration: This section discusses the use the Report Server Configuration Manager to configure and start newly installed Reporting Services instance.
- Verifying and Securing Reporting Services Installation: In this section we will first verify Reporting Services installation by connecting to report manager and then we will show how to secure your Reporting Services Manager.
The procedures described are for a non-clustered server, and can be applied either to a default instance or a named instance. This document is concerned with building a dedicated Reporting Services instance, with the databases on a remote server.
Installation Prerequisites and Preparation for Installation
Reporting Services 2008 can be installed on the following Microsoft operating systems:
Server operating systems include:
- Windows Server 2003.
- Windows Small Business Server 2003.
- Windows 2000 Server.
Workstation operating systems include:
- Windows XP Professional.
- Windows 2000 Workstation.
Web server & Web browser:
Internet Explorer 7, Internet Explorer 6 with SP2 or above.
Preparing for Installation:
You should have two domain accounts created, one for the Reporting Services Account. The account should be removed from the Domain Users group and any other domain and local groups that would grant them unnecessary permissions. In particular, this account does not need to be members of the local Administrators group and should be assigned the Deny log on locally privilege.
You should attempt to log on as the accounts created above in order to verify that the Deny logon locally right has been assigned.
You must also have a SQL Server 2008 server that will hold the Reporting Services databases. The server should have the TCP/IP and Named Pipes protocols enabled.
Installing SQL Server™ 2008 R2 SSRS Instance
Before starting your SQL Server installation, please follow these steps:
1.1 | Locate the installation media. You can use a CD or DVD, but it is more usual to use the files on the shared drive. You can use the same SQL Server™ installation media whether you are installing 32-bit or 64-bit – you can choose which one will be installed. | |
1.2 | Log on to the server as an account with Local Administrator privileges. If you are using Terminal Services (Remote Desktop) then it is best to use mstsc/console to start this since you are more likely to be able to reboot the server successfully if necessary. | |
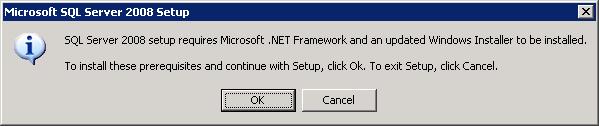
1.3 | To begin the installation, browse the installation folder and run setup.exe from the root. Click on OK and follow the steps to install .Net if you see the message below – you will probably have to reboot and start again afterwards. If .Net does not install automatically then you can download DotNet 3.5 from Microsoft website and then install it manually. Rerun the setup program, and it will start by installing the updated installer. Restart the computer if prompted, and run setup again. | |
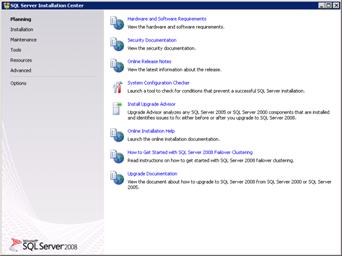
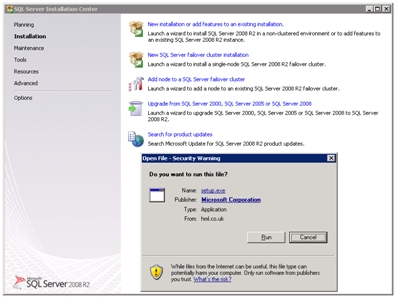
1.4 | The first screen is the SQL Server Installation Center. Click on System Configuration Checker – The System Configuration Checker is now scanning your computer for conditions that may cause possible installation problems. Correct any errors that are identified before continuing. A warning does not necessarily prevent installation from continuing. Click in the Message column for more detailed information on actions that do not have a green success icon beside them. If the IIS Feature Requirement has an error or warning, you must be sure that IIS is configured correctly. | |
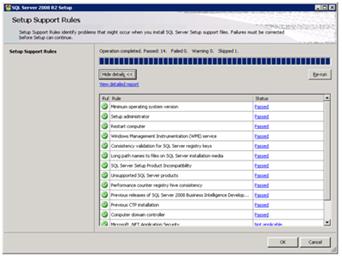
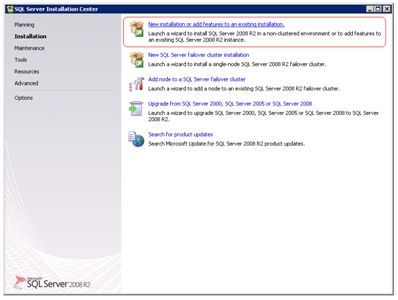
1.5 | In the navigation pane, click Installation and then choose New installation or add features to an existing installation. Security Warnings window will appear, click Run to continue. More Setup Support Rules will now run, once completed click OK to continue. | |
1.6 | In the Product Key window, enter the Product license key (if required), and click Next to continue. | |
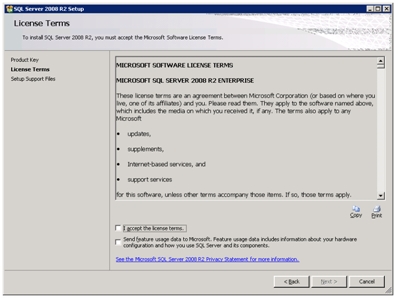
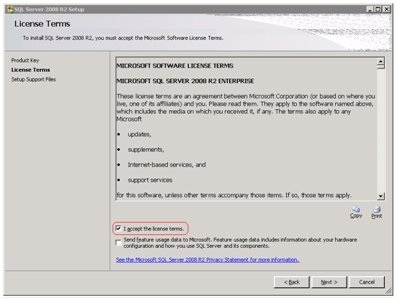
1.7 | In the License Terms window, tick the box I accept the license terms and then click Next to continue. You must accept the license agreement before you can continue the installation of SQL Server™. Send feature usage data to Microsoft option is optional. | |
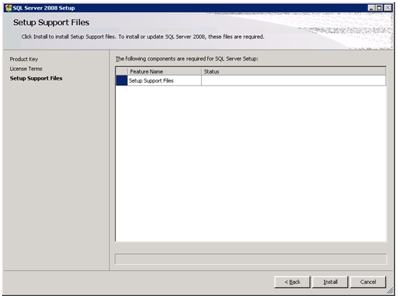
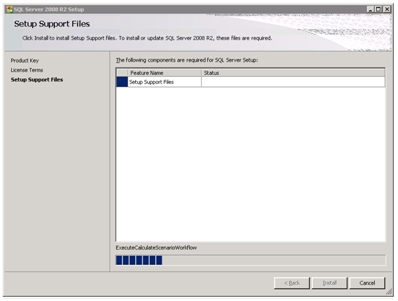
1.8 | Setup Support Files window will now appear. In the Setup Support Files window, click on Install to install setup support files and then click on OK to continue. | |
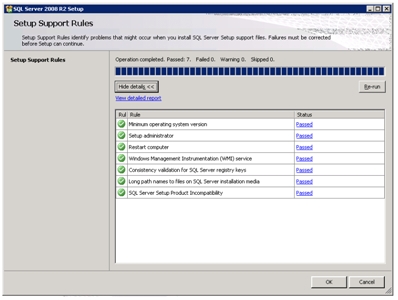
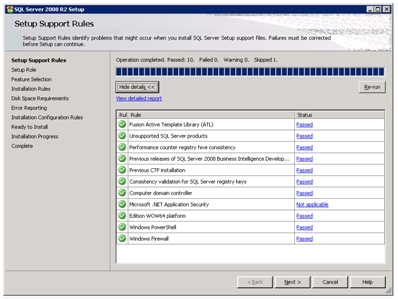
1.9 | Again some more Setup Support Rules will now run, once completed click Next to continue. | |
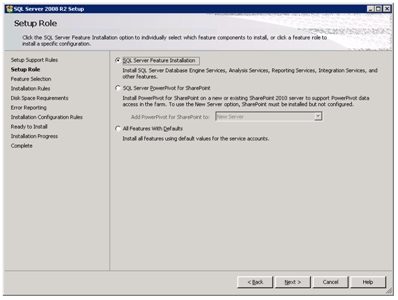
1.10 | In the Setup Role window, select the SQL Server Feature Installation and then click on Next to continue. | |
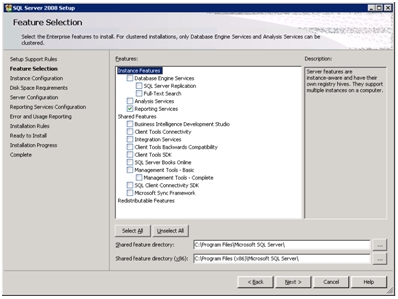
1.11 | In the Feature Selection window, select the Reporting Services; then click on Next to continue. | |
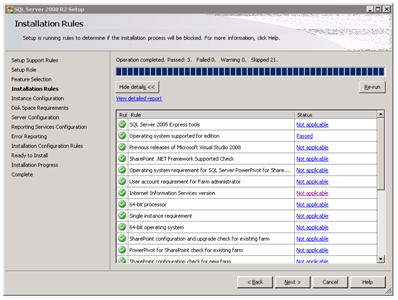
1.12 | Now setup will run some more Installation Rules. Once completed, click Next to continue. | |
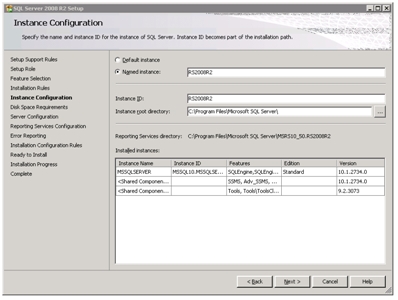
1.13 | In the Instance Configuration window, select a Default or Named Instance for your installation.
| |
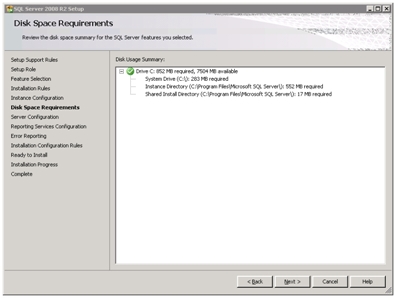
1.14 | In the Disk Space Requirements window, review the disk space summary for the SQL Server Reporting Services feature; Click on Next to continue. | |
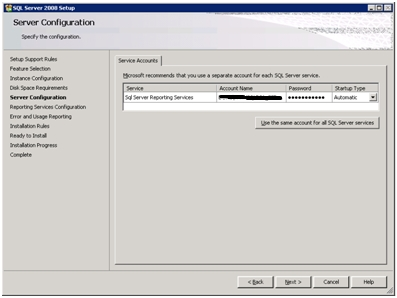
1.15 | In the Server Configuration window, Enter the account name, password, and domain for your SSRS service account. Click on Next to continue. | |
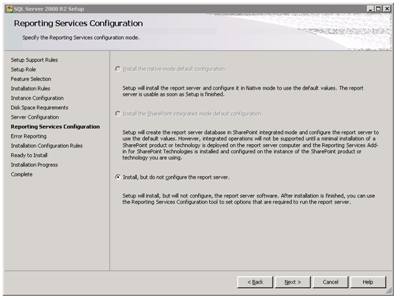
1.16 | In the Reporting Services Configuration window, There will only once choice available i.e. Install, but do not configure the report server which is selected by default. Click on Next to continue. | |
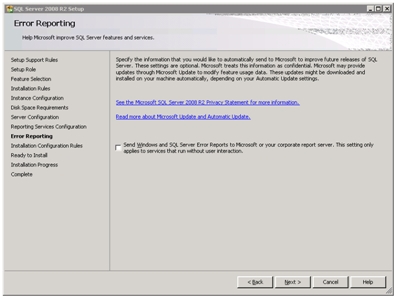
1.17 | In the Error Reporting window, select the required error and usage report settings. Click on Next to continue. | |
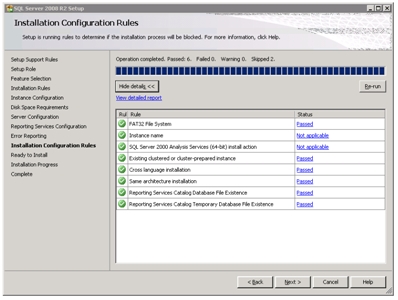
1.18 | Now setup will run some more Installation Configuration Rules Once completed, click Next to continue. | |
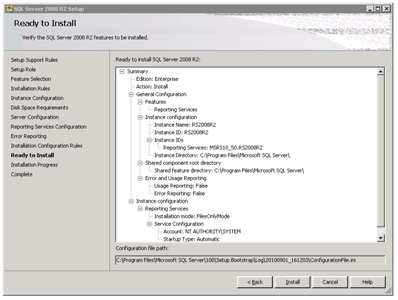
1.19 | In the Ready to Install window, review the installation summary screen, taking particular note of any actions ensuing from the installation. Click on Install to start the installation. | |
1.20 | The Installation Progress window appears, allowing you to view the status of the installation. The installation process will take some time to complete. Click on Next after the installation is completed successfully. | |
1.21 | When the installation is complete, click on Next. Click on the link to review the installation log if appropriate, and then click on Close. | |
1.22 | Apply the latest service pack for SQL Server™ 2008 R2. At the time of writing, this was Service Pack 1. | |


Configuring Reporting Services Instance
After installing Reporting Services, use the Report Server Configuration Manager to configure and start Reporting Services. The Report Server Configuration Manager has a number of pages that you can use to configure Reporting Services. Each page name is shown in the page menu. If the icon next to the page name is green with a check mark, the items on the page are configured correctly. If the icon has an X, the items aren’t configured correctly.
2.1 | To configure Reporting Services, start Report Server Configuration Manager. (Start > All Programs > Microsoft SQL Server 2008 R2> Configuration Tools > Reporting Services Configuration Manager) | |
2.2 | Log on to the server as an account with Local Administrator privileges. If you are using Terminal Services (Remote Desktop) then it is best to use mstsc/console to start this since you are more likely to be able to reboot the server successfully if necessary. | |
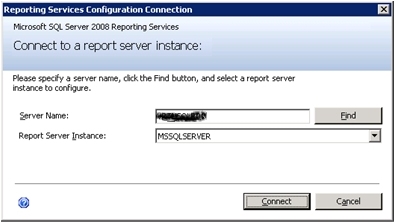
2.3 | Enter the name of a server and select an instance to connect to in the Reporting Services Configuration Connection window. Click Connect. If you installed Reporting Services on a Web server where SQL Server isn’t installed, connect to the reporting server and not the SQL server. | |
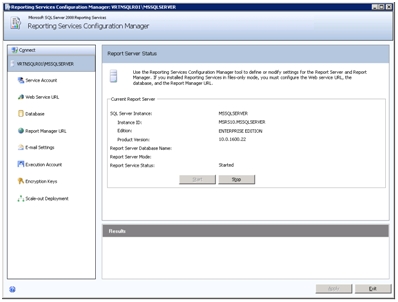
2.4 | The Report Server Status page displays status information about the instance that you’ve selected. If Reporting Services isn’t running, click the Start button in the Report Server Status page. | |
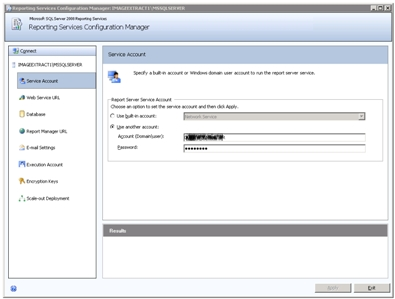
2.5 | Since we specified the service account during setup, the details should be present and correct in Service Account page. | |
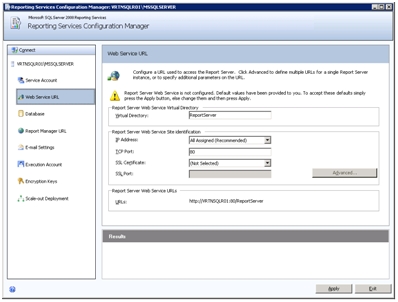
2.6 | In the navigation pane, click Web Service URL to open Web Service URL page. Default values for the web service are already entered for you. Click on Apply to accept these settings. | |
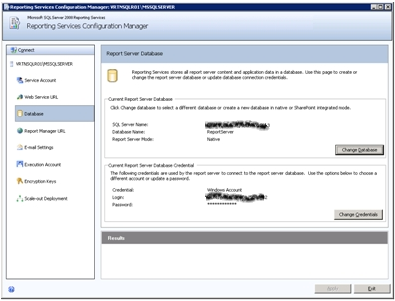
2.7 | In the navigation pane, click Database to open the Report Server Database page. Use the Report Server Database Configuration Wizard to enter the details of the server that the database will reside on. | |
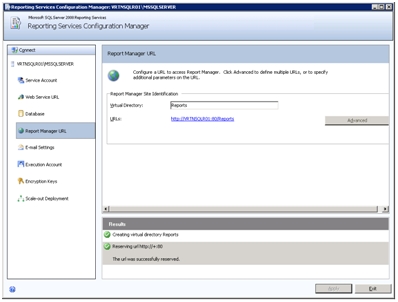
2.8 | In the navigation pane, click Report Manager URL to open the Report Manager URL page. Default values for Report Manager are already entered for you. Click on Apply to accept these settings. | |
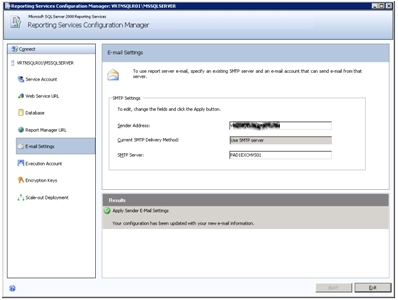
2.9 | In the navigation pane, click E-mail Settings to open the E-mail Settings page. Enter the SMTP details and click on Apply to accept changes. | |
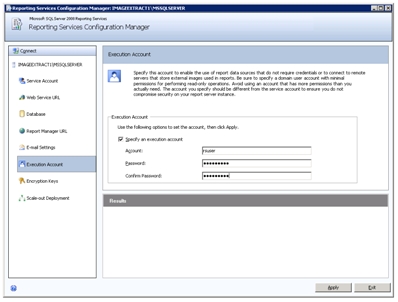
2.10 | In the navigation pane, click Execution Account to open the Execution Account page. Specify account and password. Click on Apply to confirm action. You only need to configure an execution account in the following circumstances:
You will not normally need to set up one of these accounts; if you do, follow the procedures on the following web page: | |
Verifying and Securing Reporting Services Installation
Report Manager is installed during setup on the same computer as the report server. You should verify that you can connect to the Report Manager.
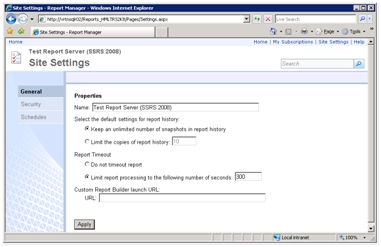
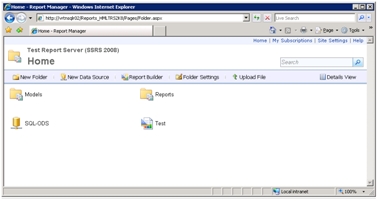
3.1 | Report Manager is installed during setup on the same computer as the report server. You should verify you installation by connecting to the Report Manager. In a browser window, type http://localhost/reports (http://<computer name>/Reports<instance name>) this is the virtual directory for Report Manager. Use Report Manager to create a new folder or upload a file to test whether definitions are passed back to the report server database. If these operations are successful, the connection is functional. If Site Settings is not available, you do not have permission to access site settings. | |
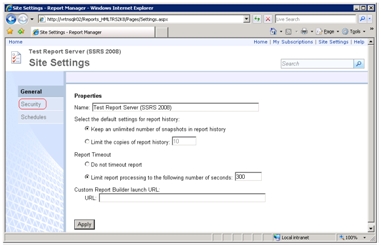
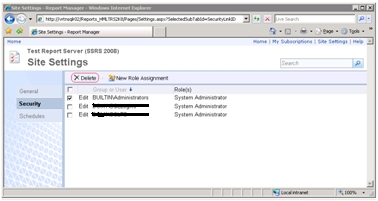
3.2 | Click on Site Settings. | |
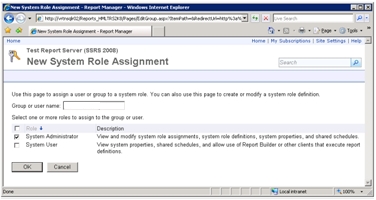
3.3 | In the navigation pane, click Security to open the Security Settings page. | |
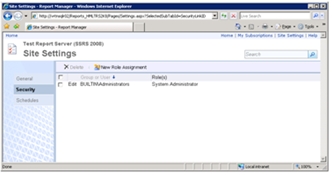
3.4 | Click New Role Assignment. Type <DBA’s Group Name> in textbox next to new user or group name and select System Administrator checkbox in role definitions section. Click OK to apply. | |
3.5 | Remove BUILTIN\Administrators group from the site by selecting the group and then click Delete button. Click Home to return to Home page. | |
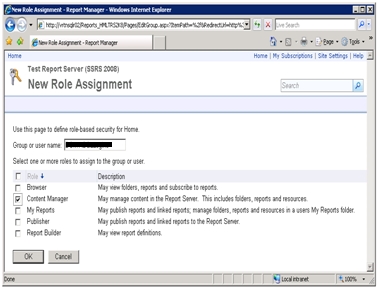
3.6 | Click the Folder Settings >> Click New Role Assignment to open the New Role Assignment page. Type <DBA’s Group Name> in textbox next to new user or group name and select Content Manager checkbox in role definitions section. Click OK to apply. Don’t forget to remove BUILTIN\Administrator group. | |

Conclusion
Working with a new piece of technology can be intimidating. Not having the technology installed correctly can only lead to more difficultly. In this article outlines steps to properly install, Configure and Secure SQL Server 2008 R2 Reporting Services instance. The installation step described in this article is for a non-clustered server, and can be applied either to a default instance or a named instance. This document is concerned with building a dedicated Reporting Services instance, with the databases on a remote server.

