

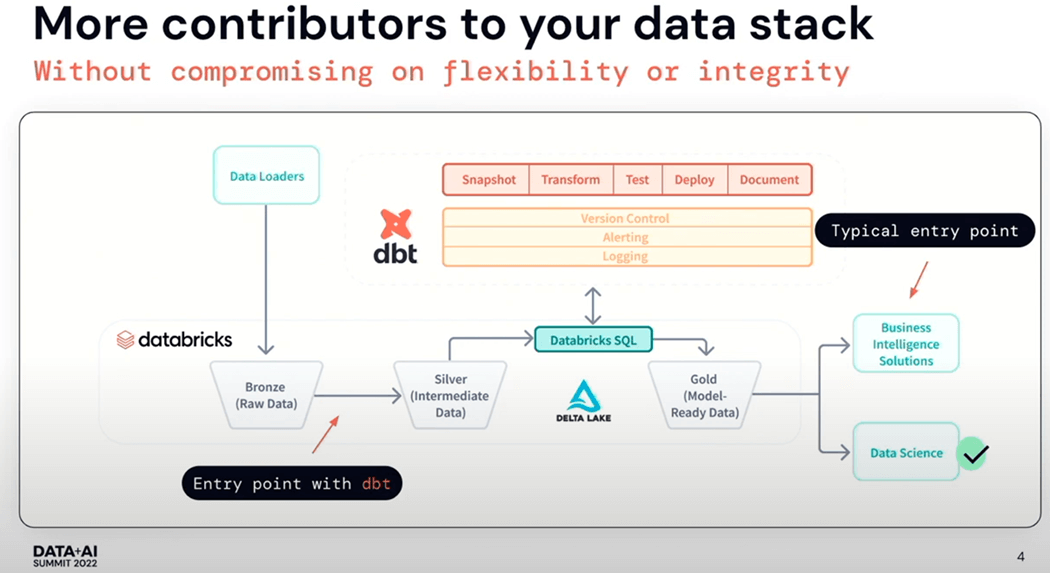
Data build tool (dbt) is an open-source command line tool that helps analysts and engineers transform data within their warehouses. This tool does not perform the Extract and Load actions of ETL. Instead, it focuses on Transformation process using select statements to covert the data into tables and views. Having the data separated into raw (bronze), refined (silver) and curated (gold) quality zones allows a clear separation of processes. The medallion architecture was coined by Databricks. A tool like Fivetran can be used to load into the raw quality zone and dbt can be responsible for transforming that data into the silver and curated layers.
There are always exceptions to the rule. That is where is the seed command comes into play. It is used to load small batches of static data into a warehouse from CSV files. Thus, loading the dimensional tables in the raw quality zone is a clever use of this command.
Business Problem
Our manager has heard about the chinook sample database. He would like the team to learn how to create the raw quality zone of the warehouse using this dataset. In today’s article, we will go through the process of creating the case insensitive warehouse, converting the existing SQL Server scripts into the Fabric Warehouse syntax, test loading the warehouse with sample data, and transforming the insert statements into CSV files. Of course, we will be using Agentic AI when some difficult problems arise.
Configure dbt for Visual Studio Code
The real power behind dbt is the ability to work with multiple target databases and/or warehouses. This functionality is achieved by using ODBC drivers. There are three main components that need to be installed: Python, ODBC, and the dbt Adapter. See documentation for details.
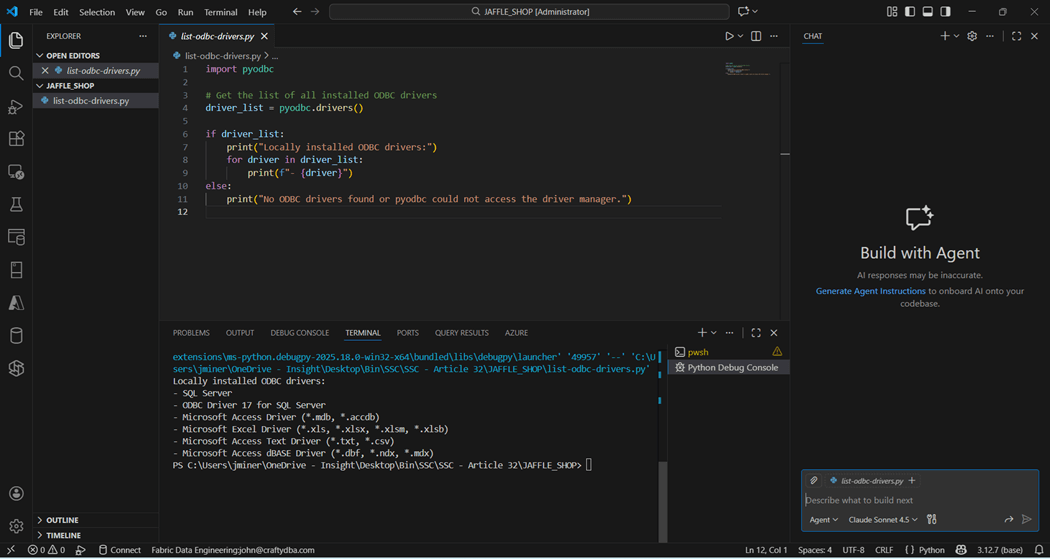
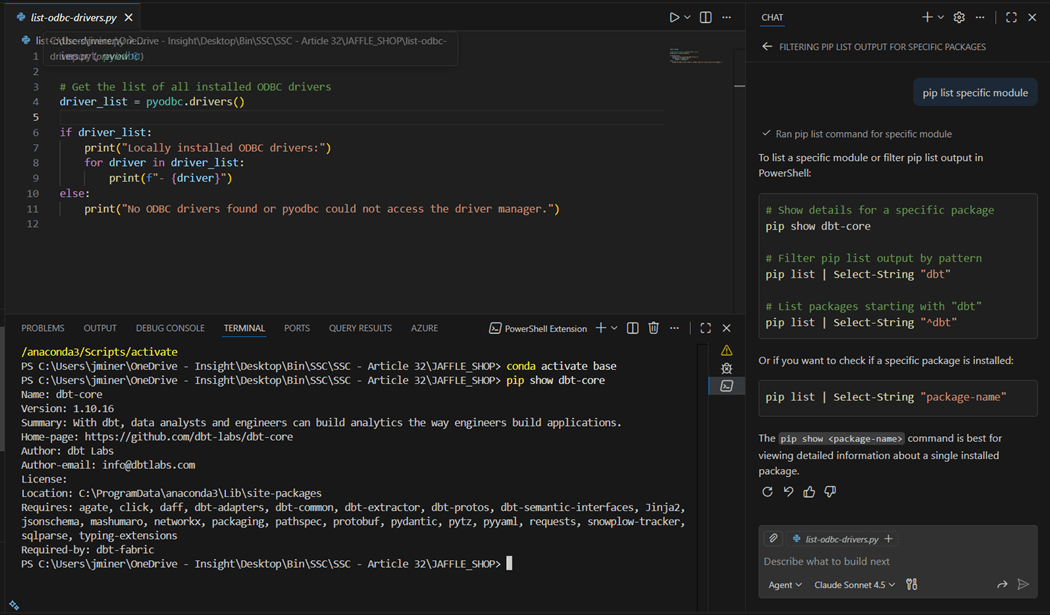
Since I have Python already installed within Visual Studio Code, I asked my favorite large language model to generate a python program to list ODBC drivers. We can see that the latest SQL Server driver is not installed. We want to install version 18 that has support for Entra Id Authentication which is used by Fabric.
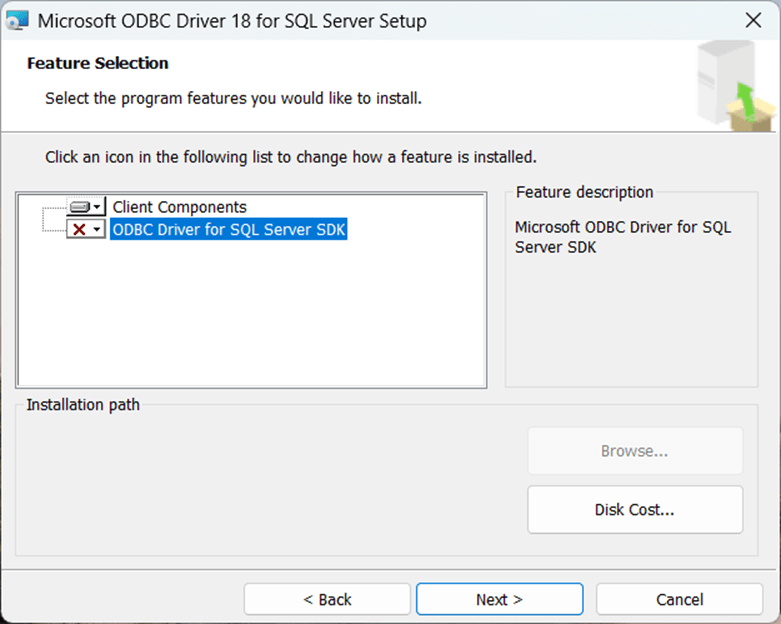
Please download version 18 of the SQL Server ODBC driver from this location and start the installation. We do not need the SDK elements for the install.
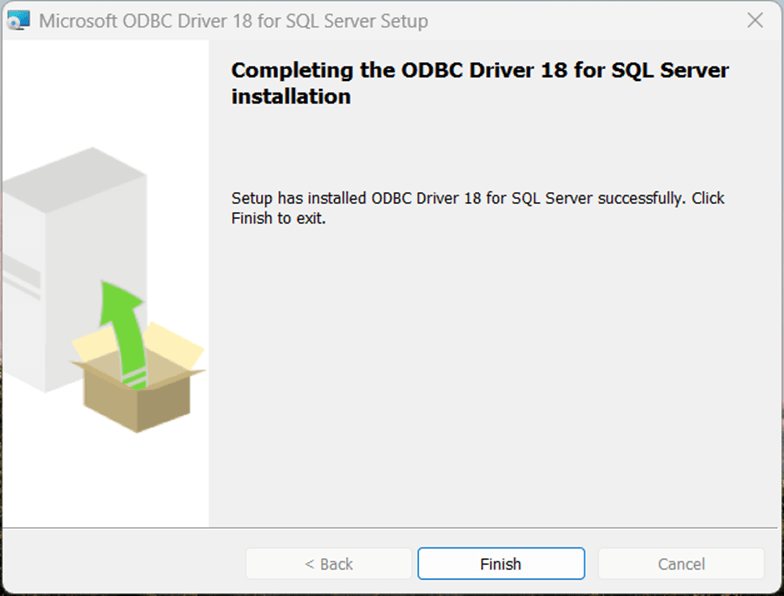
Make sure the installation is complete before skipping to the next step.
The Jaffle Shop Classic is a sample dbt project that can be used to test our installation. But we will not learn much from a prebuilt solution. That is why we are going to transform an existing database install script into both a Fabric Warehouse SQL script as well as a dbt project.
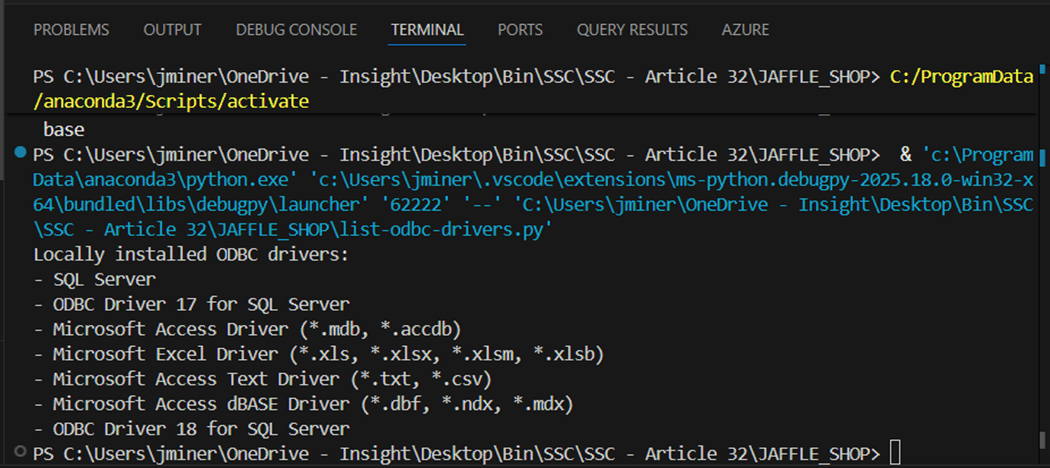
The above image shows the newest driver that has been installed. Please run the pip command to install the dbt adapter for Microsoft Fabric. I use the chat window for Agentic AI during my daily coding. In this example, I do not know the command to show installed packages. I ask the question (prompt) in English text to the Claude Sonnet 4.5 and I get several examples of how to use the show command. First, I want to make sure the “dbt-core” package has been installed.
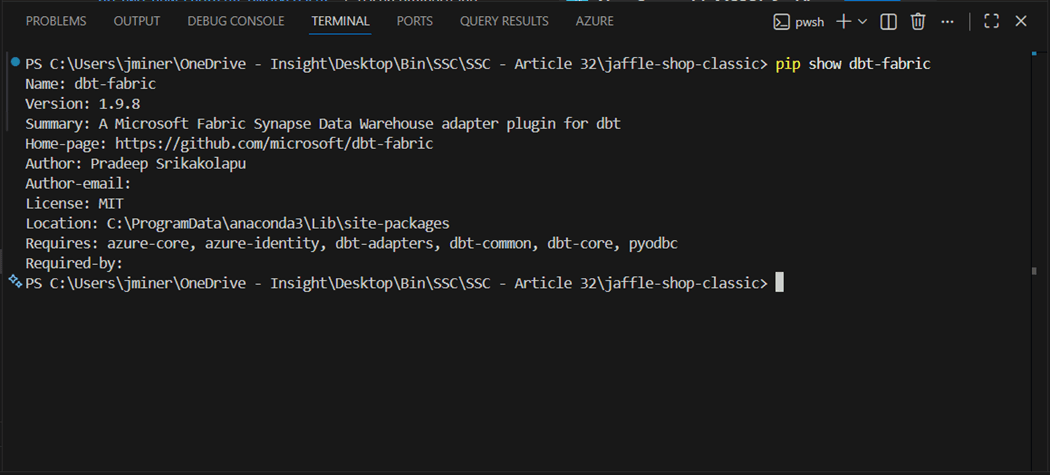
The last step is to validate that the “dbt-fabric” adapter has been installed in the environment. The image below shows our configuration is complete.
Deploy Fabric Warehouse
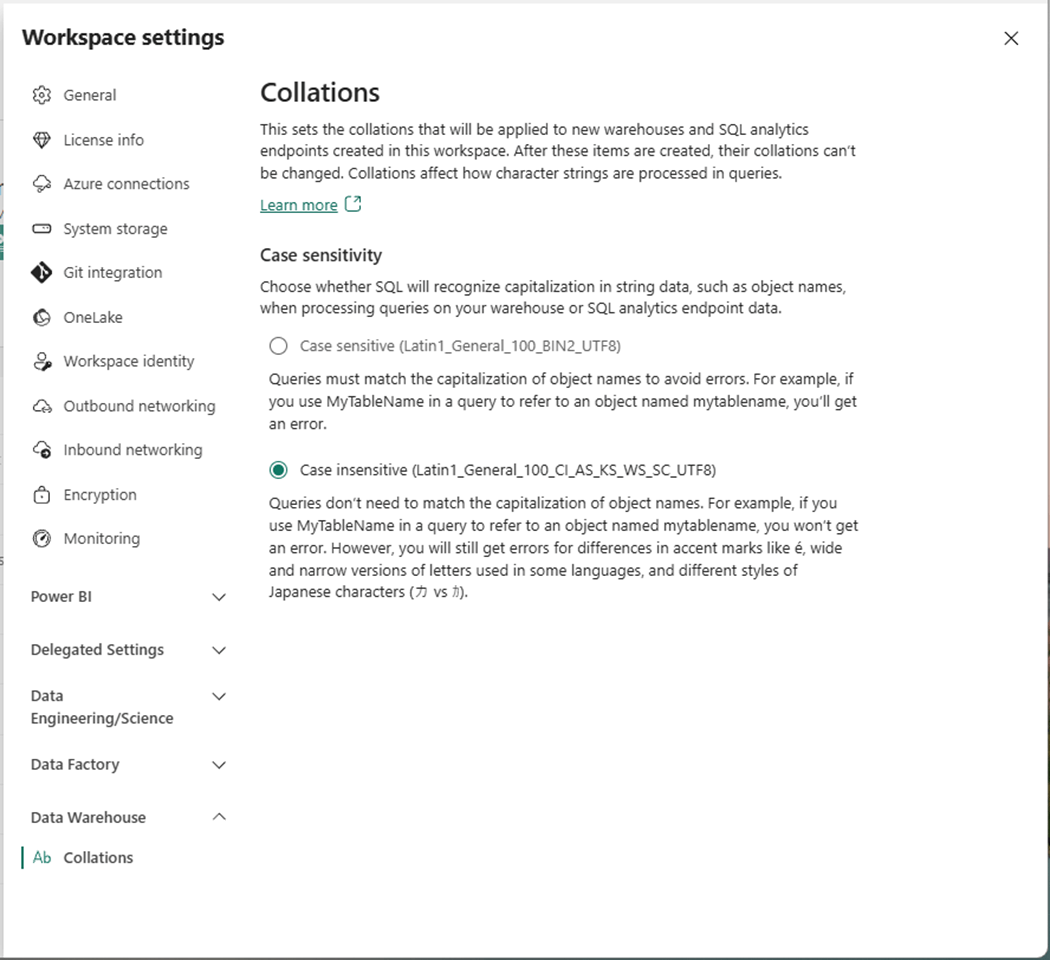
In the past, we had to use REST APIs to specify the collation of the warehouse at deployment time. Microsoft has recently added the ability to specify the warehouse collation at the workspace level. Please use the gear icon to open the workspace settings and select the Data Warehouse section. We can specify whether the database is case sensitive or case insensitive.
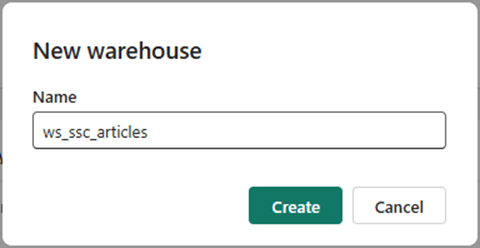
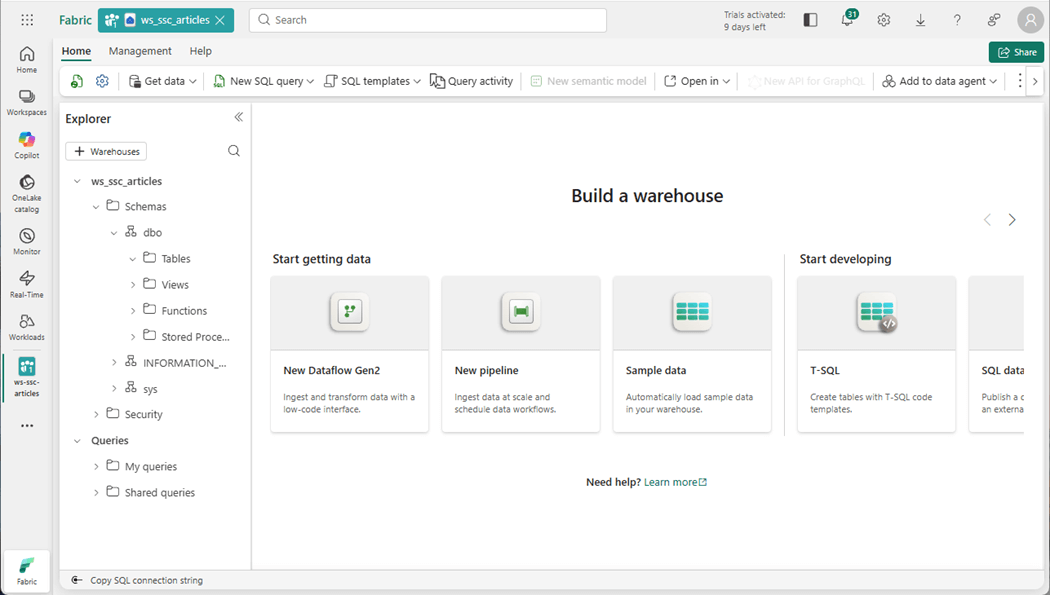
Use the add button to deploy a new Fabric object. In our case, we want to create a new warehouse named “ws_ssc_articles”.
We can use the Fabric explorer to see that an empty warehouse has been deployed.
The Fabric objects are listed under the workspace. Select the warehouse, right-click and find the properties panel. We want to capture the SQL connection string for the endpoint.
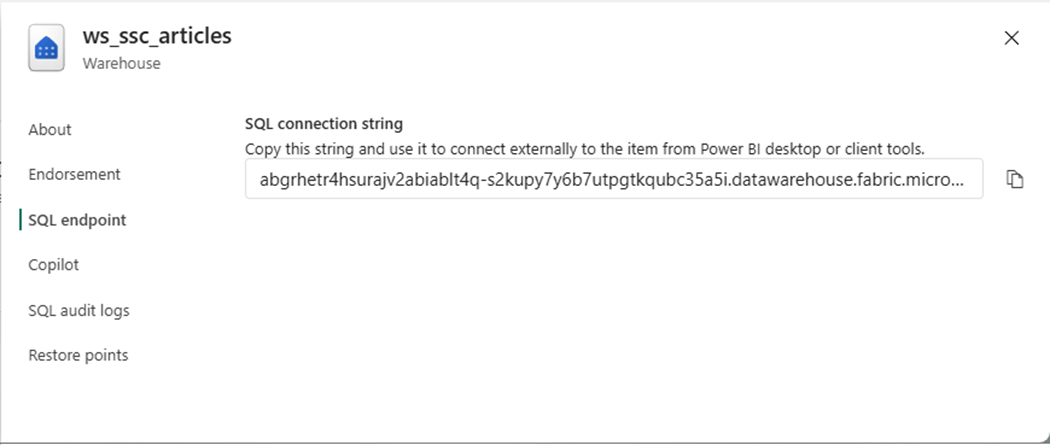
In the next section, we will connect to the warehouse with SSMS and deploy a sample table. This will ensure that our user has the correct rights.
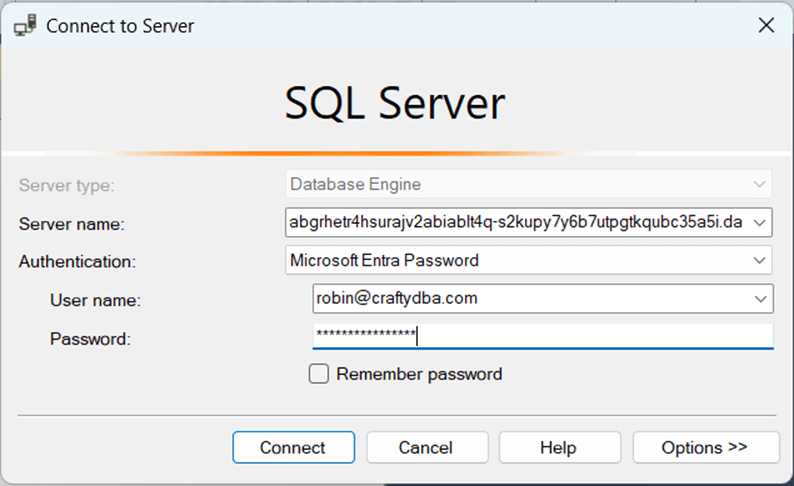
Test Warehouse Access
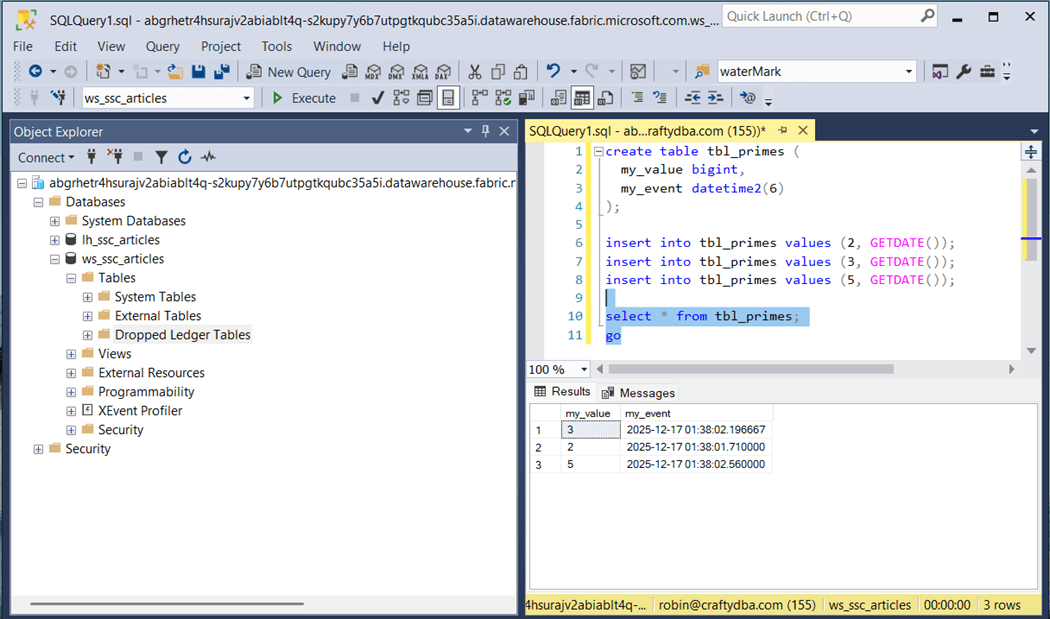
The quickest way to evaluate the access rights to the warehouse is to use SQL Server Management Studio. The user robin@craftydba.com has been given administrative rights to the workspace.
The eleven-line program creates a new table called “tbl_primes” and loads it with three records. The last step is to display the data within the table.
Next, let us review the database schema that we are going to deploy.
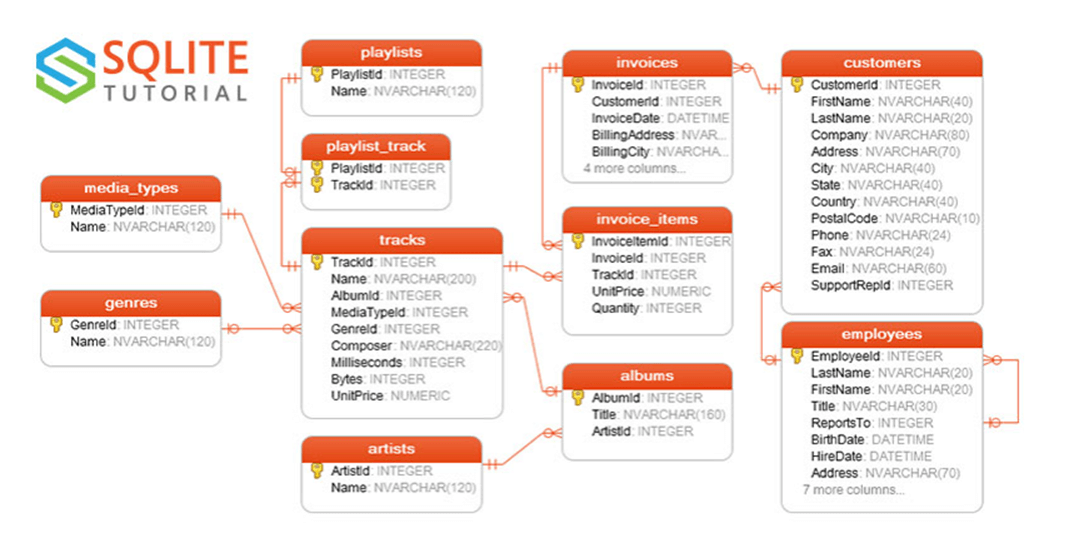
Chinook Database Schema
A quick search of the internet for an entity relationship diagram shows that SQLITE uses this database in examples. The sample database is for a small company that sells music. All samples in this article will be include at the end of the article as a zip file. Translating the T-SQL to Fabric SQL was quite easy. The only issue we had is that the INSERTS statements did not complete after 60 minutes of execution.
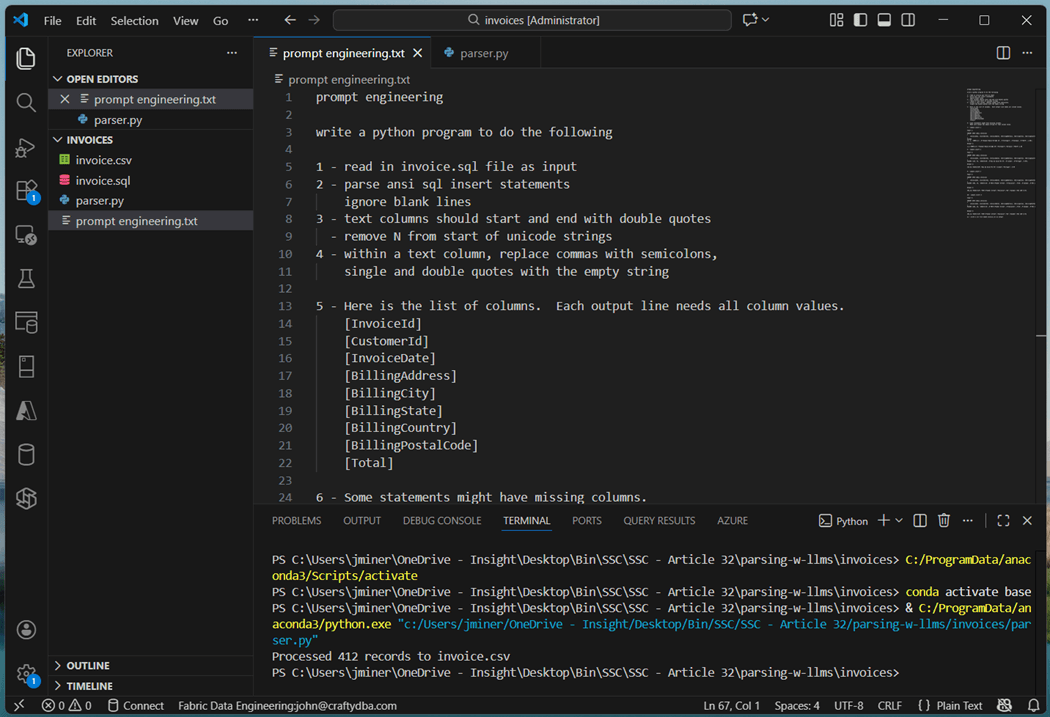
I used notepad++ to translation 8 out of the 11 sets of inserts statements into CSV files. This is a simple removal of the T-SQL INSERT command and converting the values array into a CSV line. However, three files had difficulties. The insert statements had partial column listings with many different variations in syntax. The warehouse columns are set to treat each field as nullable. This is where Agentic AI can help again. Part of the prompt engineering text file is show below. The resulting program is saved as “parser.py”. The input file, called invoice.sql, is read in and the output file, named invoice.csv, is created.
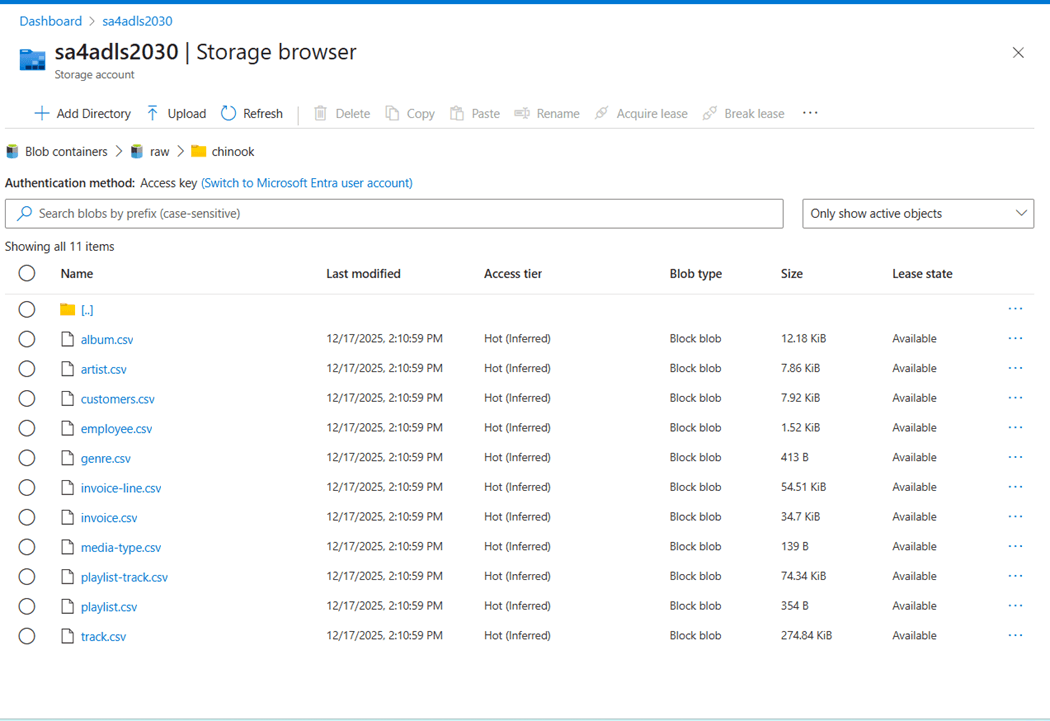
The performance problem we are having is the fact that we have over twelve thousand statements. An OLTP database can manage this amount of individual insert operations, whereas an OLAP database cannot. Each statement results in the creation of a parquet file. Make sure your user account has both RBAC and ACLs rights for ADLS storage. I used the Azure portal to upload the eleven CSV files. These files do not have a header line.
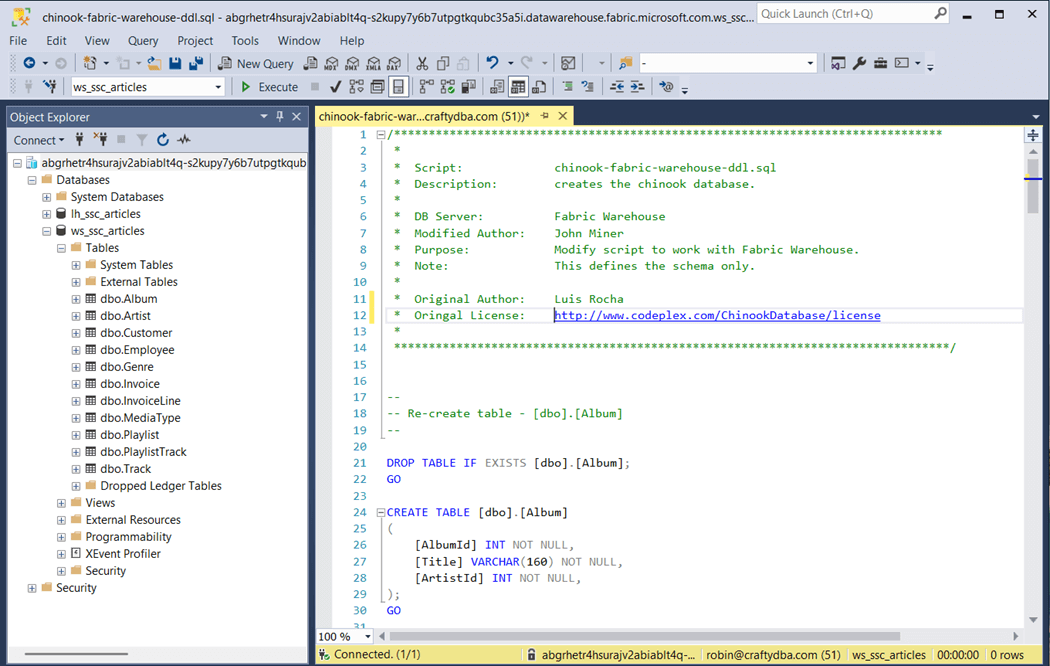
I broke the original T-SQL script generated by Luis Rocha into two parts. The first part, shown below, creates the tables in the dbo schema. This script was published on Codeplex a long time ago.
The second part uses the COPY INTO statement to load data directly from storage into tables.
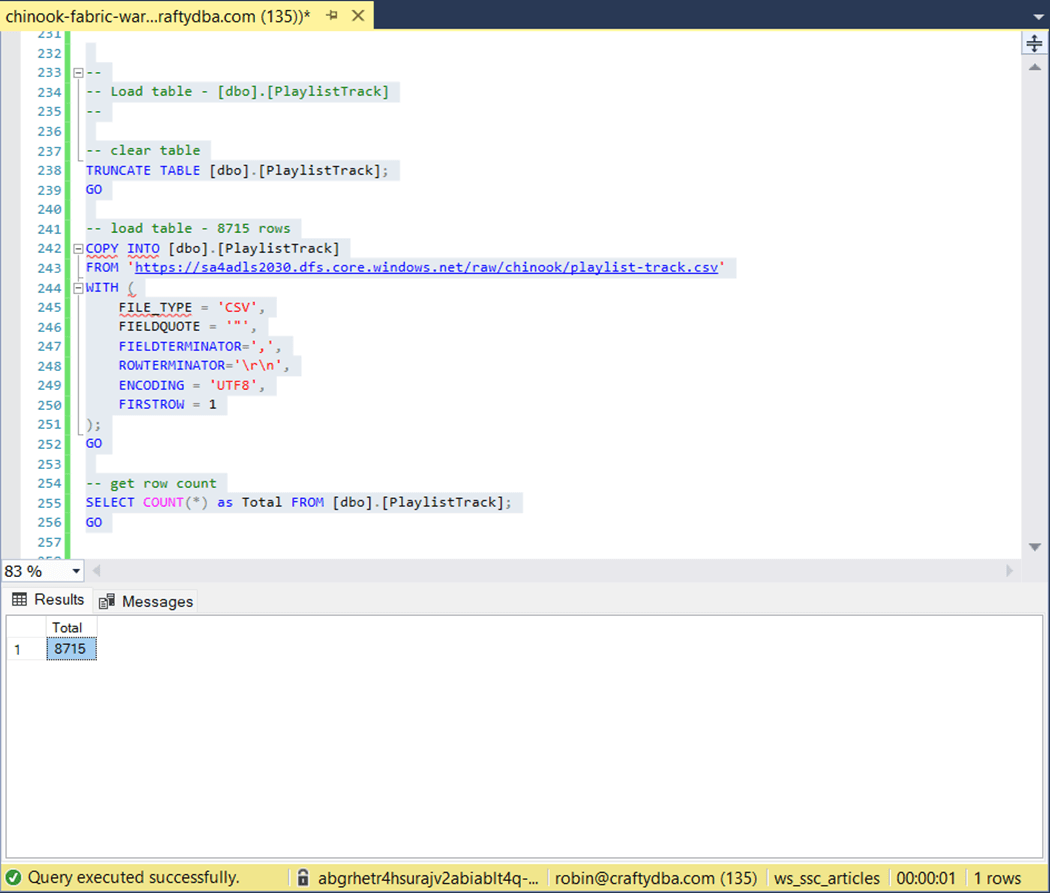
The original script did not complete after 60 minutes of execution. The above image shows the largest table took one second to complete. That is less that 15 seconds to load all the data.
The above T-SQL was taken from Koen Verbeek’s article. Of course, I did some formatting and commenting to make the script production ready. I created the Fabric SQL script for the Chinook schema and CSV files for another purpose. I will be re-using the CSV files with the dbt seed command in the near future.
Create Raw Zone with dbt
Again, I want to stress that dbt is usually not used to load data into the database or warehouse. However, for small datasets, we can use the seed command for dimensional data that does not change often. Let us create our dbt project right now. Please execute the following in the terminal window. It uses the dbt init command to create our dbt project.
dbt init chinook
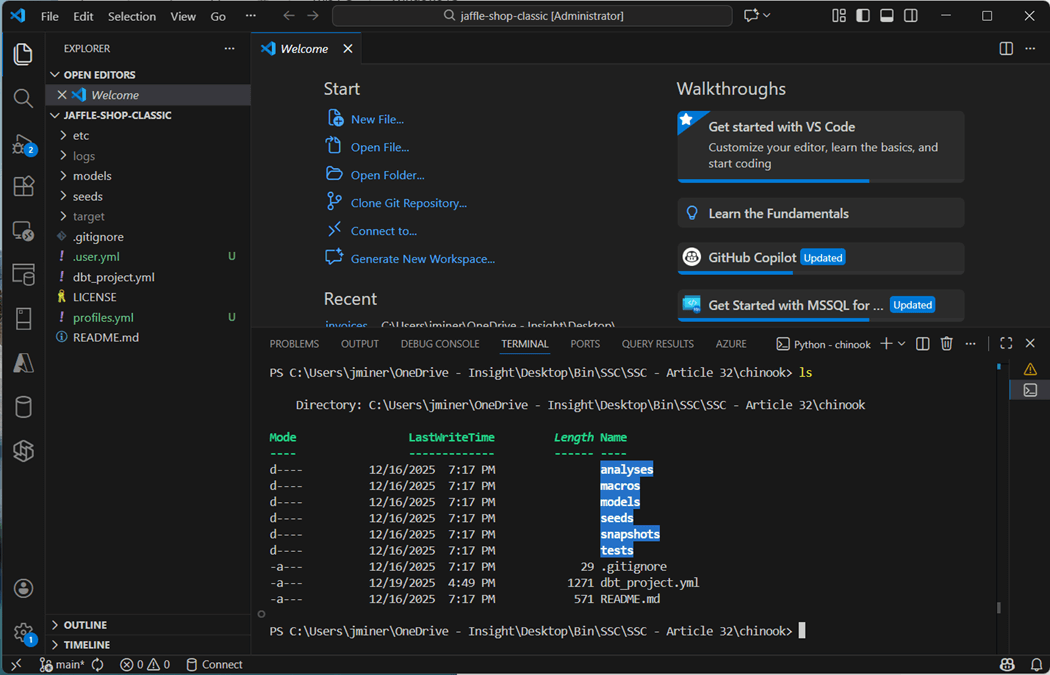
If we change directory and list directory in the new dbt project, we can see a bunch of folders have been created.
One file that we need to create is called “profiles.yml”. This file tells the adapter how to connect to Microsoft Fabric. I used Active Directory Interactive authentication when I played around with the Jaffle Shop Classic project. The issue with this selection is the fact that we have to login with MFA for every action. A better solution is to use a Service Principle as shown below.
chinook:
  target: fabric-dev
  outputs:
    fabric-dev:
      type: fabric
      driver: ODBC Driver 18 for SQL Server
      host: abgrhetr4hsurajv2abiablt4q-s2kupy7y6b7utpgtkqubc35a5i.datawarehouse.fabric.microsoft.com
      database: ws_ssc_articles
      schema: data
      threads: 4
      authentication: ServicePrincipal
      tenant_id: <your tennant id>
      client_id: <your client id>
      client_secret: <your client secret>
      encrypt: True
      trust_server_certificate: True
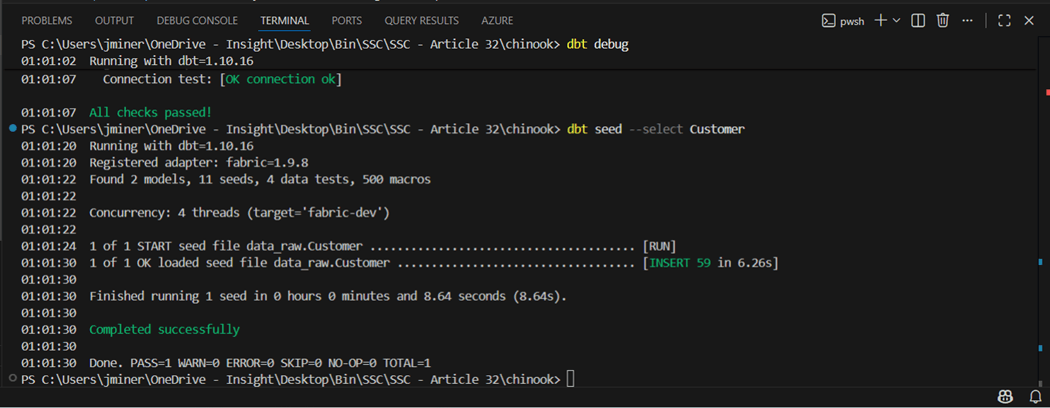
The dbt debug command validates that everything is installed, and we can connect to the target warehouse.

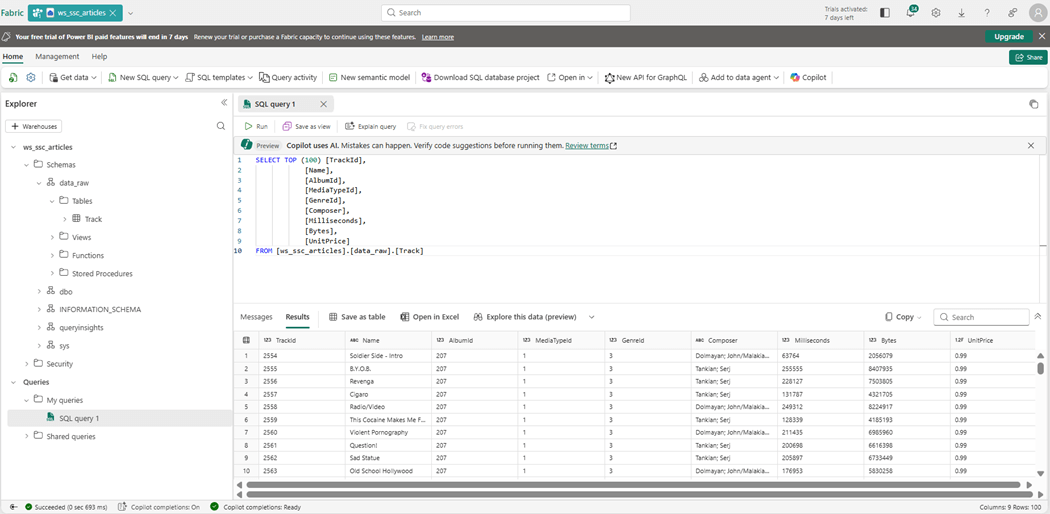
We can selectively use the dbt seed command to load just a single CSV file as a table.
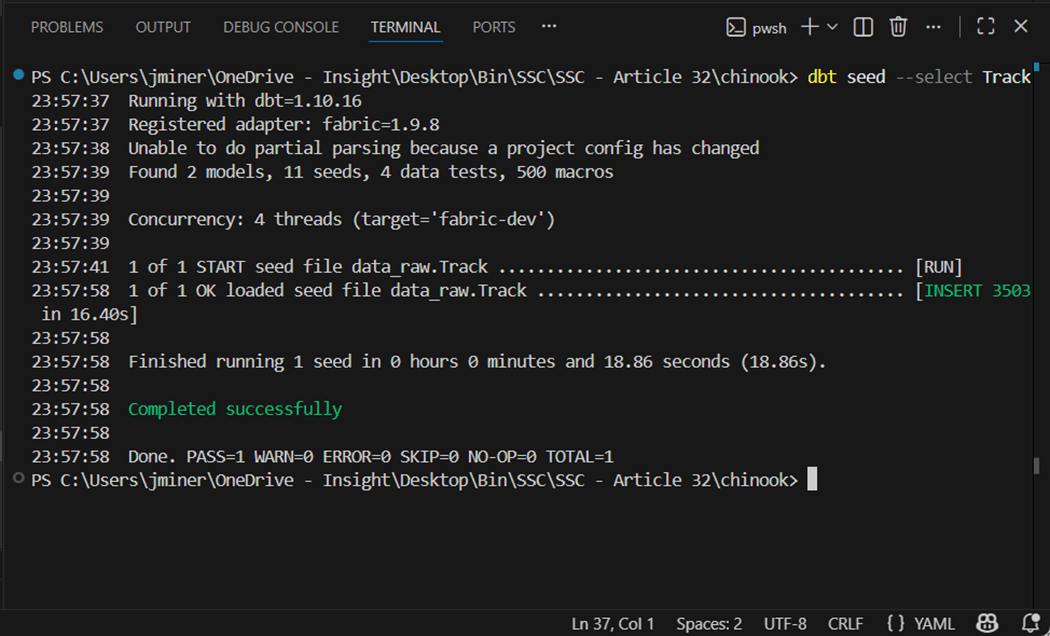
If we switch to the Fabric Explorer, we can see the first table was created and loaded with data. The column headers have been added to these files compared to the ones used by the COPY INTO command. Additionally, the program is inferring the data types during the load process.
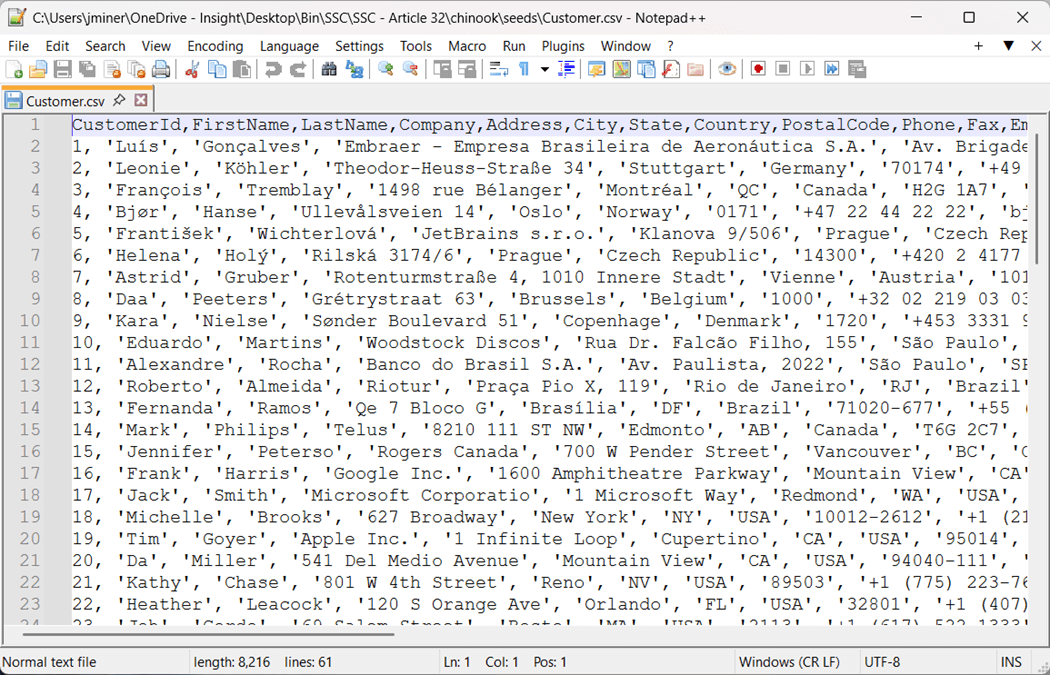
I purposely left a bug in the project to illustrate where you can find the audit file. We can see the customer file failed with a mismatch of column values.
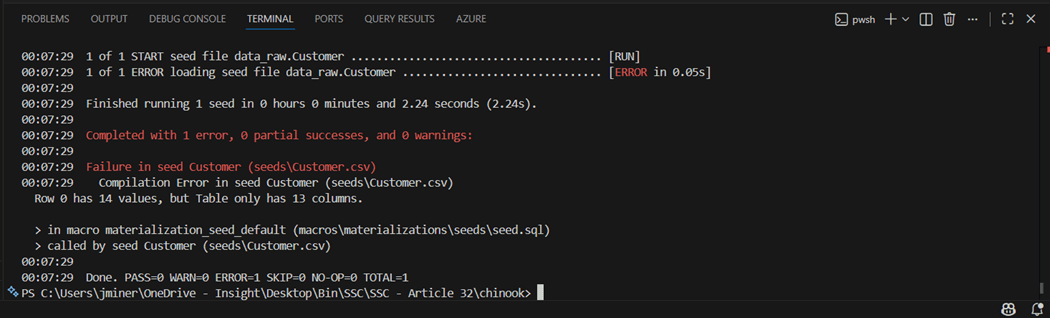
The file has nine different INSERT statements that results in ragged a ragged CSV file. We need to write a python program so that all columns in the data file have data. Thus, missing data is just an empty string.
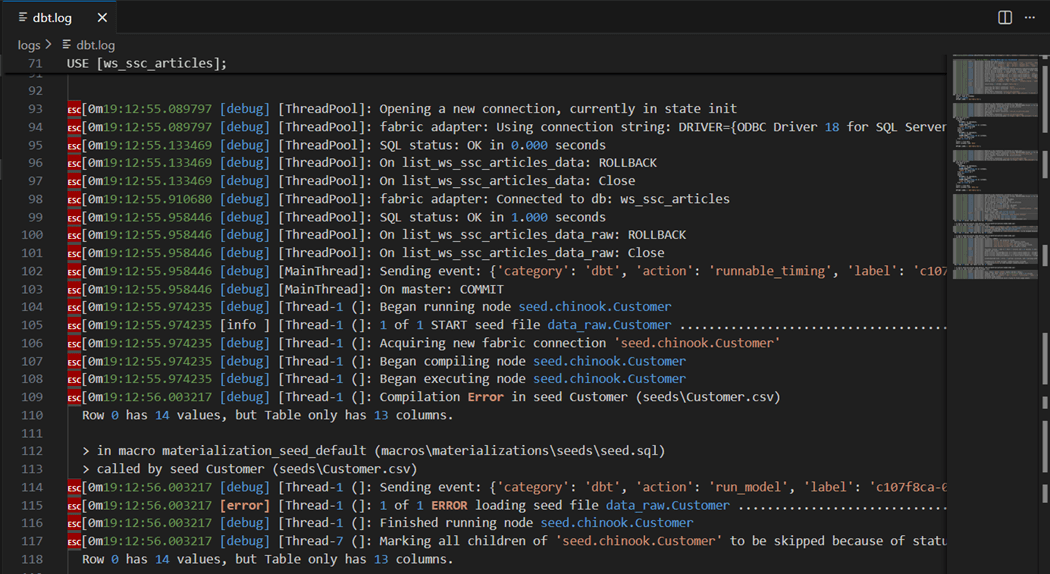
Next time, we will go over the file structure of the main yaml file. The logs file shows the details of the adapters execution. The same error is showing up in the log. This log keeps on growing until you delete it. The tool automatically re-generates log file on the next run of the dbt command.
It is important to remember that dbt batches the inserts with default size of 400 records. Thus, it takes 6.26 seconds to run the seed command instead of 1 second for the COPY INTO statement. But that 1 second does not account for the upload time to stage the data in storage.
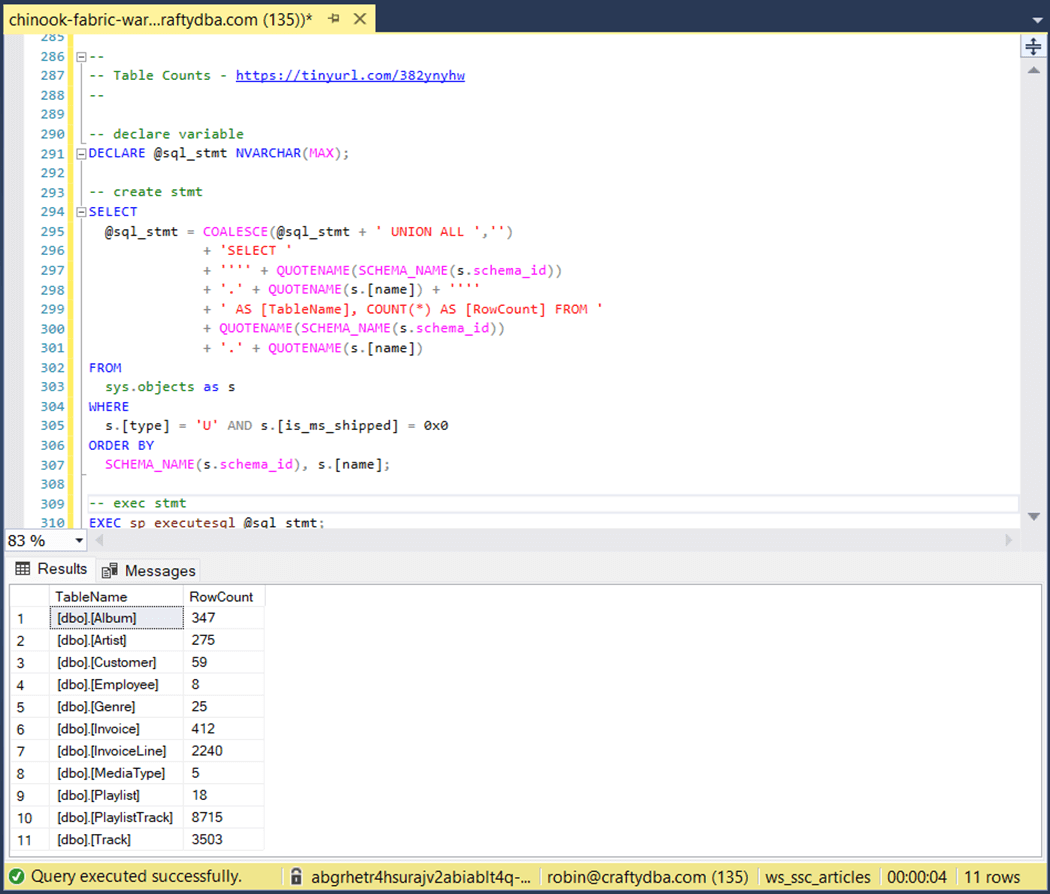
If we count the rows using the dynamic SQL statement, we get the same results.
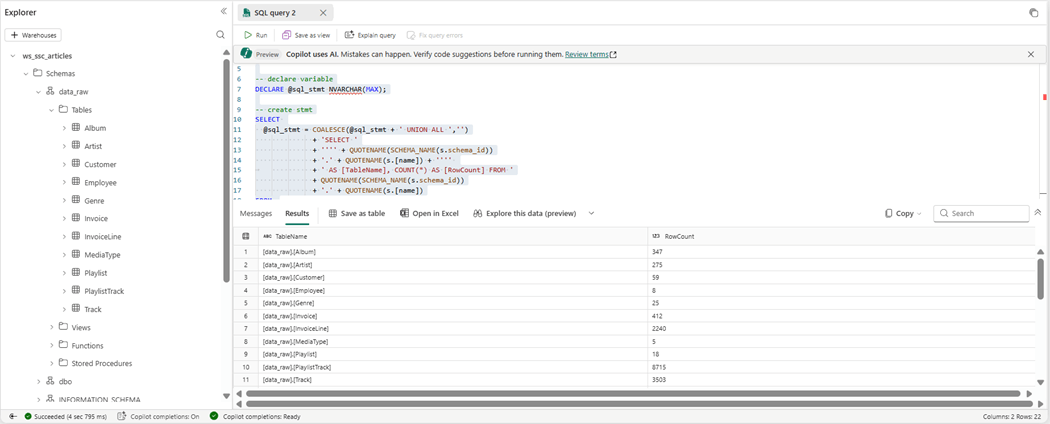
The hardest part of seeding data it to get the CSV file formatted correctly.
Recap of dbt project
The image below was taken from a dbt session at the Databricks Data + AI summit in 2022.
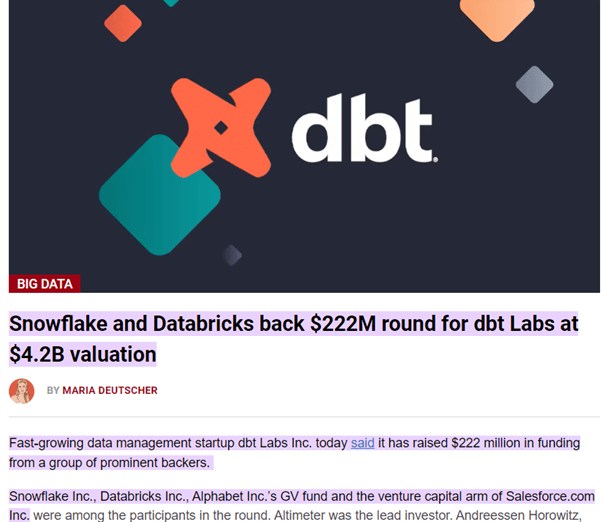
I did mention Fivetran at the start of the article since they acquired dbt Labs in the Fall of 2025. Please see article for details. We can see that many prominent companies funded the startup in the past.
There are a bunch of commands that we will be learning in the next article to build out our silver and bronze layer. Fivetran is not the only way to ingest data. We can use Data Pipelines in Fabric with the right source connection to accomplish the same task.
The “profile.yml” file contains credentials. We do not want to store this file in the project and check into source control such as a git repo. What I did not show is that the users directory for my windows account has a new sub-directory called “.dbt”. Placing the file in the location allows dbt to figure out the connection information. This works when there is one project. With multiple projects, this solution will not work.
Summary
Today, I wanted to load a sample data warehouse using data build tool. Since the Jaffle Shop sample used seeds to load data into tables, I wanted to follow suit. However, the INSERT statements were not fully qualified with every single column. This resulted in ragged CSV files. The solution to this problem was to use Agentic AI to create a python parser (program) to convert the INSERT statements into rows of CSV data.
The Fabric Warehouse is extremely slow with singleton statements. Therefore, it is important to load data in large batches. But this can be limited by the size of a SQL statement. The best way to load data into the warehouse is the COPY INTO statement. This was the fastest solution; However, we did not account for the file upload time into the ADLS storage.
The data build tool (dbt) has many different options. We only went over creating a new project, validating the adapter connection, and loading data into the raw quality zone. One thing I almost forgot to mention, in the connect file (profile) we have to define the root name of the schema. But we can qualify this name for a given section of the dbt project in future. The profile has “data” as the schema and the project has seeds as “raw”. Thus, the final name of the schema is “data_raw”. Next time, we will continue building out the refined and curated zones of the project.
Enclosed is the zip file with the samples used in this project.