
Throughout this series, we’ve seen how U-SQL can be used to generate data within our Azure Data Lake. We also saw in the last article how to link data in an Azure SQL Database to the Data Lake. Now we’re going to see how to move data from the Data Lake to the Azure SQL Database.
Why Would I Want to Move Data from the Data Lake?
The Data Lake is great at converting data – lots of data – into file formats. It’s a great ETL tool – something that may take a few hours to put together in SSIS can be put together in moments with a U-SQL script. What it isn’t great at is real-time analysis. Scripts always take a minute or so to execute, which isn’t exactly responsive. This is where systems like Azure Data Warehouse and Azure SQL Database come in, allowing users to query data quickly and efficiently. A common usage of Azure Data Lakes is to convert data into a particular format, then move that data into (for example) an Azure SQL Database. Let’s find out how we can do that.
A quick disclaimer:the example presented transfers all data from a single Azure Data Lake database table to Azure SQL Database. In reality, you are likely to split your data into different time periods, or filter it by certain conditions. Moving the contents of one entire table could entail the transfer of huge amounts of data, which would lead to a large Azure bill! Please carefully consider how much data are involved in the transfer and try to limit the transfer to just the data you are interested in.
How Can I Move Data to Azure SQL Database?
Azure offers a number of ways of moving data from your Data Lake. We could write something in PowerShell or C#, maybe utilising the BULK INSERT command. But why do all that manual work when Azure can do it for us? We’re going to take a look at how the Azure Data Factory can be used to move data from one system to another.
The Data
In the last article, we generated a file which utilised some data from the Azure Data Lake and some data from an Azure SQL Database. Let’s assume we’ve been asked to import this converted file format into a table in Azure SQL Database. Here’s the file.

There are nine columns:
- CountyCode (string)
- CountyName (string)
- AbbreviatedName (string)
- NumberOfFootballTeams (integer)
- AreaKMSquared (integer)
- Population1991 (integer)
- Population2001 (integer)
- Population2011 (integer)
- Population2016 (Integer)
The file is attached to this article if you want to follow along. Here’s a simple script which will create the import table in SQL Azure Database.
CREATE TABLE DataLakeCountyInfo
(
 CountyCode              VARCHAR(100),
 CountyName              VARCHAR(100),
 AbbreviatedName          VARCHAR(100),
 NumberOfFootballTeams     INT,
 AreaKMSquared            INT,
 Population1991           INT,
 Population2001           INT,
 Population2011           INT,
 Population2016           INT,
 CONSTRAINT pk_DataLakeCountyInfo PRIMARY KEY CLUSTERED (CountyCode)
);
Creating the Data Factory
Data Factory pipelines can be created using PowerShell, Visual Studio, or via the Azure Portal. I’m going to demonstrate using the Azure Portal in this article.
Microsoft states that creating Data Factories using the Azure UI is only supported in Edge and Chrome at the time of writing. I tried it in Firefox and while it did work, Firefox continually complained about the browser being slowed down by a Web page. I didn’t experience any issues with Chrome, so stick with the official advice!
Open up the Azure Portal and click Create a resource. Pick Data + Analytics and choose Data Factory.

Complete the form that appears for the Data Factory. The key things are:
- Name – I’ve gone for sqlservercentraldf
- Resource Group – Put it in the same resource group as your Data Lake Store and Azure SQL Database if possible
- Version – V2 is in preview, but seems pretty stable. I’ve gone for V2
- Location – Again, try to put the data factory in the same location as your Data Lake Store and Azure SQL Database. This will reduce network traffic

Hit the Create button and after a short delay, the data factory will be created. You should be able to search for the name of the data factory to open it up.

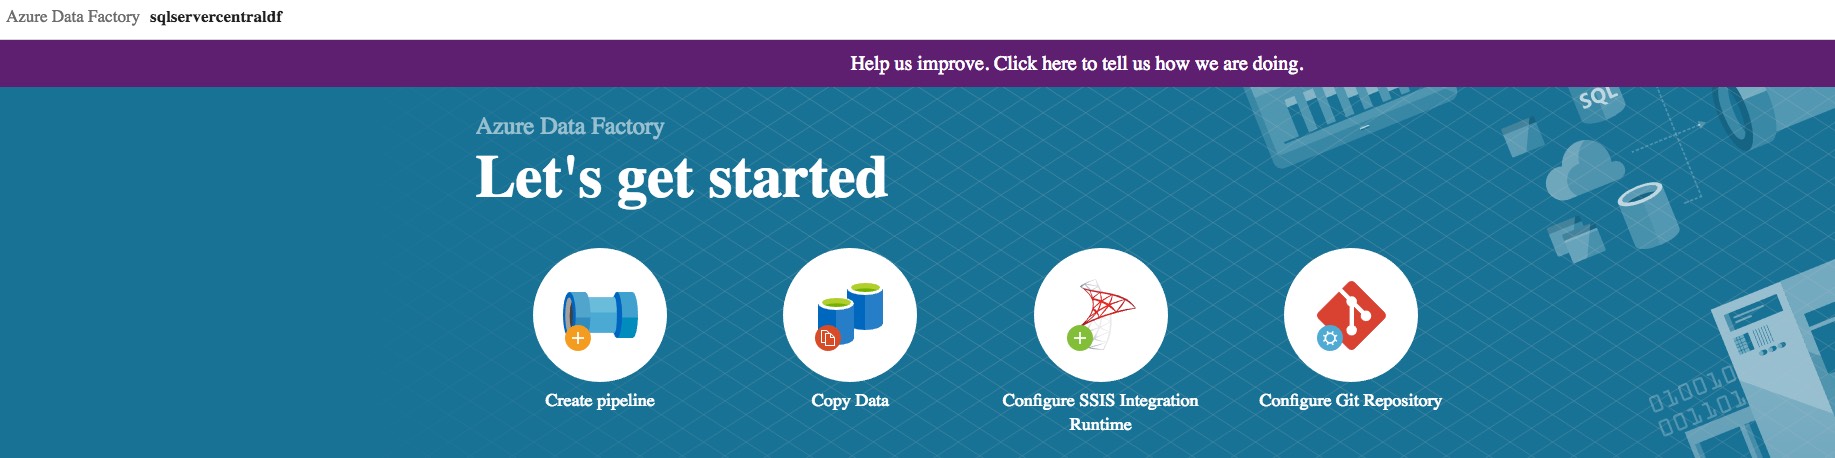
We’ll go straight into the creation of a task to move data from the Data Lake to the Azure SQL Database. Hi the Author & Monitor button.

This opens up in a new tab, showing a Let’s Get Started page.
What is Azure Data Factory?
Azure Data Factory is essentially a simpler version of SSIS in the Microsoft cloud (indeed, it can be used to run SSIS packages). It allows you to move data from one system to another, although as you might expect the Web interface isn't as rich as standard SSIS. A common use is to simply move data from one system to another – which is just what we’re going to do.
Copying Data
Data Factories use pipelines to move data. Creating a detailed pipeline is beyond the scope of this article, but Microsoft has a lot of documentation available on this subject so feel free to take a look. We’re going to use the simple Copy Data task to move our data. On the Let’s Get Started page, click Copy Data. The properties page appears – give the task a meaningful name, and choose whether you want to run this task once or on a schedule. There are plenty of scheduling options available – you can run the task every fifteen minutes if you wish!

Hit Next and you’ll be presented with a list of available data sources. The copy task requires a source and a sink (the destination).

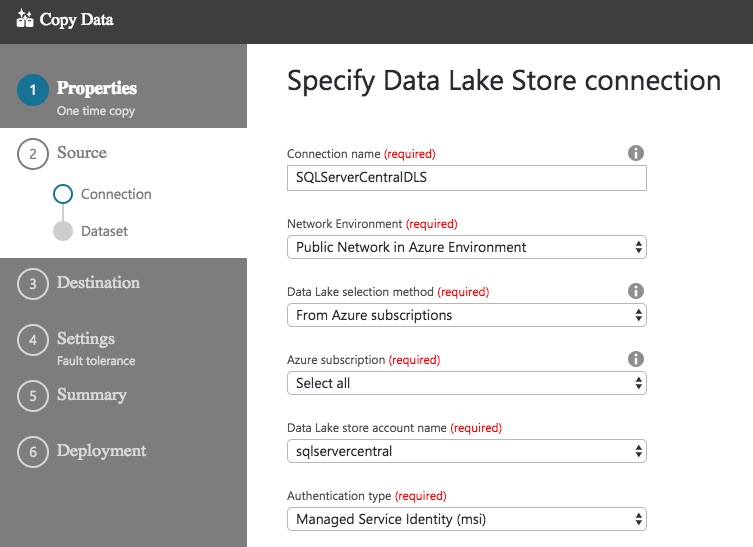
Choose Azure Data Lake Store and click Next. Now you are asked to specify how the Copy Data task should connect to the Data Lake Store. You can leave most of these as the defaults, except for the Connection name and the Authentication type.

If you use a custom network in Azure, you may need to change your Network Environment. If you usually accept the Azure defaults you’ll be OK leaving the default selection of Public Network in Azure Environment. If you’re not sure which setting to go for here, talk to your Azure administrator.
If you have multiple Data Lake Stores, make sure you choose the correct store in the Data Lake store account name dropdown! Choosing the wrong value in here could cause much head scratching further down the line.
On to the biggie…Authentication type. The default here is Service Principal, which involves you setting up an application in Azure Active Directory. The alternative is Managed Service Identity (msi), which use the data factory account. This makes configuration a bit easier as you don’t need to specify the Service principal ID. I’ve gone with Managed Service Identity (msi). Both options work well, again you may need to speak to your Azure administrator to determine which security model you should follow.
With the appropriate details configured, click Next. Oh no! We’ve hit an error.

The wonderfully descriptive error message tells us to fix the errors before continuing. The only indication we have of where the error occurred is the exclamation mark next to the Authentication type field. What is the problem? You wouldn't know it from what Azure is telling us, but the problem is we haven’t granted any access to the Data Lake Store – the data factory can’t access the Data Lake.
Granting Access to the Data Lake Store
Return to the Azure Portal tab you should already have open (or open a new browser tab and navigate to the portal). Navigate to your Data Lake Store and open up the Data Explorer. Navigate to the root folder – you need to give access to all folders for the data factory wizard to pick up the permissions. I’m not convinced by this – you should be able to grant access to certain folders if you wish – but that’s the way it all seems to work at the moment (via the UI, anyway).
Click the Access button on the toolbar to open up the access blade.

The default permissions are displayed on-screen (I’ve blanked these out!). Click Add to add a new permission, and type in the name of the Azure Data Factory you created earlier. Click on this once it is displayed, at which point the Select button should be enabled.

Click Select to continue on. You can now grant the appropriate permissions. Write permission isn’t required, so just grant Read and Execute. As the file I want to access is located in my Data Lake Store’s output folder, I need to grant access to this folder and all children.
Both access and default permissions are required, so select An access permission entry and a default permission entry. Now you can click OK to create the permissions.

It can take a little while to grant the permissions – make sure you don’t close the blade until you see a message confirming all permissions have been granted! Once you see the message confirming the permissions have been created with a green check/tick, you can return to the data factory page.
Completing the Data Store Connection
Back on the Data Store connection page, you can still see the little pink exclamation mark.

Don’t worry! Change the Authentication type to Service Principal, then change it back to Managed Service Identity (msi). A little swirly should appear next to the box. Once that has disappeared, the Next button will be enabled. Hurrah!

Click Next and you’ll be asked to choose the input file or folder. The contents of your Data Lake Store will be displayed. Navigate to the file you want to use, and set the compression type if the file is compressed.

Go to the next page and the settings for the file should be automatically detected. A preview of the file will also be displayed.

You can change these settings if you wish, or if the detection process doesn’t pick up the expected values. The one thing that wasn’t identified for my test file was the column headings being in the first line of the file. This is pretty important. Click on the SCHEMA option and you’ll see that the column names haven’t been identified correctly.

Fortunately, the fix is an easy one! Check the box labelled The first data row contains column names. The schema will automatically be refreshed…with the correct column names.

There are other settings you can specify – whether empty column values should be treated as nulls (yes they should, by default) and whether any lines should be skipped at the start of the file (you can choose how many). Once you are happy with these settings, click Next and we can choose the destination data store.

As you can see in the image, there are plenty of destinations! I’m going for Azure SQL Database. Once I click Next a similar screen to the one we saw when setting up the source is displayed.

Once I’ve selected my database and configured authentication, I can move on to mapping the contents of the file to a table.

This begins with selecting the appropriate table. Once this is done, the schema mapping page is displayed. If the column names in your source file match the column names in your destination table, they’ll be mapped automatically.

You can choose which columns you want to include/exclude. You also have control of the mappings here, so if you want to change any of the mappings this is the screen to do it on.
When you are happy with the mappings, go the next page – which is the last settings page!

On here, you can choose what should happen when errors occur and how much parallelism should be used. Once you move past this screen, you see a summary confirming the various selections you’ve made.

Click Next on this screen and the data factory pipeline will be created and executed if you’ve asked for a once-only execution. If a schedule was chosen, the schedule is created alongside the pipeline. If you asked for once-only execution, you’ll see a message telling you the Copy completed successfully. If you don’t see this, uh-oh – something went wrong. Retrace your steps.
Checking the Data in Azure SQL Database
Open up Management Studio and connect to the Azure SQL Database instance you inserted the data to. Run this query:
SELECT * FROM DataLakeCountyInfo;
Check out those results – the data have been successfully inserted!

Monitoring
Back in Azure, you can click the Monitor button to view the execution details. This allows you to re-run the job if needed, as well as telling you how long the job took to execute.

Summary
Whew! That was a long article, mainly because of the number of screenshots needed to adequately demonstrate the process. We’ve seen how data can be moved from the Azure Data Lake to SQL Azure Database. This completes the circle – we now know how to use SQL Azure data in the Data Lake, and how to move transformed data back to SQL Azure.
We’ve ran through the configuration of Data Copy using the Azure Portal, but as with most things in Azure you can use PowerShell or .NET.
We’re going to change tack in the next article by taking a look at how we can create our own data extractor using C#. This will allow us to move away from the standard row-delimited formats we’ve been dealing with. Should be interesting, I look forward to seeing you then!