

Once you have finished the development of Analysis Services project, there are several methods available for deploying analysis services objects from one server to other server. In this series, we will discuss the most commonly used deployment methods one by one. This article covers deployment using BIDS. The entire series covers deployment using:
Deployment with Analysis services Deployment Wizard
Before running the Deployment Wizard you will need to create a .asdatabase file by building the solution in BIDS. This file contains definition of the database and all of its objects. The wizard makes use of this file to deploy the objects to the target server. To build the solution, right-click the project name in solution explorer and select Build. After building the solution, the next step is to configure deployment settings as discussed before in the first method.
To launch Deployment Wizard, go to Start->All Programs->Microsoft SQL Server 2008/2005->Analysis
Services->Deployment Wizard.
1. Click next to skip the welcome page.
2. In the Specifiy Source Analysis Services Database dialog, click the ellipsis button and navigate to the locaton where your .as database file is stored as shown below and click next.
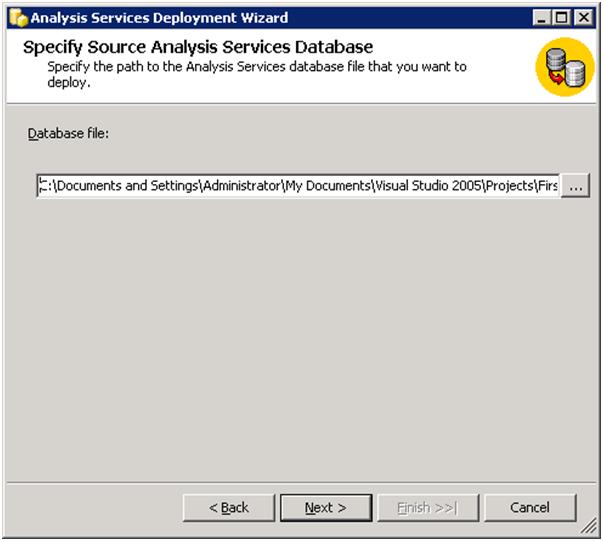
Figure 1
In the Installation Target dialog box, type the target server name and target database name as shown in the figure below and click next.
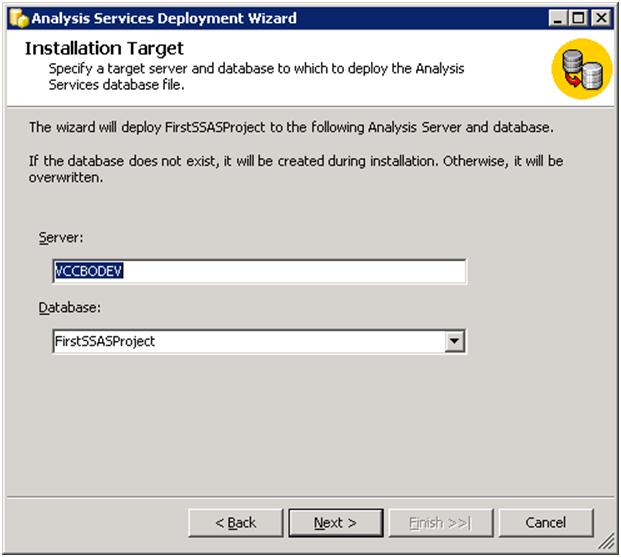
Figure 2
In the Specify Options for Partitions and Roles, select the options that match your need and click next. Please note that you will not be able to get such granularity when deploying using BIDS. With BIDS, you can either deploy everything or nothing at all. If you wish to preserve setting for any object that is already deployed to the target server, select the option that offers you to retain that particular setting. For example, if you intend to preserve the roles and member on the target server, select the Retain roles and members option.
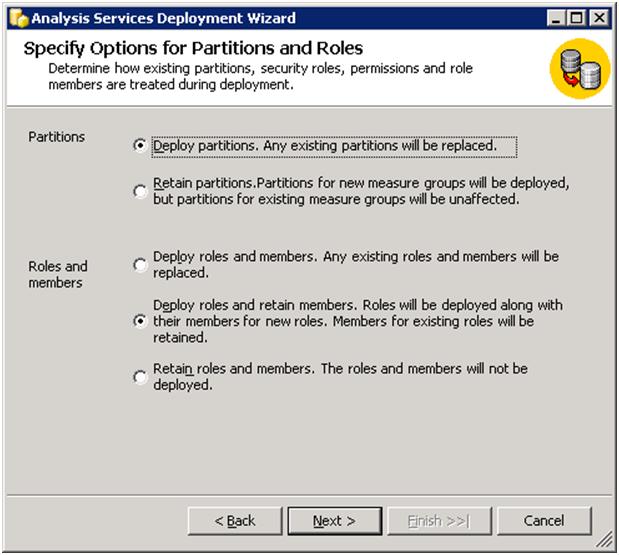
Figure 3
The Specify Configuration Properties dialog box as shown below lets you configure several properties. First, it lets you specify whether the configuration and optimization settings for existing objects should be retained or overwritten. If you haven’t made any configuration and optimization changes since your last deployment and intend to preserve those setting on the target server, check the first two options.
It also lets you specify data source connection string, data source impersonation information, location of log files, and locations for partition storage.
The Data Source Impersonation Information indicates the credentials that are to be impersonated while accessing the underlying database. As seen in the dialog box below, it is not recommended that service account be used. The reason is because a service account has more permissions than it needs to process the cube. So if the services account gets hacked someday (God forbid), it can cause more damage to your environment. A domain account, not tied to any person and created solely for this purpose is recommended. Click next, after selecting the appropriate options.

Figure 4
The Select Processing options dialog box lets you specify what type of processing is performed when the changes are deployed. If Do Not Process option is selected, only the changes are deployed and no processing is done. If Full option is selected, analysis server will delete all the data from the objects and then processes the deployed objects. If Default option is selected, analysis server will use its intelligence (based on the changes made) to perform just enough processing to bring the cube to a fully processed state.
Please note that different definition changes require different processing options, so select the one that fits your requirement, if you are not sure, select the default option and let analysis services decide. This dialog box also lets you manage writeback table options as shown below in the figure. Finally, you can also instruct the wizard whether the processing should be done as a single transaction or as multiple transactions. After selecting the appropriate options, click next.
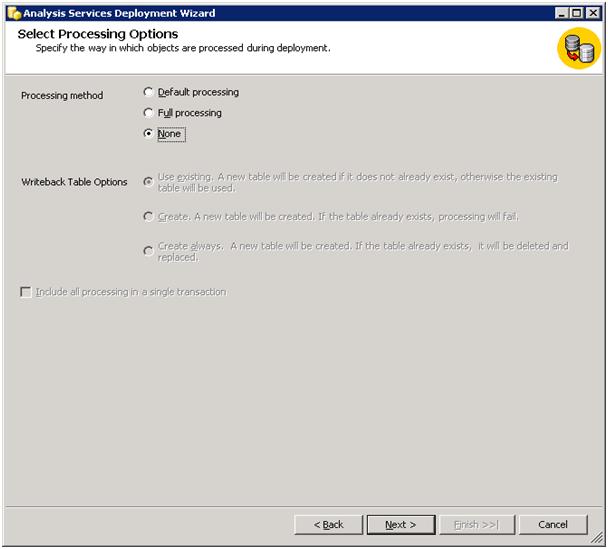
Figure 5
In the Confirm Deployment dialog box shown below, click next to execute the deployment immediately. You can also opt to create the deployment script to deploy the database later. If you opt to create the deployment script, the wizard will create an XMLA file and save it under the specified location. You can later execute the script in SQL server management studio or schedule it to run by creating a job using SQL agent.

Figure 6
NOTE: When scheduling the deployment script to run as a job in SQL agent, select the job type as SQL Server Analysis Services Command and paste the deployment script in the command field.
When to use Deployment Wizard
Use the deployment wizard when you don’t want to deploy everything in the analysis services database and you want to have more granular control over deployment process. For example, use this wizard when you do not want to deploy security (roles and members) while promoting your analysis database from development to production.

