

Previously, it was a standard approach to use the Json.NET library or JavaScriptSerializer class in the Script Component in order to import JSON data in SSIS. In this article, I’m going to compare performance of Json.NET library to the performance of the new JSON functionality that appeared in SQL Server 2016. This article consists of two parts. In the 1st part, we’ll consider reading data directly from files and a database. In the 2nd part, we’ll review processing large JSON datasets on a row basis. In addition, we’ll consider how to implement these approaches in SSIS. Let’s start!
Why Json.NET, not JavaScriptSerializer
You may ask: if tutorials usually show us how to use JavaSciptSerializer class to parse JSON in SSIS, why would we need to use something else? First of all, JavaScriptSerializer is much slower. When we are dealing with ETL processes, speed plays an important role. Also, JavaScriptSerializer requires additional configuration (maxJsonLength) for large datasets and the need for it can be easily missed if packages are tested only on small datasets. On the other hand, in order to run an SSIS package with the referenced third-party library (e.g. Json.NET), we need to add it to GAC. It’s extra work for a build engineer, but it pays off in terms of performance.
Test Machine Specifications
All the tests were performed on machine with
- 4 Intel Core i7 cores
- 12GB RAM
- HDD
- Windows 10 (64-bit)
- SQL Server 2017
Note that the packages ran on the same machine with installed SQL Server, so the network transfer expenses didn’t impact the results.
Approach 1: Import Files
Let’s start implementing the approaches. The first approach we’ll consider is reading JSON data from files. I’ve prepared two files: PeopleLarge.json and PeopleLarge_Indented.json, each containing a JSON array of 500k records with people’s mock data. The difference is the first file contains minified JSON while the second file stores intended format. Both files are available for download here.

I created a Person table in the JsonTest test database, which will be used throughout the article:
USE JsonTest
GO
CREATE TABLE Person
(
       Id INT IDENTITY(1,1) NOT NULL
             CONSTRAINT PK_Person PRIMARY KEY CLUSTERED,
       FirstName VARCHAR(50) NULL,
       LastName VARCHAR(10) NULL,
       BirthDate DATETIME NULL,
       PersonId_SK INT NOT NULL
)
GO
Using SQL Functionality
We’ll use the OPENROWSET method along with CROSS APPLY OPENJSON to read JSON data from a file and to convert items from the JSON array to multiple rows. In order to parse column values from each JSON row, we’ll use the WITH clause.
Let’s create our first package:
- Open Visual Studio and create an Integration Services Project. I named it Test-JSON

- Open the package created by default or create a new one, and drop the Data Flow Task to its Control Flow. I just renamed the default package to SQL.dtsx.
*Reminder: If you don’t see the SSIS Toolbox, go to View -> Other Windows -> SSIS Toolbox or Right click on an empty space inside the Control Flow or Data Flow and select SSIS Toolbox.
- Double-click on the Data Flow Task. After you move into the Data Flow area, drop the OLE DB Source to it and Double-click on the component to configure.
In the OLE DB Source Editor create a connection to your database by clicking on the New… button next to the OLE DB connection manager. In this example, I created a connection to the JsonTest database.
Select the SQL command option from the Data access mode dropdown and insert the following query into the SQL command text area:
SELECT
       p.Id,
       p.FirstName,
       p.LastName,
       p.BirthDate
FROM OPENROWSET (BULK 'C:\temp\PeopleLarge.json', SINGLE_CLOB) as j
CROSS APPLY OPENJSON(BulkColumn)
WITH (
       Id INT,
       FirstName VARCHAR(50),
       LastName VARCHAR(10),
       BirthDate DATETIME
) AS p
SINGLE_CLOB allows you to read a file as ASCII and returns VARCHAR(MAX). If you have a Unicode (widechar) input file, just use SINGLE_NCLOB instead (it will return NVARCHAR(MAX)).
In addition, we could parameterize the file path, but I’ll keep it as it is for simplicity.
Click OK.
- Drop the OLE DB Destination to the Data Flow and Double-click on the component.
Select a connection to the database, choose the Table or view option from the Data access mode dropdown and select the Person table:
- Go to the Mappings tab and apply the changes you want. This is how my configurations look:
Click OK.


Our package is ready to run! That’s how the Data Flow looks:

Similarly, we could just create a package with a single Execute SQL Task in the Control Flow to read data and insert it into the table directly. That’s not our goal here. The advantage of processing data in the Data Flow is the ability to work with each row separately in case we need to clean, transform, redirect, etc.
*Personal Tip: Usually, if there is a high chance that the connection will be reused across the project, I convert existing connections to the Project Connections. Since our connection to the JsonTest database will be used by each package, let’s convert it to the Project Connection. To do that, just Right click on the connection in the Connection Managers window (under the Data Flow) and click on the Convert to Package Connection in the context menu.
Using Json.NET
This package is going to be similar to the one we just considered. The difference is using the Script Component instead of the OLE DB Source. Also, we’ll need to use the Json.NET library in the component. I downloaded its latest version from here (Bin/net45/Newtonsoft.Json.dll file is needed only).
Let’s create another package (e.g. NET.dtsx):
- Add the Data Flow Task and the Script Component into it.
We’ll be asked what type of Script Component we want to add. Choose Source and click the Ok button.
- Double-click on the Script Component, go to the Inputs and Outputs tab.
Expand the Output 0 node, click on the Output Columns and add 4 columns by clicking on the Add Column button:
- Id – DataType: four-byte signed integer [DT_I4]
- FirstName – DataType: string [DT_STR], Length: 50
- LastName – DataType: string [DT_STR], Length: 10
- BirthDate – DataType: database timestamp [DT_DBTIMESTAMP]
- Go to the Script tab and click the Edit Script… button.
Right click on References in the Solution Explorer, choose Add Reference… and select the downloaded Newtonsoft.Json.dll library.
Modify the CreateNewOutputRows method in the code (C# in this example):
public override void CreateNewOutputRows() { List<Person> records = null; using (var fs = new FileStream(@"C:\temp\PeopleLarge.json", FileMode.Open, FileAccess.Read, FileShare.ReadWrite)) //could be parameterized { records = DeserializeFromStream(fs); } foreach (var r in records) { Output0Buffer.AddRow(); Output0Buffer.Id = r.Id; Output0Buffer.FirstName = r.FirstName; Output0Buffer.LastName = r.LastName; Output0Buffer.BirthDate = r.BirthDate; } } - Then, create the DeserializeFromStream method and Person class with property names (Id, FirstName, LastName, BirthDate) exactly matching the field names in the JSON (PeopleLarge.json):
public List<Person> DeserializeFromStream(Stream stream)
{
    var serializer = new JsonSerializer();
    using (var sr = new StreamReader(stream))
    using (var jsonTextReader = new JsonTextReader(sr))
    {
        return serializer.Deserialize<List<Person>>(jsonTextReader);
    }
}
public class Person
{
    public int Id { get; set; }
    public string FirstName { get; set; }
    public string LastName { get; set; }
    public DateTime BirthDate { get; set; }
}
Find the complete code of the package here.
Close the code editor and click the Ok button (in the Script Transformation Editor window).
- Add the OLE DB Destination and configure it similarly to the first package in steps 4-5.
- Install Newtonsoft.Json.dll to GAC.
*Personal Tip: To achieve this, I like to use the gacutil tool on dev machines because of its simplicity. It’s a part of Visual Studio. If we don’t have Visual Studio installed, as is often the case on production machines, I use the Powershell script below.
- If Visual Studio is installed, open the Developer Command Prompt for VS as Administrator and type:
cd C:\[path to a folder with Newtonsoft.Json.dll]gacutil –i Newtonsoft.Json.dll - If Visual Studio is NOT installed, use the Powershell script:
[System.Reflection.Assembly]::Load("System.EnterpriseServices, Version=4.0.0.0, Culture=neutral, PublicKeyToken=b03f5f7f11d50a3a")$publish = New-Object System.EnterpriseServices.Internal.Publish$publish.GacInstall("C:\[path to a folder with Newtonsoft.Json.dll]\Newtonsoft.Json.dll")
- If Visual Studio is installed, open the Developer Command Prompt for VS as Administrator and type:

Execution Results
I ran both packages with the source files PeopleLarge.json and PeopleLarge_Indented.json one by one.
Let’s look at the results below:
| Elapsed Time | ||
|---|---|---|
| File Name | SQL.dtsx | NET.dtsx |
| PeopleLarge.json | 3:28.734 | 2:47.562 |
| PeopleLarge_Indented.json | 3:19.547 | 3:01.109 |
Honestly, I expected from the NET.dtsx package to be faster and it was, but it’s interesting to note that it degraded with the indented JSON. Meanwhile, the SQL method performed better with the indented data than it did with the minified JSON. Considering all this, I’d use the Json.NET for reading files in SSIS rather than the SQL native functionality, but in cases where those several seconds are not so important, the SQL method is something to consider because it’s easier to implement and doesn’t require additional configurations. Stay tuned, we have other approaches to test out!
Approach 2: JSON from DB
The picture has become clearer for cases where reading from files is needed. It’s time to consider cases where JSON data is already in the database. In preparation for this, I’ve created a table PersonJson and inserted the content of the files PeopleLarge.json and PeopleLarge_Indented.json into it with Id 1 and 2 accordingly:
CREATE TABLE PersonJson
(
       Id INT NOT NULL
             CONSTRAINT PK_PersonJson PRIMARY KEY CLUSTERED,
       Data NVARCHAR(MAX) NOT NULL
)
GO
DECLARE @EmployeeDetails NVARCHAR(MAX)
SELECT @EmployeeDetails = BulkColumn FROM OPENROWSET(BULK'c:\temp\PeopleLarge.json',
       SINGLE_CLOB) JSON;
INSERT INTO PersonJson (
       Id,
       Data
)
SELECT
       1,
       @EmployeeDetails
GO
DECLARE @EmployeeDetails NVARCHAR(MAX)
SELECT @EmployeeDetails = BulkColumn FROM OPENROWSET(BULK'c:\temp\PeopleLarge_Indented.json',
       SINGLE_CLOB) JSON;
INSERT INTO PersonJson (
       Id,
       Data
)
SELECT
       2,
       @EmployeeDetails
GO
Since we already have nicely working packages, we can copy and modify them slightly.
Using SQL Functionality
Let’s copy the SQL.dtsx package and rename it to something like SQLDBSource.dtsx. Now, we can replace the SQL command text in the OLE DB Source:
DECLARE @json NVARCHAR(MAX) = (SELECT Data FROM PersonJson WHERE Id = 1)
SELECT
       p.Id, p.FirstName, p.LastName, p.BirthDate
FROM OPENJSON(@json)
WITH (
       Id INT,
       FirstName VARCHAR(50),
       LastName VARCHAR(10),
       BirthDate DATETIME
) AS p
That’s it!
Using Json.NET
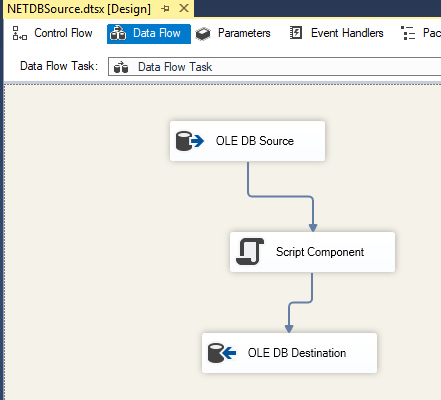
A copy of the NET.dtsx would help as well, so let’s copy and rename it NETDBSource.dtsx. Once done, do the following:
- Add the OLE DB Source into the Data Flow to read JSON from the PersonJson table with the command:
SELECT Data FROM PersonJson WHERE Id = 1
- The Script Component needs to be converted to Transformation type:
- Remove the Script Component and drag & drop a new one
- Select Transformation type and connect the OLE DB Source created in the 1st step to it
- Create the output columns as we did for the 2nd package
- After that, let’s edit the component’s code:
public override void Input0_ProcessInputRow(Input0Buffer Row)
{
    var jsonConverted = System.Text.Encoding.Unicode.GetString(Row.Data.GetBlobData(0, Convert.ToInt32(Row.Data.Length)));
    var records = JsonConvert.DeserializeObject<List<Person>>(jsonConverted);
     foreach (var r in records)
    {
        Output0Buffer.AddRow();
        Output0Buffer.Id = r.Id;
        Output0Buffer.FirstName = r.FirstName;
        Output0Buffer.LastName = r.LastName;
        Output0Buffer.BirthDate = r.BirthDate;
    }
}
Note that the System.Text.Encoding.Unicode is used to read NVARCHAR data. If it was VARCHAR, we would use System.Text.Encoding.ASCII.
Like in the 2nd package, don’t forget to reference the Newtonsoft.Json.dll library and add the Person class:
public class Person { public int Id { get; set; } public string FirstName { get; set; } public string LastName { get; set; } public DateTime BirthDate { get; set; } } - Close the code editor and click the Ok button (in the Script Transformation Editor window).
- Connect the Script Component to the OLE DB Destination:
Now, we have two new packages. Let’s test them out!
Execution Results
Again, I ran the packages with the minified and indented JSON source data. Json.NET performed better on the minified input, but the SQL’s native functionality was impressively quicker on the indented JSON. Considering that the execution time difference between the SQL method and Json.NET was insignificant with the minified input, I’d use the SQL method to process JSON if it’s already in the database. Degradation of Json.NET with the indented input and implementation complexity of the NETDBSource.dtsx package made my preference more obvious.
| Elapsed Time | ||
|---|---|---|
| JSON Taken from (Id in the PersonJson) | SQL.dtsx | NET.dtsx |
| PeopleLarge.json (Id = 1) | 3:22.734 | 3:07.063 |
| PeopleLarge_Indented.json (Id = 2) | 2:42.015 | 3:22.468 |
Conclusion
We’ve considered the new JSON functionality in SQL Server and how it can be used in SSIS. Let’s form our preliminary conclusion based on the tests we performed in this part and we’ll consider one more approach in the 2nd part. So far, we’ve seen that it’s much simpler to use the SQL’s native functionality in SSIS packages rather than to create Script Components and reference the Json.NET library (+add the library to GAC). Json.NET would be beneficial to process files with minified JSON. Also, it performs well on the same type of data stored in the database. When dealing with indented JSON, it degrades. The SQL method was incredibly quick with the indented JSON stored in the database but was slower than Json.NET in all the other tests. However, the execution time difference wasn’t too significant and if we are okay with the extra seconds of processing, the SQL method is something to consider and simpler to use in SSIS. Personally, I’d choose Json.NET for files and the native SQL for processing JSON stored in the database.
Please don’t consider this article as a final guide on how to choose a specific approach. Every day, we face different circumstances that can easily affect performance and our ultimate decisions as well.
See the source code on GitHub.