

Introduction
In a preview article, we learned how to work with PowerShell from a local machine. In that article, we installed PowerShell for Azure in the local machine. In this new article, we will show how to work in the Azure Portal without installing PowerShell for Azure in your local machine. We will use the Cloud Shell. With the Cloud Shell, you can work in bash (if you love Linux) or PowerShell (if you like the Windows shell).
In this article, we will play with the Cloud Shell using PowerShell. We will show some basic commands in PowerShell for newbies and then we will start creating Azure SQL Servers, Azure Resource Groups and Azure SQL Databases.
Requirements
An Azure Account
Getting started
At the top right of the Azure Portal click the >_ icon this icon will open the Cloud Shell:

By default, it opens the PowerShell. You can check the PowerShell version by using the following cmdlet:
$PSVersionTable.PSVersion
This will show the PowerShell version:
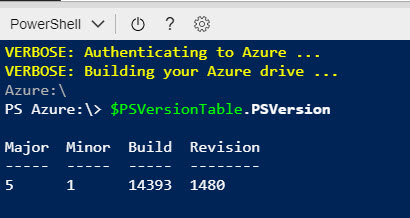
Major is for major releases, important features. Minor is for features and modifications that are not relevant. Build is the number of builds created. Revision is usually for fixes for minor releases.
To get the current date in PowerShell, you can use the get-date function. Let's take a look at an example:
get-date
The result displayed will show the date and time:

If you want to get just the time, you can store the date in a variable. The following example stores the current date in a variable named time:
$time=get-time
You can use the function ToShortTimeString to show the time only:
$time.ToShortTimeString()
The function will show the current time:

We will now create a Resource Group. The Azure resources can be grouped and require a group to be created. We will create a Resource Group in Azure named sqlcentralgroup:
New-AzureRmResourceGroup -Name sqlcentralgroup -Location "Central US"
If it is created successfully, it will show the following message:

You can verify that the resource group is created with the following cmdlet:
Get-AzureRmResourceGroup -Name sqlcentralgroup
The result displayed is the following:
Location is the physical location where the resource group will be stored (Central United States). For a list of different locations, refer to this link: Azure Regions
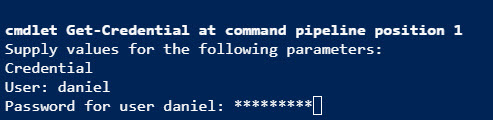
Once, that the resource is created, you can create a SQL Server. We will create a Server, named sqlcentralsrv, using the resource group created earlier, using the same location. We will use the Get-Credential function to specify and create credentials for the user administrator of the Azure SQL Server:
New-AzureRmSqlServer -ResourceGroupName "sqlcentralgroup" -Location "Central US" -ServerName "sqlcentralsrv" -ServerVersion "12.0" -SqlAdministratorCredentials (Get-Credential)
The Get-Credential command will ask for a user name and a Password. Enter a user name and a strong password:
If everything is fine, the Azure SQL Server will be created successfully:
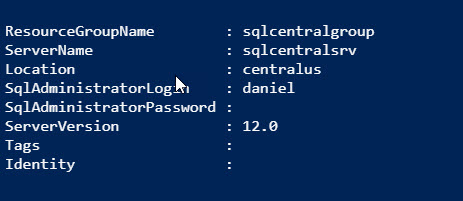
You can verify the Azure SQL Servers created using the following cmdlet:
Get-AzureRmSqlServer -ResourceGroupName "sqlcentralgroup"
Now that we have the Azure SQL Server and the resource group, we can create the database using the following cmdlet:
New-AzureRmSqlDatabase -ResourceGroupName "sqlcentralgroup" -ServerName "sqlcentralsrv" -DatabaseName "sqlcentraldb" -RequestedServiceObjectiveName "DW100"
The command creates a database named sqlcentraldb. We need to specify the Resource Group Name, the SQL Azure Server Name. Requested Service ObjectiveName will allow to show the type of Azure Data Warehouse DW100 is the Performance Tier. The minimum performance Tier is DW100. For a complete list of specifications for Azure Performance Tiers, refer to this link: Azure Performance Tiers
To verify that the ASDW exists, you can use the following cmdlet:

You can verify the database information with the following cmdlet:
Get-AzureRmSqlDatabase -ResourceGroupName "sqlcentralgroup" -ServerName "sqlcentralsrv"
Now you have your ASDW database ready to be used.
Conclusion
In this chapter, we show how to work with PowerShell without installing client tools in the local machine. You can run cmdlets using your browser and work with PowerShell.
We learned first how to get the current date and time and worked with variables. We then started to work creating a resource group, Azure SQL Server and finally an Azure SQL Database.
References
For more information, refer to these links:


