

If you navigate your object explorer tree to Server Objects, Linked Servers, Providers and open the properties dialog, you will find an option named “Allow inprocess” as shown in the image below. Have you ever wondered what it means and how this setting can affect the security model of your SQL Server installation?

Most OLEDB provider vendors suggest loading the provider in-process to simplify the security model. After a lot of research, I think I will have to agree with them. Loading the provider out-of-process is not only a pain itself, but also brings security issues in some scenarios.
The question may arise: why load a provider out-of-process? Short answer: because a provider loaded in-process can crash SQL Server when it fails. It’s not the case with most OLEDB providers (including MSSQL Native Client), but some third-party OLEDB providers are a bit buggy and are much safer to load out-of-process. Sometimes we can accept that a provider seldom fails if we can limit the failure to the provider itself and are able to avoid the propagation to the whole SQL Server process. The only way to do this is loading the provider out-of process.
When instantiated in-process, a DLL-based COM object gets loaded within the SQL Server process memory address space, and gains full access to that memory area. Therefore, it could potentially overwrite memory within the SQL Server process or leak resources, causing instability.
When the COM object is instantiated out-of-process, SQL Server does not load it directly within its memory address space, but, instead, it spawns a “surrogate” process that will load the object and use proxy/stub pairs to marshal the requested interface transparently back to the SQL Server process. The default surrogate executable used by the DCOM Service Control Manager (Rpcss.exe) is named DllHost.exe.
You can see a diagram of these two options below.

Depending on the authentication method of the client, the surrogate process will run under the account of the windows user connected to SQL Server (Windows Authentication) or under the SQL Server service account (SQL Server Authentication). Keeping in mind this difference is fundamental, because, in order to allow the provider to work properly, we will have to grant some permission to the appropriate users or groups. Typically, members of the local Administrators group are already granted all these permissions and no action is required. However, running SQL Server service as an administrator user is not a good practice.
There are plenty of permissions to grant and they are not always easy to identify. I will try to enumerate them in this document.
DCOM Configuration:
General DCOM settings
Open “Component Services” (Administrative Tools, Component Services or “dcomcnfg” from Windows run dialog).
Navigate to Console Root - Component Services - Computers - My Computer
Right-click "My Computer" and select "Properties"
In the "Default Properties" tab:
- Check the option "Enable Distributed COM on this computer"
- Default Authentication Level = Connect
- Default Impersonation Level = Identify or Impersonate
In the "COM Security" tab:
- Click on the "Edit Default..." button for "Access Permissions"
If you see a list of names in the dialog box then make sure the account used to start the SQL Server service belongs to the list or a group that belongs to this list. - Click on the "Edit Default..." button for "Launch and Activation Permissions"
If you see a list of names in the dialog box then make sure the account used to start the SQL Server service belongs to the list or a group that belongs to this list
In the "Default Protocols" tab:
- You should at least see "Connection-oriented TCP/IP"
DCOM Access Permissions for MSDAINITIALIZE
MSDAINITIALIZE is a COM class that is provided by OLEDB. This class can parse OLEDB connection strings and load/initialize the provider based on property values in the connection string.
Open “Component Services” (Administrative Tools, Component Services or “dcomcnfg” from Windows run dialog).
Expand Component Services, Computers, My Computer and select MSDAINITIALIZE from the right panel as shown here:
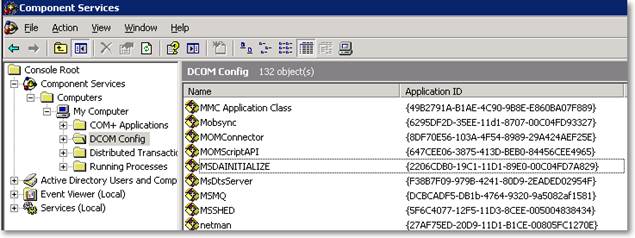
Right-click MSDAINITIALIZE and select “Properties” from the context menu.
WARNING FOR WINDOWS 2008 USERS
In Windows 2008 R2/Vista/7, by default members of the Administrators group are not granted full control on DCOM settings, that means that you will have to tweak the permissions on some registry keys if you want to change those settings. If you are running Windows 2003/XP you can skip this step.
As you can see from the above picture, the Application ID of MSADINITIALIZE is {2206CDB0-19C1-11D1-89E0-00C04FD7A829}. Open regedit and navigate to the HKCR\AppID\{2206CDB0-19C1-11D1-89E0-00C04FD7A829} key. Right-click the key and select “Permissions” from the context menu. Click the “Advanced” button (1) and open the “Owner” tab. Select the Administrators group and apply changes (2). On the permissions dialog, you can now grant full control to the Administrators group (3).

Before you can edit the permissions, you will have to restart the DCOM Configuration applet (dcomcnfg).
When you have finished editing the permissions on the DCOM settings, you can revoke the full control permissions from Administrators. Be careful to leave the permissions for the TrustedInstaller account untouched and assign ownership back to it on the key before applying changes.

Under the Security tab, for “Launch and Activation Permissions” select “Customize” and “Edit”. In the permissions dialog, add the SQL Server service account and grant all the permissions listed in the bottom panel (this will be used for SQL Server authentication). Now add the users or groups that will have to instantiate the provider in Windows authentication mode and grant all the permissions.
Repeat these steps also for “Access Permissions” and “Configuration Permissions”.
Errors you may get without these permissions:
Msg 7399, Level 16, State 1, Line 1
The OLE DB provider "PROVIDERNAME" for linked server "LINKED_SERVER_NAME" reported an error. Access denied.
DCOM Access Permissions for the Provider COM Object
After loading an instance of MSDAINITIALIZE, the surrogate will also have to load the provider itself. In order to do so, the launching user must be granted the appropriate permissions on the COM class of the OLEDB provider. Unfortunately, setting the permissions will be slightly harder in this case, because you probably will not find an entry for the provider COM class in the DCOM Configuration applet. In order to make it appear, there are some simple steps to follow.
Open the Registry Editor and search (keys, values and data) for the provider ProgID (for instance “MSDAORA” for Oracle OLEDB provider). If you don’t know the ProgID for the provider you are using, you can right-click the DLL file and select properties from the context menu. In the properties dialog, under the “Version” tab, select the “Internal Name” property and you should see the ProgID appear in the right panel. You should find the first occurrence of the ProgID in a key named HKEY_CLASSES_ROOT\CLSID\{xxxxxxxx-xxxx-xxxx-xxxx-xxxxxxxxxxxx}. For instance, for MSDAORA the key name is HKEY_CLASSES_ROOT\CLSID\{E8CC4CBE-FDFF-11D0-B865-00A0C9081C1D}.
Note down the GUID and the ProgID and create a text document containing the following text:
Windows Registry Editor Version 5.00
[HKEY_CLASSES_ROOT\AppID\{xxxxxxxx-xxxx-xxxx-xxxx-xxxxxxxxxxxx}]
@="ProgID"
"DllSurrogate"=""
[HKEY_CLASSES_ROOT\CLSID\{xxxxxxxx-xxxx-xxxx-xxxx-xxxxxxxxxxxx}]
"AppID"="{xxxxxxxx-xxxx-xxxx-xxxx-xxxxxxxxxxxx}"
For instance, for the Oracle OLEDB provider, the file will read as follows:
Windows Registry Editor Version 5.00
[HKEY_CLASSES_ROOT\AppID\{E8CC4CBE-FDFF-11D0-B865-00A0C9081C1D}]
@="MSDAORA"
"DllSurrogate"=""
[HKEY_CLASSES_ROOT\CLSID\{E8CC4CBE-FDFF-11D0-B865-00A0C9081C1D}]
"AppID"="{E8CC4CBE-FDFF-11D0-B865-00A0C9081C1D}"
Save the file with the “.reg” extension and merge it to the registry by double-clicking it. Go back to DCOM Configuration and refresh the right panel by hitting F5: you should now see the ProgID of the OLEDB provider listed within the other COM classes.
Open the properties dialog for the COM class of the OLEDB provider and configure it as follows:
- In the "General" tab: Authentication Level = Default
- In the "Identity" tab select the option "The launching user" or look up which user account is selected
- In the "Security" tab: if any of the 3 sections ("Launch and Activation Permissions", "Access Permissions", "Configuration Permissions") is set to "Customize" click the Edit button for this section and verify that the account used to start the SQL Server service or the account selected in the "Identity" tab belongs to the list or to a group that belongs to this list.
Local Security Policies :
Open the Local Security Policies snap-in (Administrative Tools, Local Security Policies or “gpedit.msc” from Windows run dialog).

Navigate to Local Computer Policy, Computer Configuration, Windows Settings, Local Policies, User Rights Assignment.
Grant the following local security policy rights to the user that will instantiate the provider and to SQL Server service account:
- Create Global Objects (SeCreateGlobalPrivilege)
- Impersonate a client after authentication (SeImpersonatePrivilege)

Errors you may get without these permissions:
Msg 7399, Level 16, State 1, Line 1
The OLE DB provider "PROVIDERNAME" for linked server "LINKED_SERVER_NAME" reported an error. The provider did not give any information about the error.
Distributed Transaction Coordinator
If you are planning to use the provider to perform distributed transactions, you will also have to configure the Distributed Transaction Coordinator.
Open “Component Services” (Administrative Tools, Component Services or “dcomcnfg” from Windows run dialog).
Navigate to Component Services, Computers, My Computer. Right-click My Computer and select “Properties” from the context menu.
On the Properties dialog, open the MSDTC tab and configure as follows:
- Client Network Protocol Configuration: TCP/IP
- Security Configuration:
- Network DTC Access: yes.
- Allow Remote Clients: yes
- Allow Remote Administration: yes
- Transaction Manager Communication
- Allow Inbound: yes
- Allow outbound: yes
- No Authentication Required
- Enable TIP Transactions: yes
- Enable XA Transactions: yes
- DTC Logon Account: NT AUTHORITY\NetworkService
- Network DTC Access: yes.

After applying the changes, restart the server.
Service Control Manager:
In order to start distributed transactions, the user must be granted access permission on the Service Control Manager and other services running on the server, including MSDTC and CLUSSVC services. Typically, members of the local Administrators group are already granted those permissions and you don’t need to change anything when running under those accounts. However, interactive users and the SQL server service account will not be members of the Administrators group.
Granting permissions on system services can become a challenging task, because the management tools are not very user-friendly. Basically, you will have to perform this task using either SC.exe or MMC.
Regardless of the tool you decide to use, the permissions to grant are the following:
| Service Name | Service Friendly Name | Permissions | Grantee |
| CLUSSVC | Cluster Service | GENERIC_READ | Authenticated Users |
| MSDTC | Distributed Transaction Coordinator | SERVICE_QUERY_CONFIG | Authenticated Users |
Setting permissions with SC
SC.exe is the command line tool used for interacting with NT Service Control and services, including the security descriptor. The commands “sdshow” and “sdset” allow displaying and setting the security descriptor in SDDL format. The security descriptor definition language (SDDL) uses ACE strings in the DACL (Discretionary Access Control List) and SACL (System Access Control List) components of a security descriptor string.
Explaining the security model of the Service Control is far beyond the purpose of this document: if you want to have a deeper dive into these topics I suggest starting from one of the pages linked in the “Resources” section at the end of this document.
In a clustered environment, the CLUSSVC service must be configured to grant GENERIC_READ to Authenticated Users. To display the Security Descriptor for CLUSSVC you can run the following command:
sc sdshow CLUSSVC
You will have to modify the Security Descriptor, so I suggest redirecting the output to a text file:
sc sdshow CLUSSVC > ClusSvc.cmd
ClusSvc.cmd will contain something similar to this:
D:(A;;CCLCSWRPWPDTLOCRRC;;;SY)(A;;CCDCLCSWRPWPDTLOCRSDRCWDWO;;;BA)(A;;CCLCSWLOCRRC;;;IU)(A;;CCLCSWLOCRRC;;;SU)(A;;CR;;;AU)(A;;CCLCSWRPWPDTLOCRRC;;;PU)S:(AU;FA;CCDCLCSWRPWPDTLOCRSDRCWDWO;;;WD)
In that SDDL string, the fragment to edit is (A;;CR;;;AU). “A” means Allow access, “CR” means CONTROL_ACCESS right and “AU” means Authenticated Users group. To allow firing distributed transactions from an out-of-process OLEDB provider, the user must be granted the GENERIC_READ (GR) permission and the above fragment has to be changed to (A;;CRGR;;;AU).
Edit ClusSvc.cmd and add the highlighted text:
sc sdset CLUSSVC
D:(A;;CCLCSWRPWPDTLOCRRC;;;SY)(A;;CCDCLCSWRPWPDTLOCRSDRCWDWO;;;BA)(A;;CCLCSWLOCRRC;;;IU)(A;;CCLCSWLOCRRC;;;SU)(A;;CRGR;;;AU)(A;;CCLCSWRPWPDTLOCRRC;;;PU)
S:(AU;FA;CCDCLCSWRPWPDTLOCRSDRCWDWO;;;WD)
Save the file and run it from the command prompt. You should see an output similar to this:
[SC] SetServiceObjectSecurity SUCCESS
The same steps must be repeated for MSDTC:
sc sdshow MSDTC > MsDtc.cmd
MsDtc.cmd should contain an output similar to this:
D:(A;;CCLCSWRPWPDTLOCRRC;;;SY)(A;;CCDCLCSWRPWPDTLOCRSDRCWDWO;;;BA)(A;;CCLCSWLOCRRC;;;IU)(A;;CCLCSWLOCRRC;;;SU)(A;;CR;;;AU)(A;;CCLCSWRPWPDTLOCRRC;;;PU)S:(AU;FA;CCDCLCSWRPWPDTLOCRSDRCWDWO;;;WD)
The fragment to modify is the one that defines permissions for the Authenticated Users group (A;;CR;;;AU). This will have to be changed to accommodate the CC (SERVICE_QUERY_CONFIG) permission: (A;;CCCR;;;AU).
Edit MsDtc.cmd and add the highlighted text:
sc sdset MSDTC
D:(A;;CCLCSWRPWPDTLOCRRC;;;SY)(A;;CCDCLCSWRPWPDTLOCRSDRCWDWO;;;BA)(A;;CCLCSWLOCRRC;;;IU)(A;;CCLCSWLOCRRC;;;SU)(A;;CCCR;;;AU)(A;;CCLCSWRPWPDTLOCRRC;;;PU)S:(AU;FA;CCDCLCSWRPWPDTLOCRSDRCWDWO;;;WD)
Now run the edited file and check the output: [SC] SetServiceObjectSecurity SUCCESS
Setting permissions with MMC
The same permissions can be granted using MMC, but don’t expect it to be much simpler.
Start, run “mmc.exe”. File, add/remove snap-in:

Navigate to Security Templates, “C:\windows\security\templates” and right-click the node. From the context menu choose “New Template” and name it out-of-proc-OLEDB.
Expand the newly created template and click the “System Services” node.

You can select the desired services (Cluster Service and Distributed Transaction Coordinator) from the right panel and edit the permissions using the dialog window.
After saving the template, it must be applied using another snap-in in MMC: “Security Configuration and Analysis”:

This snap-in is used to analyze and apply the security settings defined in the templates and it needs to operate on a configuration database. First of all you will have to create a new database: right click the node “Security Configuration and Analysis” and select “Open Database”. Accept the default location and enter a name for the database (again, out-of-proc-OLEDB could be fine), then import the template you created in the previous step.
Right click “Security Configuration and Analysis” and select “Analyze computer now”. This step will populate the database with the template configuration from the current computer settings. To apply the settings defined in the template you can right click “Security Configuration and Analysis” and select “Configure computer now”.
As I said before, I don’t find this method simpler than using the command line: unless some serious issues arise, I would suggest using that method instead.
However, there is one thing that MMC can’t do, that is grant permissions on the Service Control Manager itself. As far as I know, it can be done only through the command line. To display the Security Descriptor for SCMANAGER you can run the following command:
sc sdshow SCMANAGER > SCmanager.cmd
SCManager.cmd will contain something resembling this:
D:(A;;CC;;;AU)(A;;CCLCRPWPRC;;;SY)(A;;KA;;;BA)S:(AU;FA;KA;;;WD)(AU;OIIOFA;GA;;;WD)
Permissions on the above SSDL have to be changed to (A;;CCGR;;;AU) in order to add the GENERIC_READ permission.
Edit SCManager.cmd and add the highlighted text:
sc sdset SCMANAGER
D:(A;;CCGR;;;AU)(A;;CCLCRPWPRC;;;SY)(A;;KA;;;BA)S:(AU;FA;KA;;;WD)(AU;OIIOFA;GA;;;WD)
Save and run the script.
Cluster Configuration:
In a clustered environment, things become a bit more complicated. All the above steps have to be performed on all the cluster nodes and may require rebooting the server to take effect. In particular, all the changes to the MSDTC configuration require rebooting. For this reason, I suggest creating a group in Active Directory for those users that need to operate on the provider, so that adding or removing a user does not mean rebooting the server again, but just editing the group members in AD.
The account running the query must be granted full control permissions on the cluster server or must be a member of the local Administrators group. The second option is not a wise choice, so the only way to grant the required permissions is granting full control on the cluster.
Start the Cluster Administrator (cluadmin from windows run dialog) and select the topmost node in the left panel. Right click the cluster and select properties from the context menu.

Open the Security tab and add the users/group that will use the OLEDB provider. As you can see, there is no choice on the permissions to grant: Full Control is the only option. This is a security issue without any doubt: the user will now be able to configure all the cluster resources and groups and bring them online/offline. Typically, the end users should not be granted the permissions to perform this kind of task.

Microsoft is aware of the potential security issues and introduced Read permissions in Windows 2008 R2 cluster (these screenshots were taken from a Windows 2003 machine). However, given that the other option is adding the users to the local Administrators group, granting Full Control on the cluster seems to me a reasonable tradeoff.
Another thing to keep in mind is that a malicious user will need to connect to the server remotely before interacting with the cluster configuration: this operation can be easily prohibited by disabling network access with a firewall and allowing traffic on the SQL Server port only.
Errors you may get without these permissions:
Msg 7391, Level 16, State 2, Line 11
The operation could not be performed because OLE DB provider "PROVIDERNAME" for linked server "LINKED_SERVER_NAME" was unable to begin a distributed transaction.
A few words on performance
As you may have guessed, an OLEDB provider performs better when loaded in-process. This is because the remoting mechanism used in the out-of-process load has a startup cost, basically due to the instantiation of the surrogate process.
I performed two separate tests to measure the performance:
- Transfer a big table with a single SELECT … INTO statement.
- Transfer 1000 rows from the remote table using a cursor and 1000 distinct statements
In the first test there was no significant difference between the elapsed times: once loaded, the provider seems to perform equally fast in both methods.
In the second test, the provider must be instantiated 1000 times and the in-process load seems to be significantly quicker. When the provider is loaded out-of-process, the batch takes 3 times as much as the in-process run.
I am sure that you don’t have in your code anything like statements against a linked server inside a cursor, but, if you are planning to switch to out-of-process load, take into account that you will have to deal with a small overhead every time the provider gets instantiated.
RESOURCES
- Troubleshooting MSDTC Permission Issues When a Distributed Transaction Starts
- You cannot start transactions in an application running without administrative privileges on a Windows 2003 clustered Server
- Permissions needed to set up linked server with out-of-process provider
- You get 7399 and 7300 error messages when accessing a linked server
- Setting SACLs on Services
ACKNOWLEDGEMENTS
I would like to thank Johan Bijnens (twitter) and Moira Ogston for their review and the constructive feedback that they gave for this article.

