
In the previous level we built and populated the Biml Relational Hierarchy from metadata stored in a database named BRMetadata. In this section we will use the freshly-populated Biml Relational Hierarchy – along with the Mappings metadata – to build an SSIS Package that loads new rows into the ContosoRetailDW.dbo.DimChannel table.
As we worked our way through the last section, you may have been curious about why we used Biml Annotations to store attributes about Biml Tables and some Biml Columns. We took this approach to eliminate the need for more trips to the BRMetadata database as we build SSIS Packages from the Biml Relational Hierarchy.
Building an SSIS Package
Let’s build an SSIS Package to demonstrate! Begin by creating a new Biml file and rename it CreatePackages.biml. On line 1, add a template directive to inform the Biml compiler that this file is to be executed after LoadBimlRelationalHierarchy.biml, by adding the highlighted directive shown below:
<#@ template tier="20"#>
<Biml xmlns="http://schemas.varigence.com/biml.xsd">
</Biml>
Why tier 20? When building more complex solutions, it is best practice to number our Biml files by 10’s to preserve the option of adding some other Biml file between two existing Biml files in execution order.
Let’s next add a Biml Packages open and close tags:
<#@ template tier="20"#>
<Biml xmlns="http://schemas.varigence.com/biml.xsd">
    <Packages></Packages>
</Biml>
Adding the Biml Package Tag
Let’s next add a BimlScript code block and Biml Package open and close tags as shown highlighted below:
<#@ template tier="20"#>
<Biml xmlns="http://schemas.varigence.com/biml.xsd">
    <Packages>
    <#
    var sourceConnection = "ContosoSource";
    var targetConnection = "ContosoTarget";
    foreach(var tgtTable in RootNode.Tables.Where(t => t.Connection.Name == targetConnection)) {
        var sourceTable = tgtTable.GetTag("MappedTableName");
        var srcTable = RootNode.Tables[sourceTable];
        #>
    <Package Name="Load <#=tgtTable.Name#>" ProtectionLevel="EncryptSensitiveWithUserKey">
    </Package>
    <# } #>
    </Packages>
</Biml>
Your CreatePackages.biml file should appear as shown in Figure 1:

Figure 1. Viewing CreatePackages.biml with Target Table BimlScript
The BimlScript we added starts on line 4 with a code block start tag. On lines 5 and 6 we declare and initialize two variables, sourceConnection and targetConnection. We iterate RootNode.Tables starting on line 7, using Linq to filter for Target Tables. On lines 9 and 10, we declare and initialize the variables sourceTable and srcTable.
We use a Where query operator method (Microsoft’s terminology, now ours) in concert with a lambda expression to filter the results returned to the tgtTable enumerator. In our case, the lambda expression t => t.Connection.Name == targetConnection can be read “t such that t’s connection name matches the value of the targetConnection variable.” The lambda expression configures the enumeration of the foreach loop to only return AstTableNodes where the connection name property of the Biml Connection for the Biml Database for the Biml Schema for the Biml Table matches the value of the targetConnection variable. To learn more about lambda expressions and query operator methods see Getting Started with LINQ in C# at https://docs.microsoft.com/en-us/dotnet/csharp/programming-guide/concepts/linq/getting-started-with-linq.
On line 9 we read the MappedTableName tag of the target table and store this value in the sourceTable variable. On line 11 we set the srcTable variable to the table in the RootNode.Tables collection with the same name stored in the sourceTable variable. We wrote about RootNode at the beginning of this mini-series of articles.
On lines 12-13 we build a Biml SSIS Package. Please note two items:
- We derive the name of the SSIS Package from the name of the target table to be loaded, naming our SSIS Package “Load <target table name>.”
- We set the package ProtectionLevel property to the default for SSDT SSIS packages, EncryptSensitiveWithUserKey. On line 16 we close the foreach loop.
What happens when we save, compile, and update the Biml file? If CreatePackages.biml is the only file open, the results appear as shown in Figure 2:

Figure 2. Viewing the Results of CreatePackages.biml Compile with Biml Package
You may be looking at the Preview Pane and wondering, “What gives?” “Where’s my Biml SSIS Package?” you may be asking yourself. That’s a fair question.
To build our empty SSIS Package, return to Solution Explorer. Multi-select LoadBimlRelationalHierarchy.biml and CreatePackages.biml. Right-click the selected files and click Generate SSIS Packages as shown in Figure 3:

Figure 3. Generating an SSIS Package
If all goes as planned an SSIS Package named Load DimChannel.dtsx will appear in Solution Explorer’s SSIS Packages virtual folder. If you open Load DimChannel.dtsx and start the debugger (F5, or DebugàStart Debugging) this package should execute and succeed as shown in Figure 4:
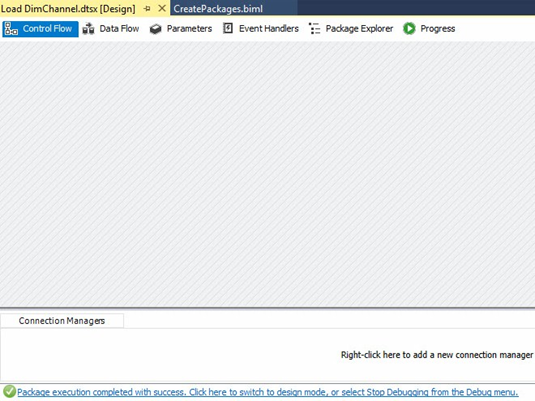
Figure 4. Successful Execution of an Empty SSIS Package
Why do we need to multi-select both Biml files? LoadBimlRelationalHierarchy.biml populates the Biml Relational Hierarchy from the BRMetadata database, and then CreatePackages.biml enumerates the contents of the Biml Relational Hierarchy in order to build the SSIS Package.
In BimlStudio, we can execute the LoadBimlRelationalHierarchy.biml to populate the Biml Relational Hierarchy and then preview the results of an expanded CreatePackages.biml file. Is there no way to preview the Biml using BimlExpress? Yes. If you open and update the preview for LoadBimlRelationalHierarchy.biml, the Preview Pane in BimlExpress will show you updates as you add Biml and BimlScript to the CreatePackages.biml file.
The Biml and BimlScript we are developing to create SSIS packages using BimlExpress works the same in BimlStudio. There are differences between BimlStudio and BimlExpress, but those differences don’t impact our project. Let’s transfer our code to BimlStudio to prove it.
Moving the Project to BimlStudio
Open BimlStudio and create a new project named BimlBookChapter7BimlStudio. Create a new Utility named LoadBimlRelationalHierarchy.biml, copy your Biml and BimlScript code from the SSDT / BimlExpress project’s LoadBimlRelationalHierarchy.biml file, and paste it into the BimlStudio version. Repeat this action for the CreatePackages.biml file.
When you initially preview the CreatePackages.biml file in BimlStudio, you see results similar to those you witnessed in BimlExpress (with LoadBimlRelationalHierarchy.biml open and updated), as shown in Figure 5:

Figure 5. Viewing the Preview of CreatePackages.biml in BimlStudio
Please note the Biml Relational Hierarchy – visualized in BimlStudio in Logical View – is not yet populated as shown in Figure 6:

Figure 6. Viewing an Empty Biml Relational Hierarchy in Logical View
We can Execute the LoadBimlRelationalHierarchy.biml file, as shown in Figure 7:

Figure 7. Executing the LoadBimlRelationalHierarchy.biml File
Executing LoadBimlRelationalHierarchy.biml populates the Biml Relational Hierarchy. We can see the results in Logical View, as shown in Figure 8:

Figure 8. A Populated Biml Relation Hierarchy in Logical View
If you convert the LoadBimlRelationalHierarchy.biml file to a Live Biml script, artifacts in the Biml Relational Hierarchy are generated automatically.
If we update the preview of CreatePackages.biml, we can now view the Biml SSIS Package as shown in Figure 9:
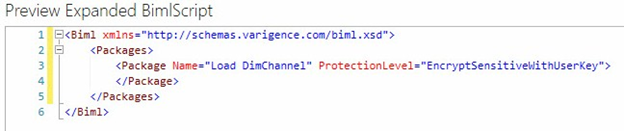
Figure 9. Previewing the Biml SSIS Package
You may continue this demonstration in either BimlExpress or BimlStudio. We will achieve the same results in the end (and we will prove it). We will proceed for now in BimlStudio.
We must now consider the requirements of our load. There are many ways to build SSIS Packages to load data. Some data is never updated, only new rows are added to the source that must be transmitted to the target. Some data includes new and updated rows at the source. The new rows must be added and the updated rows updated at the target. Some data may be deleted at the source and we may want to indicate these rows have been deleted in the target. Our SSIS design pattern must match our load requirements.
We’ve decided, based on requirements (in the author’s mind and nowhere else…) to build an SSIS Package that loads only new data, but also adds ETL (Extract, Transform, and Load) instrumentation metadata to the load process.
Adding the Tasks and Dataflow Tags
To continue our demonstration, let’s next add Biml Tasks opening and closing tags to the CreatePackages.biml file in BimlStudio. While we’re at it let us also add opening and closing tags for a Biml Dataflow. Your Biml and BimlScript should now appear as shown here (highlighted new syntax):
<#@ template tier="20"#>
<Biml xmlns="http://schemas.varigence.com/biml.xsd">
  <Packages>
  <#
    var sourceConnection = "ContosoSource";
    var targetConnection = "ContosoTarget";
    foreach(var tgtTable in RootNode.Tables.Where(t => t. Connection.Name == targetConnection)) {
        var sourceTable = tgtTable.GetTag("MappedTableName");
        var srcTable = RootNode.Tables[sourceTable];
      #>
    <Package Name="Load <#=tgtTable.Name#>" ProtectionLevel="EncryptSensitiveWithUserKey">
      <Tasks>
        <Dataflow Name="DFT Load <#=tgtTable.Name#>">
        </Dataflow>
      </Tasks>
    </Package>
    <# } #>
  </Packages>
</Biml>
In BimlStudio, our Biml and BimlScript now appear as shown in Figure 10:

Figure 10. Viewing CreatePackages.biml with Dataflow
Our newly-added Biml and BimlScript starts on line 12 with a Biml Tasks tag. On line 13 we add a Biml Dataflow tag and set the Name attribute to “DFT Load <target table name>.” On lines 14 and 15 we close the Dataflow and Tasks tags, respectively.
The BimlScript Preview Pane in BimlStudio now reflects our latest additions as shown in Figure 11:

Figure 11. Previewing CreatePackages.biml Biml with Dataflow
Adding the Transformations Tag and our First Dataflow Component
Let’s next add Biml Transformations opening and closing tags to the CreatePackages.biml file in BimlStudio, along with our first Dataflow component, an OLE DB Source adapter. Your Biml and BimlScript now appears as shown here (highlighted new syntax):
<#@ template tier="20"#>
<Biml xmlns="http://schemas.varigence.com/biml.xsd">
  <Packages>
  <#
    var sourceConnection = "ContosoSource";
    var targetConnection = "ContosoTarget";
    foreach(var tgtTable in RootNode.Tables.Where(t => t.Schema.Database.Connection.Name == targetConnection)) {
        var sourceTable = tgtTable.GetTag("MappedTableName");
        var srcTable = RootNode.Tables[sourceTable];
      #>
    <Package Name="Load <#=tgtTable.Name#>" ProtectionLevel="EncryptSensitiveWithUserKey">
      <Tasks>
        <Dataflow Name="DFT Load <#=tgtTable.Name#>">
          <Transformations>
            <OleDbSource Name="OLEDBSrc <#=sourceTable#>" ConnectionName="<#=sourceConnection#>">
              <DirectInput><#=srcTable.GetSelectSql()#></DirectInput>
            </OleDbSource>
          </Transformations>
        </Dataflow>
      </Tasks>
    </Package>
    <# } #>
  </Packages>
</Biml>
In BimlStudio, our Biml and BimlScript now appear as shown in Figure 12:

Figure 12. Viewing CreatePackages.biml with an OLE DB Source Adapter
Our newly-added Biml and BimlScript starts on lines 14 and 18 with Biml Transformations open and close tags. On lines 15-17 we add a Biml OLE DB Source and set the Name attribute to “OLEDBSrc <source table name>.” Please note we set the value of the DirectInput tag for the OLE DB Source adapter by calling the GetSelectSql() method of the srcTable variable. This is why we went to the trouble to setup the srcTable variable.
The BimlScript Preview Pane in BimlStudio now reflects our latest additions as shown in Figure 13:
Figure 13. Previewing CreatePackages.biml Biml with OLE DB Source Adapter
Adding a Lookup Transformation
Next, let’s add a Lookup Transformation to the CreatePackages.biml file in BimlStudio. Your Biml and BimlScript now appears as shown here (highlighted new syntax):
<#@ template tier="20"#>
<Biml xmlns="http://schemas.varigence.com/biml.xsd">
  <Packages>
    <#
    var sourceConnection = "ContosoSource";
    var targetConnection = "ContosoTarget";
    foreach(var tgtTable in RootNode.Tables.Where(t => t.Connection.Name == targetConnection)) {
      var sourceTable = tgtTable.GetTag("MappedTableName");
      var srcTable = RootNode.Tables[sourceTable];
      var keyCols = srcTable.Columns.Where(c => c.GetTag("IsBusinessKey").ToLower() == "true");
      var mappedKeyColNames = keyCols.Select(c => c.GetTag("MappedColumnName"));
      var lkupSelect = "Select [" + string.Join("],[", mappedKeyColNames) + "] From " + tgtTable.SchemaQualifiedName;
      var lkupWhere = string.Join("] = ?\nAnd [refTable].[", mappedKeyColNames);
       #>
    <Package Name="Load <#=tgtTable.Name#>" ProtectionLevel="EncryptSensitiveWithUserKey">
      <Tasks>
        <Dataflow Name="DFT Load <#=tgtTable.Name#>">
          <Transformations>
            <OleDbSource Name="OLEDBSrc <#=sourceTable#>" ConnectionName="<#=sourceConnection#>">
              <DirectInput><#=srcTable.GetSelectSql()#></DirectInput>
            </OleDbSource>
            <Lookup Name="LkUp Correlate" OleDbConnectionName="<#=targetConnection#>" NoMatchBehavior="RedirectRowsToNoMatchOutput">
              <Parameters>
                <# foreach(var keyCol in keyCols) { #>
                <Parameter SourceColumn="<#=keyCol.Name#>" />
                <# } #>
              </Parameters>
              <Inputs>
                <# foreach(var keyCol in keyCols) { #>
                <Column SourceColumn="<#=keyCol.Name#>" TargetColumn="<#=keyCol.GetTag("MappedColumnName")#>" />
                <# } #>
              </Inputs>
              <DirectInput><#=lkupSelect#></DirectInput>
              <ParameterizedQuery>select * from (<#=lkupSelect#>) [refTable] where [refTable].[<#=lkupWhere#> = ?</ParameterizedQuery>
            </Lookup>
          </Transformations>
        </Dataflow>
      </Tasks>
    </Package>
    <# } #>
  </Packages>
</Biml>
In BimlStudio, our Biml and BimlScript now appear as shown in Figure 14:

Figure 14. Viewing CreatePackages.biml with a Lookup Transformation
Our newly-added Biml and BimlScript starts and ends on lines 22 and 35 with Biml Lookup Transformation open and close tags. We chose a static name for Lookup Transformation, “LkUp Correlate,” because the operation of correlation with the target is fairly generic. We use the value of the targetConnection variable in the OleDbConnectionName attribute of the Lookup tag, and we set the NoMatchBehavior to “RedirectRowsToNoMatchOutput.”
In the next portion of the Biml Lookup Transformation configuration – Parameters – we chose a string collection to represent related pairs of column names. The variable named keyCols is declared on line 10 to contain only columns that are configured (in Mappings metadata) as business key columns. A foreach loop begins on line 24, enumerating the keyCols collection. On line 25 we jump out of BimlScript to build the Biml Lookup Parameter tag, supplying the name of the source column – previously identified as a business key – to the SourceColumn attribute. We close the Parameters tag on line 27.
On line 28 we start the next portion of the Biml Lookup Transformation – Inputs. We enumerate the keyCols collection and build a Biml Column tag for each, setting the SourceColumn attribute to the keyCols.Name value and the TargetColumn attribute to the value found in the Biml Annotation MappedColumnName using keyCols.GetTag(“MappedColumnName”). The Inputs tag is closed on line 32.
The next portion of the Biml Lookup Transformation is the DirectInput tag. We construct the DirectInput query in a variable named lkupSelect on line 12. The DirectInput open and close tags are on line 33 and we write the contents of the lkupSelect variable into the DirectInput tag on the same line.
The next portion of the Biml Lookup Transformation is the ParameterizedQuery. We construct the Where clause of the ParameterizedQuery in a variable named lkupWhere on line 13. The ParameterizedQuery open and close tags are on line 34 along with the ParameterizedQuery using the lkupSelect variable value to populate the refTable sub-select statement and the lkupWhere variable for the Where clause of the ParameterizedQuery.
The BimlScript Preview Pane in BimlStudio now reflects our latest additions as shown in Figure 15:

Figure 15. Previewing CreatePackages.biml Biml with a Lookup Transformation
Adding a Derived Column Transformation
Let’s next add a Derived Columns Transformation to the CreatePackages.biml file in BimlStudio. Your Biml and BimlScript now appears as shown here (highlighted new syntax):
<#@ template tier="20"#>
<Biml xmlns="http://schemas.varigence.com/biml.xsd">
  <Packages>
    <#
    var sourceConnection = "ContosoSource";
    var targetConnection = "ContosoTarget";
    foreach(var tgtTable in RootNode.Tables.Where(t => t.Connection.Name == targetConnection)) {
      var sourceTable = tgtTable.GetTag("MappedTableName");
      var srcTable = RootNode.Tables[sourceTable];
      var keyCols = srcTable.Columns.Where(c => c.GetTag("IsBusinessKey").ToLower() == "true");
      var mappedKeyColNames = keyCols.Select(c => c.GetTag("MappedColumnName"));
      var lkupSelect = "Select [" + string.Join("],[", mappedKeyColNames) + "] From " + tgtTable.SchemaQualifiedName;
      var lkupWhere = string.Join("] = ?\nAnd [refTable].[", mappedKeyColNames);
        #>
    <Package Name="Load <#=tgtTable.Name#>" ProtectionLevel="EncryptSensitiveWithUserKey">
      <Tasks>
        <Dataflow Name="DFT Load <#=tgtTable.Name#>">
          <Transformations>
            <OleDbSource Name="OLEDBSrc <#=sourceTable#>" ConnectionName="<#=sourceConnection#>">
              <DirectInput><#=srcTable.GetSelectSql()#></DirectInput>
            </OleDbSource>
            <Lookup Name="LkUp Correlate" OleDbConnectionName="<#=targetConnection#>" NoMatchBehavior="RedirectRowsToNoMatchOutput">
              <Parameters>
                <# foreach(var keyCol in keyCols) { #>
                <Parameter SourceColumn="<#=keyCol.Name#>" />
                <# } #>
              </Parameters>
              <Inputs>
                <# foreach(var keyCol in keyCols) { #>
                <Column SourceColumn="<#=keyCol.Name#>" TargetColumn="<#=keyCol.GetTag("MappedColumnName")#>" />
                <# } #>
              </Inputs>
              <DirectInput><#=lkupSelect#></DirectInput>
              <ParameterizedQuery>select * from (<#=lkupSelect#>) [refTable] where [refTable].[<#=lkupWhere#> = ?</ParameterizedQuery>
            </Lookup>
            <DerivedColumns Name="DER ETL Instrumentation">
              <InputPath OutputPathName="LkUp Correlate.NoMatch" />
              <Columns>
                <Column Name="ETLLoadID" DataType="Int32">(DT_I4)@[System::ServerExecutionID]</Column>
                <Column Name="LoadDate" DataType="Date">@[System::StartTime]</Column>
              </Columns>
            </DerivedColumns>
          </Transformations>
        </Dataflow>
      </Tasks>
    </Package>
    <# } #>
  </Packages>
</Biml>
In BimlStudio, our Biml and BimlScript now appear as shown in Figure 16:

Figure 16. Viewing CreatePackages.biml with a Derived Columns Transformation
Our newly-added Biml and BimlScript starts and ends on lines 36 and 42 with Biml Derived Columns Transformation open and close tags. As with the Lookup Transformation, we chose a static name for Derived Columns Transformation, “DER ETL Instrumentation.” All Biml in the Derived Columns Transformation is hard-coded in our example. Two columns are added to our Data Flow:
- ETLLoadID – derived from the value of the System::ServerExecutionID SSIS variable, converted from an 8-byte integer to a 4-byte integer (short-sighted we know – the better solution is to update the ETLLoadID column in the target table to bigint).
- LoadDate – derived from the System::StartTime SSIS variable.
The BimlScript Preview Pane in BimlStudio now reflects our latest additions as shown in Figure 17:

Figure 17. Previewing CreatePackages.biml Biml with a Derived Columns Transformation
Adding an Ole DB Destination Adapter
Next, let’s next add an OLE DB Destination adapter to the CreatePackages.biml file in BimlStudio. Your Biml and BimlScript now appears as shown here (highlighted new syntax):
<#@ template tier="20"#>
<Biml xmlns="http://schemas.varigence.com/biml.xsd">
  <Packages>
    <#
    var sourceConnection = "ContosoSource";
    var targetConnection = "ContosoTarget";
    foreach(var tgtTable in RootNode.Tables.Where(t => t.Connection.Name == targetConnection)) {
      var sourceTable = tgtTable.GetTag("MappedTableName");
      var srcTable = RootNode.Tables[sourceTable];
      var keyCols = srcTable.Columns.Where(c => c.GetTag("IsBusinessKey").ToLower() == "true");
      var mappedKeyColNames = keyCols.Select(c => c.GetTag("MappedColumnName"));
      var lkupSelect = "Select [" + string.Join("],[", mappedKeyColNames) + "] From " + tgtTable.SchemaQualifiedName;
      var lkupWhere = string.Join("] = ?\nAnd [refTable].[", mappedKeyColNames);
        #>
    <Package Name="Load <#=tgtTable.Name#>" ProtectionLevel="EncryptSensitiveWithUserKey">
      <Tasks>
        <Dataflow Name="DFT Load <#=tgtTable.Name#>">
          <Transformations>
            <OleDbSource Name="OLEDBSrc <#=sourceTable#>" ConnectionName="<#=sourceConnection#>">
              <DirectInput><#=srcTable.GetSelectSql()#></DirectInput>
            </OleDbSource>
            <Lookup Name="LkUp Correlate" OleDbConnectionName="<#=targetConnection#>" NoMatchBehavior="RedirectRowsToNoMatchOutput">
              <Parameters>
                <# foreach(var keyCol in keyCols) { #>
                <Parameter SourceColumn="<#=keyCol.Name#>" />
                <# } #>
              </Parameters>
              <Inputs>
                <# foreach(var keyCol in keyCols) { #>
                <Column SourceColumn="<#=keyCol.Name#>" TargetColumn="<#=keyCol.GetTag("MappedColumnName")#>" />
                <# } #>
              </Inputs>
              <DirectInput><#=lkupSelect#></DirectInput>
              <ParameterizedQuery>select * from (<#=lkupSelect#>) [refTable] where [refTable].[<#=lkupWhere#> = ?</ParameterizedQuery>
            </Lookup>
            <DerivedColumns Name="DER ETL Instrumentation">
              <InputPath OutputPathName="LkUp Correlate.NoMatch" />
              <Columns>
                <Column Name="ETLLoadID" DataType="Int32">(DT_I4)@[System::ServerExecutionID]</Column>
                <Column Name="LoadDate" DataType="Date">@[System::StartTime]</Column>
              </Columns>
            </DerivedColumns>
            <OleDbDestination Name="OLEDBDest <#=tgtTable.Name#>" ConnectionName="<#=targetConnection#>">
              <Columns>
                <# foreach(var c in srcTable.Columns) { #>
                <Column SourceColumn="<#=c.Name#>" TargetColumn="<#=c.GetTag("MappedColumnName")#>" />
                <# } #>
              </Columns>
              <ExternalTableOutput Table="<#=tgtTable.SchemaQualifiedName#>" />
            </OleDbDestination>
          </Transformations>
        </Dataflow>
      </Tasks>
    </Package>
    <# } #>
  </Packages>
</Biml>
In BimlStudio, our Biml and BimlScript now appear as shown in Figure 18:

Figure 18. Viewing CreatePackages.biml with an OLE DB Destination
Our newly-added Biml and BimlScript starts and ends on lines 43 and 50 with Biml OLE DB Destination adapter open and close tags. On line 43 we define the Name attribute as “OLEDBDest <target table name>” and the ConnectionName attribute is set to targetConnection. The Biml Columns open and close tags are found on lines 44 and 48, respectively. On line 45, we start a foreach loop to enumerate the srcTable.Columns collection. On line 46, we use attributes of the srcTable.Columns collection and Biml Annotations to build the individual Biml Column tags for the OLE DB Destination adapter. On line 49 we configure the Biml ExternalTableOutput tag, aiming the OLE DB Destination at the SchemaQualifiedName property of the target table.
The BimlScript Preview Pane in BimlStudio now reflects our latest additions as shown in Figure 19:

Figure 19. Previewing CreatePackages.biml Biml with an OLE DB Destination
Testing the CreatePackages.biml File
We moved to BimlStudio so we could preview the progress of our Biml as we built up the CreatePackages.biml file. Let’s copy the contents of the CreatePackages.biml file from BimlStudio and paste them into our BimlExpress solution in SSDT.
Save the Chapter7 project and then multi-select the CreatePackages.biml and LoadBimlRelationalHierarchy.biml files in Solution Explorer. Right-click the selected files and click Generate SSIS Packages as shown in Figure 20:

Figure 20. Generating SSIS Packages
If all goes as planned you should see an SSIS Package named Load DimChannel.dtsx as shown in Figure 21:

Figure 21. The Load DimChannel.dtsx SSIS Package
If you open the Load DimChannel.dtsx SSIS Package, view the Data Flow Task, and execute the SSIS Package in the debugger. The package should execute and succeed as shown in Figure 22:

Figure 22. Execution Success!
In this section we read metadata from the Biml Relational Hierarchy to build an SSIS Package that loads new rows into the ContosoRetailDW.dbo.DimChannel table. In the end, we built a single SSIS Package. Only one.
In the next section we see more value in our custom Biml Framework solution by adding metadata for a second table.
Load Currency Metadata
In the last section we completed the Biml and BimlScript required to build a single SSIS Package… or did we? Actually, we built a Biml Framework that builds SSIS Packages from any metadata we choose to load into the BRMetadata database. Let’s test this assertion.
Just Add Metadata…
If we look at the metadata currently stored in the BRMetadata database, we see Connections, Databases, and Schemas already present for loading the ContosoOLTP.dbo.Currency table to the ContosoRetailDW.dbo.DimCurrency table. We need only add Tables, Columns, and Mappings metadata.
To add metadata for the Currency and DimCurrency tables, execute the following Transact-SQL statement in the BRMetadata database:
Insert Into [di].[Tables]
(SchemaID
,TableName)
Values
 ((Select SchemaID From [di].[Schemas] Where DatabaseID = (Select DatabaseID From [di].[Databases] Where DatabaseName = 'ContosoOLTP'))
 ,'Currency')
,((Select SchemaID From [di].[Schemas] Where DatabaseID = (Select DatabaseID From [di].[Databases] Where DatabaseName = 'ContosoRetailDW'))
 ,'DimCurrency')
To add metadata for the columns in the Currency and DimCurrency tables, execute the following Transact-SQL statement in the BRMetadata database:
Insert Into [di].[Columns]
(TableID
,ColumnName
,DataType
,[Length]
,IsNullable
,IsIdentity
)
Values
 ((Select TableID From [di].[Tables] Where TableName = 'Currency')
 ,'CurrencyLabel', 'String', 10, 0, 0)
,((Select TableID From [di].[Tables] Where TableName = 'Currency')
 ,'CurrencyName', 'String', 20, 0, 0)
,((Select TableID From [di].[Tables] Where TableName = 'Currency')
 ,'CurrencyDescription', 'String', 50, 0, 0)
,((Select TableID From [di].[Tables] Where TableName = 'Currency')
 ,'UpdateDate', 'DateTime', 0, 1, 0)
,((Select TableID From [di].[Tables] Where TableName = 'DimCurrency')
 ,'CurrencyLabel', 'String', 100, 0, 0)
,((Select TableID From [di].[Tables] Where TableName = 'DimCurrency')
 ,'CurrencyName', 'String', 20, 0, 0)
,((Select TableID From [di].[Tables] Where TableName = 'DimCurrency')
 ,'CurrencyDescription', 'String', 50, 0, 0)
,((Select TableID From [di].[Tables] Where TableName = 'DimCurrency')
 ,'UpdateDate', 'DateTime', 0, 1, 0)
To add metadata for the column mappings in the Currency and DimCurrency tables, execute the following Transact-SQL statement in the BRMetadata database:
Insert Into [di].[Mappings]
(SourceColumnID
,TargetColumnID
,IsBusinessKey)
Values
 (9, 13, 1)
,(10, 14, 0)
,(11, 15, 0)
,(12, 16, 0)
Once this metadata has been loaded, return to the Chapter7 SSIS project in SSDT.
Regenerate the SSIS Packages by multi-selecting the LoadBimlRelationalHierarchy.biml and CreatePackages.biml files, right-clicking the selection, and clicking Generate SSIS Packages.
If all goes as planned, you will see a dialog that warns you the code is attempting to overwrite the Load DimChannel.dtsx package, as shown in Figure 23:

Figure 23. Confirm Load DimChannel.dtsx Overwrite
Click the Commit button to overwrite the Load DimChannel.dtsx SSIS Package. A second or so later you should see the Load DimCurrency.dtsx SSIS Package appear in Solution Explorer as shown in Figure 24:

Figure 24. The Load DimCurrency.dtsx SSIS Package
As before, let’s open the Load DimCurrency.dtsx SSIS Package and execute it in the SSDT debugger. It should succeed as shown in Figure 25:

Figure 25. Success!
What does this test tell us? We can build SSIS Packages using this new-rows-only design pattern by simply supplying Connections, Databases, Schemas, Tables, Columns, and Mappings metadata to the proper tables in the BRMetadata database.
Conclusion
Business Intelligence Markup Language (Biml) often uses metadata to source data-related objects. In these articles we built a relatively simple custom Biml metadata-driven framework. Our solution consisted of a database containing metadata and two Biml files that read and responded to that metadata.