

It is not necessary to know the C# universe in order to write valuable C# script tasks. Keep in mind that it is being used as a scripting language, not a full-fledged application development language. The ability to perform the following basic operations will allow you to do quite a lot.
- Create a C# script task
- Create dialog boxes for data output
- Access SSIS variables
- Parse strings with the split function
- Create and loop through list arrays
- Read/write ASCII files
- Copy, move and delete files
- Capture a listing of specified files in a subdirectory
- Email a file
- Create a database connection to enable C# to talk to SQL Server
- Execute T-SQL queries and stored procedures and capture any results
The purpose of this article is to provide easily-understood example C# code of the above tasks for SSIS package developers who know a programming language, but are unfamiliar with C#.
Lesson 1: Create an SSIS package with a C# script task
Open Business Intelligence Development Studio, click the "Create:" link, select "Integration Services Project," type the name of the project in the "Name:" text box and click the "OK" button.
A default SSIS package named "Package" will have been created. Double-click on the "Script Task" control flow item to add a script task to the package.

Double-click on the Script Task and select "Microsoft Visual Basic 2008" from the Script Language drop-down list, then click on the "Edit Script" button.

At this point you have created a script task template ready to accept your C# code.

Lesson 2: Create an output dialog box
Replace the "// TODO: Add your code here" text in the Main procedure with the follwing three statements.
string message = "This variable holds the dialog box message."; string caption = "This variable holds the dialog box title."; DialogResult button = MessageBox.Show(message, caption, MessageBoxButtons.OK);("scriptmain",> (false)>
Save and execute the package to display the following dialog box.

Among other uses, the output dialog box provides the ability to display the contents of variables while developing a package. Development Studio provides means for doing the same thing, but a popup is a quick and easy way of doing it in your code.
Lesson 3: Access an SSIS global variable
Add a global variable to the package by clicking the "Add Variable" button of the variables panel.
Change the name of the variable to "TestVariable," its data type to "String," and it's value to "InitialValue."

Double-click on the Script Task component to bring up the script task editor.

Click on the "ReadWriteVariables" button to bring up the "Select Variables" window.

Check the box in the "User:TestVariable" line and click the "OK" button.

The script task now has read/write access to the TestVariable. Click the "OK" button to end the variable configuration session.
Replace the C# script task code in the Main procedure from the previous lesson with the following code, then save and execute it.
string temp1 = null;
string temp2 = null;
temp1 = (string)Dts.Variables["TestVariable"].Value;
temp2 = "New Value";
DialogResult button = MessageBox.Show("The current value of the SSIS global variable 'TestVariable' is '" + temp1 + ".'\r\n \r\n The value will be changed to '" + temp2 + ".'");
Dts.Variables["TestVariable"].Value = temp2.ToString();
button = MessageBox.Show("The value of SSIS global variable 'TestVariable' has been changed to '" + (string)Dts.Variables["TestVariable"].Value + ".'");
The current value of 'TestVariable' is read by this statement.
temp1 = (string)Dts.Variables["TestVariable"].Value;The first dialog box displays the current value of 'TestVariable' and the value to which it will be changed.
The new value of 'TestVariable' is set by this statement.
Dts.Variables["TestVariable"].Value = temp2.ToString();The second dialog box confirms that the value of 'TestVariable' has been changed.

Being able to read and write global SSIS variables enables transfer of information between SSIS package components.
Lesson 4: Parse a string with the Split() function
In order to transfer data from an ASCII file to a table, each line of the file must be parsed into individual fields. A file that has the fields separated by commas (comma-separated values, or CSV) can be parsed with the C# Split() function.
Here is an example of a line being parsed into individual values with the Split() function.
     string line = "Blow,Joe,1234 Main Street,Anywhere,USA";
     string[] value = line.Split(',');
At this point, value[0] contains "Blow", value[1] contains "Joe", value[2] contains "1234 Main Street", value[3] contains "Anywhere", and value[4] contains "USA."
Replace the C# script task code in the Main procedure from the previous lesson with the following code, then save and execute it.
string line = "Blow,Joe,1234 Main Street,Anywhere,USA";
string[] value = line.Split(',');
DialogResult button = MessageBox.Show(value[0], "First Value", MessageBoxButtons.OK);
button = MessageBox.Show(value[1], "Second Value", MessageBoxButtons.OK);
button = MessageBox.Show(value[2], "Third Value", MessageBoxButtons.OK);
button = MessageBox.Show(value[3], "Fourth Value", MessageBoxButtons.OK);
button = MessageBox.Show(value[4], "Fifth Value", MessageBoxButtons.OK);The output dialog boxes confirm the content of the value[] array.


Lesson 5: Create and loop through an array list
An array list is an object that can store a list of values in order and release them in the same order.
Replace the C# script task code in the Main procedure from the previous lesson with the following code, then save and execute it. (Add using System.Collections; to the namespace listing.)
//using System.Collections; (Add to the namespace listing)
ArrayList MyList = new ArrayList();
MyList.Add("Apple");
MyList.Add("Orange");
MyList.Add("Banana");
MyList.Add("Peach");
MyList.Add("Cherry");
int i = 0;
string value = null;
foreach (string value_loopVariable in MyList)
{
value = value_loopVariable;
DialogResult button = MessageBox.Show(value.ToString(), "ArrayList Value " + i.ToString(), MessageBoxButtons.OK);
i += 1;
}This code loads five values into an ArrayList named MyList.
     Dim MyList As New ArrayList
     MyList.Add("Apple")
     MyList.Add("Orange")
     MyList.Add("Banana")
     MyList.Add("Peach")
     MyList.Add("Cherry")
This code loops through the MyList ArrayList and displays the list values in sequence.
foreach (string value_loopVariable in MyList)
{
     value = value_loopVariable;
     DialogResult button = MessageBox.Show(value.ToString(), "ArrayList Value " + i.ToString(), MessageBoxButtons.OK);
     i += 1;
}
The output dialog boxes confirm the values contained by the array list.


Lesson 6: Write an ASCII file
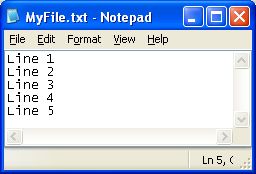
This lesson uses a StreamWriter object to create an empty ASCII file with the CreateText method and write five lines of text to the file.
Replace the C# script task code in the Main procedure from the previous lesson with the following code, then save and execute it.
System.IO.StreamWriter Writer = null;
Writer = System.IO.File.CreateText("C:\\MyFile.txt");
Writer.WriteLine("Line 1");
Writer.WriteLine("Line 2");
Writer.WriteLine("Line 3");
Writer.WriteLine("Line 4");
Writer.WriteLine("Line 5");
Writer.Close();This code creates the empty text file C:\MyFile.txt.
Writer = System.IO.File.CreateText("C:\\MyFile.txt");This code writes a line of text to the file.
Writer.WriteLine("Line 1")Open a file manager window and find the "C:\MyFile.txt" ASCII file you just created.

Double-Click on it to open it in Notepad to confirm that the five lines of text inserted by the StreamWriter are there.
Lesson 7: Read an ASCII file
This lesson creates uses a StreamReader object to read the ASCII file created in the previous lesson.
Replace the C# script task code in the Main procedure from the previous lesson with the following code, then save and execute it.
System.IO.StreamReader Reader = new System.IO.StreamReader("C:\\MyFile.txt");
string line = "";
do
{
line = Reader.ReadLine();
if ((line != null))
{
string number = line.Substring(line.Length-1,1);
DialogResult button = MessageBox.Show(line, "This is Line # " + number, MessageBoxButtons.OK);
}
} while (!(line == null));The resulting popups confirm that it is reading the file we created.


Lesson 8. Move, copy and delete files
Make sure that your C:\ drive has a C:\Temp\ subdirectory. Create one if it does not.
Replace the C# script task code in the Main procedure from the previous lesson with the following code, then save and execute it.
string filename = "MyFile.txt";
System.IO.FileInfo file = new System.IO.FileInfo("C:\\" + filename);
try
{
file.MoveTo("C:\\Temp\\" + filename);
DialogResult button1 = MessageBox.Show("The file has been moved.", "FEEDBACK MESSAGE", MessageBoxButtons.OK);
}
catch (Exception)
{
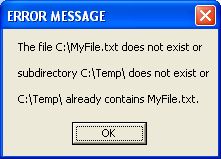
DialogResult button2 = MessageBox.Show("The file C:\\MyFile.txt does not exist or" + Environment.NewLine + Environment.NewLine + "subdirectory C:\\Temp\\ does not exist or" + Environment.NewLine + Environment.NewLine + "C:\\Temp\\ already contains MyFile.txt.", "ERROR MESSAGE", MessageBoxButtons.OK);
}If the file C:\MyFile.txt does not exist, or if the C:\Temp\ subdirectory does not exist, or if you have already moved the file, you will get this message box.
If everything was set up correctly, you will get this message.
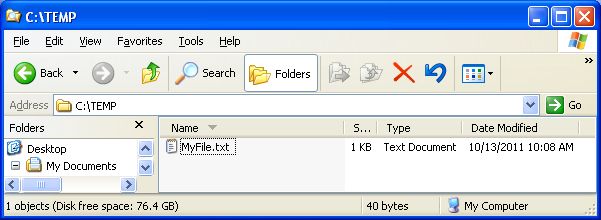
Confirm that MyFile.txt is now in C:\Temp\.
To copy the file instead of moving it, change
file.MoveTo("C:\Temp\" & filename)to
file.CopyTo("C:\Temp\" & filename).To delete the file instead of moving it, change
file.MoveTo("C:\Temp\" & filename)to
file.Delete().Lesson 9: Capture the names of all the matching files in a subdirectory to an array list
Make four copies of the MyFile.txt file in C:\TEMP\ and rename all five files MyFile1.txt, MyFile2.txt, MyFile3.txt, MyFile4.txt and MyFile5.txt as shown below.
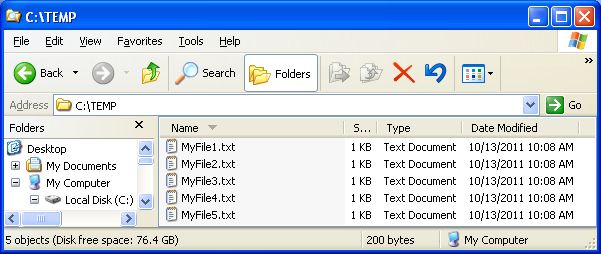
Replace the C# script task code in the Main procedure from the previous lesson with the following code, then save and execute it.
string message = "The following files matching the pattern 'My*' were found in C:\\Temp\\" + Environment.NewLine + Environment.NewLine;
System.IO.DirectoryInfo di = new System.IO.DirectoryInfo("C:\\Temp\\");
System.IO.FileInfo[] fiArr = di.GetFiles("My*");
foreach (System.IO.FileInfo fri in fiArr)
{
     message += di;
     message += fri;
     message += Environment.NewLine;
}
DialogResult button = MessageBox.Show(message, "Message", MessageBoxButtons.OK);
The code
System.IO.DirectoryInfo di = new System.IO.DirectoryInfo("C:\\Temp\\");creates a DirectoryInfo object
The code
System.IO.FileInfo[] fiArr = di.GetFiles("My*");tells the DirectoryInfo object to look for files starting with the two characters "My."
The code
foreach (System.IO.FileInfo fri in fiArr)
{
     message += di;
     message += fri;
     message += Environment.NewLine;
}
loops through the 'fri' values conatined in the file info array.
The popup confirms that only files beginning with "My" were found.
Lesson 10: Email a file
Email requires the addition of two libraries to the Imports statements of the script task.
     using System.Net.Mail;
     using System.Net;
Replace the C# script task code in the Main procedure from the previous lesson with the following code, then save and execute it. (You can't actually run this code if you do not have access to an SMTP server and know its IP address.)
'using System.Net.Mail; (Uncomment and add to the Imports section)
'using System.Net; (Uncomment and add to the Imports section)
string SenderEmail = "SenderAddress@domain.com";
string RecipientEmail = "RecipientAddress@domain.com";
string Subject = "Here is the data";
string Message = "Attached is your data. Have fun.";
string AttachmentPath = "C:\\TEMP\\MyFile1.txt";
string SmtpAddress = "123.123.123.123";
MailMessage myHtmlMessage = default(MailMessage);
SmtpClient mySmtpClient = default(SmtpClient);
myHtmlMessage = new MailMessage(SenderEmail, RecipientEmail, Subject, Message);
myHtmlMessage.Attachments.Add(new Attachment(AttachmentPath));
mySmtpClient = new SmtpClient(SmtpAddress);
mySmtpClient.Credentials = CredentialCache.DefaultNetworkCredentials;
mySmtpClient.Send(myHtmlMessage);
myHtmlMessage.Dispose();
Replace the bogus values in the first six statements with real values, execute the code, and an email with attachment will be sent. To add more attachments, add more myHtmlMessage.Attachments.Add statements and AttachmentPath variables.
Lesson 11: Create a database connection
Create the Customer table by executing the following T-SQL code in SQL Server Management Studio.
BEGIN TRY
DROP TABLE Customer
END TRY
BEGIN CATCH
END CATCH
CREATE TABLE Customer
(
CustomerId INT,
LastName VARCHAR(20),
FirstName VARCHAR(20),
City VARCHAR(20),
State VARCHAR(2),
ZipCode VARCHAR(10),
Phone VARCHAR(12)
)
Browse the SQL Server Managment Studio Object Explorer to confirm that the table was created.

Next, we need an ADO.NET connection to the server and database containing the Customer table so that our SQL Statements can talk to it.
Create an ADO.NET connection to the server/database by right-clicking the "Connection Managers" panel and selecting "New ADO.NET Connection..." from the menu.

Click the "New" button of the "Configure ADO.NET Connection Manager" window.
Select the names of the server and database where you created the Customer table from the drop-down menus and click the "OK" button.

Click the "OK" button to conclude the connection manager configuration session.

You can see that the new ADO.NET connection manager has been added to the package.
Lesson 12: Execute an INSERT query
In order to execute T-SQL statements, the System.Data.SqlClient namespace needs to be added to the using section of the script task.
using System.Data.SqlClient;This statement will insert five records into the Customer table.
     INSERT INTO TestDB.dbo.Customer
          (CustomerId,LastName,FirstName,City,State,ZipCode,Phone)
     VALUES
          (7923,'Blow','Joe','Chicago','IL','12345-9876','555-555-5555'),
          (7924,'Antoinette','Marie','Chicago','IL','84356-8456','777-777-7777'),
          (7925,'Doe','Janet','Houston','TX','99354-9445','333-444-555'),
          (7926,'Alverez','Desmond','Des Moines','IA','79684-8473','222-222-2222'),
          (7927,'Contrary','Mary','Boston','MA','17545-4564','111-111-1111')
Replace the C# script task code in the Main procedure from the previous lesson with the following code, then save and execute it. (Replace the connection manager 'XW4100-9.TestDB' with your connection manager.)
'Replace the connection manager 'XW4100-9.TestDB' with your connection manager.
string mySqlStatement = "INSERT INTO TestDB.dbo.Customer (CustomerId,LastName,FirstName,City,State,ZipCode,Phone) VALUES (7923,'Blow','Joe','Chicago','IL','12345-9876','555-555-5555'),(7924,'Antoinette','Marie','Chicago','IL','84356-8456','777-777-7777'),(7925,'Doe','Janet','Houston','TX','99354-9445','333-444-555'),(7926,'Alverez','Desmond','Des Moines','IA','79684-8473','222-222-2222'),(7927,'Contrary','Mary','Boston','MA','17545-4564','111-111-1111')";
System.Data.SqlClient.SqlConnection myADONETConnection = new SqlConnection();
myADONETConnection = (SqlConnection)(Dts.Connections["XW4100-9.TestDB"].AcquireConnection(Dts.Transaction) as SqlConnection);
System.Data.SqlClient.SqlCommand myCommand = new System.Data.SqlClient.SqlCommand(mySqlStatement, myADONETConnection);
myCommand.ExecuteNonQuery();
myADONETConnection.Close();
Execute a query on the Customer table to confirm that the five records were inserted.

Lesson 13: Execute a SELECT query
Replace the C# script task code in the Main procedure from the previous lesson with the following code, then save and execute it. (Replace the connection manager 'XW4100-9.TestDB' with your connection manager.)
'Replace the connection manager 'XW4100-9.TestDB' with your connection manager.
string mySqlStatement = "SELECT CustomerId,LastName,FirstName,City,State,ZipCode,Phone FROM TestDB.dbo.Customer";
System.Data.SqlClient.SqlConnection myADONETConnection = new SqlConnection();
myADONETConnection = (SqlConnection)(Dts.Connections["XW4100-9.TestDB"].AcquireConnection(Dts.Transaction) as SqlConnection);
System.Data.SqlClient.SqlCommand myCommand = new System.Data.SqlClient.SqlCommand(mySqlStatement, myADONETConnection);
SqlDataReader reader = myCommand.ExecuteReader(CommandBehavior.CloseConnection);
string CustId = null;
string LName = null;
string FName = null;
string Municipality = null;
string Region = null;
string Zip = null;
string PhoneNumber = null;
string message = "";

while (reader.Read())
{
     CustId = Convert.ToInt32(reader["CustomerId"]).ToString();
     LName = reader["LastName"].ToString();
     FName = reader["FirstName"].ToString();
     Municipality = reader["City"].ToString();
     Region = reader["State"].ToString();
     Zip = reader["ZipCode"].ToString();
     PhoneNumber = reader["Phone"].ToString();
     message += "Customer ID: " + CustId + Environment.NewLine;
     message += "Last Name: " + LName + Environment.NewLine;
     message += "First Name: " + FName + Environment.NewLine;
     message += "City: " + Municipality + Environment.NewLine;
     message += "State: " + Region + Environment.NewLine;
     message += "Zip Code: " + Zip + Environment.NewLine;
     message += "Phone: " + PhoneNumber + Environment.NewLine;
}
reader.Close();
myADONETConnection.Close();
DialogResult button = MessageBox.Show(message, "Record Detail", MessageBoxButtons.OK);
The output dialog box confirms that the data in the Customer table has been read.

Lesson 14: Execute an UPDATE query
The following code contains the SQL statement
UPDATE TestDB.dbo.Customer SET City = 'Seattle' WHERE City = 'Chicago'which will change the City value from Chicago to Seattle.
Replace the C# script task code in the Main procedure from the previous lesson with the following code, then save and execute it. (Replace the connection manager 'XW4100-9.TestDB' with your connection manager.)
'Replace the connection manager 'XW4100-9.TestDB' with your connection manager.
string mySqlStatement = "UPDATE TestDB.dbo.Customer SET City = 'Seattle' WHERE City = 'Chicago'";
System.Data.SqlClient.SqlConnection myADONETConnection = new SqlConnection();
myADONETConnection = (SqlConnection)(Dts.Connections["XW4100-9.TestDB"].AcquireConnection(Dts.Transaction) as SqlConnection);
System.Data.SqlClient.SqlCommand myCommand = new System.Data.SqlClient.SqlCommand(mySqlStatement, myADONETConnection);
myCommand.ExecuteNonQuery();
myADONETConnection.Close();
Execute a query on the Customer table to confirm that Chicago was changed to Seattle.

Lesson 15: Execute a query as a stored procedure
Placing a C# SQL query in a long string is OK for learning purposes, but not in production environments, because queries can get very large. The solution is to place the query in a stored procedure and execute the stored procedure.
To create the previous select query as a stored procedure, copy this code to a SQL Server Mangament Study query window and execute it.
CREATE PROC SelectCustomer
AS
SELECT
    CustomerId,
    LastName,
    FirstName,
    City,
    State,
    ZipCode,
    Phone
FROM
    TestDB.dbo.Customer
Confirm that the stored procedure was created in SQL Server Management Studio.
Following is the same code as Lesson 14, except that the SELECT query string has been replaced by "EXEC SelectCustomer."
Replace the C# script task code in the Main procedure from the previous lesson with the following code, then save and execute it. (Replace the connection manager 'XW4100-9.TestDB' with your connection manager.)
'Replace the connection manager 'XW4100-9.TestDB' with your connection manager.
string mySqlStatement = "EXEC SelectCustomer";
System.Data.SqlClient.SqlConnection myADONETConnection = new SqlConnection();
myADONETConnection = (SqlConnection)(Dts.Connections["XW4100-9.TestDB"].AcquireConnection(Dts.Transaction) as SqlConnection);
System.Data.SqlClient.SqlCommand myCommand = new System.Data.SqlClient.SqlCommand(mySqlStatement, myADONETConnection);
SqlDataReader reader = myCommand.ExecuteReader(CommandBehavior.CloseConnection);
string CustId = null;
string LName = null;
string FName = null;
string Municipality = null;
string Region = null;
string Zip = null;
string PhoneNumber = null;
string message = "";
while (reader.Read())
{
     CustId = Convert.ToInt32(reader["CustomerId"]).ToString();
     LName = reader["LastName"].ToString();
     FName = reader["FirstName"].ToString();
     Municipality = reader["City"].ToString();
     Region = reader["State"].ToString();
     Zip = reader["ZipCode"].ToString();
     PhoneNumber = reader["Phone"].ToString();
     message += "Customer ID: " + CustId + Environment.NewLine;
     message += "Last Name: " + LName + Environment.NewLine;
     message += "First Name: " + FName + Environment.NewLine;
     message += "City: " + Municipality + Environment.NewLine;
     message += "State: " + Region + Environment.NewLine;
     message += "Zip Code: " + Zip + Environment.NewLine;
     message += "Phone: " + PhoneNumber + Environment.NewLine + Environment.NewLine;
}
reader.Close();
myADONETConnection.Close();
DialogResult button = MessageBox.Show(message, "Record Detail", MessageBoxButtons.OK);
The result with the stored procedure is identical to the result with the query in a string.

Lesson 16: Putting it all together
Execute this T-SQL statement in Microsoft SQL Server Management Studio to create the data for the following demo, which uses most of the tools presented in the previous lessons.
CREATE TABLE [TestDB].[dbo].[SalesReps](
    [RepId] [int] NULL,
    [LastName] [varchar](20) NULL,
    [FirstName] [varchar](20) NULL,
    [Email] [varchar](30) NULL
) ON [PRIMARY]
GO
INSERT INTO [TestDB].[dbo].[SalesReps]
(RepId,LastName,FirstName,Email)
VALUES
(1234,'Smith','Will','smithw@domain.com'),
(1235,'Jones','Indiana','jonesi@domain.com'),
(1236,'Lange','Jessica','langj@domain.com'),
(1237,'Flintstone','Fred','flintstonef@domain.com'),
(1238,'Cowell','Simon','cowells@domain.com')
CREATE TABLE [TestDB].[dbo].[Sales](
    [RepId] [int] NULL,
    [ItemId] [int] NULL,
    [Amount] [numeric](10, 2) NULL
) ON [PRIMARY]
GO
INSERT INTO [TestDB].[dbo].[Sales]
(RepId,ItemId,Amount)
VALUES
(1234,98765,1829.37),
(1234,74829,7345.87),
(1235,85893,9475.72),
(1235,12938,2436.34),
(1236,56465,9456.12),
(1236,74865,3746.99),
(1237,43526,6453.54),
(1237,38464,4985.84),
(1238,64345,8439.66),
(1238,78534,7329.52)
Replace the C# script task code in the Main procedure from the previous lesson with the following code. (Replace the connection manager 'XW4100-9.TestDB' with your connection manager.)
/*
Be sure that the following four namespaces are included in the using section of the script task.
using System.Collections;
using System.Data.SqlClient;
using System.Net;
using System.Net.Mail;
*/ArrayList SalesRepList = new ArrayList();
string mySqlStatement = "SELECT RepId FROM TestDB.dbo.SalesReps";
System.Data.SqlClient.SqlConnection myADONETConnection = new SqlConnection();
myADONETConnection = (SqlConnection)(Dts.Connections["XW4100-9.TestDB"].AcquireConnection(Dts.Transaction) as SqlConnection);
System.Data.SqlClient.SqlCommand myCommand = new System.Data.SqlClient.SqlCommand(mySqlStatement, myADONETConnection);
SqlDataReader reader = myCommand.ExecuteReader(CommandBehavior.CloseConnection);
while (reader.Read())
{
    SalesRepList.Add(reader["RepId"]);
}
reader.Close();
myADONETConnection.Close();
foreach (int Rep_loopVariable in SalesRepList)
{
    ArrayList lines = new ArrayList();
    lines.Add("RepId   Name          ItemId      Amount" + "\r\n\r\n");
    mySqlStatement = "SELECT a.RepId,a.FirstName + ' ' + a.LastName AS Name,a.Email,b.ItemId,b.Amount FROM TestDB.dbo.SalesReps a INNER JOIN TestDB.dbo.Sales b ON a.RepId = b.RepId WHERE a.RepId = " + Rep_loopVariable;
    myADONETConnection = new SqlConnection();
    myADONETConnection = (SqlConnection)(Dts.Connections["XW4100-9.TestDB"].AcquireConnection(Dts.Transaction) as SqlConnection);
    myCommand = new System.Data.SqlClient.SqlCommand(mySqlStatement, myADONETConnection);
    reader = myCommand.ExecuteReader(CommandBehavior.CloseConnection);
    while (reader.Read())
    {
        string RepId = Convert.ToString(reader["RepId"]);
        string Name = (string)reader["Name"];
        string Email = (string)reader["Email"];
        string ItemId = Convert.ToString(reader["ItemId"]);
        string Amount = Convert.ToString(reader["Amount"]);
        lines.Add(RepId + "\t" + Name + "\t" + ItemId + "\t" + Amount);
    }
    reader.Close();
    myADONETConnection.Close();
    string file_content = "";
    foreach (string line_loopVariable in lines)
    {
        file_content += line_loopVariable + "\r\n";
    }
    System.IO.StreamWriter Writer = null;
    Writer = System.IO.File.CreateText("C:\\SalesReport" + Rep_loopVariable + ".txt");
    Writer.WriteLine(file_content);
    Writer.Close();
    string SenderEmail = "sender@domain.com";
    string RecipientEmail = email;
    string Subject = "Sales Report";
    string Message = "Attached is your sales report.";
    string AttachmentPath = "C:\\SalesReport" + Rep_loopVariable + ".txt";
    string SmtpAddress = "123.123.123.123";
    MailMessage myHtmlMessage = default(MailMessage);
    SmtpClient mySmtpClient = default(SmtpClient);
    myHtmlMessage = new MailMessage(SenderEmail, RecipientEmail, Subject, Message);
    myHtmlMessage.Attachments.Add(new Attachment(AttachmentPath));
    mySmtpClient = new SmtpClient(SmtpAddress);
    mySmtpClient.Credentials = CredentialCache.DefaultNetworkCredentials;
    mySmtpClient.Send(myHtmlMessage);
    myHtmlMessage.Dispose();
}
foreach (int Rep_loopVariable in SalesRepList)
{
    System.IO.FileInfo file = new System.IO.FileInfo("C:\\SalesReport" + Rep_loopVariable + ".txt");
    file.Delete();
}
The demo code reads all the RepIds in the SalesReps table into an ArrayList. It then loops through the array list and joins the SalesReps table with the Sales table for each RepId. It creates an ASCII file report for each representative, then emails that report as an attachement to the representative. After the RepId ArrayList finishes, it is looped through again to delete the ASCII files created for each representative.
If you want to make the demo actually work, you will have to replace the sender email address and the email addresses in the SalesReps table with real email addresses that you can acces, and enter a valid SMTP IP address.
Conclusion
The basic programming tools presented in this article can enable SSIS package developers familiar with one or more programming languages but not with C# to write useful SSIS script tasks almost immediately.
For another example of what can be done with these tools, see my previous SQL Server Central article Copy and Paste SSIS Execution Monitoring with Failure-Alert Email. This package is written in VB.NET, but the tools are exactly the same.