

Introduction
This is the third part of a series of articles presenting SQL SERVER CE, the new light-weight database engine released by Microsoft recently. In the last two articles we have had a basic overview of the product, its capabilities and functionalities. You can find the previous articles in this series here:
- Part I - An Introduction to SQL Server Everywhere
- Part II - A Closer look at SQL Server Compact Edition
In this session we will start working with SQLCE 3.5 Beta, officially named "Microsoft SQL Server Compact 3.5 for Windows Desktop Beta 2". You can download and install the product from here. The setup is just 1.8 MB and is one of the easiest setup I have ever seen. You can complete the setup in a few seconds and two-three mouse clicks.
SQLCE 3.5 Beta supports side-by-side installation with the previous versions. So if you have version 3.1 installed already, it is not a problem. Under default settings, the installer will install the binaries at C:\Program Files\Microsoft SQL Server Compact Edition\v3.5. If you look at the installed folder, you will see that we have the same set of DLLs but renamed with a "35" at the end, which indicates version 3.5.
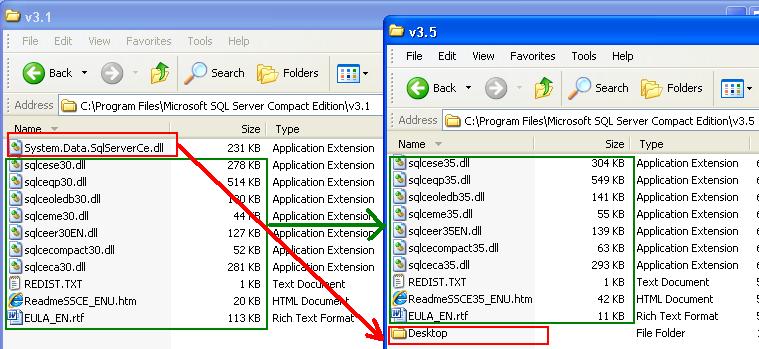
In the previous version we had all DLLs suffixed with "30". One additional difference that you might note is that the DLL System.Data.SqlServerCe.dll is moved to the folder Desktop. The total size of all the DLLs of version 3.5 Beta is 1.75 where as the previous version was 1.61. Not a big change though.
Create a Database
The focus of this article is to get started with SQLCE 3.5 Beta. Let us start by creating a Database. There are different ways to create a database. Let us first look into SQL Server Management Studio and see how we can create a new database. Open SQL Server Management Studio and select SQL Server Mobile as Server Type.

If you are using the Management Studio of KATMAI, you will see SQL Server Compact Edition, instead of SQL Server Mobile.

Let us now go ahead and create a database named Employee. The default extension of an SQLCE database is sdf. However, you can change it to any extension that you would like. An SQLCE database has only data and no code. Hence
the database will work even if you change the extension to something different.
The other versions of SQLSERVER does not allow to change the extension
of the database file. The data files those versions cannot take any extension other
than ".mdf".
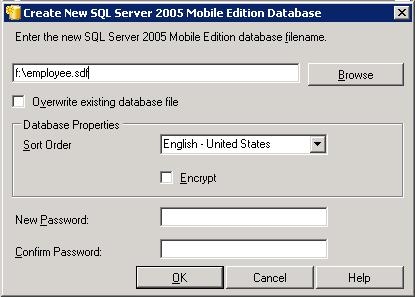
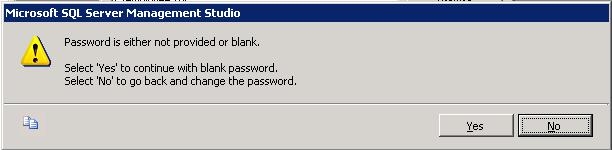
If you wish, you can protect your database file with a password. If you do not assign a password, SQL Server Management Studio will remind you about it with the following dialog. For the purpose of this example, you can click YES and go ahead without a password.
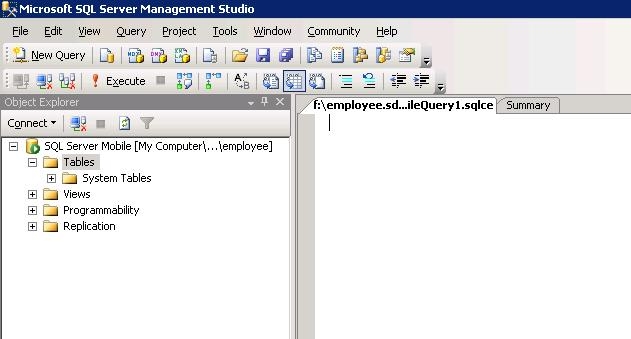
Now, click on the Connect button to establish a connection to the database we just created.

After you connect to the database, you will see the familiar Management Studio interface. Note that the tree view of the Object Explorer shows lesser number of objects than we used to see with other versions of SQL Server. That is true. In the previous sessions, we have seen that SQL CE does not support Views or Stored Procedures. Many of the stuff that you used to see in other versions of SQL Server are not available with SQLCE. We will look at the details on what is missing later on.
Create a table
At this stage, we will create a table that we will use in our examples. From SQL
Server Management Studio, open object explorer and click on New Query. You will see the familiar Query Designer.
Run the following code to create the Employees table. This version of the
Employees table has only a minimum number of columns. We will enhance this schema as we go ahead with more detailed examples.
1 CREATE TABLE Employees (
2 EmployeeID INT IDENTITY(1,1),
3 EmployeeName NVARCHAR(50),
4 EmployeeCode NVARCHAR(10)
5 )
DOT NET application
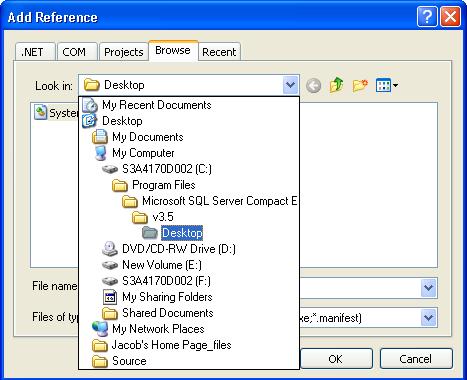
Next, let us try to create a small .NET application which connects to the SQLCE database and inserts a few records. Create a new VB.NET Console application project. Once the project is created, add a reference to the dll "System.Data.SqlServerCe.dll" located at the C:\Program Files\Microsoft SQL Server Compact Edition\v3.5\Desktop folder.

Let us write the code to connect to the SQLCE database that we created previously and insert a new record to the Employees table. Here is the VB.NET code.
1 'Import "SqlServerCe" Namespace
2 Imports System.Data.SqlServerCe
3 Module Module1
4
5 Sub Main()
6 'Create and open the connection
7 Dim con As SqlCeConnection
8 Dim str As String = "Data Source =""F:\employee.sdf"";"
9 con = New SqlCeConnection(str)
10 con.Open()
11
12 'Execute an Insert Query
13 Dim Qry As String
14 Qry = "INSERT INTO Employees(EmployeeName, EmployeeCode) "
15 Qry = Qry + String.Format("VALUES ('{0}','{1}')", "Jacob", "J001")
16 Dim cmd As SqlCeCommand = New SqlCeCommand(Qry, con)
17 cmd.ExecuteNonQuery()
18
19 'Clean up
20 con.Close()
21 con.Dispose()
22 cmd.Dispose()
23 End Sub
24
25 End Module
If you are a C# programmer, you might be more comfortable with C#. Create a C# console
application project and add a reference to "System.Data.SqlServerCe".
Here is the C# version of the above code.
1 using System;
2 using System.Collections.Generic;
3 using System.Text;
4 //Import "SqlServerCe" namespace
5 using System.Data.SqlServerCe;
6
7 namespace ConsoleApplication1
8 {
9 class Program
10 {
11 static void Main(string[] args)
12 {
13 //Create and open the connection
14 SqlCeConnection con;
15 String str = "Data Source =\"F:\\employee.sdf\";";
16 con = new SqlCeConnection(str);
17 con.Open();
18
19 //Execute an Insert Query
20 String Qry;
21 Qry = "INSERT INTO Employees(EmployeeName, EmployeeCode) ";
22 Qry = Qry + String.Format("VALUES ('{0}','{1}')", "Jacob", "J001");
23 SqlCeCommand cmd = new SqlCeCommand(Qry, con);
24 cmd.ExecuteNonQuery();
25
26 //Clean up
27 con.Close();
28 con.Dispose();
29 cmd.Dispose();
30 }
31 }
32 }
Conclusions
I hope this session has helped some of you to get started with SQLCE 3.5.
We have discussed only elementary stuff in this chapter. The examples may not be good enough for a production application. The intention of the examples presented
in this chapter was to get started with SQLCE programming. We will discuss more advanced usages and features of SQLCE in the coming sessions.
