Getting Started with Flyway CLI and any RDBMS
How to get started with Flyway, as simply as possible, using PowerShell. This article provides a practice set of Flyway migration scripts that will build the original pubs database on either SQL Server, PostgreSQL, MySQL, MariaDB or SQLite and then migrate it from version to version, making a series of improvements to its schema design.
If you’re unfamiliar with Flyway command line, it is probably a good idea just to start off simply and get a feel for how it works. Flyway can seem complex at first, but the complex aspects kick in only when you are doing complicated things. It has a comprehensive help system for its various commands and options. Rather than try to learn them all up-front, it will probably pay to experiment, try things out and to get something up and running quickly. The basic operations are simple.
I’ll provide a practice set of SQL migration files that you can use with SQL Server, PostgreSQL, MySQL, MariaDB and SQLite. These scripts will recreate the old Sybase Pubs database, complete with data, on your RDBMS of choice and then make a series of improvements to its design to allow for a much larger data set. I’ll show how to automate database migrations, using Flyway and PowerShell, but you can use Flyway within a DOS or BASH script too. I’ll be using Windows for this demo, but a Linux version would be very similar.
You can find all these scripts in the GitHub project accompanying this article.
I’ve written articles previously that describe running Flyway migrations on each of the individual RDBMSs: SQL Server, PostgreSQL, MySQL/MariaDB and SQLite.
Installing Flyway command-line
If you haven’t installed the Flyway command line on Windows, you can get the latest version direct from Redgate’s Flyway website. There is a free “Flyway Community” edition and a paid “Flyway Teams” edition that is fully supported by Redgate. You download the same package in either case, but the Flyway Teams license activates a lot of additional features.
Flyway Desktop GUI
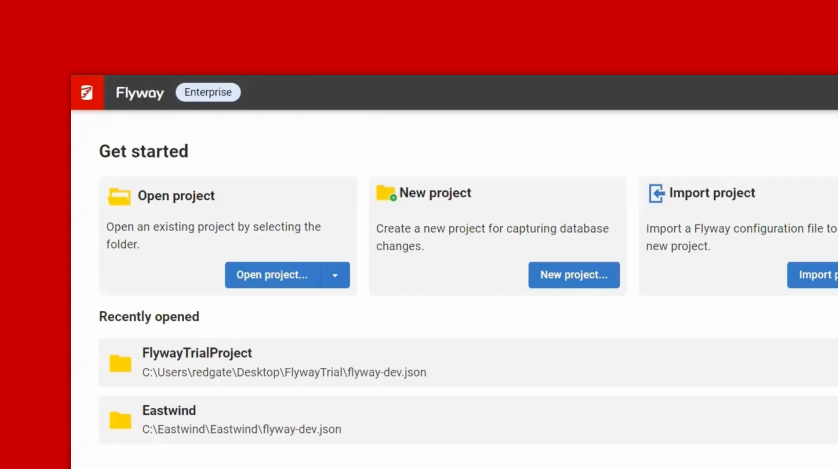
Redgate provides a desktop GUI for Flyway – the functionality of which varies according to the Flyway Edition (Community, Teams or Enterprise). I don’t use the GUI and cover only the Flyway command line tool here and in my other articles. However, Robert Sheldon’s Getting Started with Flyway Desktop gives a good introduction to the Enterprise Edition.
You can also download Flyway command line from Chocolatey, which is my preferred method. Whichever route you take, all you then need to do, in PowerShell, is to set the PATH environment variable to tell the OS where the executable is. You can, alternatively, set an alias, like this:
Running Flyway migrations
Flyway will migrate a database to the version you need by running a series of versioned migration scripts (meaning that each script has a version number). It looks for scripts that must be applied, sorts them, and applies them in version order, directly against the database. It records the details of the migrations applied, so you can always find out the version number of any installed copy of a database. For further details on how Flyway works, see my previous article, Managing database changes using Flyway: an Overview.
Overview of a Flyway project
To use Flyway, it is best to create a directory for all your Flyway projects, with each project stored in a subdirectory. In the following example, I’ve created a directory called FlywayDevelopments, and two subdirectories. The PubsFlyway directory is for the Flyway project. We won’t use the other directory, Resources, in this article, but it stores all the utilities I need to help make scripting Flyway migrations easier and more automated, for all projects.

Whether you’re using the command line, running a batch, or using a scripting language such as PowerShell, Perl or Python, or using BASH, you need to make the project folder your current working directory.
Within the project directory there will be a Flyway configuration file called Flyway.conf. Flyway works most simply if you define all the parameters, settings and preferences of the project within this file. This will include details such as the URL to locate your database server and database, a list of schemas in the database that Flyway will manage, the location of your migration files, and a name and description for the project. The location of the migration files will typically be a Migrations sub-directory of your project folder.
To run a migration project, we make our project directory the current working directory and then command Flyway to migrate the database to the required version. On doing this, Flyway will:
- Read in all the configuration settings – first it reads defaults in the installation directory and the user directory .conf files, then the one in the current working directory and then then looks to see if there are any settings you’ve specified at the command line or in environment variables.
- Read, sort and validate the migrations (using the configuration data to their locations, plus the target database, and so on)
- Perform the migration (or any other action you specify).

Assuming the migration is successful, Flyway enters the new version number for the database, and other details about the migrations, into a special Flyway table in the target database called flyway_schema_history (if a migration fails it will, if it can, roll back any changes and leave the database at the original version).
Running a simple Flyway migration, using a conf file for settings
To get started, we’ll create a blank database (called Pubs, in this example) on a database server that has the RDBMS of our choice. Heidi SQL is a good cross-RDBMS query tool that will happily create the database for you, and execute basic queries, against any of these RDBMSs.
I’m using MariaDB/MySQL, but I’ve provided sample migration files for SQL Server, PostgreSQL and SQLite. I’ve also written Getting started articles that are more specific to some of these database systems. SQLite is so small and cute that it can reside on your workstation, but generally it is a good idea to use a server where possible.
Next, we need to add to our PubsFlyway project folder a Flyway.conf text file containing all the configuration details required for the migration runs.
The Flyway.conf file
When you need to specify configuration options to Flyway, you can use parameters, environment variables, or place them in a configuration file. In this simple example, we’ll put all the details we need in the project-level flyway.conf file, except for the user password which we’ll supply using an environment variable.
When we invoke Flyway, it first reads in ‘global’ configuration from a flyway.conf file located in the Flyway installation directory, and then details from one located in the user home directory, and then the project-level file in the current working directory. Additionally, we can specify configuration details, or override existing settings in the conf files, using command line parameters or environment variables. For more details on handling Flyway configuration options, see A Programmer’s Guide to Flyway Configuration.
Here’s what my project-level flyway.conf (it is a UTF8-encoded text file) looks like for a MariaDB database (you can find sample conf files for various types of database in my GitHub project):
At this point, only the first four parameters are essential, and I describe them briefly below. The others are just there because they will come in useful in later articles, and are examples of placeholders. These allow you to add your own parameters. There are plenty of other settings, which I describe in detail in A Programmer’s Guide to Flyway Configuration.
flyway.url
You’ll need to provide the correct URL for the database system you’re using. The general form of the URLs that you need are listed in the sample Flyway.conf that comes with Flyway when it is installed.
flyway.user
The UserID used to connect to the database (but not the password). If you use the same credentials for every database, you can store them more securely in the user area conf file, where they can’t be seen by other users. However, it’s likely that different credentials will be required for different databases and projects.
flyway.schemas
This is a comma-delimited list, without spaces, of all the schemas you want Flyway to manage for you. In our case, this is ‘dbo,people’. The default schema, which Flyway uses to store its schema history table, must be listed first.
flyway.locations
This is where to find the migration files. You’ll see that I’ve used the relative path to a subfolder in the project, called Migrations. If you choose differently, you’ll need to provide the correct location.
The migration files
The next step is to get the appropriate migration files from my Github site for the project.

You’ll see that for MySQL or MariaDB, I’ve provided 7 sample migration files. Versions 1.1.1. and 1.1.2 create the initial pubs database and fill it with data, and subsequent files then make a series of schema improvements, up to version 1.1.7.
Setting an environment variable
In this simple example, we have one last action. We must, with the console, create an environment variable with the password for the UserID that we identified in the flyway.conf file.
In PowerShell, this would be …
…or in DOS…
We can’t put the password in the project-level .conf file because despite human willpower, mysterious supernatural powers seem to subsequently propel such files with visible passwords into the public domain, to general hilarity. We could, alternatively, put both the UserID and password in the flyway.conf file in the secure user area, but if you’re like me, every credential has a different password and you’ll be needing several.
We’re now set to go!
Running Flyway commands
The first action we’ll attempt is to run the flyway info command. Before we do that, we need to establish the Flyway project directory as the current working directory, and set the environment variable for the password, as discussed earlier. I’m invoking Flyway from PowerShell, in this example:
The info command reads the information currently stored in the flyway_schema_history table. If this works, you’re probably airborne with Flyway. In our case, it lists our 7 migration files, each one currently shown to be in a “pending” state.
+-----------+---------+-----------------------------+------+--------------+---------+----------+
| Category  | Version | Description                 | Type | Installed On | State   | Undoable |
+-----------+---------+-----------------------------+------+--------------+---------+----------+
| Versioned | 1.1.1   | Initial Build               | SQL  |              | Pending | No       |
| Versioned | 1.1.2   | Pubs Original Data          | SQL  |              | Pending | No       |
| Versioned | 1.1.3   | UseNVarcharetc              | SQL  |              | Pending | No       |
| Versioned | 1.1.4   | RenameConstraintsAdd tables | SQL  |              | Pending | No       |
| Versioned | 1.1.5   | Add New Data                | SQL  |              | Pending | No       |
| Versioned | 1.1.6   | Add Tags                    | SQL  |              | Pending | No       |
| Versioned | 1.1.7   | Add Indexes                 | SQL  |              | Pending | No       |
+-----------+---------+-----------------------------+------+--------------+---------+----------+
Then we can simply migrate the database to our required version using the flyway migrate command. If we simply issue flyway migrate, then Flyway will run all 7 scripts to take the database to version 1.1.7.
Instead, to illustrate the process, we’ll execute just the first two files, one after the other, to build the classic Pubs database, complete with its original data. In this case, we start with an empty database, but otherwise we could use the clean command, to remove all existing objects in any of the schemas that Flyway manages (in this example, the dbo and people schemas).
We get the changes in the flyway_schema_history table revealed each time using Flyway info. The final info command should confirm that the database has ended up at the correct target version.
+-----------+---------+------------------------------+--------+---------------------+---------+----------+
| Category  | Version | Description                  | Type   | Installed On        | State   | Undoable |
+-----------+---------+------------------------------+--------+---------------------+---------+----------+
|           |         | << Flyway Schema Creation >> | SCHEMA | 2022-04-21 15:49:10 | Success |          |
| Versioned | 1.1.1   | Initial Build                | SQL    | 2022-04-21 15:49:12 | Success | No       |
| Versioned | 1.1.2   | Pubs Original Data           | SQL    | 2022-04-21 15:49:30 | Success | No       |
| Versioned | 1.1.3   | UseNVarcharetc               | SQL    |                     | Pending | No       |
| Versioned | 1.1.4   | RenameConstraintsAdd tables  | SQL    |                     | Pending | No       |
| Versioned | 1.1.5   | Add New Data                 | SQL    |                     | Pending | No       |
| Versioned | 1.1.6   | Add Tags                     | SQL    |                     | Pending | No       |
| Versioned | 1.1.7   | Add Indexes                  | SQL    |                     | Pending | No       |
+-----------+---------+------------------------------+--------+---------------------+---------+----------+
With Flyway, as we’ve seen, you provide an action, or command, via parameters. Basically, you must tell Flyway in a parameter the action you want to achieve, such as ‘migrate’, ‘clean’, ‘info’, ‘validate’, ‘baseline’ ‘repair’ or ‘undo’ (the last one is available only in the Flyway Teams edition).
Finally, you can add whatever flags you need as parameters. The most important one to know about if anything goes wrong, we can put Flyway into ‘verbose’ mode, and so get a running commentary on what it is doing, by using the -X flag:
Aside from getting the server name or database wrong, the most likely cause of a problem is that either a config file or a migration file has been encoded wrongly (Flyway expects UTF-8).
Avoiding common ‘gotchas’
There are several common stumbling blocks for users who are just getting started with Flyway, and other problems you’ll hit once you start to manage more complex developments. I’ve covered all the main ones I’ve encountered, in my Flyway Gotchas article.
For new users, perhaps the most common source of errors is the file encoding used when generating, editing and saving Flyway migration files. Flyway expects them to be encoded as UTF-8, and you can get ‘checksum’ errors with other encodings. My Flyway Gotchas article demonstrates how to set, or ‘fix’, the file encoding in Flyway, in your RDBMS’s query editor, in Redgate tools, in PowerShell or just using Notepad.
Other common errors caused by Flyway’s case sensitivity (all commands, parameters, and configuration items are case-sensitive), and by confusion with understanding which schemas to allow Flyway to manage.
Running Flyway from PowerShell within a framework
There comes a point in time that you’ll want to run more ambitious projects that generate reports and produce archives of useful scripts and reports. You might, for example, need to generate a database build script for every new version of the database produced by a Flyway migration. You might also find it’s very handy to generate a report of the changes to the database between each successive version.
I’ve provided a PowerShell framework, called Flyway Teamwork, which is designed to demonstrate how we might generate these scripts and reports during Flyway migrations (I use the Flyway Teams engine). I’ve written a series of articles to show how this works. What is the Flyway Teamwork Framework? explains the structure of the framework and gives a demo. Getting an Overview of Changes to a PostgreSQL Database using Flyway shows a basic way to get a build script out of PostgreSQL, for every Flyway migration. Database Development Visibility using Flyway and PowerShell shows the sort of reporting that’s possible.
Auto-generating migration scripts
Flyway Enterprise Edition has the built-in schema comparison tools that means it can provide these sorts of scripting and reporting features out-of-the-box, removing the need to write and maintain them ourselves. Currently Flyway Enterprise will auto-generate scripts and reports for SQL Server, Oracle and PostgreSQL with support for MySQL and other database systems to follow.
Summary
I’m sure I’m not alone in finding that I learn technology much more easily by trying things out. For anyone who wants to, or needs to, become familiar with Flyway quickly, I’ve provided in this article a series of flyway migrations for several different relational database systems. I hope I’ve given you enough to get you started with enough materials to explore ways of using Flyway.


