
An animation in a Unity project is an opportunity to perform many additional actions on top of the animation itself. These actions can be anything the developer desires, including allowing specific user actions or changing variables to your needs. Some time back, Unity’s animation events were demonstrated as a tool for accomplishing some of these goals. They’re great for performing functions at specific points in an animation but not as helpful if there’s something more general you want to do at any point in the animation. Enter Unity State Machine Behaviours, a class of script that works specifically with the Unity Animator system.
Working alongside the Animator, State Machine Behaviours lets you define actions for entering, exiting, and updating various animation states. This means you can have code that runs specifically during an object’s idle state and another script that only executes during the same object’s walking state. Not only does this allow you to perform specific actions during certain states, but it’s also a great way to keep your code organized too. Another great benefit is the ability to reuse these scripts on other state machines, so you don’t have to worry about a script being tied to a single object. As usual, the best way to see the benefits is to see it all in action. Follow along to see how to use these scripts in a project, and by the end, you’ll have a Unity project with a character that performs different actions based on whether it’s in an idle or walking state.
There are many unique assets in this project, so to focus on the code and how it works, a sample project has been created to give you a starting point if you choose to follow along. Additionally, there is a completed version with all the code included to view and modify as you see fit. Links for these projects are listed below. Open the Unity Hub app and click the Add button, find the folder containing the Unity project, and choose Select Folder.
Codeless project: https://github.com/prof-smash/SimpleTalk-StateMachines-Codeless
Complete project: https://github.com/prof-smash/SimpleTalk-StateMachines-Complete
Project overview
First, take a brief look at what’s included in the sample project. Upon opening the project, you should be greeted with a scene with a blue bot character standing on a plane. If you don’t see this, find the SampleScene asset in your Assets window and open it. This blue bot has an animator tied to it that allows playing idle and walking animations. As it walks, it will leave markers on the floor to indicate where it has been. The markers come from the prefab simply named Marker in the Prefabs folder.
Additionally, some text displaying the number of walks the bot has taken is in the upper left corner of the screen. The exact location and appearance of the text may vary depending on your display, so feel free to adjust its position, color, and other properties in the Inspector. Finally, though you can’t see it at the moment, a nav mesh has been set up, which defines the area the bot can walk. If you wish to see this nav mesh, click the Navigation tab in the Inspector area (if you don’t see this tab, go the top menu and choose Window->AI->Navigation), and you should see a blue area in the Scene window that defines the nav mesh. All other assets in the Assets window include the texture for the marker and animations for the bot.
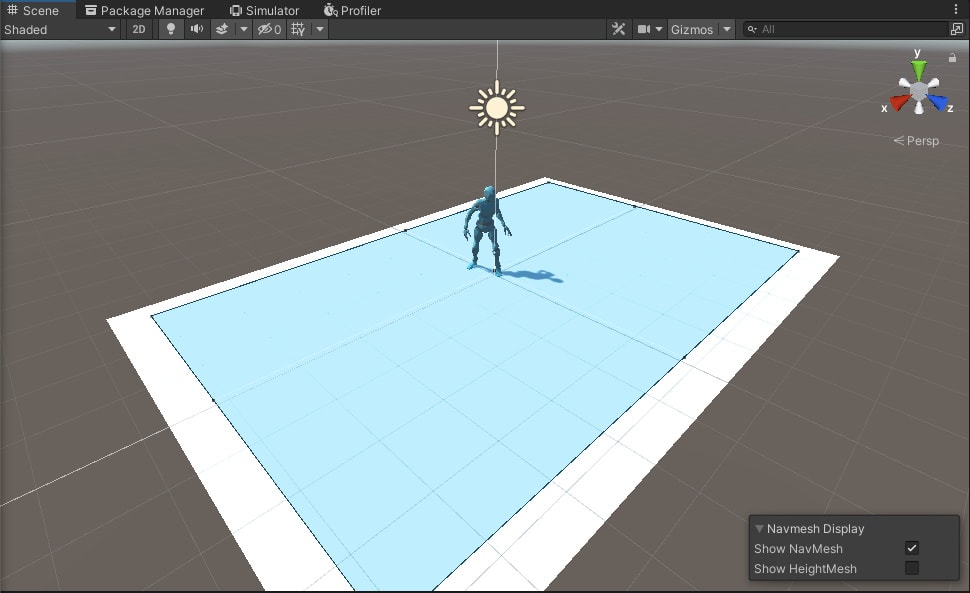
Figure 1: The project scene with the nav mesh shown
Those animations are brought together via the bot_anim_controller asset in the Animations folder. If you select this asset and open the Animator window (found by going to Window->Animation->Animator), you can see the animator immediately launches the bot into the idle state. If you can’t see this right away, you may need to navigate the Animator window using the Alt key plus mouse button to pan the view. The arrows pointing to and from the idle and walk states are transitions, with each given a condition that must be met for the transition to occur. In this case, two booleans named idle and walk are set to control when the bot is in the idle or walk state, respectively. These two states are where the scripts will be attached to give the bot unique behaviours based on the state.
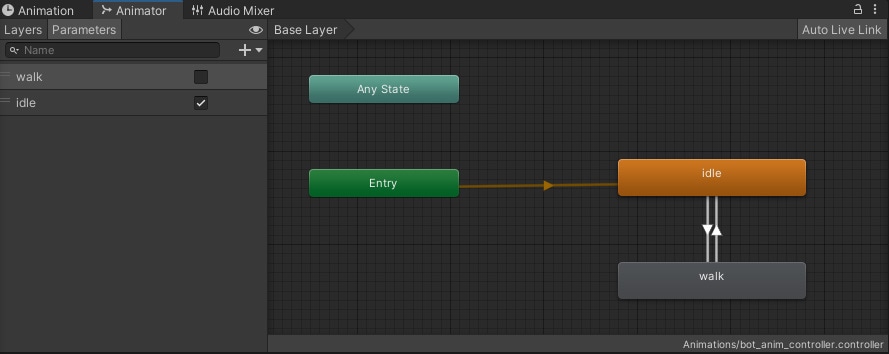
Figure 2: bot_anim_controller, showing animation states, transitions, and booleans
If you click on the idle state, you should see a button in the Inspector window that says Add Behaviour. Click this button, then click New Script, then give the script the name IdleStateBehaviour. The newly created script will be immediately added to the idle state, with the asset itself being placed in the Assets folder. Repeat this process for the walk state, this time calling the script WalkStateBehaviour.
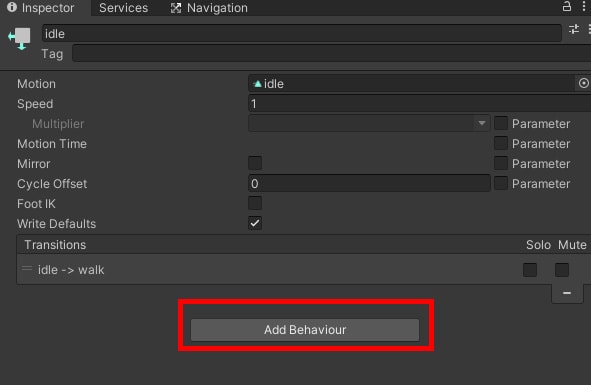
Figure 3: Adding a new state machine behaviour script
By using this specific button to create the script, Unity will know to make this a script that inherits from the StateMachineBehaviour class, so we won’t have to worry about changing that. It also sets up a template for the state machine behaviour script that gives you all the methods you’ll need to code state behaviours. Double click the IdleStateBehaviour script to open it in Visual Studio and set up the first state behaviour.
IdleStateBehaviour code
As promised, the IdleStateBehaviour script is inheriting from StateMachineBehaviour from the start. Additionally, there are five methods, each with brief documentation of how they work. For this project, the focus will be placed on OnStateEnter, OnStateUpdate, and OnStateExit. As the names imply, these methods perform code based on when the bot enters or exits its idle state and is currently in the idle state. But that’s not all! Like the traditional MonoBehaviour scripts Unity users are used to, you can define variables that can be edited in the Unity editor right here in this script. These variables are a good place to start with the coding process. So, just above OnStateEnter, enter the following:
|
1 2 3 4 5 |
[Range(2.0f, 10.0f)] public float waitTime = 5f; public GameObject marker; private float timeTillMove = 5f; private Vector3 stopPosition; |
The first two variables will be for you to decide in the editor, with waitTime defining how much time there is between walks. Next is marker, which will be what the bot places down upon leaving its position. Finally, timeTillMove will be the actual timer that counts down between walks, with the time in question coming from waitTime, and stopPosition is the location the bot stops at, which will be used to place markers.
Moving on to OnStateEnter, you’ll notice that an Animator is set in the method’s parameters. In fact, this is true of all the methods in the script. This will be helpful as it allows you easy access to the bot’s animator and the methods and data associated with it. Let’s put it to use along with some additional code:
|
1 2 3 |
animator.SetBool("walk", false); stopPosition = new Vector3(animator.transform.position.x, 0.01f, animator.transform.position.z); |
Recall the booleans that control when transitions occur in the bot’s animator. When the bot is in its idle state, you wouldn’t want it to start walking in place. To prevent this, set the walk bool in the animator to false the moment the bot enters its idle state. You’ll also go ahead and get its current position for leaving a marker later on when exiting the idle state. The Y value of stopPosition will be set to 0.01 to allow the marker to be slightly above the floor so you can see it. Without this change, the marker will “blend” with the floor and stutter or even be impossible to see.
Let’s move on to OnStateUpdate, which will execute continuously so long as the bot is in its idle state. This method is perfect for counting down the seconds before moving again. To execute this, enter the following:
|
1 2 3 4 5 6 |
timeTillMove -= Time.deltaTime; if (timeTillMove <= 0) { timeTillMove = waitTime; animator.SetBool("walk", true); } |
This code is pretty straightforward. The timeTillMove variable is subtracted until it reaches zero, at which point the timer is reset using waitTime, and the walk bool in the animator is set to true. Notice that the timer will not count down until this state is active again, so there’s no need to worry about it counting down too early.
Finally, let’s implement the code for OnStateExit. It consists of a single line that spawns the marker object into the world at the position recorded in stopPosition.
|
1 |
Instantiate(marker, stopPosition, Quaternion.identity); |
That’s all the code for IdleStateBehaviour. Now it’s time to move on to the code for the bot’s walk state.
WalkStateBehaviour code
Like the IdleStateBehaviour script, this script will keep its focus on OnStateEnter, OnStateUpdate, and OnStateExit. However, the script as a whole will be slightly more involved than IdleStateBehaviour as it will search for objects in the scene, find a random position for the bot, and update statistics. It will also utilize the UnityEngine.UI and UnityEngine.AI namespaces. With that in mind, let’s set up the using statements now.
|
1 2 |
using UnityEngine.UI; using UnityEngine.AI; |
Like before, there are also a few variables to declare before getting into the meat of the code, with one of them being a value you’ll set in the editor.
[Range(2.5f, 7f)]
public float maximumWalkingDistance = 4f;
private Text walkText;
private NavMeshAgent agent;
private int walks = 0;
Of particular note, here are the walkText and agent variables. The walkText variable will be given string data to display in the UI seen earlier in the scene. It will be updated with the values of walks whenever the bot has finished taking its short walk. Meanwhile, the agent variable will contain the Nav Mesh Agent component on the bot object. As you’ll see later on, we get the agent by using GetComponent whenever the bot enters the walk state. Why wouldn’t you just set agent in the editor? This is because scripts inheriting from StateMachineBehaviour do not allow you to pass in gameobject data into the script before runtime, including their components. Because the state machine behaviour lives within the animator asset, as opposed to within the scene, we cannot link objects within the scene to the script. Thus, we work around that by using methods like GameObject.Find or reference the gameobject (and thus its components) where the animator is attached.
Next, the code for OnStateEnter:
animator.SetBool(“idle”, false);
|
1 2 3 4 |
walkText = GameObject.Find("WalksText").GetComponent<Text>(); agent = animator.GetComponent<NavMeshAgent>(); agent.destination = RandomPosition(animator.transform.position, maximumWalkingDistance, -1); |
First, we make sure the bot cannot accidentally go back to its idle animation while walking. Then you find the WalksText object in the scene and tell the script to use that for walkText. You then set up the NavMeshAgent, including its destination. The destination is found using the RandomPosition, a custom method for finding a random point in the Nav Mesh to walk. Now would be an excellent time to create the RandomPosition method.
|
1 2 3 4 5 6 7 8 9 |
Vector3 RandomPosition(Vector3 origin, float distance, int layerMask) { Vector3 randomDirection = Random.insideUnitSphere * distance; randomDirection += origin; NavMeshHit navHit; NavMesh.SamplePosition(randomDirection, out navHit, distance, layerMask); return navHit.position; } |
Returning to the pre-generated methods, OnStateUpdate will be utilized to check how far away the bot is from its destination. If it has made it to its destination, then the bot will simply return to the idle state, and the process repeats.
|
1 2 3 4 5 6 7 |
float dist = agent.remainingDistance; if (dist != Mathf.Infinity && agent.pathStatus == NavMeshPathStatus.PathComplete && agent.remainingDistance <= 0.01f) { animator.SetBool("idle", true); } |
After leaving this state and returning to the idle state, the number of walks taken is incremented by one. walkText is updated to reflect this change. That code will be going in OnStateExit.
|
1 2 |
walks++; walkText.text = "Walks Taken: " + walks.ToString(); |
That ends all the code needed for this project. Be sure to save all scripts, then return to the Unity editor for some final tasks.
Finishing up
There’s not much else that needs to be done to complete the project. If it’s not open already, make sure the Animator window is open, and you have the bot_anim_controller asset selected. Start by clicking on the idle state. Set the time you want the bot to wait before starting its next walk and make sure the script knows where to find the Marker prefab.
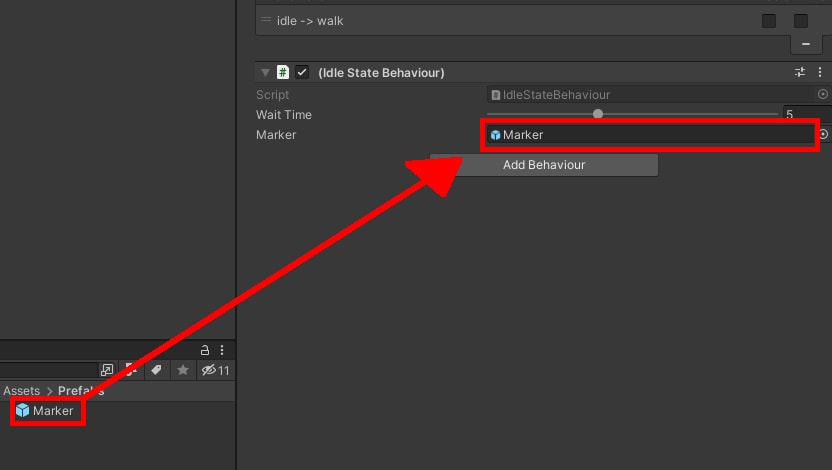
Figure 4: Assigning the marker
Likewise, select the walk state and set your maximum walking distance. If you only want the bot to take short walks, lower the walking distance. For the opposite, raise the Maximum Walking Distance. Once you’ve made your decision, test out the project using the play button at the top. The bot should start going to random spots on the floor, leaving markers along the way, and counting how many walks it has taken. It will continue to do this until you stop running the project.
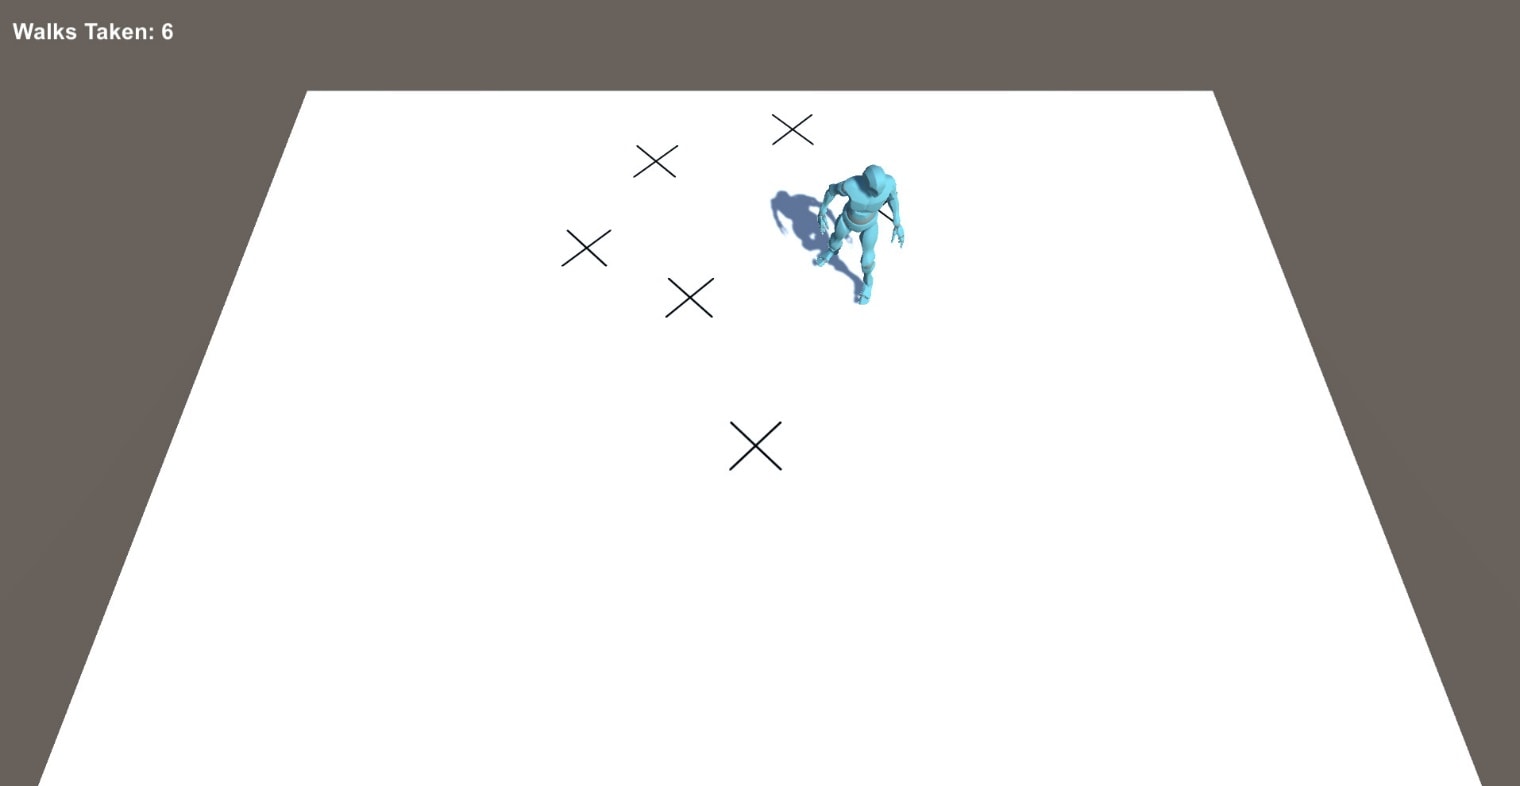
Figure 5: The project in action
Conclusion
As stated before, the beauty of these scripts is that they can be assigned to any animation state. So you can have multiple objects use the code you’ve just written, even if they have different animators powering them. You just need to be mindful of items like animator booleans and any additional states within the animator. Additionally, these can also be used to give an object specific instructions in an organized, easy to access way. Whether it’s for a simple prototype or a large, complex project, state machine behaviours can be a valuable tool to help you achieve the goals of your Unity project.
As stated before, the beauty of these scripts is that they can be assigned to any animation state. So you can have multiple objects use the code you’ve just written, even if they have different animators powering them. You just need to be mindful of items like animator booleans and any additional states within the animator. Additionally, these can also be used to give an object specific instructions in an organized, easy to access way. Whether it’s for a simple prototype or a large, complex project, state machine behaviours can be a valuable tool to help you achieve the goals of your Unity project.