The series so far:
- How to Create an Ubuntu PowerShell Development Environment – Part 1
- How to Create an Ubuntu PowerShell Development Environment – Part 2
- How to Create an Ubuntu PowerShell Development Environment – Part 3
Microsoft has made great effort over the last few years toward multi-platform compatibility. A large part of the IT world runs on Linux. Microsoft recognizes this and has been deploying a lot of their software to now run on the Linux platform. Visual Studio Code, PowerShell, even SQL Server can now run on Linux. As such, it can be beneficial to create your own Linux development environment on your desktop, whether for doing work or just for learning.
While it would be nice to have a computer to install Linux and our other tools directly on, often referred to as a “bare metal” install, most people don’t have extra computers laying around. The solution to this is the use of a virtual machine. In this article, part 1 of 2, I’ll show you how to setup a virtual machine, often referred to as a VM.
Into that VM, you’ll install a Linux distribution, often referred to as a “distro” in the Linux community. It’s important to understand that Linux is the core of the operating system, often called the kernel. Around this kernel people have developed many server and desktop environments. This article will demonstrate use of the most popular ones, Ubuntu, specifically the 19.10 version.
Part 2 of this series will demonstrate how to install PowerShell, Visual Studio Code, and other tools into the Ubuntu VM.
This will create a foundation for a future article, in which you’ll see how to install Docker, then SQL Server into the VM. You’ll then see how to use PowerShell to work with SQL Server as it runs in the Docker container.
VirtualBox
The first thing you need is virtualization software, this is the software that will host and run the virtual machine. Hyper-V is one choice, and if you have it and are comfortable with it, you are welcome to use it for this project.
Hyper-V does require you to have Windows 10 Pro. Many people, especially those at home, may not have the Pro version. For this article then I will be using VirtualBox.
VirtualBox is free, and easy to use. It is also multi-platform, it will run on Windows, Linux, macOS, and Solaris. This article will cover running it on Windows. Do be aware you cannot run VirtualBox and Hyper-V on the same machine, as they both need exclusive access to the same system resources.
You can obtain VirtualBox by going to their website, https://www.virtualbox.org/ and downloading it. Installation is extremely simple, there are almost no options. You can take the defaults for an easy install.
Ubuntu 19.10
After getting VirtualBox installed, you will need a copy of the Ubuntu 19.10 ISO image. The ISO is a file that can be used to install operating systems. ISOs can be written to a USB key or DVD and used to boot a computer, or in this case as a source for VirtualBox.
Getting the ISO is easy, just go to https://ubuntu.com/ . On the front page in the title bar is a Download link. Clicking on it will take you to the downloads page for 19.10, where you will want to download the desktop version of Ubuntu.
From the downloads, simply save the ISO file to your hard drive. Note if you want to experiment with other versions of Ubuntu, simply go to the Downloads link in the upper right and you’ll find other versions you can experiment with.
Creating the Ubuntu Virtual Machine
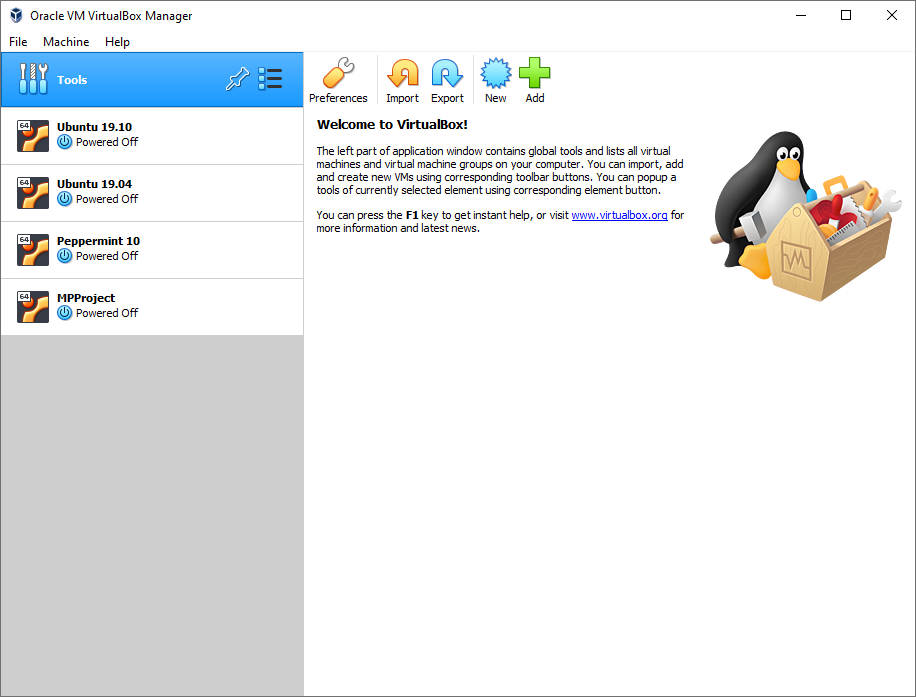
Now you’re ready to take the first step and create the virtual machine. Open VirtualBox, and you’ll see the following screen. In this shot, on the left you will note a list of VMs that I have from other projects, your area will be empty initially but will soon be populated with your own virtual machines.
Setting the VM Name and Type
Start by clicking the big New button in the toolbar to begin the process of creating our VM. When you do, the following dialog in appears. Click Expert Mode to see all the options instead of a wizard.
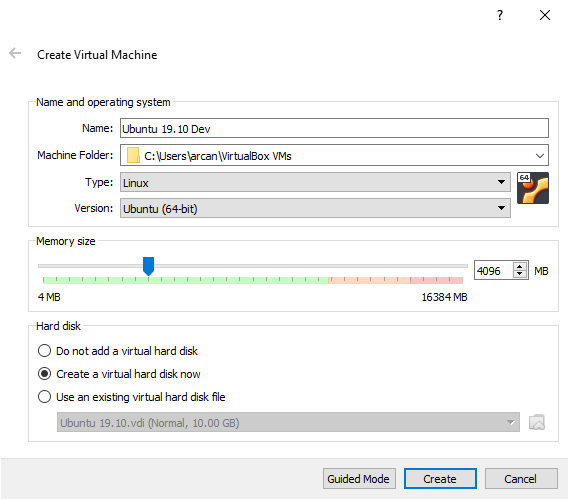
Here you can see I’ve filled out the basic information needed to create the VM. First, I gave it a good name. I took the default for the Machine Folder, that is the path where the virtual machine information will be stored. Note this is for the VM metadata but does not include the location of the virtual hard drive, which will be set in a moment.
I’ve made sure to set the Type to Linux, and the version to Ubuntu (64 bit). The next setting, Memory size, will be somewhat dependent on the computer you are using. Typically for this type of application you want at least 4 gigabytes, or 4096 megabytes, which is what I have set here.
Finally, make sure the Create a virtual hard disk now is selected the click the Create button.
VM Hard Disk Options
On the next screen you are presented with options about the virtual hard drive that will be created. Here is the screen all filled out.
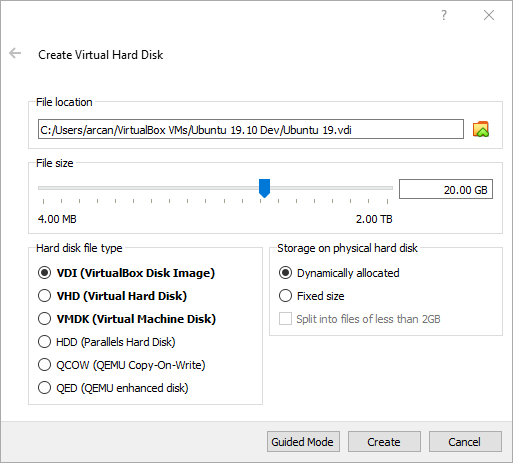
You can store the virtual hard drive in a different location than the rest of the VM’s data. The File location box is used to indicate that location. A helpful hint, often you can get a performance boost by storing your virtual hard drives on a different physical hard drive than the one of the host operating system. Commonly, the operating system running on the computer itself is referred to as the host operating system. Any virtual machines are known as the guest operating system.
Next up is the File size. Because you will be working with SQL Server, you may need extra space, so initially I recommend setting this to 20 GB. You can do so by using the slider bar, or simply typing into the box to the left of the slider.
On the lower left is the file type, and there are multiple choices. VDI is the native type for VirtualBox, and what will be used for this article. However, VirtualBox also supports types may other types from other virtualization software. VHD is the format for Hyper-V, VMDK for VMWare, and so on. Typically, you would not create a full OS drive in another file type, however this capability may be used later to attach files from other virtualization software to read their data.
Finally, on the lower right, you’ll see the Storage on physical hard disk options. With the Dynamically allocated option, VirtualBox will only take as much space as it needs for the drive, up to the maximum indicated in the file size area (in this case, 20 GB). The second option, Fixed size, will create the virtual disk at its maximum size of 20 GB. Fixed size can perform a bit better as it does not need to worry about checking for disk size and expanding on the fly, it also takes up disk space that may not be needed much of the time. For this article go with the dynamic option and click Create.
Setting Additional VM Options
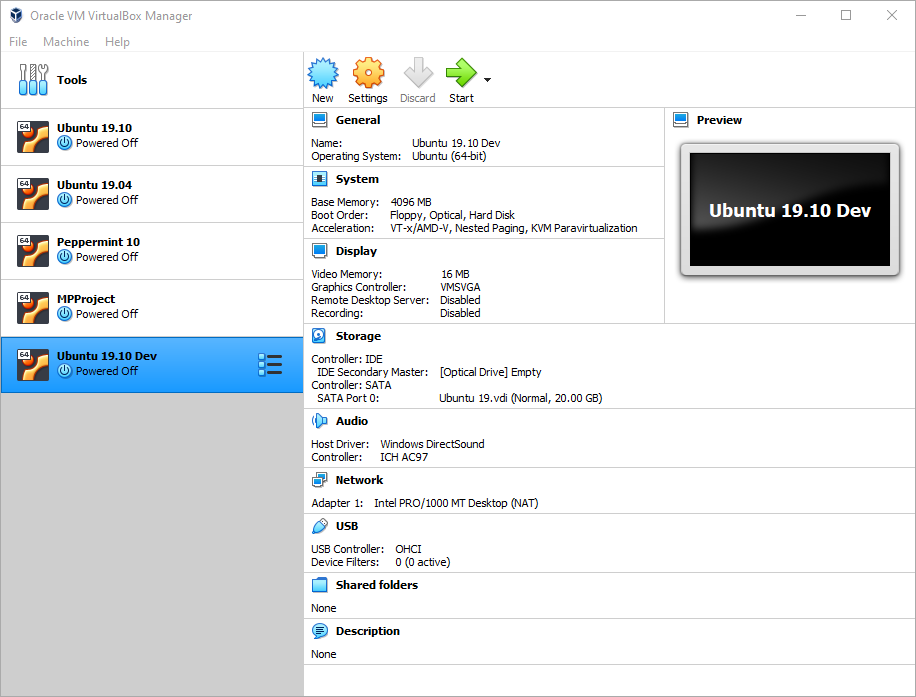
When you create the VM, it now appears in the list on the left. On the right are the machine options.
General Settings
Before you can launch your new VM, there are some settings you need to update. Do note though, if you go into the settings of a running VM many options will be disabled, and this holds true regardless of what virtualization software you are using. You can change the majority of settings only when the VM is shutdown. You won’t have that issue quite yet as you haven’t installed Ubuntu in the VM yet, but it’s something to be aware of for your future use.
Start by clicking on the gold Settings gear icon in the toolbar. As you can see, the dialog that appears allows you to change many options.
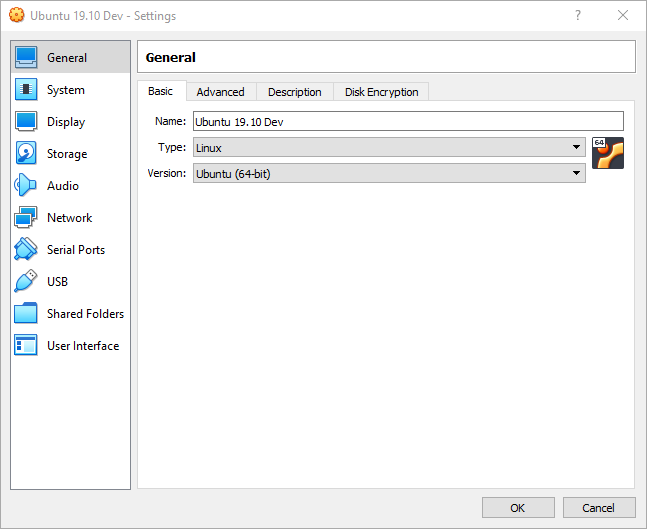
While still on the General settings page, click on the Advanced tab.
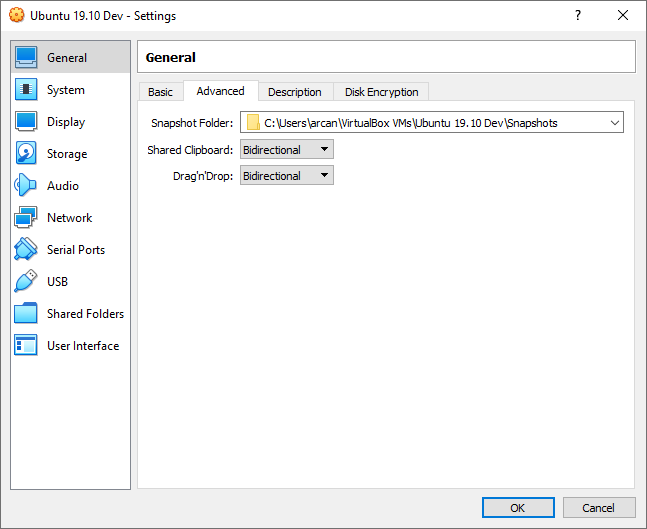
On this tab, change the Shared Clipboard and Drag’n’Drop to Bidirectional, as you see above. This will allow you to cut and paste to and from the virtual machine. Likewise, you can copy files into the VM using drag and drop. This is entirely optional, of course, but will make it much easier to work with the VM. Do note that if you are doing security testing of some type, you will wish to alter these settings to either Disabled, or just allow pasting into the VM by picking Host to Guest. However, this is a simple development box so having bidirectional copy/paste will be fine.
System Settings
Next, click on the System page on the left to bring up the system settings.
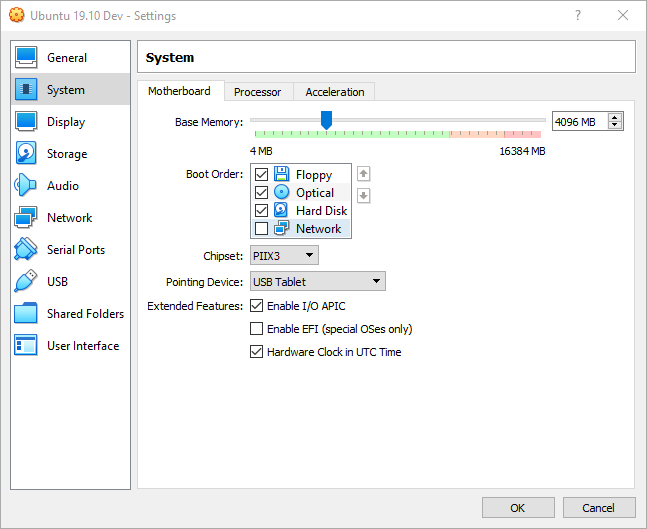
The first tab is the Motherboard; it is on this page where you can change the amount of ram for example. Don’t change anything on this tab, but it very useful to know where to come should you later decide you need to change the amount of ram or any of the other motherboard settings. Take a look at the Processor tab next.
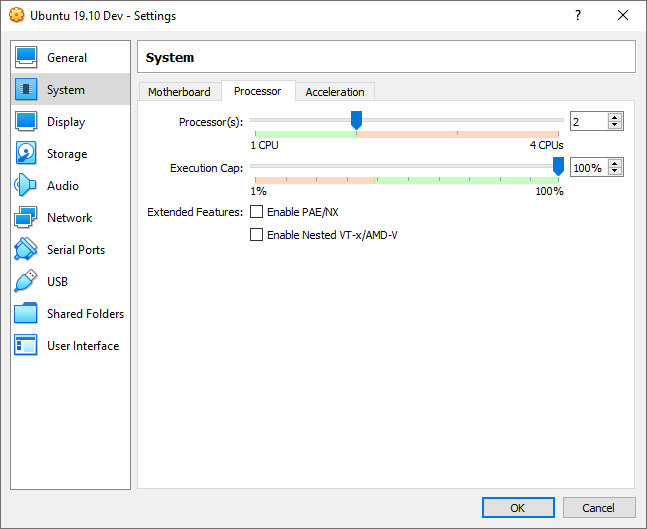
By default, VirtualBox set up this VM with 1 CPU. The computer I’m writing this on has 4 CPUs, so I have opted to increase the CPU count to 2, as you see in the above image. Ultimately this is something you’ll have to determine based on the physical characteristics of your host computer, as well as the demands you’ll be placing on the VM. In my case, I only plan to run one VM at a time, and I won’t be using many resources in the host computer while I am working in the virtual machine.
Now it’s time to move on; click on the Display option on the left.
Display Settings
There are a few changes on the Screen tab you should make here to increase performance.
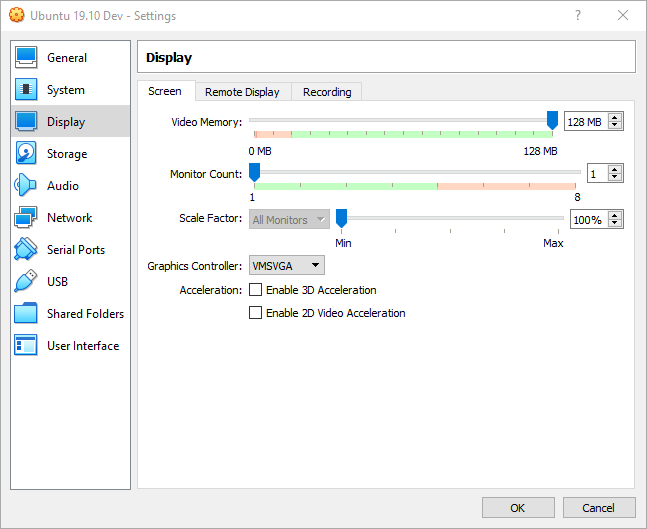
First is the Video Memory. By default, it is at 16MB. I suggest maxing it out to the full 128MB. If you discover later this provides too negative of an impact to your system you can always adjust it to a lower value.
I want to call your attention to the next item, Monitor Count. VirtualBox will let you create multiple virtual monitors, a very helpful utility when you have multiple physical monitors on your host computer. When I first setup a new virtual machine, I always leave this to 1, as you see here. Once I have the VM up and running, I can return here later and add monitors if needed. For example, at home with my laptop hooked to its docking station, I will open the settings and adjust this to 3. Later, when I take my laptop out of the house, I will adjust this back down to 1.
Scaling Factor works just like it does in Windows, it will magnify certain graphical elements in the guest operating system while leaving the resolution alone. I typically leave this set to the default.
The last item of note is the Graphics Controller. We suggest you set to VMSVGA. This setting should allow you to resize the window of your VM, and the VM will then adjust its resolution to fit that of the resized window. However, not all graphics cards respond the same, so you may need to return later and try some of the other settings. Once a virtual machine is created, you can easily go back later and edit things like the graphics controller.
Also be aware some guest operating systems may not support this feature, although the Ubuntu 19.10 used in this article does.
There is one last thing to update, and it is the most important to getting our VM up and running. Click on the Storage icon on the left.
Storage Settings
In order to install the Ubuntu, you need to insert the Ubuntu ISO image into the VM’s virtual CD/DVD drive. It is in this step you will accomplish this.
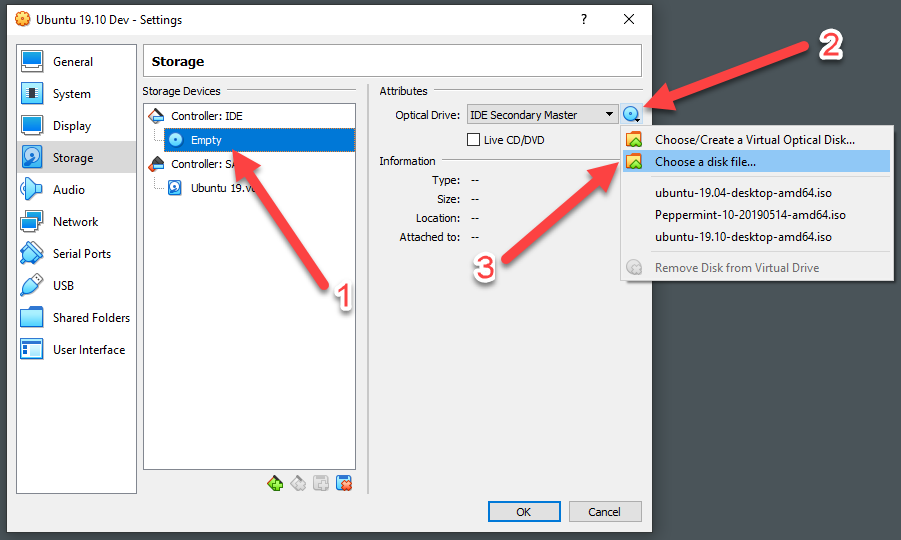
Start by clicking on the Empty label, pointed to by number 1 in the above image.
To the right of the Optical Drive is an icon of a DVD (pointed at by number 2). Click on it to expand the menu.
Now click on Choose a disk file…, indicated by number 3 in the above graphic. Note that if you have installed other VMs in the past, the most recent three ISOs used will appear in the menu. If one of these is the operating system you want to install, you can simply pick it. In this case, navigate to the ISO you downloaded from the Ubuntu site.
Other Settings
There are no more modifications to make in order to proceed. You are free of course to explore the other setting pages. I do want to call your attention to the Shared Folders page. With Shared Folders, you designate a folder location in your host operating system. That folder will then appear inside the file manager inside your guest operating system. This makes it very easy to copy files in and out of your virtual machine.
Just click the big OK button to save your configuration settings and proceed to the next step.
Installing Ubuntu 19.04
Now that you have the machine configured it’s time to get started installing Ubuntu. Make sure the new Ubuntu 19.10 Dev VM is selected in the list of VMs on the left, then click the green Start arrow in the toolbar above the VM settings.
If you forgot to attach the ISO in the previous step, when the machine launches, VirtualBox detects there is no operating system installed. Here it is prompting you for the ISO image to use. 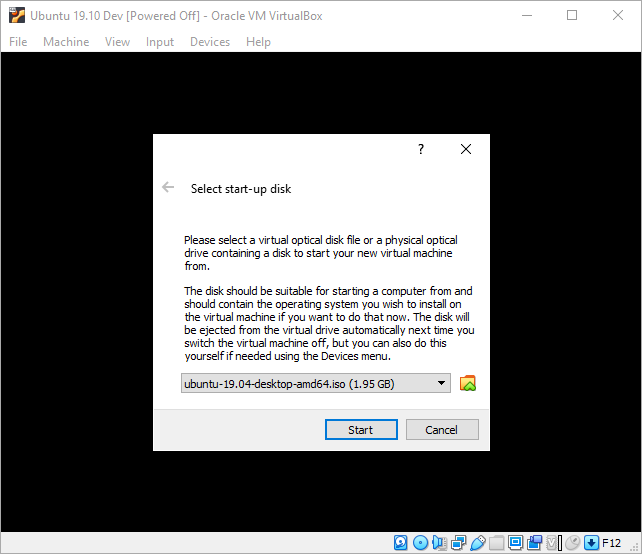
If you remembered to connect it, you’ll skip the above screen. It’s a common mistake to miss attaching the ISO so we wanted to make sure to mention it.
Because you had loaded the Ubuntu ISO in the Storage settings in the previous section, it defaults to it. Just click Start to run the machine with this ISO.
If you are running on a slower machine, you may see the following dialog.

At this point VirtualBox has begun the processes of setting up the VM. Just sit back and wait. The amount of time it will take depends on your computer, so be patient. If you computer is fast enough, you may not see the above dialog box at all.
You will soon see a new window open, with the Ubuntu Virtual Machine. It will take it a little time to spin up, don’t be surprised if you see a blank screen for a little bit. Eventually you will see the Ubuntu installer appear.

Here you have two choices, Try Ubuntu or Install Ubutnu. Ubuntu is distributed as a Live DVD. In Live mode, you could use a tool to create a bootable USB stick, then boot your physical computer to the USB stick instead of your hard drive. Using the Try option would let you experiment with Ubuntu without making changes to your computer. (If you decide you want to try this for yourself, I recommend the balenaEtcher tool, available at https://www.balena.io/etcher/ ).
In this case you are installing in a virtual machine, with no risk to the host operating system, so after verifying the correct language is selected on the left, click the Install Ubuntu option.
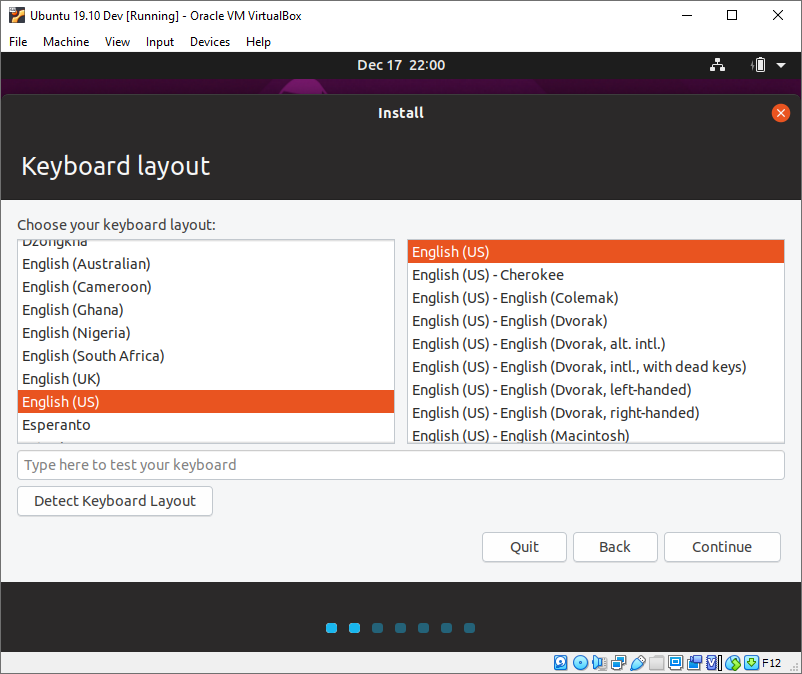
The first thing you are asked is to confirm your keyboard layout. Ubuntu does a good job of figuring it out and picking it automatically, but if you would like to pick something different this is the time to change it. If you are happy, then just click the Continue button.

In the next screen, you are given some options. First, it wants to know if you want a normal install or minimal. With minimal, only the web browser and a few basic tools are installed. In normal mode, it will also install office software, media players, and more. I suggest using the Normal Installation option, as it’s often useful to have some of the office tools in your VM. Don’t worry though, if you go with a minimal install, you can easily install other things from the Ubuntu software store that is built into the Ubuntu operating system.
Under the other options, the Download updates… is checked on by default. While you can install updates after installation, it makes it easy to just go ahead and download them now. It will add a bit of time to the setup operation, but if you have a decent internet connection this will be minimal.
The last option, Install third-party software… is unchecked by default. Some Linux users are “purists” and will only use open source software. Others are more pragmatic and are willing to use software that may be closed source or proprietary, such as video and other hardware drivers. I personally fall into the “pragmatic” camp and check this on, as I’ve done here. This is a choice you will have to make, but for this article I suggest checking it on as shown in the above image and click Continue.
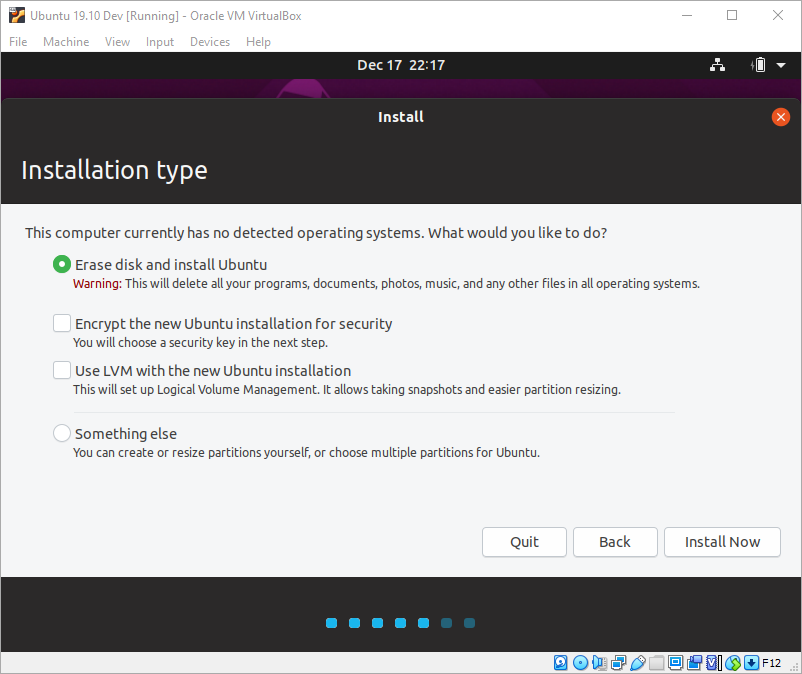
In the next step, you are asked about the installation type. Since the virtual disk is empty, go with the default option of Erase disk and install Ubuntu. The other options are geared toward installation on a physical computer, or into a machine that you want to install Ubuntu side by side with another operating system.
At this point you are ready to begin the installation, so simply click the Install Now button. Because you picked the erase disk option, you are given a warning that you are about to create changes to the target drive.
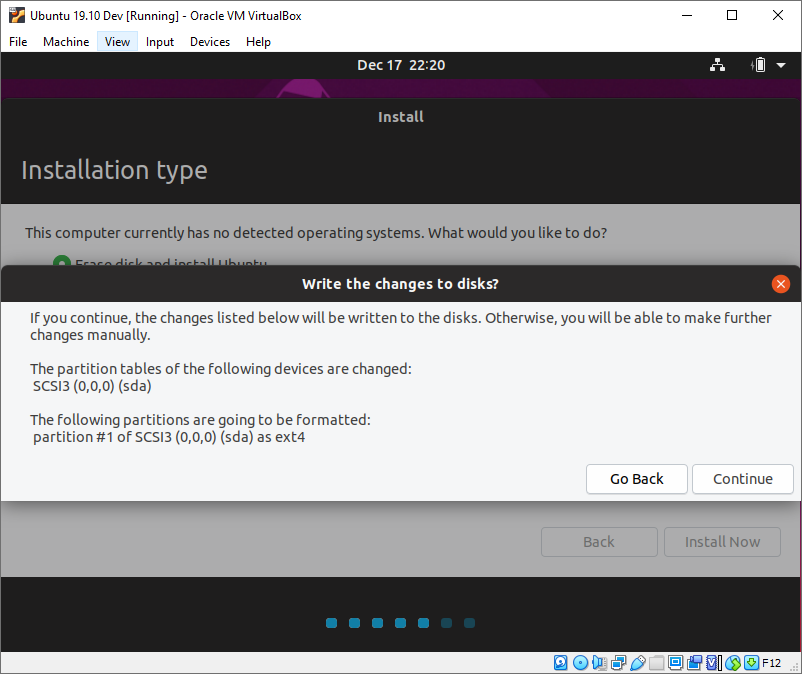
This is OK, it’s what you want, so just click the Continue button.
Next, you are asked what time zone you are in. VirtualBox will provide the current date/time info from the host operating system to Ubuntu, and it will default to that time zone. If you need to use another time zone though, this is a good time to change it.
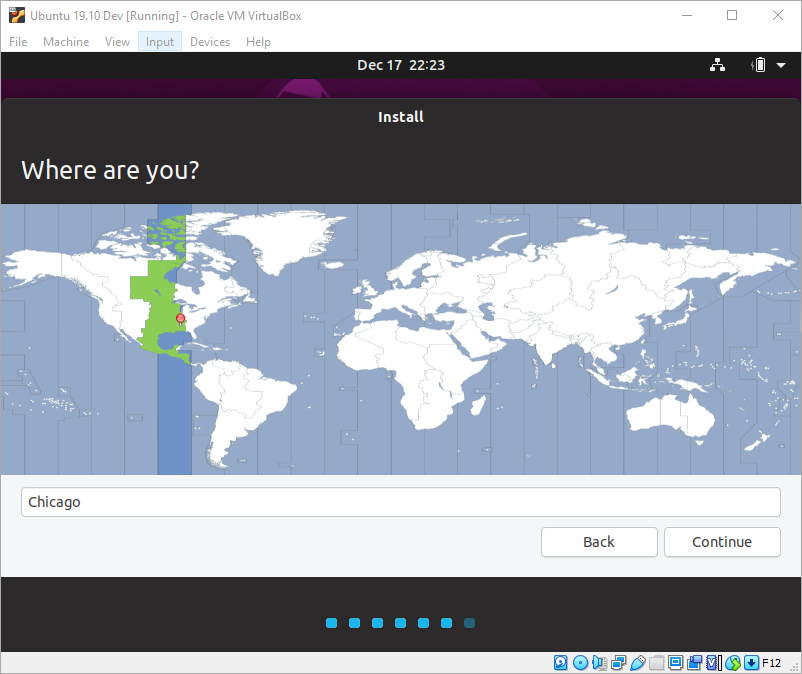
In my case, I am in the Chicago (Central US) time zone, so I will just click Continue.
In this next screen, you are asked for some information about your user ID in this virtual machine. Your name is up to you. Typically, you might enter your full name, such as Robert Cain. When it comes to VMs though, I generally use the same information here as my username. For the computer name, I usually begin my virtual machines with vm- in case I am using a network tool. It will be clear this is one of my virtual machines and not a physical computer. After this I’ve added the same information as the name it was given in VirtualBox.
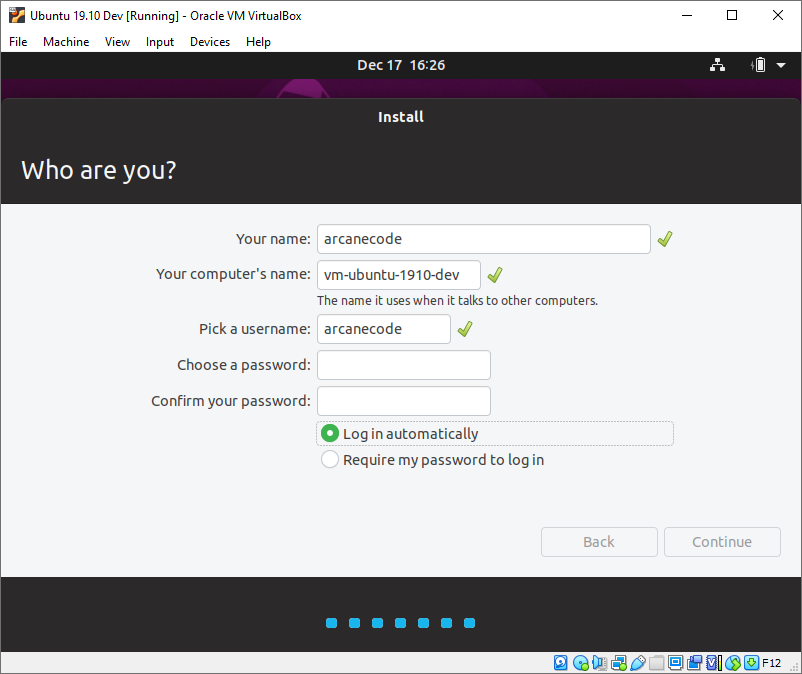
Next up is the username, this is a choice for you to make. Below it you will enter the password to use. Be aware this password is used for more than just logging in. Whenever you install software or alter other system settings, Ubuntu will prompt you for this password as a security measure, to confirm you have permission to make these changes. As a result, you should select a password that is complex enough to be secure, but easy to type and remember as you will be entering it a lot. Note in the above image I haven’t entered the password, when you do it will appear as dots. After entering a password you’ll need to re-enter it in the confirmation box.
The last option is in regard to logging in. The default will be Require my password to login. If you are installing Ubuntu on a physical computer, or in a user testing / production situation, then I highly advise taking this option. In this case, you are creating a machine for simple development and learning so you might want to change it Log in automatically. If this makes you uncomfortable or violates a corporate policy, then by all means go with the default.
Once you are ready, click Continue.
At this point Ubuntu begins installing.
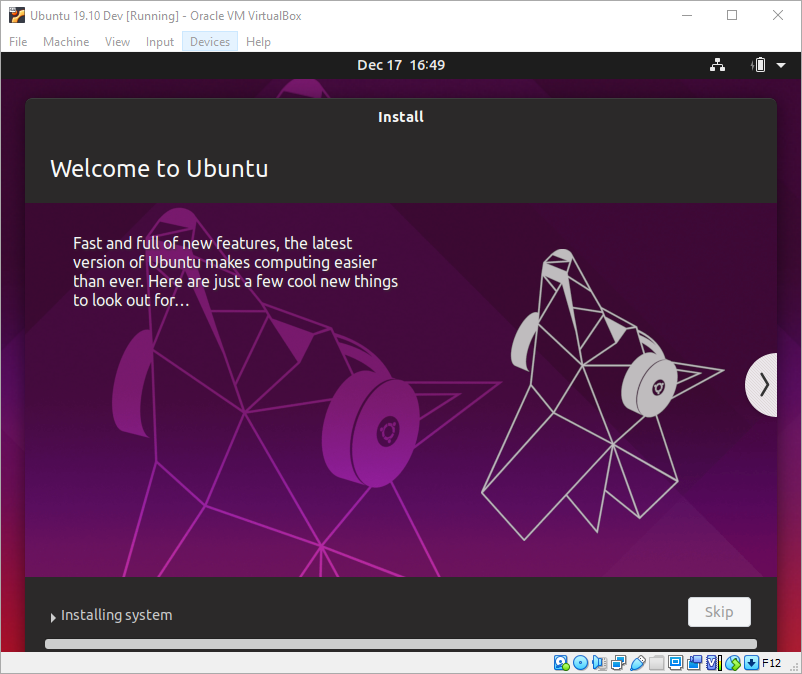
Here you see the progress bar. As it proceeds you will see the display update with helpful tips and tricks. Take a look at them as the install proceeds, it includes some helpful information.
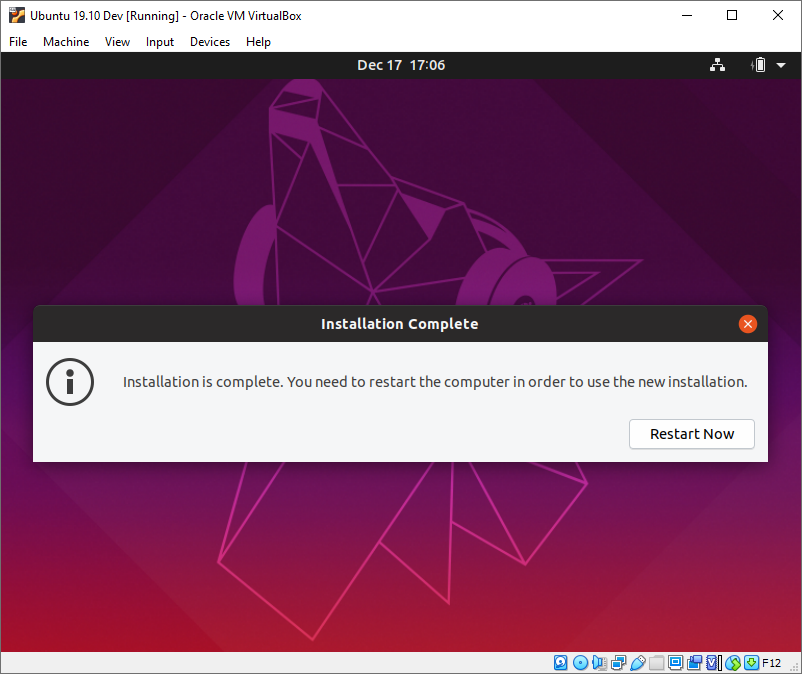
When the installation completes, you will be prompted to restart. Simply click the Restart Now button.
After it reboots, you will be prompted to remove the installation medium then press Enter.
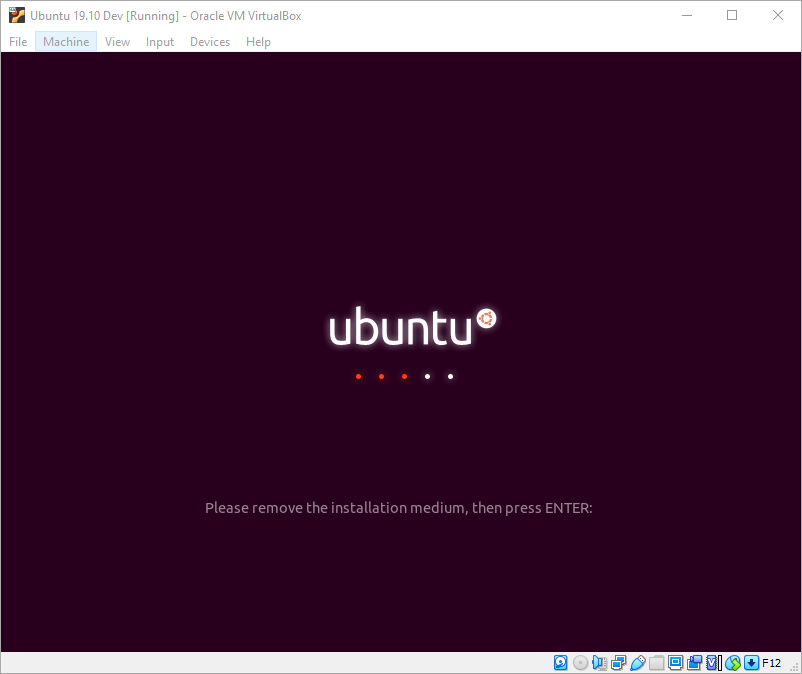
In this case VirtualBox has already taken care of this for you, so all you have to do is click the mouse inside the VM window (so it gets the focus) and press the Enter key.
Once Ubuntu restarts again, you will be prompted to connect your online accounts.
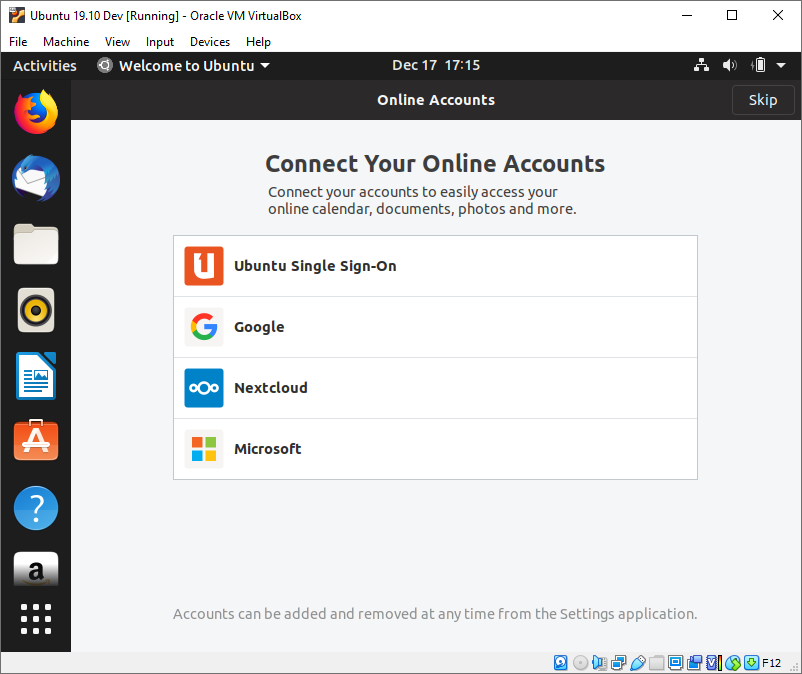
Since this is a virtual machine for doing development, I usually skip this step by clicking the Skip button in the upper right.
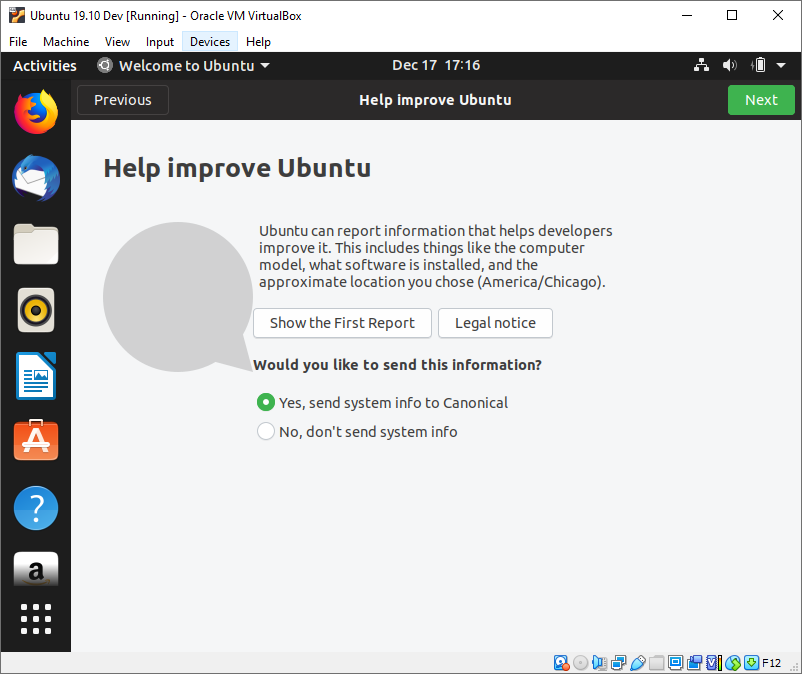
In the next step you are prompted to send system reports to Canonical, the makers of Ubuntu. I usually leave this at the default, but some companies have policies that state you should not share this information. Other people are not comfortable with sharing, so take which ever option you wish and click the Next button in the upper right.
Next Ubuntu wants to know if it can activate Location services. These services are used for things like mapping websites, or when you go to an online store. By default, it is off, and as this isn’t overly useful in a virtual machine (unless you are developing software that needs these services) just take the default and click Next.

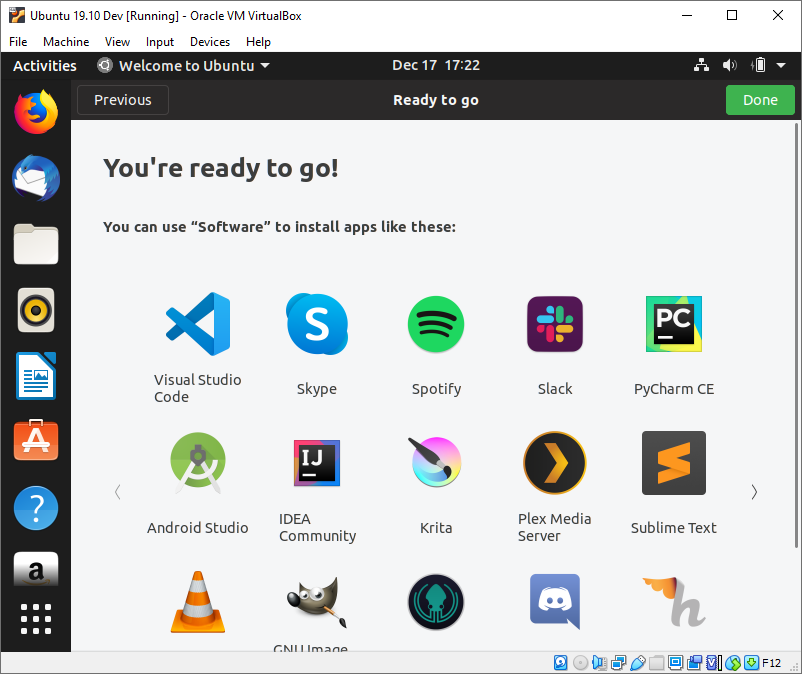
Finally, you’re done! You’ve installed and configured your Ubuntu VM. You can now click Done to close out the window and begin the next steps, updating Ubuntu and installing the software you’ll need.
Updating Ubuntu
In the next article, I’ll go through the process of installing PowerShell, Visual Studio Code (also known as VSCode), and Azure Data Studio. Before that, there are some updates as well as install a few small utilities that will make life easier. You may not use all of them in the next few articles, but as you move forward with your Linux experience, they will become handy to have.
The first thing you’ll find is Ubuntu has a very low timeout before it goes into lock screen mode. In my opinion, when running as a virtual machine, this is unnecessary. Your host system should be set to lock automatically after a set time, or when you choose to lock it manually. Having your virtual machine auto lock as well can get annoying. This first step is optional, but I think you’ll find the short timeout annoying as well, so here’s how to disable it, or if you prefer to extend the time before the VM auto locks.
In the upper right corner, next to the battery icon, is a drop-down arrow. Clicking it will bring up a menu.
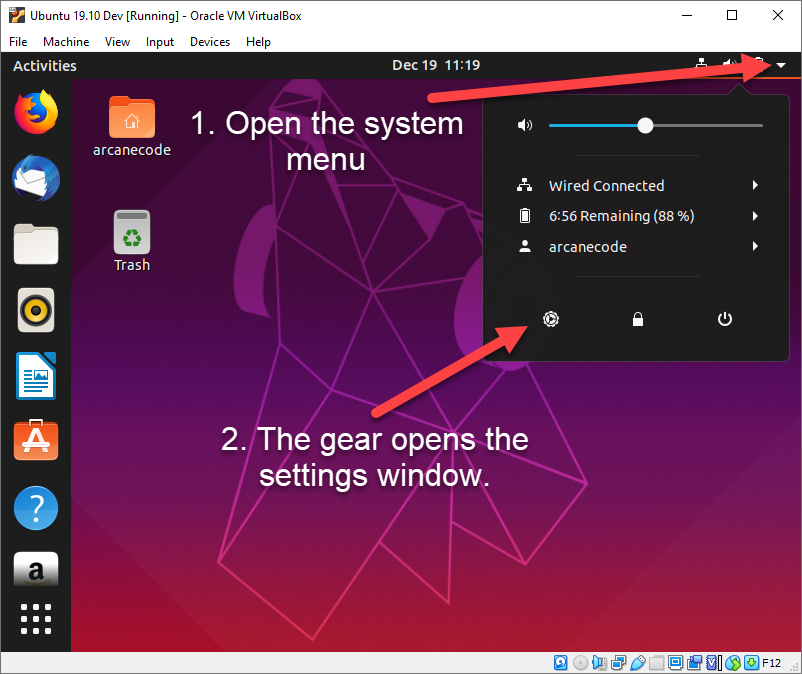
In the menu, click on the gear icon to bring up the settings window. If you are new to Ubuntu, I’ll mention a few other things. The lock icon in the middle will lock your virtual machine. Getting your machine out of the lock state is a bit odd in that you have to press a key on the keyboard to bring up the password entry dialog. Mouse clicking has no effect.
Next to the lock is the power button, which will give you options to shut down, reboot, and so on.
Go ahead and click on the gear. The settings window will now appear. On the left side is a list of settings categories. Scroll down and click on the Power settings.
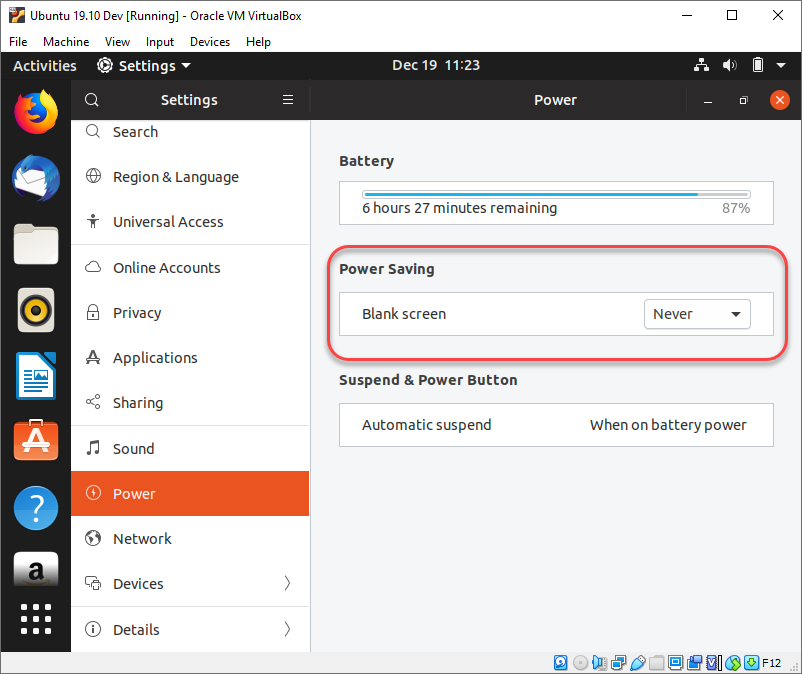
In the middle is the Power Saving area (highlighted by the orange rectangle in the above graphic). Use the drop-down to change the setting to Never, or to another setting you are comfortable with. There’s no need to press any kind of a save button; when you make a change Ubuntu automatically applies it. Just click the orange X in the upper right corner to close this window.
Opening the Terminal
Now that you VM won’t time out on you, you’ll do a general update to Ubuntu itself. You’ll be doing a lot of this through the terminal, so go ahead and open a terminal window. The 9 dot grid in the bottom left of the Ubuntu desktop is similar to the start menu in Windows. Click on it to bring up your installed applications.
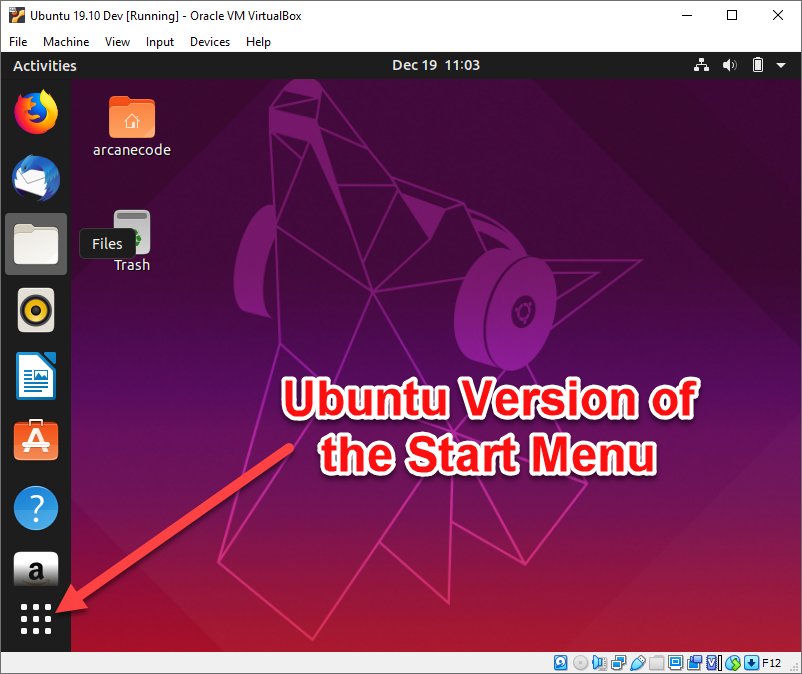
After clicking on the “start menu” the screen updates to show all your apps.
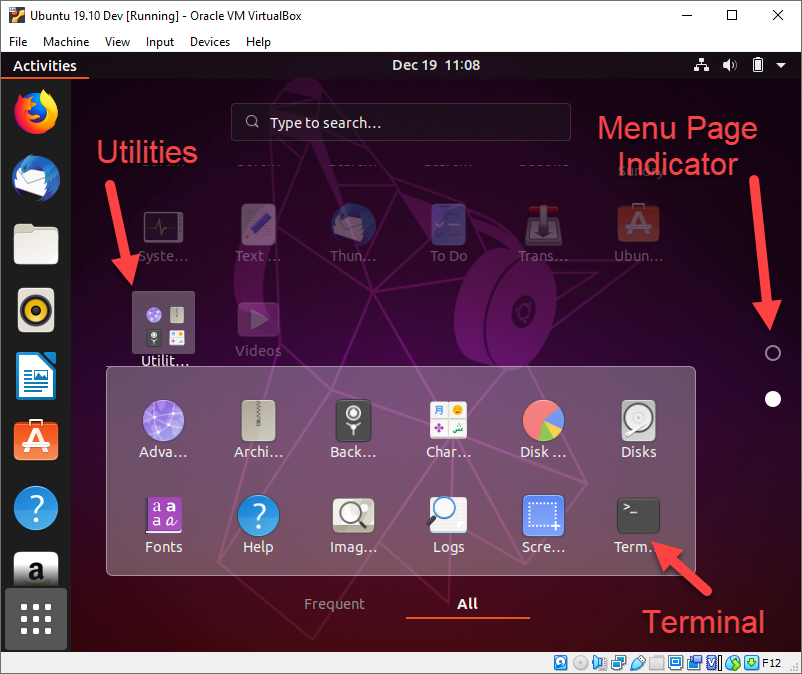
Over to the right is the Menu Page Indicator. The number of menu pages is dependent upon how many applications you have installed and the size of your screen. In the above screenshot the Menu Page Indicator shows I have two pages of menus; there will be a dot for each page and the solid dot indicates I am on the second page.
To get to the terminal, find the box labeled Utilities. This is a submenu, when you click on it the Utilities expands, and in it you’ll find the icon for the Terminal.
There is a second method for getting to the terminal that you could use. Many Linux distros have a built-in keyboard shortcut to launch the terminal, in Ubuntu CTRL+ALT+T will launch a new terminal window. Other distros use the Superkey+T shortcut, where superkey would be the Windows key on many keyboards. No matter which way you choose, it’s now time to open up a terminal window and continue our setup of Ubuntu.
Apply Updates
Before proceeding, you should first apply any new updates. Doing so is very easy, at the terminal window enter the following command.
|
1 |
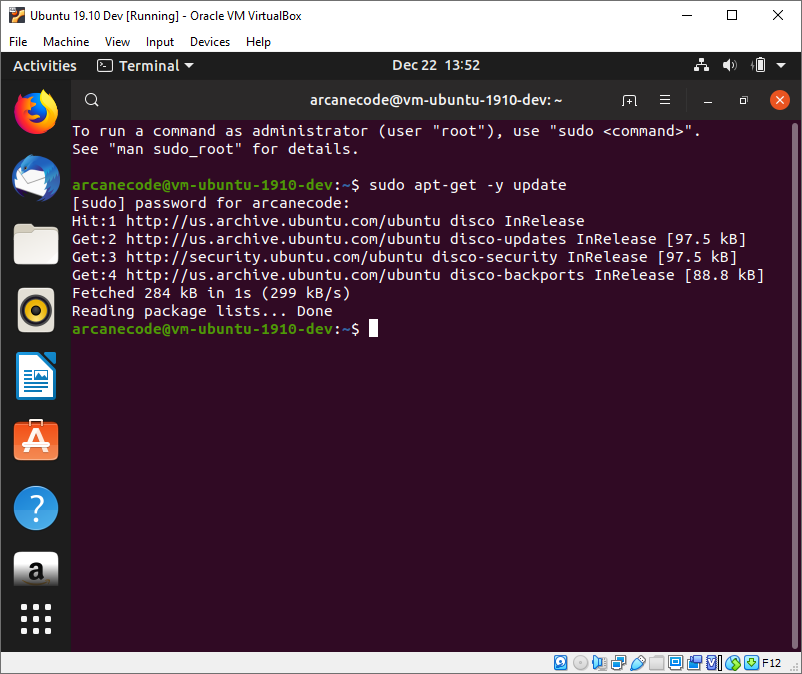
sudo apt-get -y update |
The sudo command is short for Super User DO; it is the equivalent of “Run as Administrator” in Windows. When you enter a command using sudo you’ll be prompted for your password. If you enter more sudo commands, Linux will remember your recently entered password for a brief time so you don’t have to keep reentering it.
The apt in apt-get stands for Advanced Package Tool. It, as well as the apt command you’ll see in a moment, is part of a suite of tools used to install new applications or keep your system up to date. In order to understand how this works, you need to understand how Linux manages packages. Each Linux distro maintains its own set of package repositories. Think of it as a sophisticated lookup tool. When you issue an apt command to go get application “X”, your operating system looks in its library for “X”. It has an entry to go to a specific location on the internet, where application “X” can be downloaded, along with any special instructions for installation. Note the apt commands can also be used for more than just applications. It may also be used to install operating system updates, as in the above example, or to upgrade your operating system to a more recent version.
It is also possible to add additional repositories to your distro. Many companies provide their own set of package repositories with which you can use the apt commands to install and update their specific applications.
Returning to the syntax of the command, the -y tells the apt-get command to automatically reply yes to any “are you sure” style prompts. Finally, the update tells apt-get to make sure all operating system components and applications are up to date.
Now that you understand the basic syntax of the command, enter it and press enter. You’ll be prompted to enter your password, do so and the update process will begin.
Install Additional Utilities
There are a few utilities that you may need as you work with Ubuntu over time. While you won’t necessarily use these during this course of articles, they are common to many developer installs. As you read through other tutorials here on Red Gate’s Simple Talk site as well as other locations, it will be assumed you have these already installed. As such, I go ahead and install these as part of my developer installs and suggest you do so, too.
VIM
First, install a basic text editor called VIM. VIM works in the terminal and makes it easy to edit text files. To do so, use the apt command just discussed.
|
1 |
sudo apt -y install vim |
Note this code is using only the apt command, not apt-get. It’s also using install to indicate you are installing a new application, and vim is the name of the application to install.

This would be an opportune time to mention that Linux is case sensitive. If I had used VIM instead of vim in the above example, the apt command would have failed.
This also applies to file and directory names. For example, myfilename.txt, MYFILENAME.TXT, and MyFileName.txt refer to three different files, and all three could exist in the same folder.
net-tools
Having a set of network tools can be handy to do things such as discover your network status and information. Those are found in a suite of tools called net-tools. To install, use the following command.
|
1 |
sudo apt -y install net-tools |
Once it has installed, you can use the command ifconfig to test it, ifconfig will display your network configuration.

As you can see, ifconfig returns quite a bit of useful information about our machine’s network info.
Git
Many developers use a code repository to store the source code to their applications. A code repository is a bit different than the Linux repositories you’ve seen so far in this article. Those repositories are used to hold installable applications. The git repositories are used to hold the source code needed to build those applications.
Git is one flavor of a repository. It can be hosted locally, within your own company, or on a platform. GitHub is probably the most popular of these and can host both public and private repositories for free. As it is used so much, I go ahead and install in every developer system I set up.
|
1 |
sudo apt -y install git-all |
By now most of this command should be familiar to you, git-all is the application name that will install all the git components.
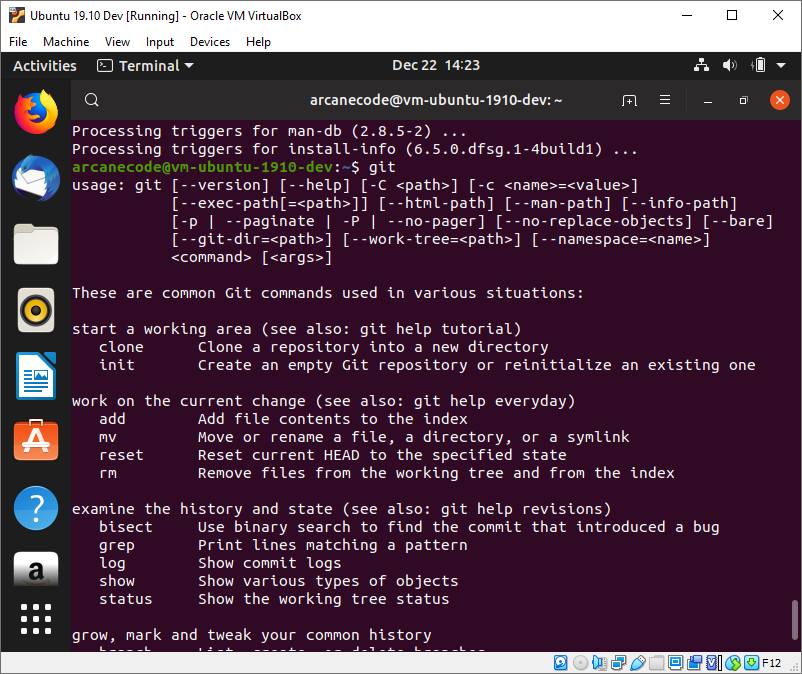
Once installed, you can enter the command git to confirm it was installed. It will show you the basic help for the git application.
Snap
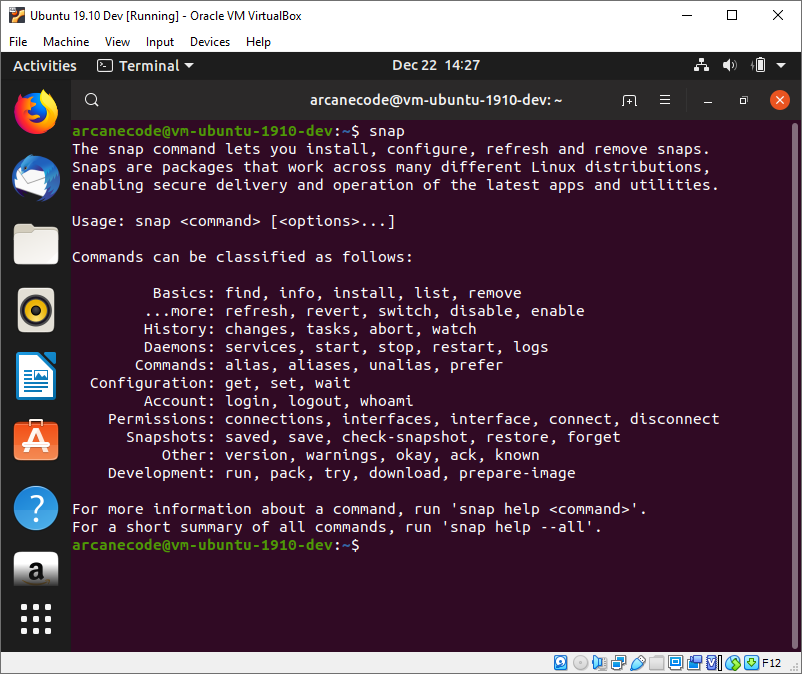
The apt command is not the only method by which you can download and install applications. The two most popular in the Linux community are flatpacks and snaps. Ubuntu favors the snap method, and the most recent versions of Ubuntu already have the snap application installed. To see if you have it, simply enter the command snap in the terminal and press enter.
Should you get the error message that snap was not found, you can install it by using apt.
|
1 |
sudo apt -y install snapd |
Two things to note, first that is not a misspelling in the command, snapd is the name of the application to use. Second, snaps are only supported on Ubuntu versions 18.04 and later.
Conclusion
This article covered the first steps in setting up a development environment for developing PowerShell Core scripts in a Linux environment, specifically Ubuntu. It described using VirtualBox as the virtual machine manager, downloaded Ubuntu, and configured VirtualBox for a new Ubuntu install. With minor modifications, you could have also adopted the instructions for Hyper-V, or set up an empty PC with Ubuntu running “bare metal”, right on the computer itself.
It then covered installing Ubuntu 19.10, stepping through each screen in the installation process and discussing the options, allowing for choices when installing in a virtual machine versus a real computer. After installing, you logged in, updated Ubuntu, and then added several small utilities such as VIM and the networking tools.
In part 2 of this series, I’ll demonstrate installing PowerShell Core and Visual Studio Code. In addition, you will learn how to install Azure Data Studio to prepare for future database work. I’ll wrap up part 2 by automating the update to the favorites bar, configuring it for a development centric environment.
This foundation is a good position for growth. I’ll expand on the base created in parts 1 and 2 in future articles, including one on installing SQL Server in a Docker container on Linux.

Load comments