You need to create a package to import data from an Excel workbook into a SQL Server table, using SQL Server Integration Services as a tool. What could possibly go wrong? Well … plenty, as it turns out. The aim of this article is to help people to avoid all the pitfalls that I fell into when first learning SSIS.
This article uses SSIS 2012, the latest version at the time of writing, but you won’t notice many differences if you’re using 2008 or 2005. The article assumes that you’re using SQL Server Data Tools – Business Intelligence within Visual Studio 2012 to create SSIS packages: Business Intelligence Development Studio (BIDS) was used until SQL Server 2012. Do Microsoft have a whole department devoted to thinking up misleading names for software?
Our Simple Example
Let’s suppose that you want to import an Excel workbook of purchases into a SQL Server table (you can download this workbook at the bottom of the article):
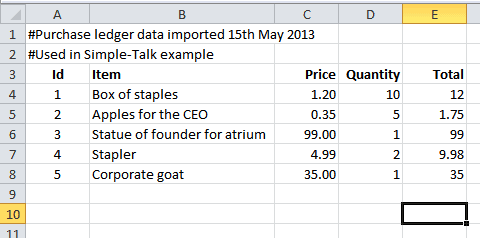
Our purchase ledger workbook, complete with2 unwanted title rows, a useful heading row and a couple of awkward blank rows at the bottom.
You could use Excel to manually delete the top two title rows and bottom two blank rows to make life easier, but this would be kind of cheating (and also kind of pointless, since whatever application produced the Excel workbook of purchases would just recreate the unwanted rows next time you ran it). To quote the words of Caiaphas in the musical Jesus Christ Superstar: “we need a more permanent solution to our problem”.
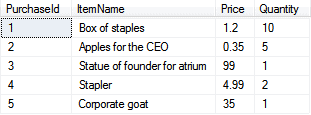
Here’s what we’d like our final SQL Server table to contain: the 5 purchases.
Before you begin, make sure that you’ve closed your Excel workbook down. If you run any SSIS package to import data from an Excel workbook which is open, you will get some horribly misleading error messages.
Step 1 – Create a Project
Before you can play about with data (sorry: extract, transform and load it), you need a project to do it in. Go into SQL Server Data Tools or Visual Studio, then choose to create a new project:

You may be able to miss out this step if you’ve just gone into SSIS for the first time.
At the top of the dialog box which appears, make sure you create the right sort of project:
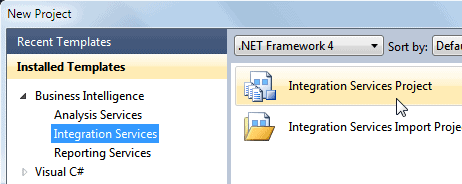
Choose to create a business intelligence SSIS project.
You can then give your project an exciting name (at least, more exciting than Integration Services Project1, which is what I’ve used!):
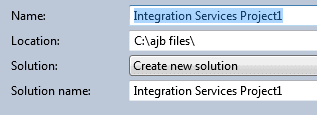
Choose a name and location for your new package.
SSIS will now create a new project, and also (by default) a new package too, imaginatively called Package.dtsx. There are two ways you can see that this is what’s happened. One is that you can see the package in Solution Explorer:
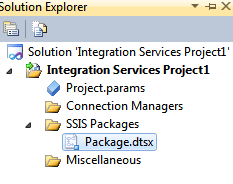
The new package created on your behalf (if you can’t see Solution Explorer, choose‘View SolutionExplorer’ from the menuto show it).
The other clue that SSIS has created a package for you is that it’s staring you in the face!

By default you are put in Control Flow view, which is like a flow diagram showing the sequence in which tasks that you create will execute.
Step 2 – Create a Connection to your SQL Server Database
Before you continue, you need to make sure that you’ve created a connection to your SQL Server database. To do this, first right-click on the ‘Connection Managers‘part of Solution Explorer:
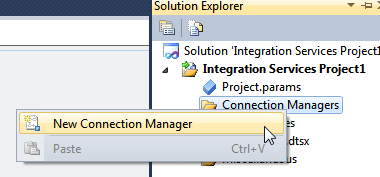
Right-click to create a new connection manager.
The most efficient way to link to SQL Server is using an OLEDB connection manager:
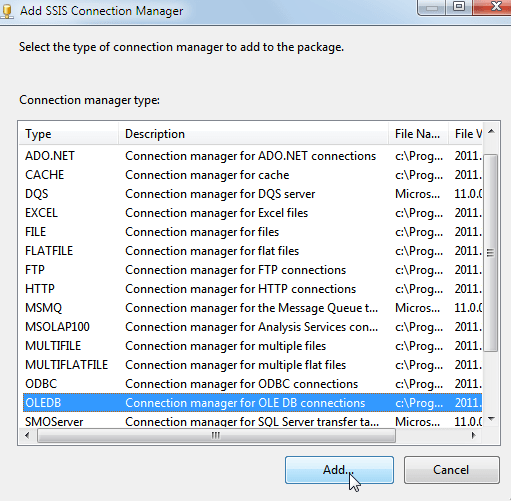
Choose to add an OLEDB connection manager.
Now click on the ‘New…‘ button to create your new connection manager:
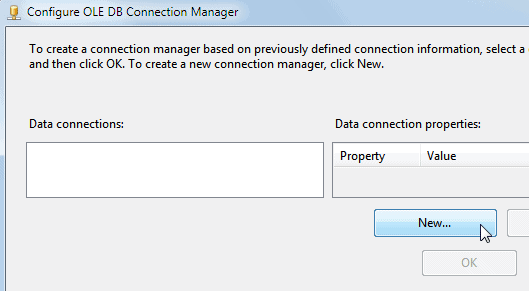
Create a new connection manager as above.
Choose your server, authentication method and database on the next screen, then select ‘OK’ twice to see your new connection manager listed:
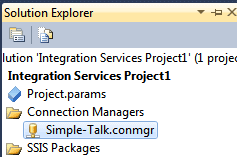
It makes sense to create this connection manager for the entire project, since it’s likely you’ll use the same connection in other packages within the same project.
I haven’t shown any more details about this here for two reasons: the settings will be different on your machine, and anyone reading this article is likely to have created connections many other times in many other software applications!
Step 3 – Create a Table
You can’t import data into a non-existent table, so the next thing we’ll do is to create the table shown below. We could do this manually within SQL Server Management Studio, but we’re aiming for an automated solution which we can run time and time again, so instead we’ll create the table as part of our SSIS package.
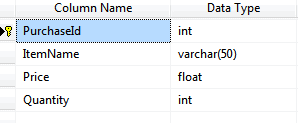
Our table will look something like this: we’ll import the item name, price and quantity, but the purchase id will be generated automatically. As for the total in column E of our spreadsheet – we’ll just choose not to import that, since it can be recreated by multiplying the Price and Quantity columns at any time.
To create the table, first double-click (or click and drag) on the ‘Execute SQL’ task to add a task to the control flow which should be visible on screen (we want to create the shell table within this task):
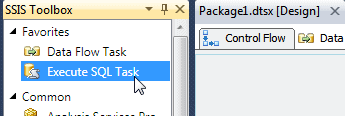
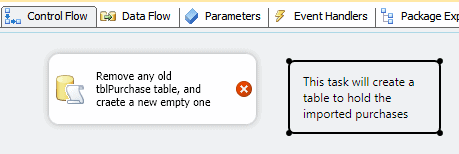
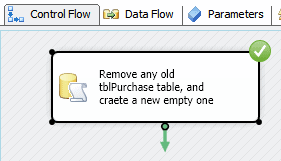
This task will run some SQL to remove any existing purchases table, and create a new one.
I tend to give my tasks long, descriptive names (geeks may prefer to use shorter meaningless names!):
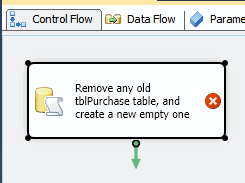
The Execute SQL task after renaming it.
You can also add sort-of-comments to packages using something called annotations:
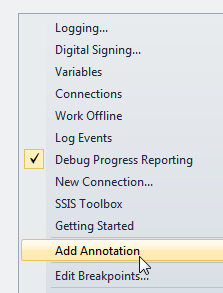
You can right-click to add an annotation to your package – they appear like post-it notes:
Anyway, returning to the main story, you can now edit your Execute SQL task:
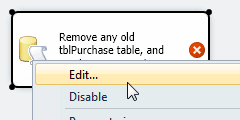
The easiest way to edit any SSIS task is to double-click on its icon, although you can also right-click on the task and choose ‘Edit…‘ as above.
In the dialog box which appears, choose to connect to your database, using the connection manager that you’ve just created at project level:
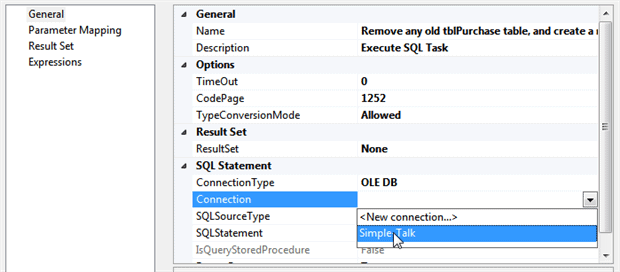
You can use a project-level connection manager in any package.
You can now enter the SQLStatement property, specifying the SQL that SSIS should run for this task. Here’s what I’ve used for this article.
|
1 2 3 4 5 6 7 8 9 10 |
IF EXISTS (SELECT 1 FROM information_schema.tables where table_name like 'tblPurchase') DROP TABLE tblPurchase -- create a table to hold purchase ledger items CREATE TABLE tblPurchase( PurchaseId int PRIMARY KEY IDENTITY(1,1), ItemName varchar(50), Price float, Quantity int ) |
This will first delete any table called tblPurchase which already exists, and then create a new, empty one. The PurchaseId column is an identity one, which will automatically take the values 1, 2, 3, etc. Here’s what the Excecute SQL task dialog box now looks like:
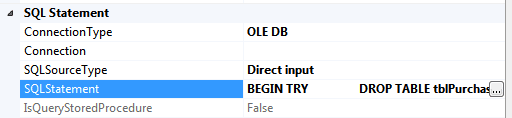
The SQLStatement property as it appears after you paste in the text.
It’s time now to test that this works by running your single-task package:

Right-click on the package name in Solution Explorer and choose to execute it as shown here. SSIS will save your package automatically before executing it.
If all goes well, you should see this:
The green tick means things went well!
If your package doesn’t run at this point, you may be trying to run it on a 64-bit computer. The default mode in SSIS on a 64-bit SQL Server installation is 64-bit. In this case, you have to specifically change the mode to run a package. I don’t want to clutter this article up with an explanation of how to do this so please refer to this article for how to do this.
You should now have a table, which you can view in SQL Server Management Studio if you should so wish:

The table has no records in – yet!
You now need to stop the package running:
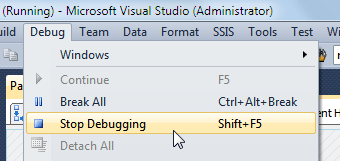
Select the menu option (or press the keystroke above) to stop your package running, and wave goodbye to the green ticks for now!
It’s now time to create the data flow tasks – although first we need to create an Excel connection.
Step 4 – Create an Excel Connection
Before you can import data from an Excel workbook, you will need to create a connection to it. You should probably create this connection within your package, as it’s likely that this’ll be a one-off (you won’t need to use the same connection in any other package):
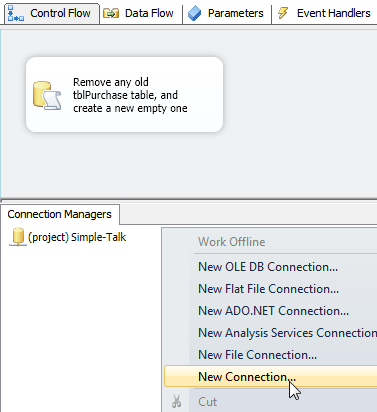
Right-click in the ‘Connection Managers‘ section of your package, and choose to create a new connection.
Note that you could alternatively use the ‘Source Assistant‘ to do this, but I always like to do things explicitly:
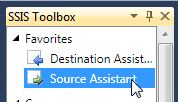
The source assistant as it appears in the SSIS toolbox – it’s not the Voldemort of wizards, but it’s not the Dumbledore either.
You can now choose to create an Excel connection:
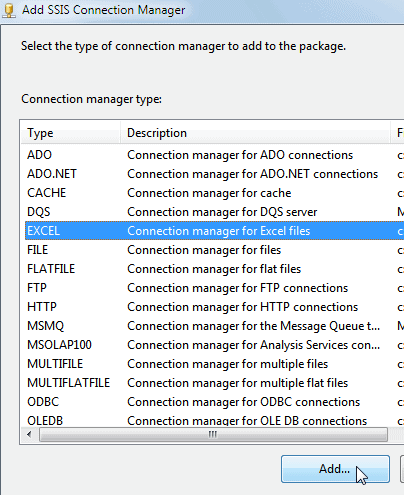
There are a few other choices!
Browse to your Excel workbook and choose it:
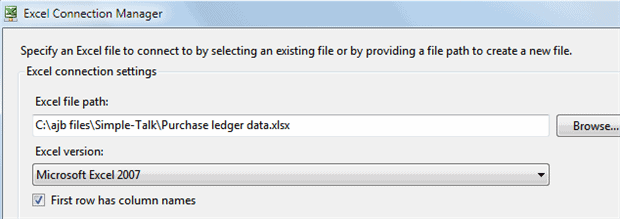
Leave the‘First row has column names‘option ticked.
When you select ‘OK‘, you should see your Excel connection:
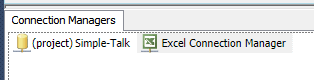
You could rename this connection manager, but we’ll leave it as it is.
Step 5 – Create a Data Flow Task
It’s time now to start the real work! We want to add a data flow task to the control flow tab of your package. This new data flow task should import data from the Excel workbook into the SQL Server table (although as we’ll see, things can go awry at this stage).
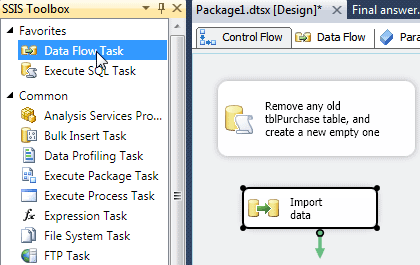
Add a ‘Data Flow‘ task to your package, and rename it to say ‘Import data‘ (as above).
You now need to get the two tasks shown to run in sequence; you’ll firstly want to create a new table to hold your purchases, and then import the data into it. To do this, click on the first task and drag its arrow onto the second. This arrow is called a precedence constraint.
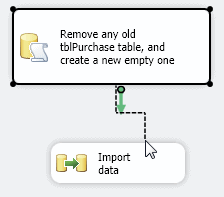
Connecting the tasks, so they follow on from each other.
You can now double-click on the data flow task to edit what it does – we’ll spend the rest of this article in the data flow tab of SSIS:
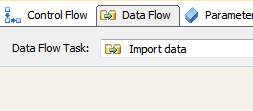
The (as yet empty) Data Flow tab for the Import data task.
Step 6 – Creating the Excel Source
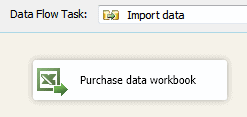
Data has to come from somewhere, and in our case it’s from Excel:
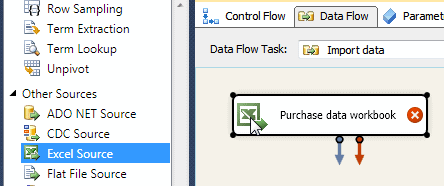
Drag an Excel Source from the SSIS toolbox onto your empty data flow window (here we’ve also then renamed it).
You can now double-click on this source to edit it, and tell SSIS where it should get its data from:
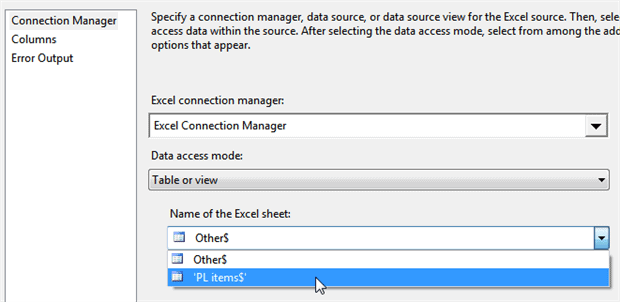
SSIS will automatically guess the connection manager if you only have one Excel connection manager for this package/project, but you’ll still need to choose the worksheet name (as shown above).
It’s a good idea now to preview your data, by clicking on the ‘Preview…‘ button:

We’ve got obvious problems with our first 2 and last 2 rows, but we can solve these by losing any rows for which the first column is null, which we’ll do shortly using a conditional split transform.
It’s a good idea now to rename all of the columns, so that you know what they refer to:
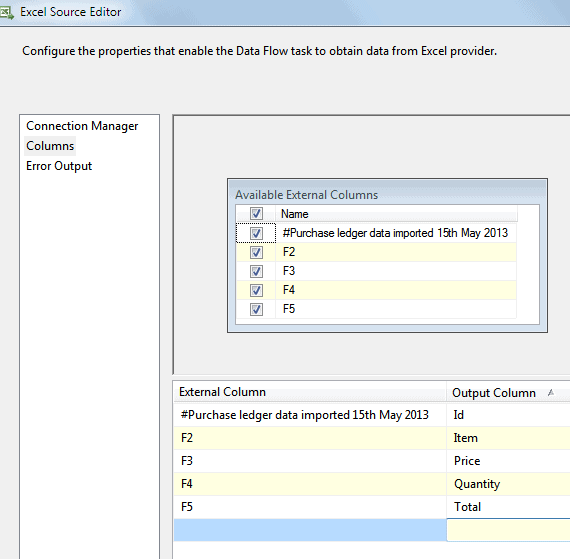
Click on the ‘Columns‘ tab (as shown above), then give the output columns better names, as we’ve done here.
When you select ‘OK‘, you should have an Excel source with no errors shown for it:
Now to do something with this data!
Step 7 – Removing Rubbish Data
The next thing we want to do is to divert all of the purchases with nulls in to… nowhere, really! To do this, add a conditional split transform to your data flow:
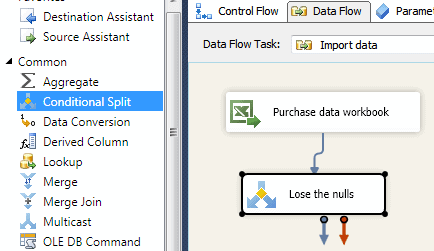
Add a Conditional Split as above (here we’ve renamed it also, to lose the nulls), and direct the output (or “data flow path”, if you want the technically correct name) from the Excel course into it.
You can now double-click on the ‘Conditional Split‘ task to configure it. We’ll set up two flows out of it:
Data where the id column is null will go down a pipe called ‘Case 1‘ (which we won’t actually connect to anything); while
All other data will flow down a pipe called ‘OK Data’.
Here’s how to set this up:
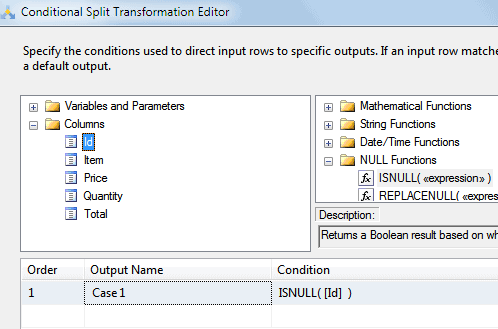
Set up an output (called ‘Case 1‘ by default) which tests the condition that the Id column is null. You can drag the ISNULL function and Id column down into the ‘Condition‘ box to avoid having to type them in.
At the bottom of this dialog box you can type in a name for your default output:

Here we’ve called the default output ‘OK Data’.
Step 8 – Piping the ‘OK Data’ into a SQL Server Table
We should be getting near the end of our journey now – all that we should need to do is to send the good data into our purchases table. Here’s how to do this:
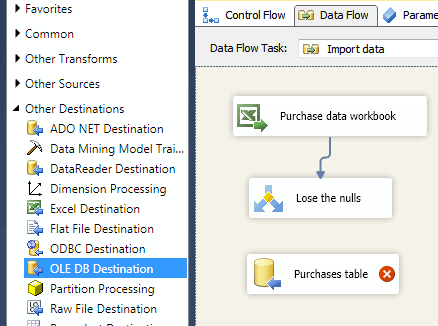
Add an OLE DB destination (as shown above) – here we’ve renamed ours as‘Purchases table‘.
You can now drag the green arrow from the ‘Lose the nulls‘ transform into the Purchases table destination:
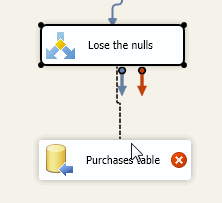
When you release the arrow, you’ll be asked which output you’re choosing: ‘Case 1‘ or ‘OK Data’ (the two outputs from the conditional split). Choose ‘OK Data’.
Having mapped data into the purchases table, it’s now time to configure it. Double-click on the ‘Purchases table‘destination to edit it:
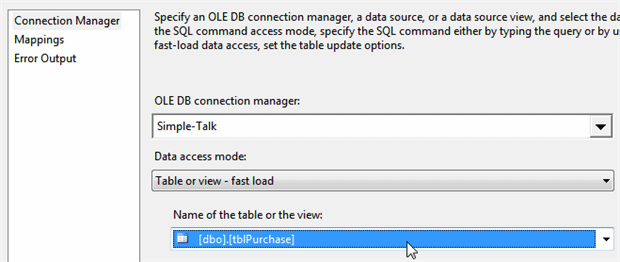
Firstly, choose the connection manager to use (although you probably won’t have to do this, as SSIS will assign it automatically if you’ve only got the one), and the table to target.
You can now choose which columns from Excel to map onto which columns in the SQL Server table:
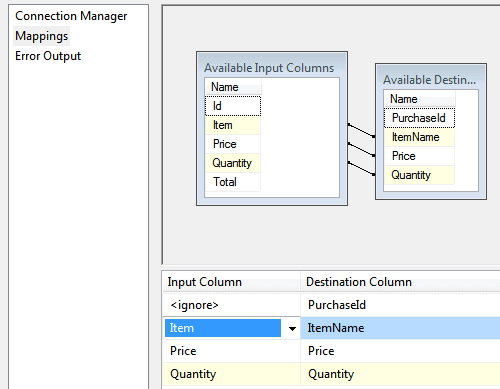
Be warned – the Item column will cause a problem soon… !
Here’s what you’ll be left looking at when you choose ‘OK‘:
There’s a problem with the ‘Purchases table‘destination.
If you mouse over the red circle, you’ll see what the problem is:

The problem is that Excel uses Unicode data, and we’ve created a varchar column in SQL Server.
Step 9 – Identifying and Solving the Data Conversion Problem
When you’re creating columns in SQL Server, you can use either nvarchar or varchar for variable length strings:
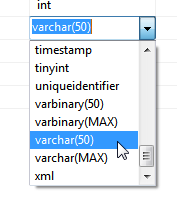
The varchar data type uses half the amount of bytes that nvarchar uses, because it can’t store extended characters. We could have used nvarchar and avoided this problem!
The benefit of using Unicode is that it allows you to store international characters: currently over 110,000 different characters from over 100 scripts, according to Wikipedia.
However, we used varchar, so we need to convert our Excel Unicode characters into normal ones. To do this we can use a ‘data conversion‘ task. First, however, we need to break the link we’ve created:
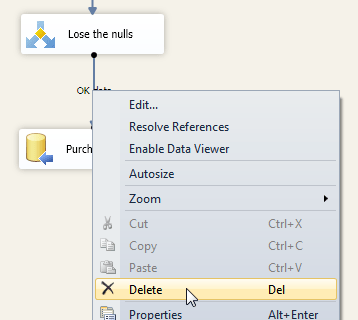
Right-click on the link between the transformation and the destination and delete it.
You can now add in a ‘data conversion‘ task:
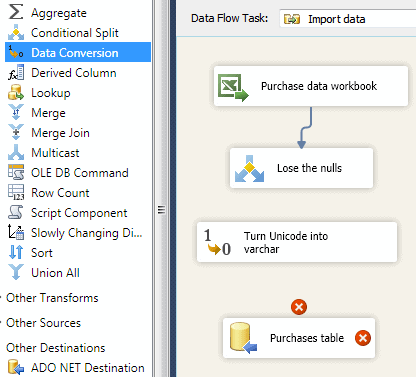
Here we’ve added a ‘Data Conversion‘ task (shown selected on the left), and renamed it to ‘Turn Unicode into varchar‘. The next thing is to pipe our data into it:
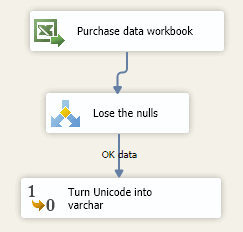
Pipe the ‘OK Data’ from the conditional split transform into this further data conversion transform.
You can now double-click on the ‘Turn Unicode into varchar‘ data conversion task, and say what it should do:
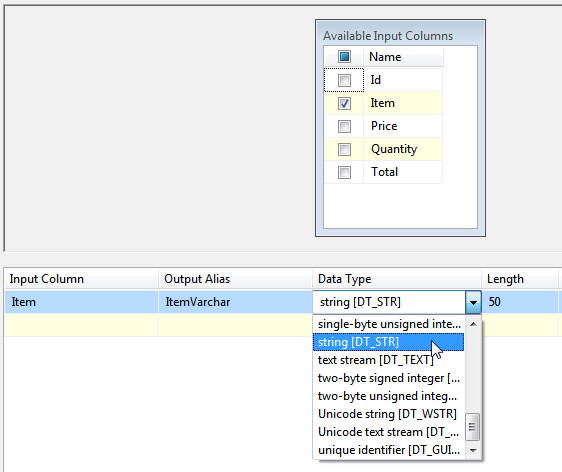
Here we’ve chosen to create a new column called ItemVarchar, which takes the Item column and turns it into a non-Unicode string using the default ANSI code page.
I’ve also changed the length to 50 characters at this point. This will mean that strings longer than 50 characters will be truncated, giving rise to truncation errors. Dealing with these is beyond the scope of this article – for now it’s sufficient to note that none of the purchase descriptions is long enough for our example to cause us any worries.
Nearly there! You can now take the output from this data conversion task and feed it into the Purchases table destination:
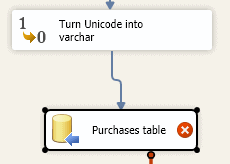
We’ve still got an error, as we haven’t redone the column mappings for the destination.
You can now double-click on the Purchases table destination to configure the column mappings:
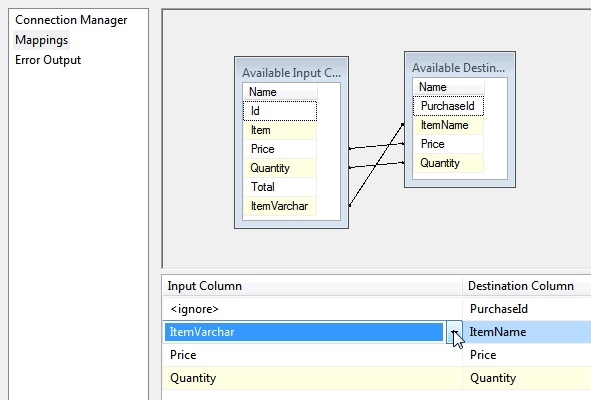
Choose to map the newly derived ItemVarchar column onto the ItemName column in the SQL Server table.
All of your errors should now have disappeared, and you can run your package!
Step 10 – Running the Package
The final step is to import your data by executing the package:
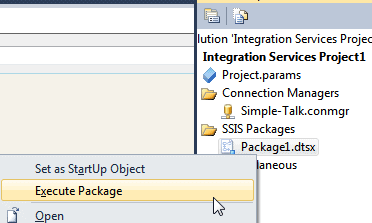
Right-click on the package in Solution Explorer to execute it (wish we’d renamed it …).
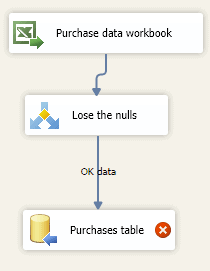
Here’s what the data flow should look like:
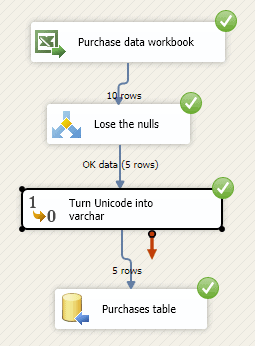
Yeah! It’s four ticks from SSIS!
You should now have 5 purchases in your tblPurchase table:
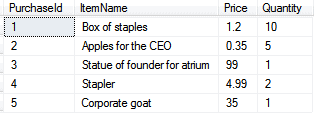
OK, it would have been quicker to type them in on this occasion, but you’ve now got a package which you can run every month-end, and which will work whether there are 5 purchases or 500,000.
Conclusion
Integration Services is just one of those software applications which is a joy to use. I hope this has encouraged you to use it to automate moving data around in your company. There’s nothing quite so satisfying as seeing the green ticks appear next to all of the tasks in your packages when you run them!

Load comments