Amazon Web Services (AWS) provides highly available, highly managed SQL Server instances through the Relational Database Service (RDS). Using RDS instances greatly reduces much of the administrative need for managing backups, minor upgrades, and monitoring. However, these conveniences come at a cost: limited administrative permissions and functionality. One such limitation that requires a workaround becomes obvious when attempting to restore a copy of an existing database to the same SQL Server instance.
One probable reason for needing multiple copies of a database on the same server might be to maintain separate database environments for development and testing, especially if using additional servers isn’t an option. Another reason might be data recovery – if data is deleted or otherwise missing, it may be necessary to temporarily restore a new copy of a database (from either a RDS snapshot or from an existing native backup file), recover the missing data, and then drop the duplicated database.
To demonstrate the RDS limitations and a workaround method, this article will develop a scenario where data has been deleted from a specific table in a RDS database. The objective is to recover the missing data using this method.
NOTE: This exercise should not be performed on a production RDS instance until it has been tested on a development instance. See the warning in the ‘Import the BACPAC’ section.
Preparing the Scenario
For this example, you will create an initial AdventureWorks2016 database from the online sample .bak file (our first instance of the database). You’ll then simulate a data loss and attempt to restore a temporary copy of the database (using the same .bak file) from which to recover the missing data.
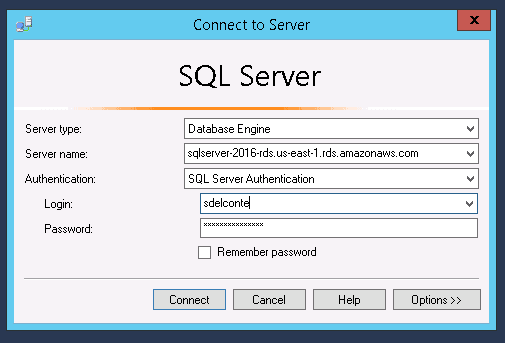
First, log into your SQL Server RDS instance, using the instance endpoint as the server name:
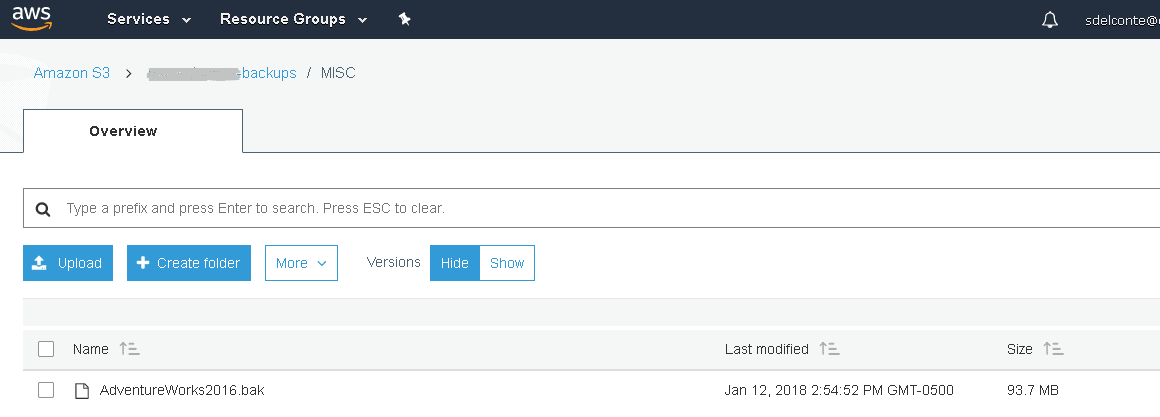
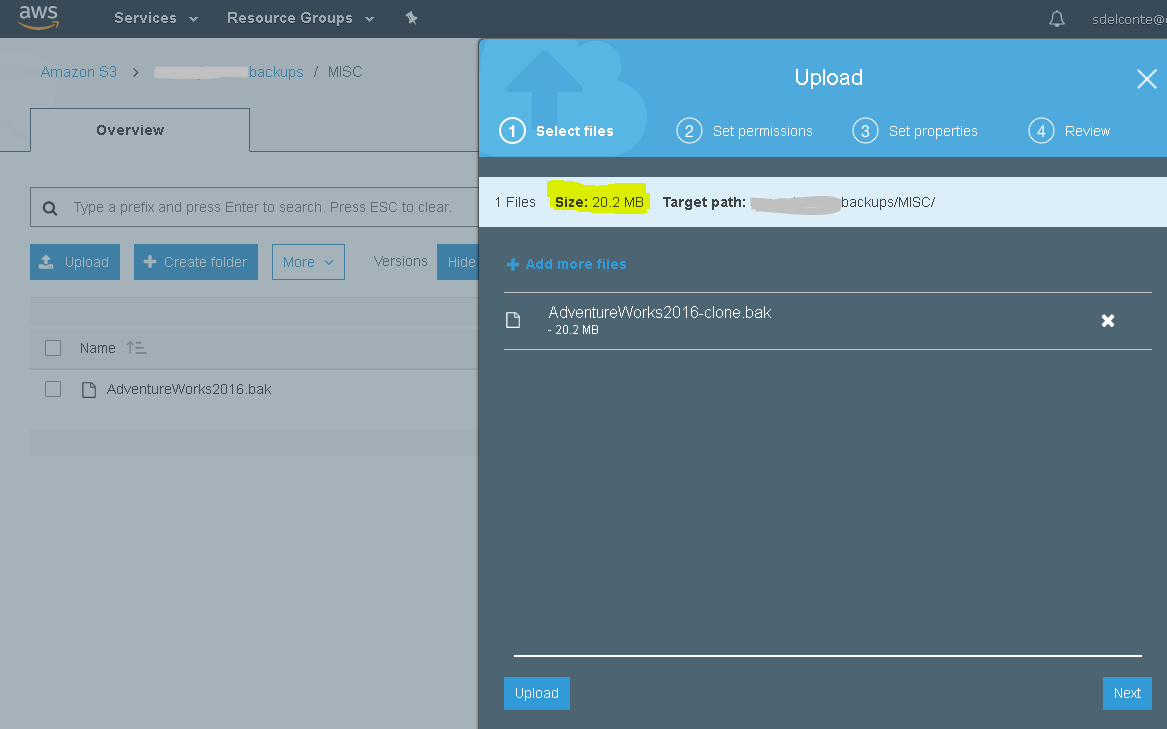
Next, download the online sample .bak file and upload it to your S3 bucket:

Once the file has been uploaded, make a note of the S3 path, in this case backups/MISC.
You can now initiate a manual database restore using the built-in RDS procedure rds_restore_database. In Management Studio, run the following statement replacing the path if yours is different:
|
1 2 3 4 |
--first database restore EXEC msdb.dbo.rds_restore_database @restore_db_name = 'AdventureWorks2016', @S3_arn_to_restore_from = 'arn:aws:s3:::backups/MISC/AdventureWorks2016.bak'; |
IMPORTANT: the path value in the @S3_arn_to_backup_from parameter is case-sensitive. For example, setting the value to ‘arn:aws:s3:::backups/misc/AdventureWorks2016.bak’ will not work.
Adding the SQLSERVER_BACKUP_RESTORE Option
If Native Backup and Restore Option has not yet been configured for your RDS instance, you will get an error, Database backup/restore option is not enabled yet or is in the process of being enabled. Please try again later, when attempting to use the rds_restore_database procedure:

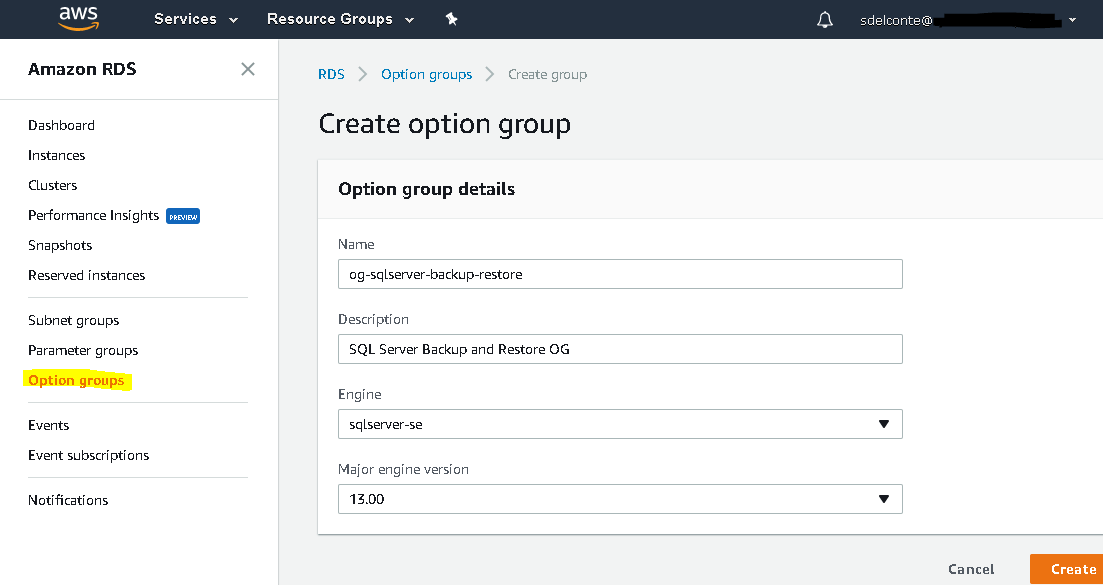
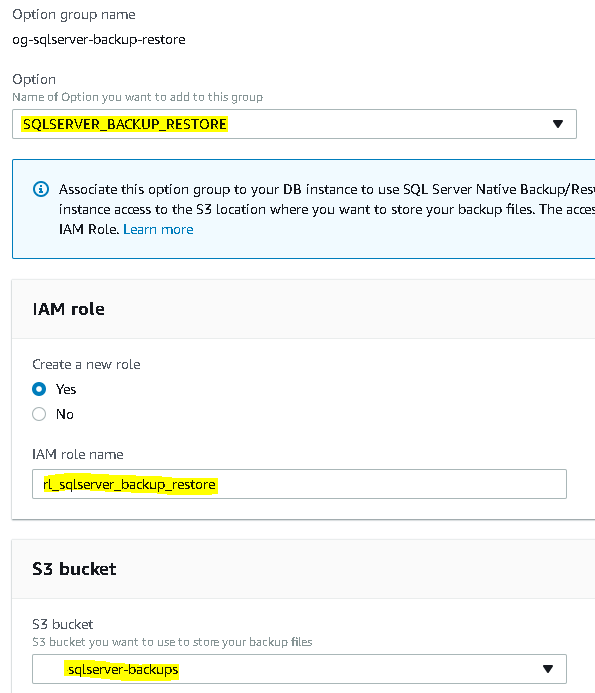
Per AWS documentation, an option group associated with the RDS instance must have the SQLSERVER_BACKUP_RESTORE option added. To do this, you’ll need to create a new option group by navigating to Option groups and clicking Create a group. Then enter a name for the option group, a description, the SQL Server engine (Enterprise, Standard, etc.) and version you are using. Then click Create:
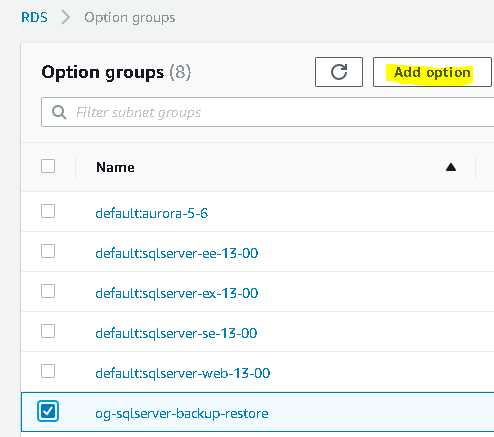
Once created, select the new option group and click Add option:
The only available option is the SQLSERVER_BACKUP_RESTORE option, the one that you need. Make sure that Create a new role is selected, enter a name for the new IAM role, and select an existing or create a new S3 bucket. Select Apply Immediately and then click Add Option:
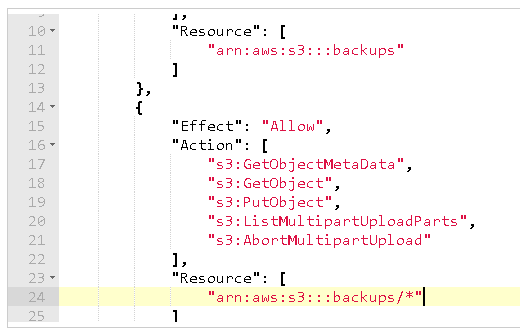
Take a look at the new sqlNativeBackup policy (IAM/Policies, then select sqlNativeBackup) that was automatically created for the new IAM role (rl_sqlserver_backup_restore). On the {} JSON tab, you can see the Action allowed on the Resource (S3 bucket):
All that is left to do now is to associate the RDS instance with the new option group. Select your instance name from RDS/Instances and choose Modify from the Instance actions dropdown. Next, scroll down to Database Options/Option group and select the new option group from the dropdown.
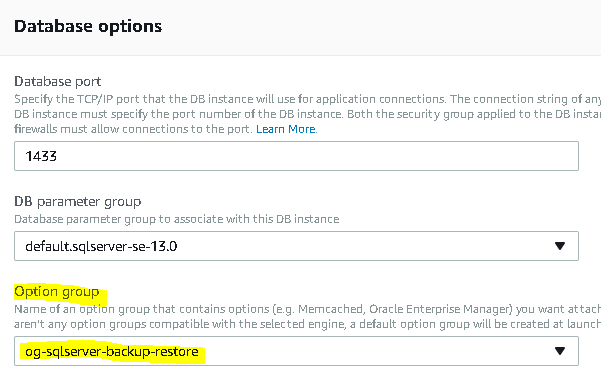
Click Continue. Select Apply immediately, and then Modify DB Instance. Even after completing the steps, it may take several minutes to go into effect.
Checking the Restore Status
You should now be able to execute the rds_restore_database procedure successfully. When executed, the rds_restore_database command returns a summary acknowledgement and status:
![]()
At any time during the restore, you can check the status using the rds_task_status procedure in another query window:
|
1 2 |
--check status EXEC msdb.dbo.rds_task_status @db_name = 'AdventureWorks2016'; |
During the restore, the lifecycle column will show a value of IN_PROGRESS:
![]()
When the restore is complete, the lifecycle column will return SUCCESS.
![]()
The new database will be visible in Object Explorer:

Simulating data loss
To simulate missing data, delete 500 records from the DatabaseLog table:
|
1 2 3 |
USE AdventureWorks2016; DELETE FROM DatabaseLog WHERE DatabaseLogID <= 500; |
The Problem
Now you can demonstrate the problem of trying to create a duplicate database (with a different database name) using the same backup file. Remember, the goal is to recover the missing data that was deleted in the previous step. Attempt to perform the restore again, this time using a different database name:
|
1 2 3 4 |
--second database restore EXEC msdb.dbo.rds_restore_database @restore_db_name = 'AdventureWorks2016_clone', @S3_arn_to_restore_from = 'arn:aws:s3:::backups/MISC/AdventureWorks2016.bak'; |
The initial status returned looks normal:
![]()
…but the restore ends with a lifecycle value of ERROR upon checking the rds_task_status procedure:
|
1 2 |
--check status EXEC msdb.dbo.rds_task_status @db_name = 'AdventureWorks2016_clone'; |
![]()
The task_info field displays the following error message:[2018-01-23 19:24:22.180] Aborted the task because of a task failure or a concurrent RESTORE_DB request.[2018-01-23 19:24:22.210] Task ID 57 (RESTORE_DB) exception: Database AdventureWorks2016_clone cannot be restored because there is already an existing database with the same file_guids on the instance.
File_guids
You can see that the RDS limitation’s root cause is the inability to allow the same database unique identifier (file_guid) more than once on the same instance – and since the AdventureWorks2016 database’s original file_guids are contained in the backup file, any databases restored from it has that same file_guid. You would have the same issue even if you attempted a restore from a fresh backup of the database. Database file_guids can be viewed by selecting them from a database’s sys.database_files table:
|
1 2 |
USE AdventureWorks2016; SELECT name, file_guid FROM sys.database_files; |

Amazon acknowledges this issue in the Importing and Exporting SQL Server Databases online user guide – which says that it is not possible to create a copy of a database to the same instance. According to the guide:

Restoring a new RDS instance from a snapshot would make missing data available, but might also expose other limitations. For example, using a linked server connection would allow data transfer between two RDS instances, but linked servers appear to be unsupported in RDS at the time of this writing. An attempt to create a linked server generates the error below:
A Solution
However, it is possible, using a known workaround, to create and maintain concurrent, identical databases on the same RDS instance. This workaround entails using the Export Data-Tier Application module in SQL Server Management Studio (SSMS) to create an export of a database to a .bacpac file. A BACPAC export can contain either an entire database or just specific objects, and can be used for importing data to Azure, AWS, and conventional SQL Server instances – and also for data archival purposes. A TechNet article describes a .bacpac file:
“The export file contains all supported database schema objects and table data in a single package. Schema objects include logins, users, schemas, tables, columns, constraints, indexes, views, stored procedures, functions, triggers, and other objects relevant to the definition of a database.”
When a .bacpac file is generated and imported, the database’s file_guids are reset – which is exactly what is needed to allow a duplicate database in RDS.
To get a BACPAC export of the AdventureWorks2016 data that is in our original AdventureWorks2016.bak backup, you need to restore the backup file to a new instance. You could restore an RDS snapshot (taken before the data was deleted) as a new, temporary RDS instance and then export the .bacpac file from that instance’s copy of AdventureWorks2016, but for this example, you’ll just restore the original backup file to another existing SQL Server instance. Restore the original AdventureWorks2016.bak to a conventional, on-premises SQL Server 2016 instance (SQL2016_DEV) that already exists as a development environment. Depending on your instance, you may need to use WITH MOVE in the backup statement to change the data and log file locations, if the original AdventureWorks2016 database used a path that doesn’t exist on you SQL2016_DEV server:
|
1 2 3 |
RESTORE DATABASE AdventureWorks2016 FROM DISK = 'D:\Backup\AdventureWorks2016.bak' WITH MOVE 'AdventureWorks2016_Data' TO 'D:\Data\AdventureWorks2016_Data.mdf', MOVE 'AdventureWorks2016_Log' TO 'D:\Data\AdventureWorks2016_Log.ldf'; |
Once the restore is complete, you can see the new database in Object Explorer:

When you check the file_guids of the new database, you’ll see that it has exactly the same file_guids as the copy you restored to the RDS instance (the name value is the logical name of the file, not the renamed file path name):
|
1 2 |
USE AdventureWorks2016; SELECT name, file_guid FROM sys.database_files; |

Export the BACPAC
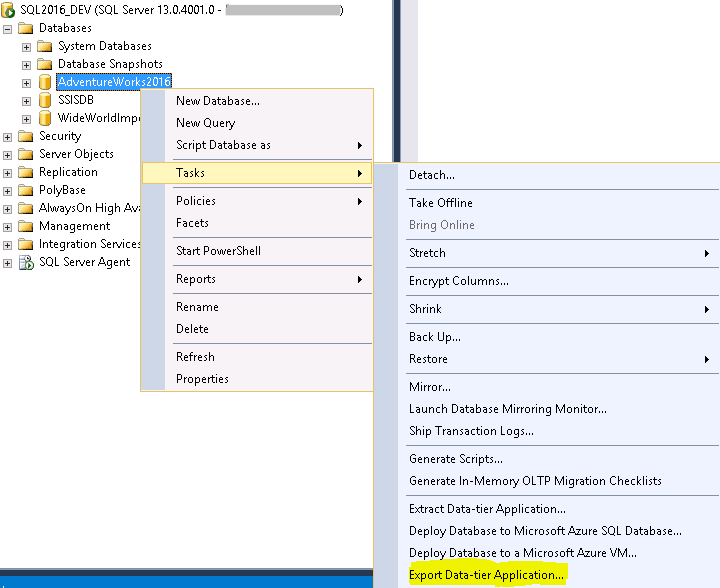
To start the BACPAC export of the newly-restored AdventureWorks2016 database, right-click the AdventureWorks2016 database, select Tasks, then Export Data-tier Application:
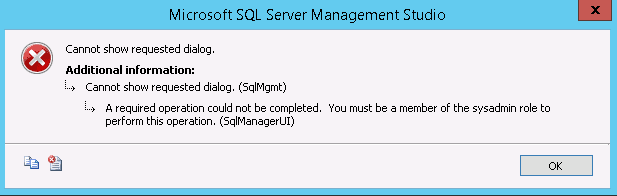
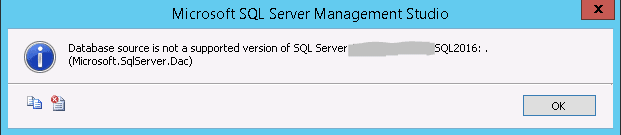
NOTE: SQL Server Management Studio must be a supported version for this step. If not, the BACPAC export will fail. For example, using SQL Server Management Studio 2014 to export a SQL Server 2016 database generates this error:
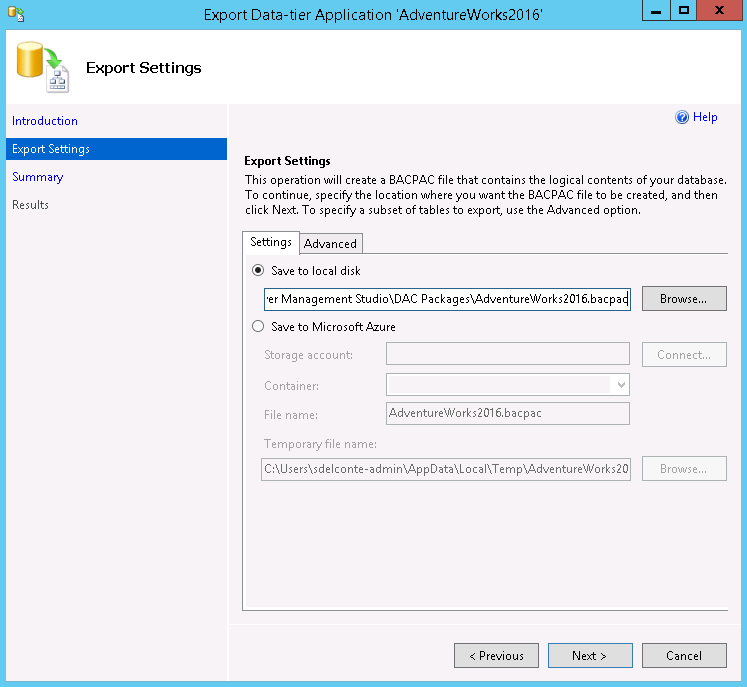
On the Introduction page, click Next. On the Export Settings page, click Browse to select a filename and location for the BACPAC export. Keep the default location, and name the export AdventureWorks2016.bacpac:
Since you only need to recover data from a single object (the DatabaseLog table), select that object only in the Advanced tab. This will minimize the recovery time by reducing the size of the export file.
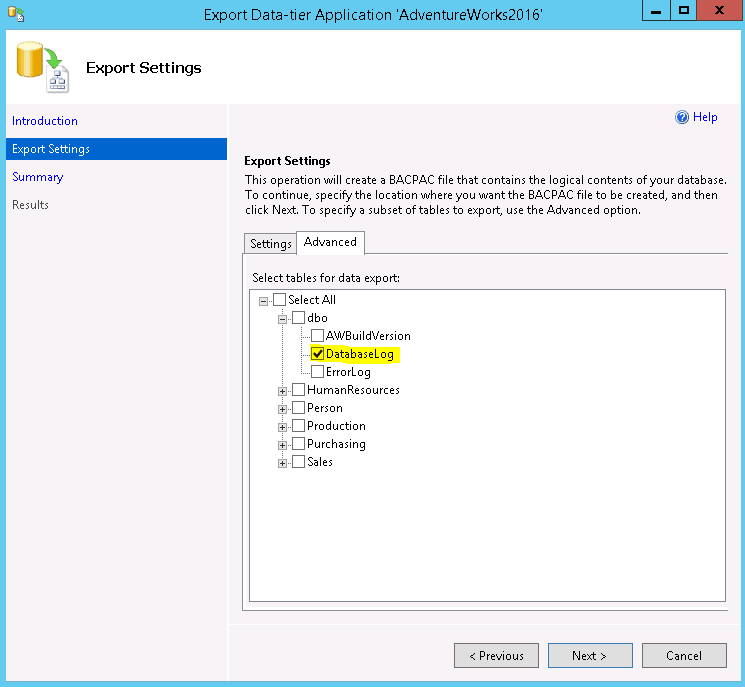
Click Next, and then Finish:
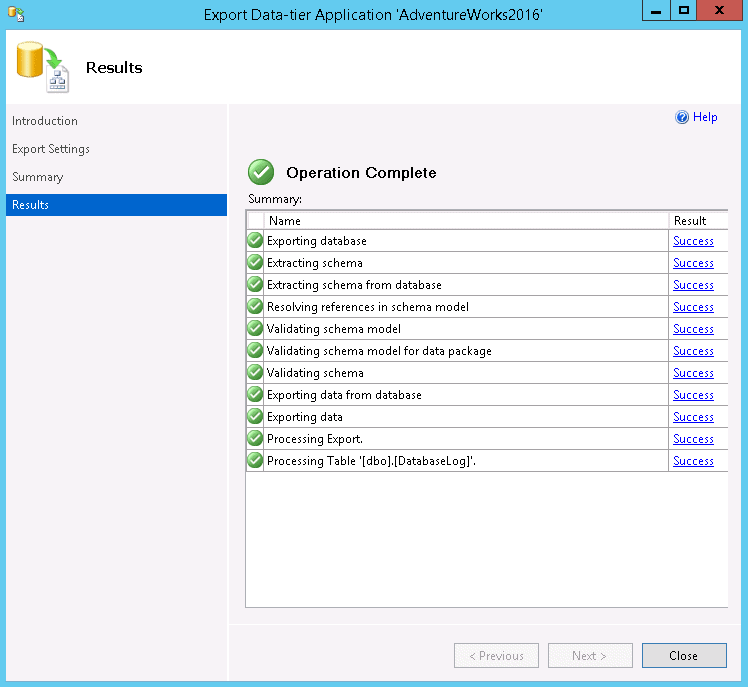
Check the summary of the processes on the Results page and click Close. The BACPAC export is complete.
The next step will be to immediately import the file back to the same instance as a new database in order to reset the file_guid.
Import the BACPAC
WARNING! You could attempt to import the .bacpac file directly back to the RDS instance, but even though RDS supports BACPAC exports (and imports using files generated from the same instance – see the note at the end of this article), a BACPAC file imported to RDS that was exported from a different instance can fail with the following error (at the time of this writing), leaving behind an empty database that cannot be easily removed:
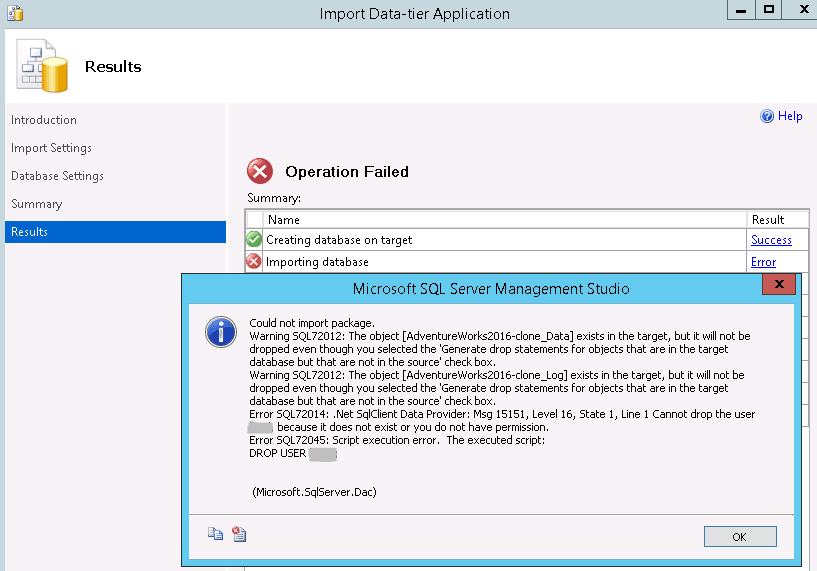
Attempting to drop the empty database that is left behind results in the below error:

For this reason, it is highly recommended to restore a new RDS instance from a snapshot to use for practicing the BACPAC import process before performing it on a production system.
To avoid the ‘empty database’ scenario, you will perform the actual BACPAC import to a new database on the on-premises SQL2016_DEV instance, create a native backup from that new database, and then backup and restore it to the RDS instance. That way, you won’t risk a BACPAC import failure.
Right-click on Databases in Object Explorer and select Import Data-tier Application:

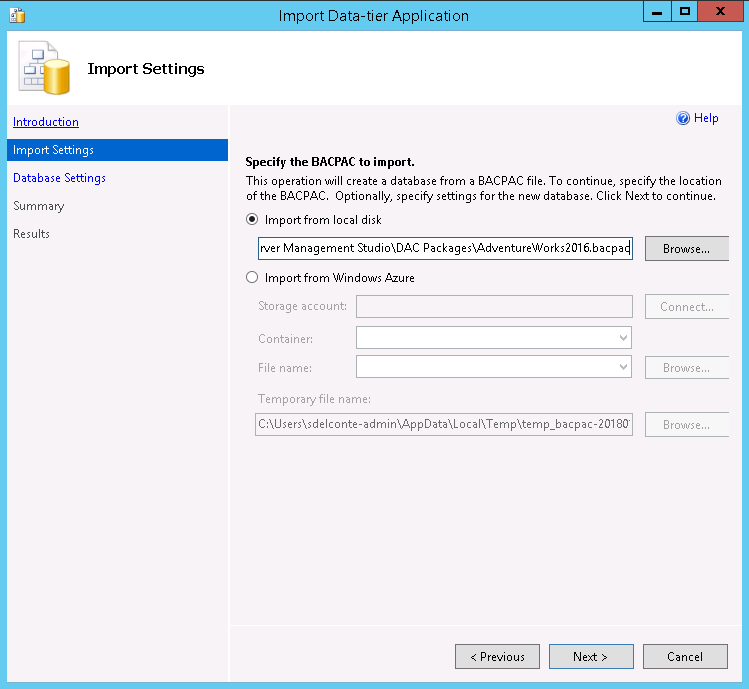
On the Introduction page, click Next. On the Import Settings page, browse to the .bacpac export file and click Next:
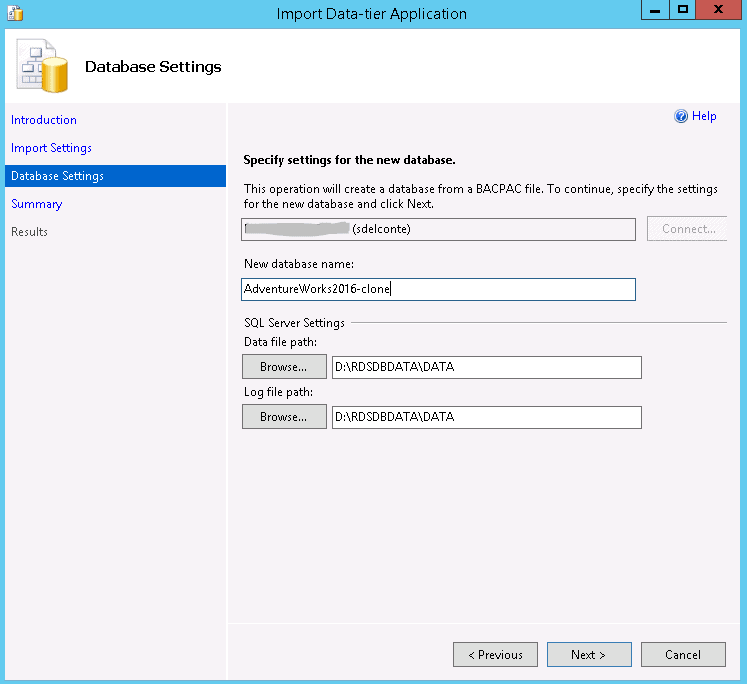
On the Database Settings page, enter a name for the temporary copy of the database on SQL2016_DEV, click Next, and then Finish:
A BACPAC Import Limitation
You will quickly find out that the BACPAC import process is very sensitive to a few factors – one of these being full-text indexes. The import process will fail with a ‘Full-text Search is not installed, or a full-text component cannot be loaded’ error, if your SQL2016_DEV instance does not have the Full-text search component installed. Why does this generate such an error on tables when no such tables are included in the BACPAC export? This is because, even though the BACPAC export does not export data from excluded objects, the object schema is still part of the export. You can verify this after the unsuccessful BACPAC import.
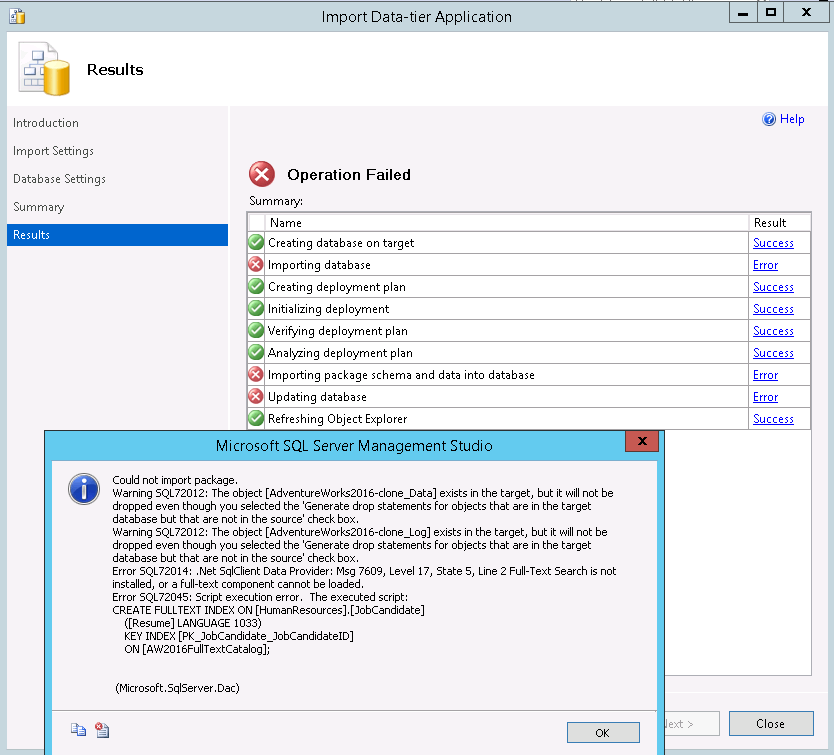
Since the goal is to recover missing data only and not full-text indexes, you can circumvent this error without installing Full-text Search. Generate a dynamic SQL script to drop all full-text indexes in the AdventureWorks2016 database on the SQL2016_Dev server, execute the script, then export and import the .bacpac file again:
|
1 2 3 |
USE AdventureWorks2016; SELECT 'DROP FULLTEXT INDEX ON ['+OBJECT_SCHEMA_NAME(object_id)+'].['+OBJECT_NAME(object_id)+'];' as ObjectName FROM sys.fulltext_indexes; |

Now that you have generated the appropriate DROP statements, copy and execute them:
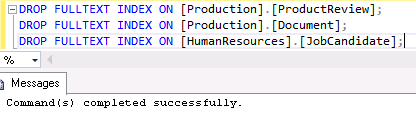
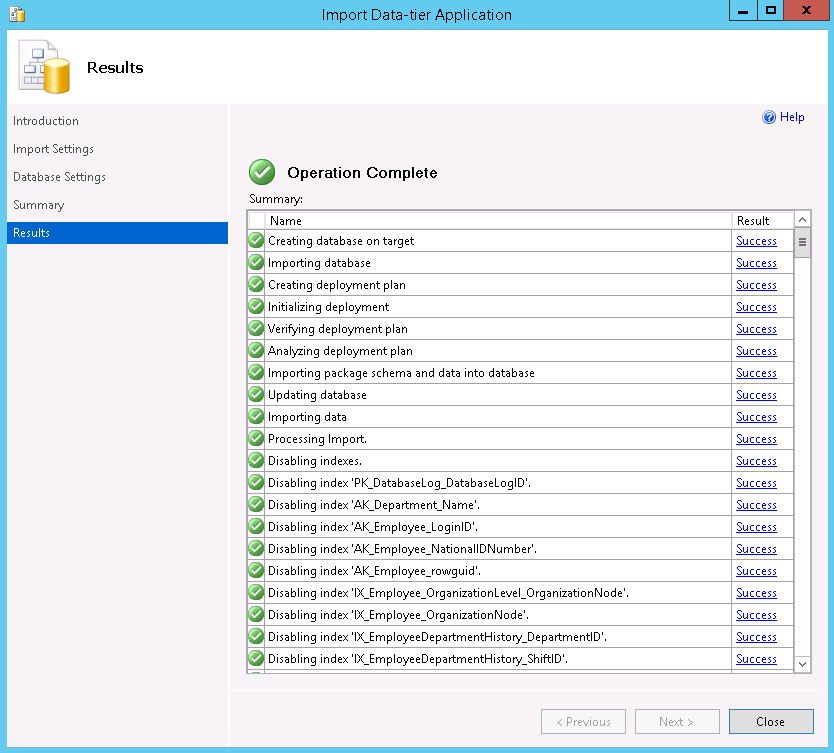
Export the .bacpac file exactly as before, and immediately import it back to SQL2016_DEV to reset the file_guids. The process is successful this time:
Now check the file_guids of the new AdventureWorks2016-clone database:
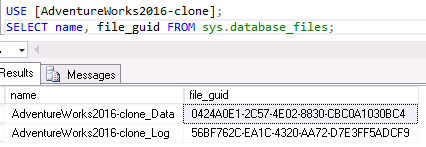
You will see that the new database has brand new file_guids after the BACPAC import. The RDS instance will now accept AdventureWorks2016-clone as a new database.
Now back up the new database so you can upload it to you S3 bucket:
|
1 |
BACKUP DATABASE [AdventureWorks2016-clone] TO DISK = 'D:\BACKUP\AdventureWorks2016-clone.bak'; |
Notice how much smaller the new backup file is now, since you’ve only exported data for one table:
Connect back to the RDS instance and try the database restore in SSMS now that you have reset the file_guids:
|
1 2 3 4 |
--restore bacpac-exported/imported database EXEC msdb.dbo.rds_restore_database @restore_db_name = 'AdventureWorks2016_clone', @S3_arn_to_restore_from = 'arn:aws:s3:::backups/MISC/AdventureWorks2016-clone.bak'; |
The rds_task_status procedure returns a lifecycle value of SUCCESS.
|
1 2 |
--check status EXEC msdb.dbo.rds_task_status @db_name = 'AdventureWorks2016_clone'; |
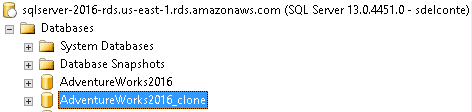
You can see the new database in the Object Explorer pane:
![]()
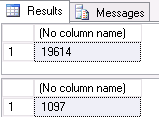
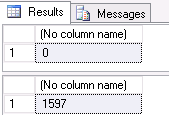
Check object contents to make sure the BACPAC import only pushed data for the required table and not the others. A count check reveals that while the original AdventureWorks2016 database’s Person.Address table contains many records, the AdventureWorks2016_clone database’s correlated table contains no records. The DatabaseLog table’s data is intact, as expected:
|
1 2 3 |
USE AdventureWorks2016; SELECT COUNT(1) FROM Person.Address; SELECT COUNT(1) FROM DatabaseLog; |
|
1 2 3 |
USE AdventureWorks2016_clone; SELECT COUNT(1) FROM Person.Address; SELECT COUNT(1) FROM DatabaseLog; |
Recover the Missing Data
You’re now able to recover the missing DatabaseLog data by joining the original table to the restored one:
|
1 2 3 4 5 6 7 8 |
SET IDENTITY_INSERT AdventureWorks2016.dbo.DatabaseLog ON; INSERT INTO AdventureWorks2016.dbo.DatabaseLog (DatabaseLogID, PostTime, DatabaseUser, [Event], [Schema], [Object], [TSQL], XmlEvent) SELECT a.DatabaseLogID, a.PostTime, a.DatabaseUser, a.[Event], a.[Schema], a.[Object], a.[TSQL], a.XmlEvent FROM AdventureWorks2016_clone.dbo.DatabaseLog a LEFT OUTER JOIN AdventureWorks2016.dbo.DatabaseLog b ON b.DatabaseLogID = a.DatabaseLogID WHERE b.DatabaseLogID IS NULL; SET IDENTITY_INSERT AdventureWorks2016.dbo.DatabaseLog OFF; |
Cleanup
Now that you’ve successfully recovered the missing data, clean up by dropping the duplicated database from the RDS instance. If Multi-AZ (mirroring) is in place for the instance, you’ll have to break the mirror partner before dropping the database:
|
1 2 3 4 5 |
USE master; --break mirroring ALTER DATABASE [AdventureWorks2016_clone] set PARTNER OFF; --drop database DROP DATABASE AdventureWorks2016_clone; |
Summary
You’ve completed the steps necessary to recover missing data from a database object in a SQL Server RDS instance using the BACPAC export method using these steps. For reference, the instructional steps are condensed here as follows:
- Restore a copy of the database (from an existing backup or RDS snapshot) to another SQL Server instance, which can be either a conventional instance or a RDS instance (if it does not already have a copy of the database on it).
- NOTE: This instance must be of the same major SQL Server version as the instance that created the database.
- Export that copy of the database as a .bacpac file, including only the objects needed, so that the export stays as small as possible.
- Import that .bacpac file as a new database (can be imported to the same instance it was exported from, as long as it is NOT a RDS instance). This step gives the database a new file_guid.
- Now that the new database contains a new file_guid, back it up to S3.
- Restore the backup file in S3 to the original RDS instance as a new, duplicated database (with a new name).
- Recover the missing data from the duplicated database.
NOTE: If you didn’t need to recover data, but simply wanted a copy of an existing RDS database, you could perform a BACPAC export, then import the .bacpac file immediately to the same instance it came from as a database copy with a new name – the empty database issue does not seem to happen when the BACPAC import is from a file that was exported from the same instance.

Load comments