
This article is the second of two articles demonstrating PowerShell Editors. The first can be found here. The first article focused on some of the older and more common tools found on both Windows and Linux systems.
This article focuses on more modern tools.
Visual Studio Code
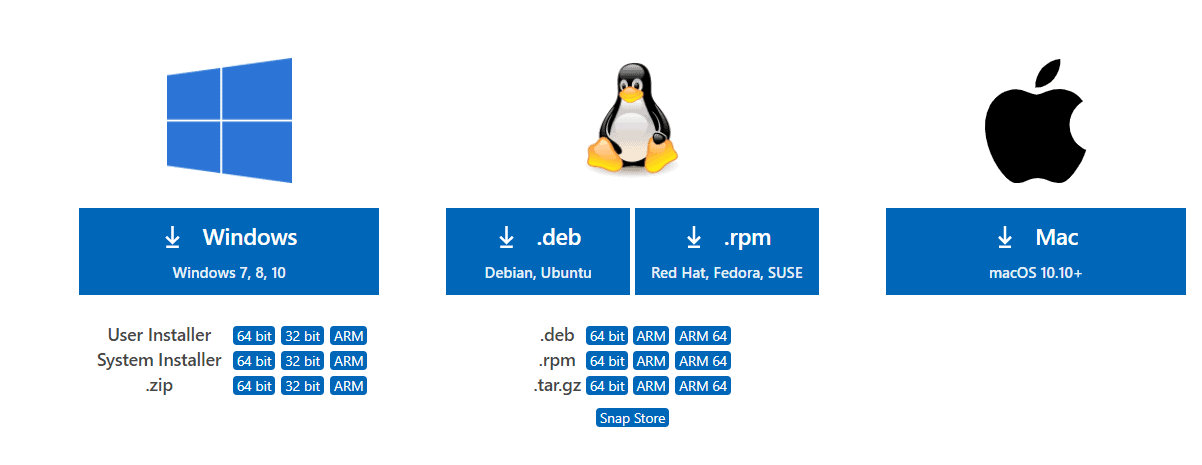
One of the more popular tools these days for creating PowerShell is Visual Studio Code (VS Code). VS Code is not installed by default on most machines but can be downloaded from here: https://code.visualstudio.com/download. One of the first things you will notice is that it is available for multiple platforms as shown in the figure. I will address that in a bit.
Visual Studio Code for Windows
For now, I will assume you are editing PowerShell on Windows 10. If you want to install Visual Studio Code just for yourself, select the 64-bit User Installer; otherwise, select the 64-bit System Installer.
The first time you run Visual Studio Code, you will see something similar to this:
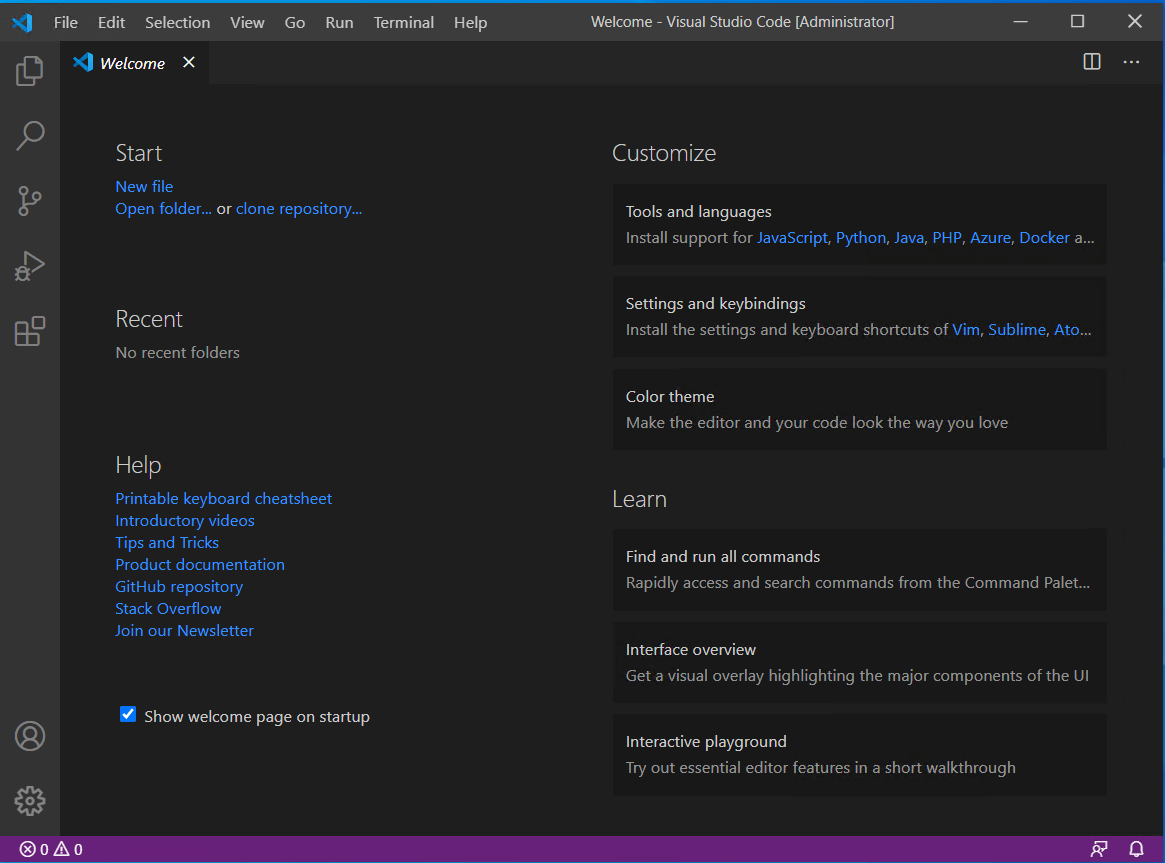
You can create a new file by using the File Menu or pressing Ctrl-N, but there’s another step you should take first.
Click on the button on the left that looks like four boxes with one flying up and to the right: ![]() . This icon opens a window that allows you to add extensions to Visual Studio Code. In the Search box that appears, type PowerShell.
. This icon opens a window that allows you to add extensions to Visual Studio Code. In the Search box that appears, type PowerShell.
You should see something similar to:
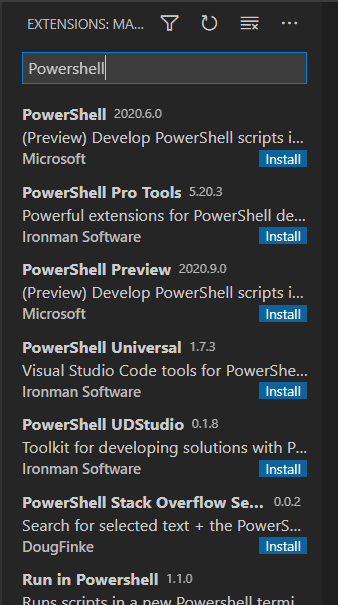
Note that your results may appear different depending on what extensions have been made available since this article was written. Select the topmost one, in this case, PowerShell 2020.6.0, and select Install.
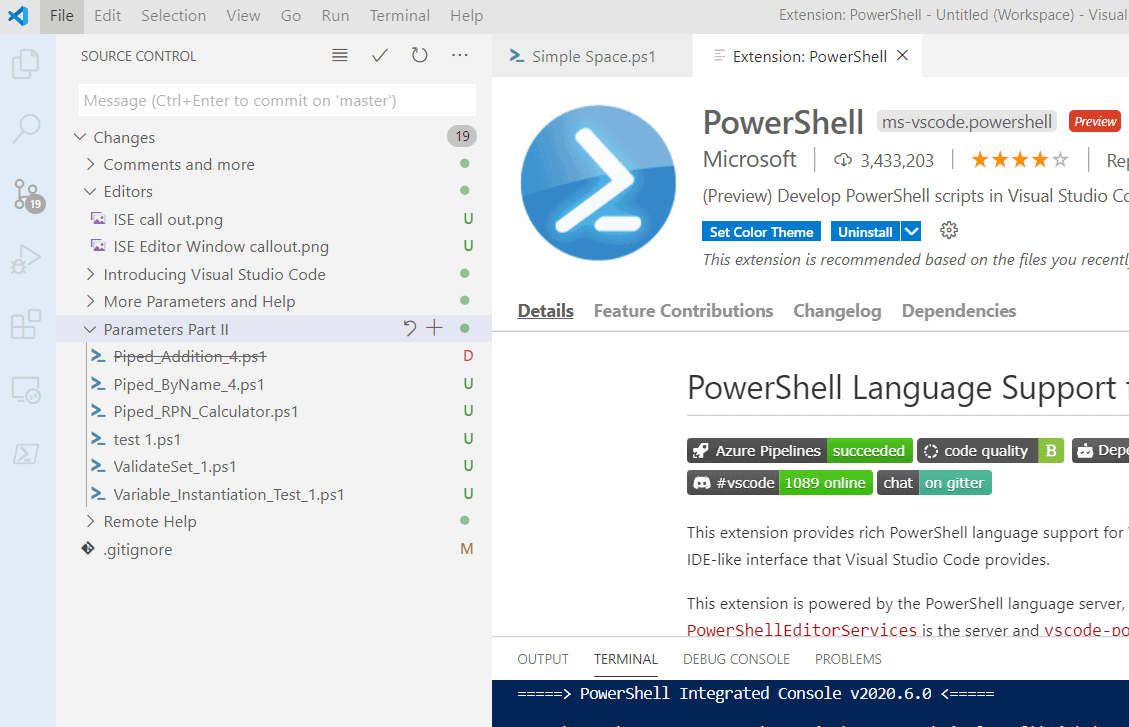
Once installed, you should see something similar in the main area of Visual Studio Code
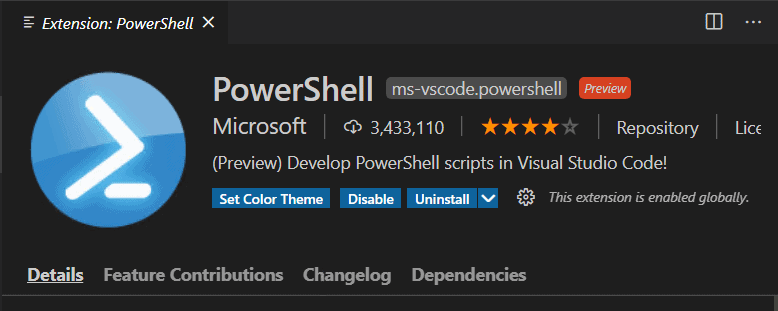
I’m not a huge fan of the Dark scheme, so I typically select the Set Color Theme and change it to the PowerShell ISE theme. This change makes it look much more like the PowerShell ISE in my previous article.
There is another way to have Visual Studio Code to install the PowerShell extension, and that is simply to open (or create) a file with a .ps1 extension. Visual Studio Code should then provide a pop-up similar to:
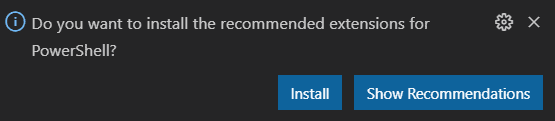
As you can see, Visual Studio Code is designed to make it easy for you to get set up to create and edit PowerShell scripts.
One more step needs to be done to unleash the full power of Visual Studio Code, setting up git.
If you select the Source Control icon ![]() you will get a screen like this if you do not have git installed:
you will get a screen like this if you do not have git installed:
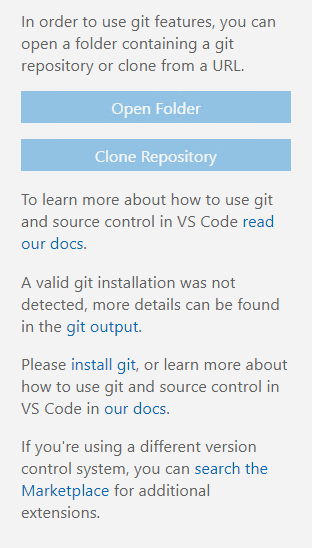
Before you can open a folder or clone a repository, you will need to click on the install git link and follow the prompts. You may need to restart Visual Studio Code after installing and setting up git.
If your screen looks like this:
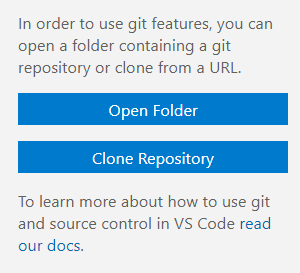
Git is already configured on your system, and you can open a repository or clone one.
In my case, I have a number of PowerShell Scripts that I have not yet committed to my git repository. Some are scripts I started and abandoned for previous articles, others are ones I’m still working on.
This tight integration with git is the reason the original commenter at the Virtual Pass Summit suggested folks should abandon the PowerShell ISE.
I’m going to be a bit controversial and disagree. Yes, this tight integration is very useful and is a solid argument for using Visual Studio Code. And I do highly encourage you to do so.
That said, how it handles tab completion of parameters is a bit different from the PowerShell ISE. Instead of showing a drop-down of available options in the command-line, you need to press tab to cycle through the parameters and any available validation sets. This isn’t a huge pain, but it does create a bit more work, and I prefer the visual representation the PowerShell ISE provides.
![]()
Note it only shows one option at a time. Now the upside: since Visual Studio Code is constantly being updated, perhaps this is a feature that might be updated in the future.
I am not going to go into detail on how to use git in Visual Studio Code in this article. I will add, however, that git is not the only code versioning tool available and that you can most likely find a plug-in for most of the popular tools. Getting on a soapbox for a moment, if you’re not using some form of version control, even for simple PowerShell scripts, you should definitely start doing so.
Visual Studio Code for Linux
Again, because Microsoft has committed to being cross-platform, it is entirely possible to install Visual Studio Code on Linux. The installation steps vary based on the distribution of Linux you are running. In my case, I am running Ubuntu, so I chose the GUI installed option at the URL: https://code.visualstudio.com/docs/setup/linux
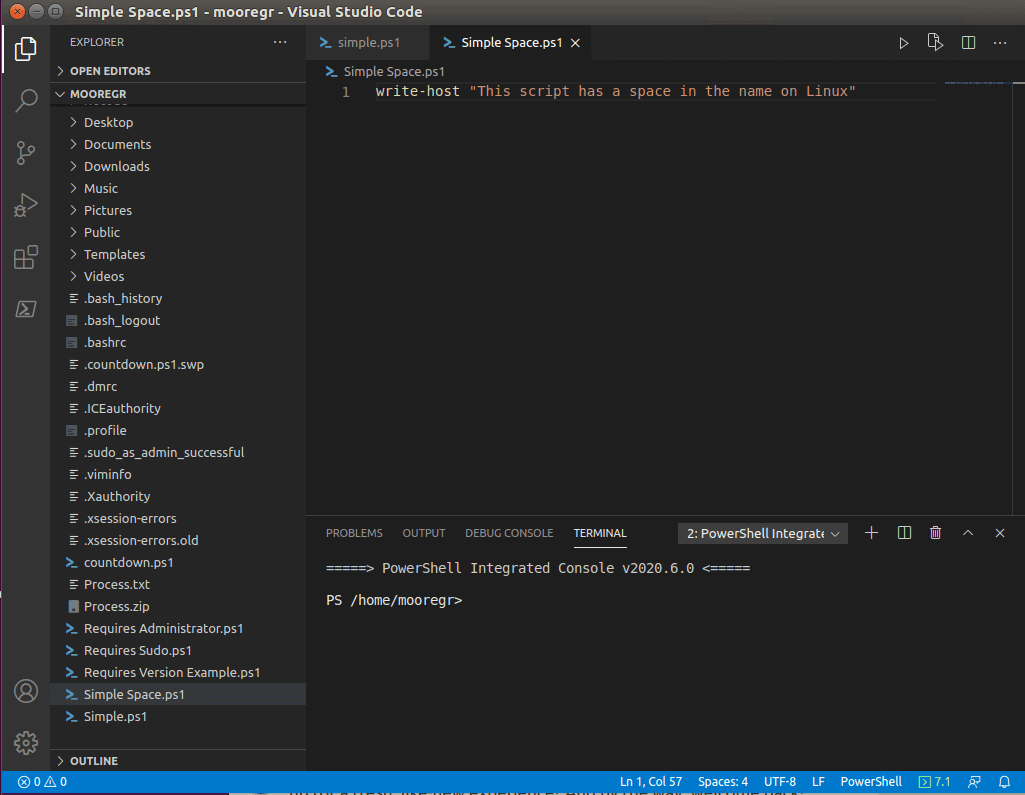
As you can see, this looks almost exactly like the Dark Mode theme for Visual Studio on Windows. From a functionality point of view, Visual Studio Code is basically the same. There may be some differences in how case-sensitivity is handled, but you will find moving from one platform to another is a trivial exercise.
Visual Studio Code for the Mac
I don’t have a running Mac environment, so I had to rely on a screenshot from fellow DBA Andy Levy:

With minor exceptions, as you can see, it’s again the same basic interface as on Windows and Linux.
Microsoft has committed to making Visual Studio Code a cross-platform tool that can be used without retraining developers for each platform.
Visual Studio Code for the Android
Ok, this one doesn’t seem to exist. Yet. But I wouldn’t be surprised if it’s available someday.
Some Features of Visual Studio Code
As powerful as VS Code is, it does not automatically know what language you’re typing something in unless you tell it. The most common way is to create a file with the extension of the file language you want to run.
In the above example, I have both a PowerShell file and a Python file open. When I hit F5 or the Execute icon, VS Code should automatically determine which interpreter run and run the script. If for some reason it asks you, you may need to set the terminal type in the lower half of the screen:

Since Visual Studio Code is intended as an actual IDE, unlike PowerShell ISE, it has many useful features. For example, it will highlight variables that are unused or may have other issues.
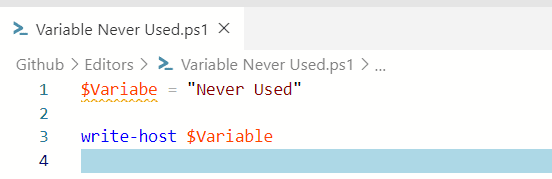
Here you can see that it warns that the variable is never used. This warning may indicate the code has changed and that variable is no longer needed or that the variable has a typo in it. In the above example, I left out the L. This is a trivial example, but if the script were dozens of lines long, you might not notice the difference unless you were warned.
However, VSC is even more helpful in making sure you avoid such mistakes.
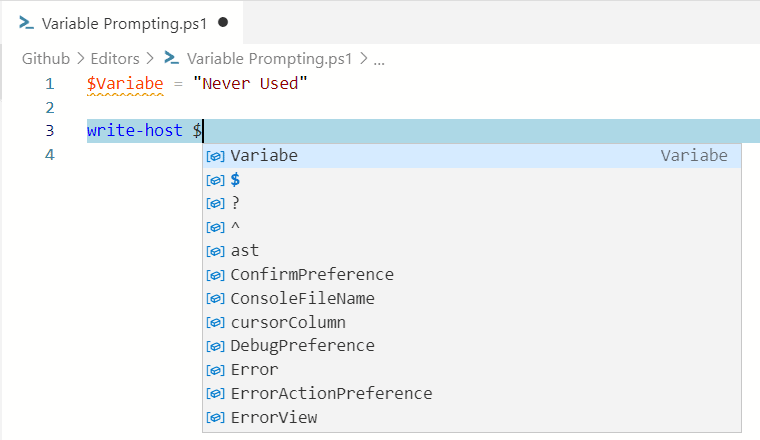
As you start to type a variable name, it will helpfully prompt you for possible variables. Here you can see it’s showing a list of variables you might want to use. Tab completion will select the highlighted one. As you type more characters, VSC will refine its options
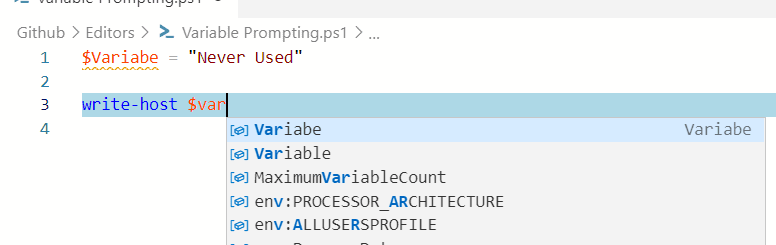
Note that it shows Variable as an option because I had previously defined that in an earlier script, and it is persisting in memory.
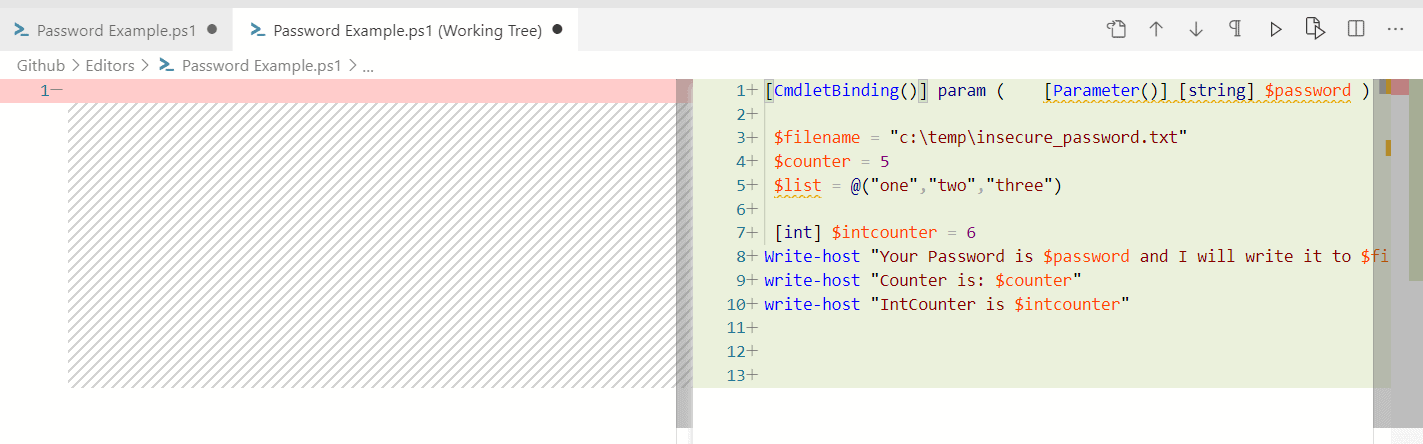
Another example of it trying to help protect you is if you want to pass a password into a script, it will guard against using a non-secure string:

There are a couple of other features I want to point out in VS Code. After clicking the Files icon, you will see an option at the bottom of the Explorer window (you may need to expand it by hitting the > symbol) for a Timeline. In the previous example, I have not yet committed this script to git, so I see:

If I click on Uncommited Changes, I will see a history of my changes:
Since I have git set up, I can go to the version control icon  and find the file in question:

And either revert the changes or commit them. In this case, I want to stage them using the + (plus) symbol. I then need to commit them using the option at the top. Remember, you always need to have a message with your commits. And if you’re using a remote repository, you need to push to it. Again, all the details of how to use git are beyond the scope of this article.
Once I commit my change, however, my history window now shows both sides as the same.
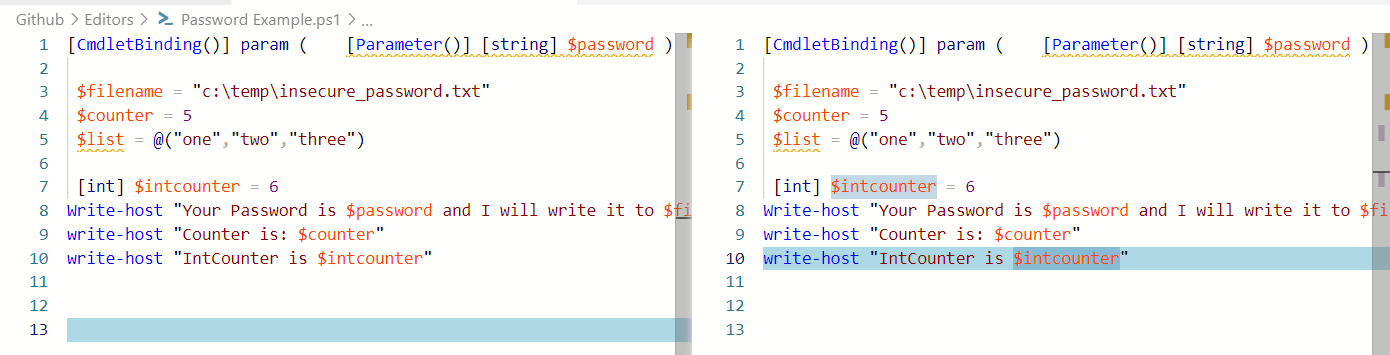
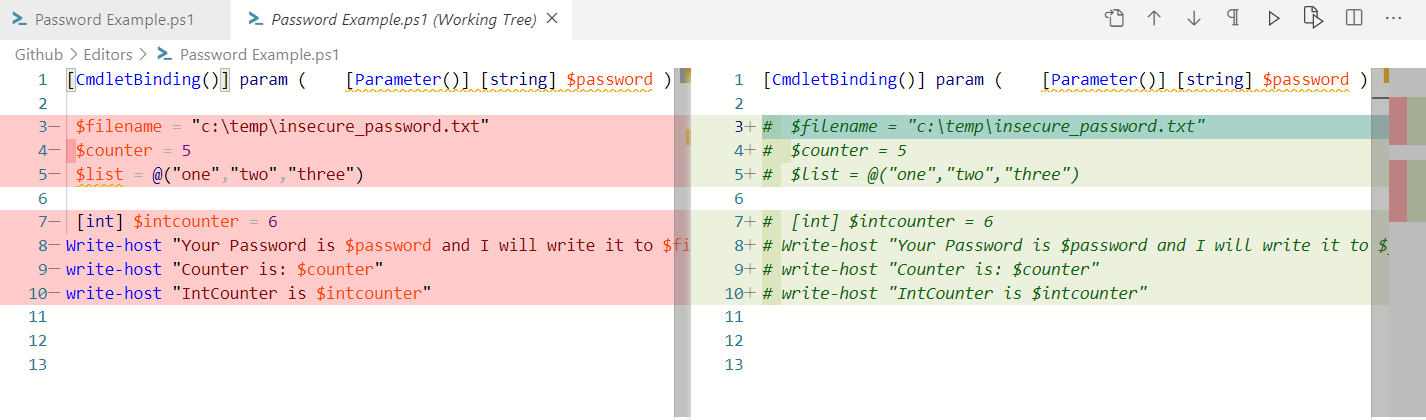
If I decide to make changes, now I can see what changes I’ve made by again going to my version control tab and selecting the file in question to see the changes.
Visual Studio Code is a full-fledged modern IDE with all the bells and whistles, not only for PowerShell but also for many other languages. If you’re not using it or something similar for your PowerShell development, you really should!
Azure Data Studio
Azure Data Studio has become increasingly popular. Despite the name, you don’t need to actually have an Azure account to use it.
You can download and install the latest version from here. Again, something you will notice is that it’s available across all three major OSes.
When you first open it, you’ll see it looks very similar to Visual Studio Code because it is built on it. However, there are some differences. The ones that are important for this article are highlighted below.
Since Azure Data Studio is built on VS Code, you can install and run the PowerShell Kernel just as you did above. But that’s not where you will see one of the biggest advantages of Azure Data Studios. This advantage is the ability to create Notebooks as demonstrated below.
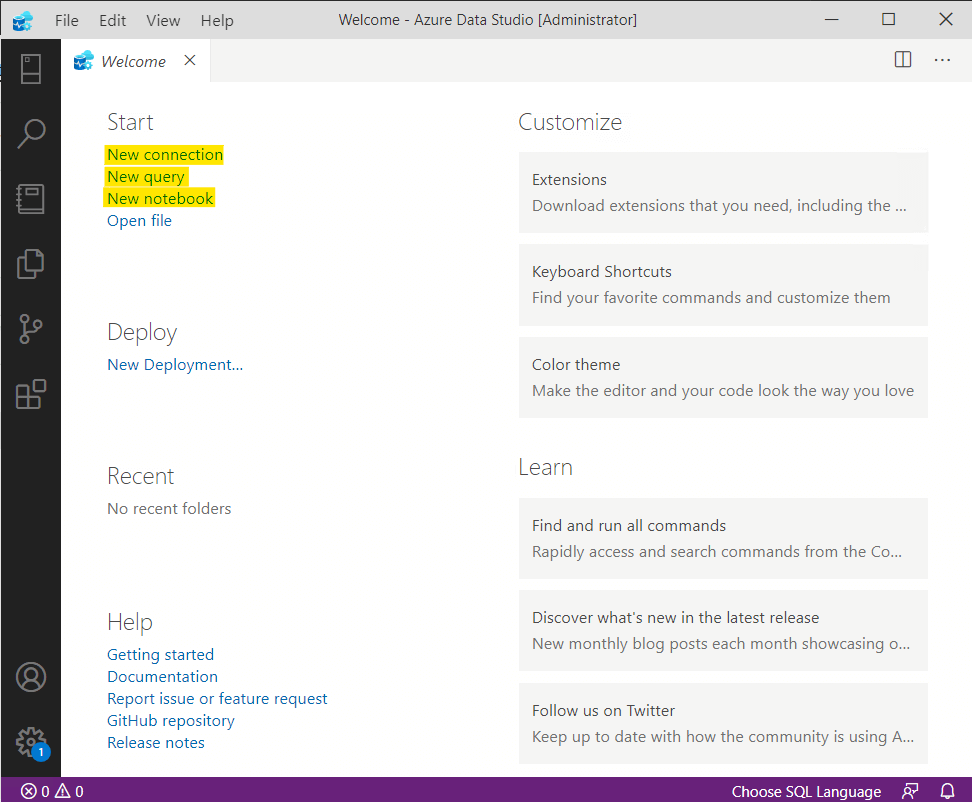
For now, simply select New Notebook.
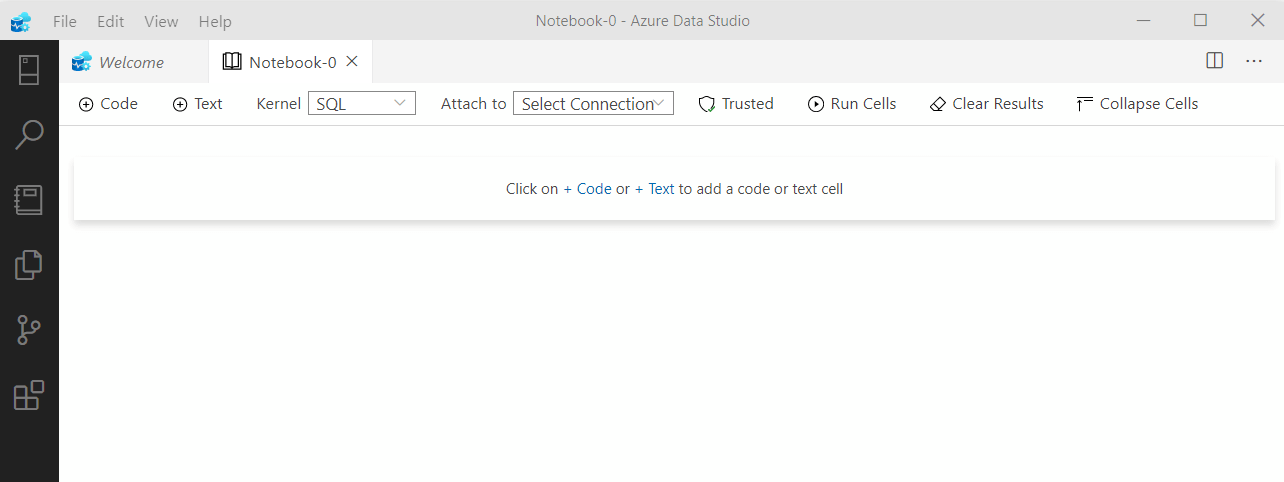
Again, this should look familiar. In this case, you will need to select a new kernel: PowerShell.
Python is required for the PowerShell functionality. If you have not previously installed Python, you will be prompted to do so. You will get a prompt similar to the following:
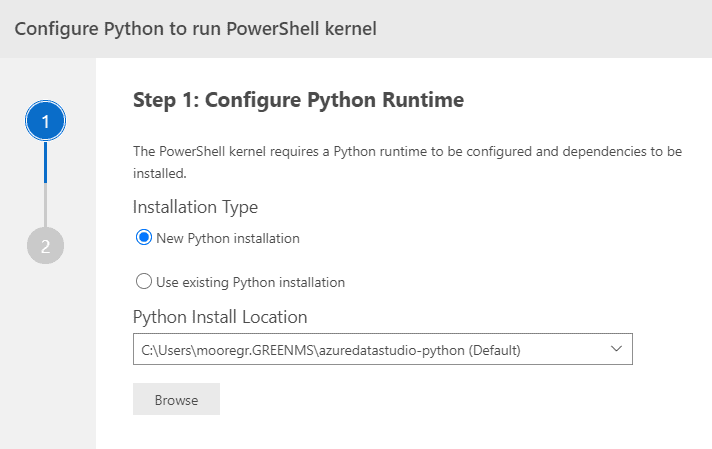
If you have dependencies, go ahead and install them.
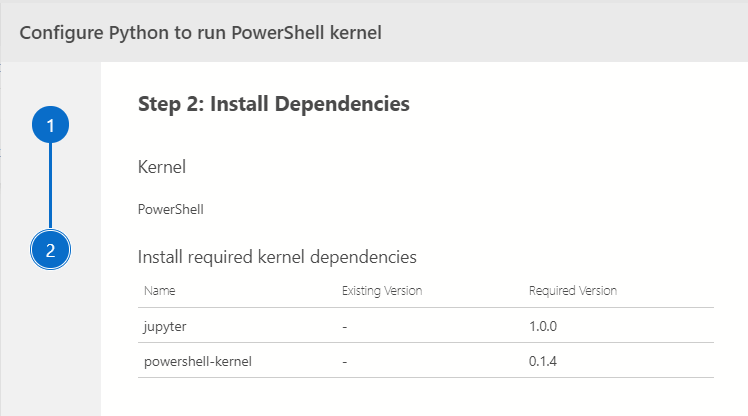
The installs will take several minutes, and you’ll see a number of messages in your output window as it installs.
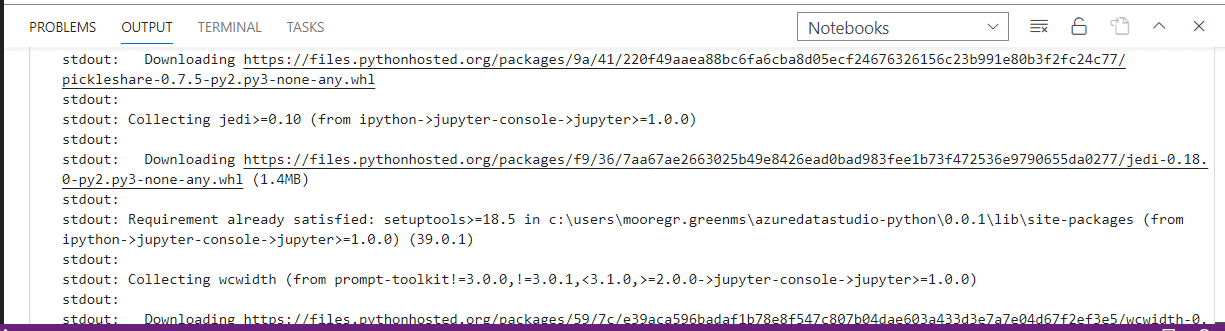
Example output.
At this point, if you’re familiar with Jupyter Notebooks, all of this, especially the Python install, should look familiar. If you’re not familiar with Jupyter Notebooks, that’s fine, but understand that Azure Data Studio with PowerShell is basically built on top of the Jupyter Framework but gives you even more power.
Once everything is installed, however, you should see that your selected kernel is now PowerShell.
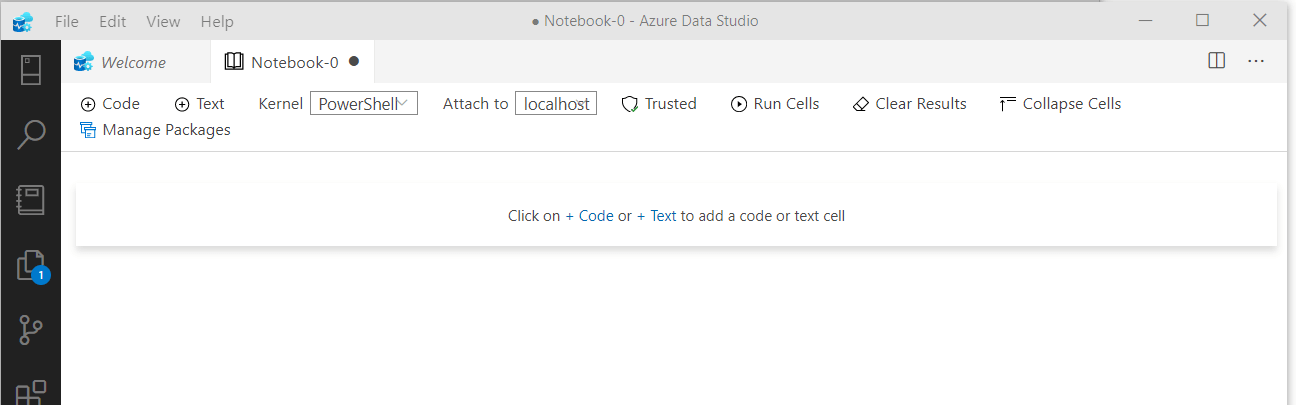
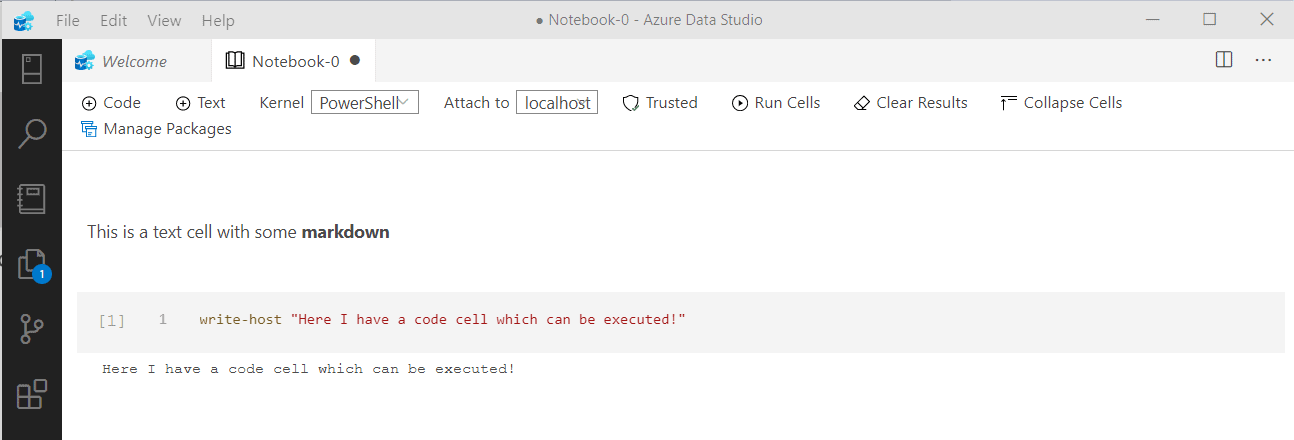
The notebook will prompt you to create a Code or Text cell. A text cell is just as you would expect, an area where you can enter text. You can use markdown or the built-in formatting tools to format the text in various ways. A text cell does not run code.
However, a Code Cell is an area where you can enter code in the language of your choice (in this case, PowerShell) and then execute it.
This example is rather trivial, and you may wonder what’s the advantage or use of Azure Data Studio.
In a previous life, I was Director and then later a VP of IT at two different Internet startups. I managed teams of people who, among other things, had the duty of keeping our servers online 24/7. This commitment meant responding to problems and developing playbooks to share knowledge among team members. I wish I had something like Jupyter Notebooks or Azure Data Studio back then because if I did, creating something like the following would have been both very handy and fairly trivial to create.

Not only do I have a playbook that documents the procedure, but also allows the person to execute the necessary steps from within the playbook! This is very useful!
Some of my fellow presenters are starting to use this for their presentations also, so they can have their talking points and demonstrations in a single place.
At the start of the section, I mentioned you do not need an Azure account, but if you do, you can write playbooks that can run both PowerShell and T-SQL scripts against your Azure instances. However, it is important to understand that while each individual code cell can run a different language you do need to switch between kernels if the language of the cell is different. In the above example, the first two code cells are PowerShell Scripts and the final one is a T-SQL script. As you can imagine, this can be a very powerful ability to have.
PowerShell Editors and Environments
When I set out to write an article on PowerShell editors and environments, I originally planned a single article. It quickly became apparent, however, that there was enough for two full articles complete with examples. Even then, I’ve found I’ve only touched upon the surface of what can be done. I think this illustrates in part how important PowerShell has become and how it absolutely should be treated as importantly as T-SQL is to a DBA, or C# is to a developer. It’s a real, full-fledged language. When I first started using PowerShell nearly a decade ago, I started with Notepad and tried to execute scripts at the PS command line, Scripts for the most part, tended to be quick one-offs of maybe 5-10 lines. Now scripts are often full-fledged programs, complete with GUI support (at least on Windows) under version control (using git or similar tools) developed in full-fledged editors.
Hopefully, these two articles have exposed you to more options, and you can choose the proper tool to solve your problem.